Saturday, February 28, 2009

Cinnamon Rolls


I once made cinnamon rolls that was supposedly "grandma's best" but I was disapointed with them as there was nothing special about them and they were tough. Hubby is such a fan of cinnamon, whether cinnamon rolls or fried dough with cinnamon sugar. He likes getting the Hannaford brand cinnamon rolls, and it is quite good ONLY WHEN FRESHLY BAKED.

After having very good success with the supersoft ensaymada that I made earlier into coco-cinni rolls, I recently made cinnamon rolls using this dough, and everyone loved it! Hubby was very very pleased with it, even like the frosting I made to go with it. And these were soft even the next day! Next time I make this dough, I will freeze some of them as cinnamon rolls ready to slice and bake.


Ingredients:

Dough of supersoft ensaymada

Cinnamon Filling (Follow this proportion; you might want to make extra. Or you can use ready made.)
1/4 cup granulated sugar
1-1/2 teaspoons ground cinnamon

Milk to brush dough with before sprinkling cinnamon-sugar mix.

Melted butter to dip rolls in (about 1/2 stick)

Frosting:
3 tbsp butter, softened
3 cups confectioner's sugar
3 tbsp plus some more of half n half

Instructions:

Prepare dough as instructed. divide into 3. Flatten each and shape into rectangles about 1 foot long (Please see slideshow of supersoft ensaymada dough).

Brush surface with milk. Sprinkle cinnamon-sugar generously all over except 1/2 inch from edge of the outer side (will create seam); roll from the long end into log. Place seam side down.[You may want to freeze at this point by wrapping tightly in cling wrap then placing on a pan.]

Using dough cutter, cut in smooth strokes into 8-9 pieces (1 to 1-1/2 inch wide). Dip in or brush with melted butter. Place in a pan (8-inch or 9-inch round, or 8x8 square). If frozen, let it thaw on the countertop for 15-20 minutes before cutting into 8-9 pieces (not including the ends of the log).


Let rise in warm, moist, draft-free environment (like the inside of the oven heated for 1 minute, with a bowl of hot water inside). If dough is not frozen, rising time may be only about 30 minutes. If frozen, it may take 1 hr or more to rise (longer if on the countertop covered with cling wrap).

When doubled in size, sprinkle some more cinnamon-sugar on top.

Bake at 375 F for 15 minutes (or 350 F for 15 minutes if you want it lighter-colored. It won't matter; this will be covered by the cinnamon and frosting.)

Cool for 5 minutes before applying frosting. Meanwhile, make the frosting.

Cream butter and confectioner's sugar with hand mixer. Add 3 tbsp half and half and beat well. Add a little bit at a time while beating until you achieve spreading consistency.

Apply atop cinnamon rolls with spatula.

Serve with a glass of milk (for them) or a cup of coffee (for me).

Cover leftovers, if any, tightly with cling wrap and place in the fridge. To re-warm, zap in microwave for 10 secs so as not to melt the frosting. Or, let sit on countertop for 30 minutes.


Chicken Alfredo


Type your summary here


INSTRUCTIONS:


Friday, February 27, 2009

Ginataang Hito (Catfish in Coconut Milk)


Catfish is one of the few fish variety that goes really really well with coconut milk cooked until creamy. I love it also grilled, because it's high fat content just makes it so ideal for grilling, and gives its yummy taste. Hubby never likes fatty fish, though.

My sons also love this ginataang hito. If not for the tedious task of removing fish bones, they would not really have anything against any fish dish I prepare. They love anything seafood.


Ingredients:

2 catfish, cut into serving pieces
3 tbsp oil
3 cloves garlic, sliced
2 tbsp sliced and mashed ginger
1 onion, sliced
1/2 cup unsalted (or barely salted) lobster broth (or water)
chunks of squash (I like mine with the skin still on; the amount depends on you; I put about 2 cups)
1 14-oz coconut milk (Premium; I use Thai brand)
1 bunch bok choy, cut at 1- to 2-inch intervals
salt and pepper to taste

Instructions:

Sautee garlic, ginger and onion. Add broth or water, let boil and add fish; season with salt and pepper. Simmer covered for 5 minutes. Add coconut milk and squash, simmer covered for 5 minutes. Add the bok choy, stems first then greens and let simmer covered another 5 minutes. If at the end of this period, the sauce is still watery and the veggies cooked fully, remove the fish, squash and veggies so as not to overcook and transfer to a bowl. Increase heat to evaporate some more liquid off the sauce then stop when creamy. Do not let it get into the oily stage. Adjust taste with salt and pepper. Pour onto the fish and veggies.

Thursday, February 26, 2009

Filipino-Italian Spaghetti


I am currently experimenting to come up with a recipe for monay...but I don't want to wait for the results of that before I make another post, so I thought I'd post about this recipe even though most likely, my kids will (eventually) be the only ones perusing it and actually cooking it.

I love the Italian style spaghetti...the one like that in Sbarro's...very tomato-ey. Sometimes I use my whole-packed tomatoes (drained). If pressed for time, I grab a jar of Classico pasta sauce. (When I had my own canned pasta sauce, I used that as well.)

However, my kids are not too fond of that. They will eat it, but not favorited.

One time, my nephew and niece were with us and I thought of preparing spaghetti that was sweet, and with hotdogs, like the Filipino style spaghetti. I knew it would be a winner because every kid loves hotdogs! So I set aside unsweetened spaghetti sauce for me and hubby, and the rest was sweetened with hotdogs.

Everyone, including my sons, even the BIG BOY (hubby), liked it better. (I was surprised when hubby got intrigued, him being a hotdog fan as well, and actually preferred it.) Nephew said, "This is even better than my mom's spaghetti!" (Shhhh, don't ever tell her that!). I have to admit I like it better, too.

Any truly Italian would laugh at the idea of hotdogs in spaghetti...

Ingredients:

2 tbsp oil
1 onion
4 garlic cloves
1 lb ground beef
14-oz 4-cheese Classico pasta sauce
5 pcs red hotdogs (WA Bean & Sons), sliced
basil, oregano parsley
salt and pepper to taste
sugar to taste (3 tbsp for me)

Instructions:
Boil pasta as instructed in the package. (Stirring in the first few minutes the pasta is in the boiling water will prevent them from sticking together. No need for oil, as how my hubby thinks it does.)

Sautee garlic and onion. Add ground beef until browned. Add pasta sauce (rinse jar with about 1/4 cup of water twice and add to saucepan) and hotdogs. Season with salt and pepper and sugar. Simmer for about 10 minutes for flavors to blend, stirring from time to time.

Serve with grated parmesan cheese.

Meanwhile, I am gonna grace myself with the wonderful performance of Charice featuring one of her newest songs in her upcoming album...(pasensya na kayo; I am such a big fan...I am so mesmerized by her.)


Monday, February 23, 2009

Eating Your Words


Tangled Noodle and Savor the Thyme posted this challenge to "write" or "spell" using food or drink. I thought it would be fun to join, although initially I could not think of what to "write."


Well, two nights ago, I was on duty, and my charge nurse warned me about the possibility of being RIF'ed after 10 PM (RIF=reduction in force, a cost-cutting measure where employees are asked not to come to work or go home if there are not enough patients). So when I came home after that duty, I resolved to sleep only 4 hours, thinking I must be able to sleep with my husband that night. However, as soon as I got to work, I learned that somebody else called out. That meant, I would have to stay and work the whole shift. Darn...

I told my charge nurse and the other nurse, "I feel sad that I can't go home....boohoo...my husband and I were planning on making whoopie tonight." And they laughed...Suddenly I knew what to "write" about.

You see, Mainers (or probably New Englanders) know the meaning of whoopie that is not the whoopie pie pictured above surrounded by the spelled whoopie.

Whoopie pies are my husband's favorite sweet snack, the reason why he gave me my Kitchen Aid stand mixer. He cannot eat the ones available in stores because "they don't make it the way Mom does." The difference being that his mom's recipe makes use of fresh egg whites for the filling; those sold in stores use fluff. His request then was for me to learn how to make whoopie pies from his mom, and I gladly obliged. Now I am making them as well, although I tweaked the recipe to make double batch, and to make use of egg yolks in the batter instead of throwing them away after making the filling.

While baking these, my husband was eagerly waiting, and as soon as I took the above photo, he was standing beside me and saw it, laughed, and asked if he could have that one in the middle (the first one assembled as whoopie pie), which of course he could. He took a bite and said, "You make the best whoopie pies." Now the letters are sandwiched and hidden...My fridge is stocked with them whoopie pies, which will probably last 2-3 days...Hubby and older son particularly like eating them with milk, I with coffee.

Whoopie pies are very popular here in Maine, but I make them only about twice a year or so because they are heavy on cholesterol and sugar...and this way, they are a real treat when I do make them.

And yes, hubby and I are making whoopies tonight. :)

Recipe can be found here.

UPDATE:
Round-up of the entries by the challengers is posted here and here.

As a reward for participating in the fun event, I got the following badge!


Thanks to Savor The Thyme and Tangled Noodles for hosting this challenge!


Posted by Picasa

Strawberry Jam

I am at work right now...I needed something to keep me awake...coffee...still sleepy.

Blogging...sure way to keep my mind going...so here I am.

I was reviewing my old posts from my old kusina that I transferred here. Most of the posts then had recipes on geocities webpage that I tied up with my blog posts because photoblogging then was not yet "in" at the time. I (painstakingly) made separate webpages to show step-by-step photos of things I was doing then. I was quite surprised to find out I did make one for homemade strawberry jam, but which was not tied to a blog post. So I am making one for that now. Though strawberry season is quite far away...

I make strawberry jams whenever my MIL tells me she has had enough for her own use. My kids would pick them, we would eat some, and the rest I would make into strawberry jams. Strawberry jams and raspberry jams are our favorites. Very good on rolls, Club crackers, over cheesecake, etc. I have brought several jars of these for munchin during work, and my British and American co-workers loved my homemade jams. "Cannot compare with them commercial ones!"

Ingredients:

5 1/2 cups mashed strawberries
1 box pectin (Her preference is Sure-Jell)
7 cups sugar
8 jars for canning

Instructions:

Boil water for sterilizing jars then let simmer until ready for sterilizing jars. Wash jars and screw bands in hot, soapy water; rinse with warm water.

Prepare strawberries by removing the stems and mashing thoroughly with fork. (I think you can also use chopper batch by batch.) Put in a big saucepan and heat to boil, constantly stirring while gradually adding the pectin until fully dissolved and bring to full rolling boil (A boil that does not stop bubbling when stirred) on high heat, stirring constantly.Add 1/2 tsp butter or margarine to reduce foaming, if desired.

Stir in sugar quickly. Return to full rolling boil and boil EXACTLY 1 MINUTE, stirring constantly. Remove from heat.

Skim off any foam with metal spoon.

Pour quickly into prepared jars, filling to within 1/8 inch of tops. Wipe jar rims and threads.

Cover with two-piece lids. Screw bands TIGHTLY.Turn upside-down right away, then turn upright again after 5 minutes (This process is to ensure that minimal (unsterile) air is trapped, and that the hot jam will sterilize that space by inversion. Setting it upright after 5 minutes will ensure proper setting where the jam does not stick to the lid.)

Let stand at room temperature 24 hours. You may store unopened jams in cool, dry dark place up to 1 year. Refrigerate opened jams up to 3 weeks.

You may use strawberry jams on rolls/bread, Ritz crackers or saltine crackers.

Note: Upon setting, if you are using a larger jar, you may notice separation of layers. Above is the jam with all the bits of strawberries, and below a clear layer, which is the jelly.

Also, after the strawberry season comes the raspberry. When picking, the stems easily detach from the ripe fruits. Wash the raspberries just before the procedure, then proceed as with the strawberry jam procedure.


Tips:

Freshly picked strawberries should be washed ONLY when you are ready to consume/use it, otherwise it will spoil easily.

Pick only red and plump strawberries. When picked too soon, it won't have a sweet taste.

When in full rolling boil, you may lessen the foaming by adding 1/2 tsp butter.

Follow closely the timing of pouring boiling water into the jars and of removing the water and of closing the jars with the lids. Also minimize the air incorporated in the jar. Leaving a small space for air will result in popping in of the lid when the jam cools down, a sign of successful technique to ensure sterile procedures.

Additional info on jams and jellies available at www.surejell.com .


Friday, February 20, 2009

My Taho Quick-Fix


Just like when I made my puto, I don't always try to make things from scratch. If there's a way to easily make them without making a two-hour trip to an Asian store, or without making a trip all the way back to the Philippines, I will try to find that way.

Well, this quick-fix taho was actually an idea from my good friend Ana.


My only problem is that I have not really learned how to cook sago the right way, without a hard uncooked middle, even for the larger ones. Can anyone teach me how???


I cooked the sago first (still unsuccessful to come up with fully cooked sago). Then I spooned out some tofu, placed in a small ramekin, added maple syrup and sago, then microwaved in increments of 30 seconds until I was satisfied with the hotness. Expect to see more water as you heat up. I just scooped out as much of this excess water as I could, just like the magtataho used to do when serving me taho (I was a loyal customer from childhood to adulthood).

UPDATE 2/22/09
I would like to post here what Ria (of Sweden) does for her taho fix. Maybe others can do the same:
hi manang! this ria, your reader from sweden. dito walang silken tofu, plus hubby and the children love it kaya ang ginagawa ko to have our taho fix is buy soya milk (no calcium) and add a little tofu coagulator (food grade gypsum) that i bought from an online wholistic store and some cassava starch. i love using dark muscovado for my arnibal and small tapioca pearls. for the small tapioca pearls, i cook them first and after the water boils, i let them sit for about 10 minutes with pot cover on (hindi sa stove top). after they sit i boil them again and let them sit again for 10 minutes....voila, they're done after that.
Thanks for the info, Ria!


UPDATE 8/02/09:
For those who might be interested in the procedure, I have these recipes below which I saved a long time ago from the DOST tecknotulong website (which now seems gone). I myself have never tried to make them, but I am posting here for the benefit of those who ask. Please do not ask me any further questions regarding these recipes because I would not know anything beyond posting them here.:

TAHO FROM SOYBEAN

Materials:
3 cups mature and newly harvested soybeans
2 bars white gulaman
3 cups brown sugar
strainer (muslin or nylon cloth)

Procedure:

1. Soak soybeans overnight in water 3 times its volume.

2. Remove outer covering, grind; add water little by little (at least 6 cups) while grinding.

3. Dissolve 2 bars gulaman in boiling water (7 cups).

4. Pour the ground soybean in boiling gulaman for 7 minutes or until the odor of grains is removed.

5. Set aside until it coagulates.

6. Serve with syrup.

Syrup is prepared as follows:

3 cups sugar is dissolved in 3 cups water. The sugar may be caramelized to improve color and flavor.

Source: The Philippine Recommends for Soybean PCARRD 1991


TAHO FROM COCONUT MILK

Instead of soybeans, coconut milk may be used with gulaman in making taho.

Procedure:

1. Mix pure coconut milk with equal volume of water and heat.

2. In a container, dissolve 1/4 gulaman bar in water, boil.

3. Strain the dissolved gulaman and coconut milk. Heat and stir continuously for at least 20 minutes.

4. Pour into molds and allow to cool and harden.

To make syrup:

Dissolve 2 cups brown sugar in one cup water. Heat until thick.

Thursday, February 19, 2009

Hopia: the Final Stages (3/3)


This is my final hopia post in a series of 3. I am writing this while waiting for my cinnamon rolls to rise (using supersoft ensaymada dough).

Photo above shows my first batch, with experimentations on different wrapping. Slideshow below shows few hopia I made with the last roll of dough I prepared before (one of 4 rolls), baked in oven toaster set at 450 deg F for 15 minutes or so. Each roll of dough could make 4-5 pieces of good-sized hopia. (Suggestion: Maybe a better method would be to flatten the whole roll and then punch out circles before putting filling in, rather than flattening each piece. )

The slideshow is pretty much self-explanatory.

While my first batch was baked in my oven set at 350 deg F, I figured, I would try baking at almost the same temp I bake my empanada. The main objective anyway is to cook and brown the dough wrapping. The filling itself was precooked, so there is no danger of underbaking.


And since I was left with only a roll of the dough I prepared earlier, I had only 8 pieces to bake. I did not feel like wasting that much energy by heating up the big space of conventional oven, so I opted to use the oven toaster. The only thing to keep in mind when doing this is not to burn the ones closest to the heating element; i.e., the middle row. So after about 10 minutes, I rotated the pieces so that the brownnest ones I placed at the periphery and vice versa, to achieve even browning of all pieces.

Baked at this temp, the crust had more crunch to it, which will only hold true for when it is freshly baked, of course. If you refrigerate then reheat later, you might not have the same crunchiness anymore. Not that a lot of Filipinos will miss this "freshly baked" sensation because a lot of us are used to the already cold hopia in the bakeries. I myself had only a few chances of getting really freshly baked hopia when I was still in PI. The hopiang baboy my Manong and the other bakers in our cheap (neighborhood type) bakery was not one I really liked, mainly because I knew there really was no "baboy" in it; only lots of onions in oil. (That said, please know that I will never have a recipe here for hopiang baboy. Now that I have shared how to make the dough and wrap the filling, it will be up to you to experiment making hopiang baboy or hopiang hapon (although I think hopiang hapon uses a different dough recipe/method).

UPDATE: Here is a recipe for hopiang hapon by Mrs. Rusty. (Note to Mrs. Rusty: Many times I would have wanted to leave a message on your site but I would have to register in Multiply so I back out. I tried to look for a way to send you a message, but it's the same thing. Please know that I love visiting your site!)

I HOPIA all enjoyed my hopia series!

Wednesday, February 18, 2009

Hopia Dough (2/3)


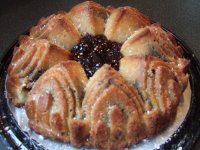
Photo above shows the very first homemade hopia I sunk my teeth into.

As promised, I am posting here today the dough for hopia. Thanks to these two recipes that gave me the idea on how to make this pinoy favorite snack that I have missed so much. When my older son tried it, he said that the dough was very much like that of the eng bee tin hopiang ube that I made him taste several days ago, but I noticed the big difference in taste because of 100% ube haleya I used here (the bought one just did not taste quite like the hopiang ube I used to buy back in the Philippines. I don't know if eng bee tin has changed their recipe). The only thing is that the underside is quite thick because of several layers of dough, but it was not too bad once baked.

Just like in one of the above links, I used lard in making the dough. But I used my homemade pork lard. My Nanay has taught me how to render the fat of some meat to use for sauteeing, and I learned how to render my own pork lard when I came to the US. Others might say "ew!" but nothing beats pork lard when it comes to flaky pie crust. Besides, it is very mildly sweet scented with the flavor of pork fat, it is so subtle and pleasant. Every year, I make this after our pig has been slaughtered, so I know where the pork came from, how it was raised, what it ate during its lifetime. In other words, my pork source would be the envy of a lot of real food foodies. You want to question the health implications for this? Here is a quote coming from my previous correspondence with fanatic, a nutritionist by profession.

My opinion about pastry ... there's nothing better than lard for making pastry (with a little butter for flavor). Lard is almost 100 percent fat, where butter is only about 80 percent fat, the other 20 percent is protein and moisture. Butter's moisture (water) makes it a poor choice for pastry (when used exclusively), since water will form gluten when it comes in contact with flour ... making the final product chewy instead of flaky.

I stay away from vegetable shortening. Even though it has about the same fat content as lard (making flaky pastry), the trans fatty acids from the process of hydrogenation are now supposedly more of a health concern than the saturated fat in lard. Shortening is pretty tasteless too.

The lard I can purchase here, believe it or not, is hydrogenated. It also contains BHA and BHT (known carcinogens) as preservatives. It's hardly a product I would consume. You deserve a pat on the back for rendering your own lard!Just yesterday I purchased a new product. It's an organic non-hydrogenated shortening, made from palm oil. Palm oil is very saturated naturally, so it's more solid at room temperature.

Another benefit of using animal fat (lard) for use in cooking ... it has a high smoking point so you can brown with it and it will not break down (oxidize). Most vegetable-based liquid oils cannot be exposed to high temperatures without oxidizing, and oxidized (rancid) fat is carcinogenic. And as your Nanay says ... fresh lard tastes better. I think you need to weigh the costs and benefits of the fat you plan on using.In the end, as long as you eat in moderation and are relatively active in life, I don't believe small amounts of animal fat are deleterious.


With that said, I present to you my recipe for a special hopia dough (I have a hunch that the same practice is done by hopia makers in the Philippines.) If you want, you may use shortening or vegetable lard. If you are interested to make your own, feel free to approach the butcher in your grocery store to inquire. They might even give this to you for free. You can freeze pork lard to keep them fresh longer. Thaw in the fridge when you are about to use. I also use it nowadays for making pie crusts, instead of vegetable shortening.

Ingredients:
Dough 1:
1 cup flour
1/4 cup pork lard

Mix together until crumbly (or it appears like coarse meal). Use your hands.
Divide into 4.

Dough 2:
Mix together until crumbly (same as in dough 1):
2 cups flour + 1 tbsp sugar
1/2 cup pork lard

Once thoroughly mixed, add 1/2 cup water to the above and mix with your hand. Divide into four. This dough is not really sticky compared to my pie crust dough, but the principles are almost the same.

Once the two are ready, proceed as follows for each part of the two types of dough (which you now have 4 of each):

Use cling wrap above and under dough 2 to make it easier to maneuver. Flatten with rolling pin and shape into a rectangle. Distribute dough 1 above. Roll the two together. Wrap tightly with cling wrap and chill in the fridge for at least 30 minutes.

Note: The contact of water in the above mixture will result to gluten formation. Gluten is what makes dough pliable and chewy. The rest time is necessary for the full development of gluten and making this dough more pliable come rolling and wrapping time. Chilling ensures that dough 1 remains physically "unmixed" with dough 2 despite proximity. The flour+lard (or flour+oil or flour+shortening) in between sheets of flat glutinous dough will create air pockets in between the sheets during baking and the results is hopia pastry with very thin flaky "crust" which is not at all crunchy or hard.

[You might be wondering why I have gloves on. Since working as an RN, I have developed dishidrosis, aka "homemaker's hands" and for me, I can very well call it "nurse's hands" because this condition develops when the hands are subjected to frequent handwashing. My skin gets tiny blisters that itch a lot, then turn flaky and super dry, then they crack and it's ouch! So I try to avoid washing my hands as much as possible. Using gloves and washing them instead of my skin helps me avoid exposure to too much handwashing, especially if I want my cracks to heal before my next duty at the hospital. It's not because I am too particular about "cleanliness" when cooking or baking. It's merely to protect my hands. Baka sabihin nyo, ang arte ko. Hindi no!]

Final post will be wrapping the filling and baking your hopia, coming up next.

Tuesday, February 17, 2009

Hopiang Ube and Hopiang Munggo (1/3)


This is the first in a series of 3 on hopia.

My family went skiing today (it's my first time!) and my body is S-O-R-E all over. Blame my blogging for the lack of exercise, so my muscles were not in their optimum condition to be subjected to this new activity. My upper body strength proved to be almost nil as I tried to get up several times when I chose to fall to the ground rather than roll down the (almost flat) hill. Pathetic...I (alone) never had the courage to go up the hill. My excuse: I am too old for this...I can easily get a fracture with one major wrong move.

Anyway, that is the reason why this is another teaser post the first in 3 (1/3) in my Hopia Series. I will continue tomorrow and the next day as I recuperate from my seemingly major injuries (muscle strain...akkk! I need a soak in the tub but my husband temporarily disconnected it from the pipe as he works on our bedroom...sigh!)

Of course, at least a day before, we ought to prepare the filling. It will be much easier to wrap the filling when it is cold and easily moldable.

My favorite fillings are ube and munggo (mung beans). As you probably know by now, I made ube haleya recently. I had several 8-oz jars in the fridge, some of which were used for the ube cake roll and ube cream cheese filling, and some I reserved for hopia.

Needless to say, I do not have to post here what the recipe for ube filling is for this hopia.

Following is how I prepared the yellow split mung bean filling, following a recipe found here (I did make my own version of the dough).

Ingredients:
14 ounces dried peeled split yellow mung beans
1 cup sugar
1/2 teaspoon salt


Instructions:
Soak beans for at least 8 hours. Drain and rinse well.
Add more water to about an inch above. Boil for about 30 minutes (keep watching so it does not dry out). Skim the scum as it arises.
Puree in food processor by batches (see the max capacity of your container). You may want to leave some intact for interesting texture (my kids did not like it, though).
Place back in saucepan and continue cooking.
When almost dry, add salt and sugar. Continue stirring to cook further until dry enough.
Transfer to jars and refrigerate.

Next in the series: Hopia Dough


Posted by Picasa

Monday, February 16, 2009

Spinach Quiche


In the Philippines, anything with meat and veggies that we cook with eggs that look like pancake, we called omelet. When I came here to the US and started browsing the net and magazines for recipes, I realized that this comes closest to "quiche" although that would have been baked and would have a crust. Well, this does not use crust nor an oven. I still fried it in oil, but covered to cook on medium low heat until the top is set. Another way for me to use leftovers - baby spinach, ground beef, and shredded cheese.

Ingredients:
Oil for frying (I used probably about 1/2 cup)
5 eggs
1 cup uncooked baby spinach
1 medium onion
1/4 cup cooked ground beef
1/4 to 1/2 cup shredded cheese
some garlic powder
salt and pepper
dash of ground basil


Instructions:
Heat the saucepan under medium heat (#6). Meanwhile, chop baby spinach in a chopper. Do the same with onion. Beat the eggs. Mix the chopped veggies in; season with salt, pepper, garlic powder and ground basil.
Pour oil into the pan. When hot enough (after about 5 minutes or so), pour the mixture. Cover, lower heat to #3 and cook until jus starting to set (about 7 minutes). Sprinkle ground beef on top and cook further until completely set. Remove from pan and transfer to a plate. Sprinkle cheese on top and cover for several minutes more until cheese is melted some.

My kids liked it. We ate that with fried dinaing na bangus, atsarang papaya, and rice.


Sunday, February 15, 2009

Amco Swing A-Way Grease Separator


For the past 5 years my cheap 1-cup fat separator had served me well enough. But many times I wish I had one with bigger capacity, with a wide mouth and stable base, such that pouring the sauce off from pan would not be too much of a hassle. So I browsed amazon.com again to look for one with good reviews. This particular brand and style caught my attention, not only because of its strainer that would get rid of big chunks of veggies and meat or bones left there and still retain some small bits that add flavor, but also of its bottom-release feature, which allows for minimal, if at all, inclusion of fat when you are pouring that gravy to saucepan. The cover of the tiny hole at the bottom is released with a squeeze of a silicone part at the handle.

However, despite buying myself this gadget for the purpose of separating fat from the sauce, I found an additional use for it. As a matter of fact, I used it first as a batter dispenser before I even had the chance to use it for fat separation when making gravy (which I haven't done to this day since I got this wonderful gadget). This photo shows the kutsinta batter being poured effortlessly and with minimal mess into individual muffin cups. I love it, and I just hope it lasts.

So even if it was more pricey than most fat separators, the two-in-one feature (which I did not foresee when I made the decision to buy it) makes it worth the price.


Posted by Picasa

No-Meat (Filipino) Chop Suey


Well, just to clarify things...I do sometimes use meat in chop suey. Also, I included the word "Filipino" in this post's title because there is such a thing as American Chop Suey, and I wanted to make the distinction that this chop suey is not American.

[At this point in time, my dough for hopia is chillin' in the fridge. I am hoping it will turn out successful. I made the yellow mung bean filling last night. And I still have some ube haleya in the fridge. While waiting, I am posting this humble entry that probably few, or none, will care to read about, but I am posting it anyway.]

I do not really know the origins of this dish. Some say it is Chinese; others say it is truly of Filipino origins. I also do not know if there is an authentic way to cook this. But this is how I typically cook mine, as I like my veggies crispy and half-cooked. This penchant for crispy veggies is shared by my boys (but hubby likes his overcooked, which is unpalatable to me); however, my boys do not like half-cooked veggies, so I had to cook them just enough so they still retain their crispiness, yet my boys would still find good. I have found out long ago (during my late teen years when I started cooking at home) that stir-frying veggies in some oil before adding broth with some cornstarch to coat the veggies good as the sauce thickens, makes this possible. As my Manong said during the first time I cooked my chop suey at home back in Pinas, "Parang lutong restaurant, ah!"

My ingredients vary a lot, depending on the availability of protein source, and veggies. This particular time, I had sayote, which I love in any veggie stir-fry. I also had a can of quail eggs and firm tofu. Instead of the usual chicken or pork (pre-marinated with soy sauce), I thought I would made use of these. And because it was quite inconvenient to add liver paste (I would have to defrost and pinch off a little), I did not bother adding it.

Probably it would be more apt to call this stir-fry veggies. But to me, chop suey is mainly that: a stir-fried mix of different veggies with some protein source. Different cooks have different versions, and even I vary in my own recipe. The only thing that does not really change is my method. As long as I end up with crispy veggies flavored with some meat, I am all set.


Ingredients:
1 pack firm tofu (I forgot to take note of weight, maybe 1/2 lb), cubed, deep fried in very hot oil and drained
3 tbsp oil
3 cloves garlic, sliced
1 medium onion, sliced
1/2 lb large shrimps, shelled
1 can quail eggs, drained
1 carrot, sliced thinly
1 sayote, peeled and sliced thinly
1 small can water chestnut, drained
1 small bag of snap peas (or about 2-3 handfuls)
1/4 head of cabbage, cut in chunks (of course, the leaves will separate)
1/4 cup sherry or Chinese cooking wine
1/2 to 1 cup chicken broth, with 1-2 tbsp cornstarch dissolved (Mix a tsp of liver paste if using)
dash of ground basil
salt and pepper (optional: oyster sauce or soy sauce)
optional: 1 tbsp sesame oil to be added after cooking

Instructions:

[AN IMPORTANT NOTE: To retain the vibrant colors of the veggies, never cover while cooking them. While the crispiness remains as long as you coat the veggies first in oil before added water or broth, the color may fade if you cover.]

After deep frying the tofu, set aside. Pour off the oil and keep 3 tbsp in the wok.
Sautee garlic for 1 minute, add onion and cook 1 minute. Add sliced carrots, cook 1 minute. Add snap beans, water chestnut and sayote, cook another minute (the tougher veggies go in first). Add shrimp and quail eggs, then the broth with cornstarch; stir about 1 minute or until sauce thickens (add some more water or plain broth if it is too thick). Add cabbage and fried tofu and stir to coat with sauce. Season with salt and pepper as needed (or oyster sauce or soy sauce). Add basil. Remove from heat once shrimps are pink/cooked. Optional to add sesame oil at the end, then stir.

Serve on a bed of plain rice.


Posted by Picasa

Tuesday, February 10, 2009

Ube Cake Roll


As I mentioned before, my first attempt at ube roll failed. So I tried a second time. I based the recipe below on a pumpkin roll recipe from epicurious, but I used 5 eggs only because that was all I had in my fridge, and they were jumbo anyway (recipe called for 6 large eggs). I also omitted the spices and replaced it with pandan essence plus the food coloring. I goofed, though, in that I broke the yolk of one egg, so I just placed the whole thing along with the rest of the egg yolks, and I was left with only 4 egg whites to whip up to make the sponge.

Now this is not in anyway like that of Goldilocks, but I was able to come up with a good thickness and sponginess of the cake, and I loved the cream cheese filling (the recipe of which I based on a pumpkin cream cheese filling shared by my friend Fe) . My kids were very excited to try it, and they loved it. I offered to hubby.

Hubby: I already tasted that before.
Me: This is a different recipe.

So maybe out of politeness, he said he would taste just a pinch off the edge.

Hubby: Hmmm. It's good! It reminds me of pumpkin roll that Mom used to make,with cream cheese filling.
Me: I based the recipe on pumpkin roll but I used ube instead of pumpkin.
Hubby: I didn't like the pumpkin roll.
Me: So, you don't like this?
Hubby: O, I like it. I did not like the pumpkin roll, but this is good. As a matter of fact, can I have half of that slice?

My husband usually does not have dessert right after supper, so this is a good sign. I shared with him half of what I had on my plate (and I ended up getting another smaller slice.

I was quite successful in rolling this cake without a single break. I probably did the right method basing on tips I read before: don't over beat the egg whites; don't overbake; and roll while hot.

The recipe below will only be for the cake. For the filling, refer to Ube Cream Cheese Filling post. Before you start baking, separate the eggs while they are cold. Best to whipe whites when they are room temp. Also, take out your cream cheese and butter to soften at room temp before you beat to make the filling.


Ingredients:

3/4 cups cake flour, sifted
5 eggs, separated
2/3 cup sugar
2/3 cup ube haleya
1/8 tsp salt
1 tsp pandan essence
25 drops purple and 10 drops blue food coloring (up to you to come up with the color you want)

Instructions:

Line a jelly roll pan (15 in x 10 in) with wax paper. Lightly grease all over, including sides.

Pre-heat oven to 375 deg F. Beat yolks and sugar for about 3 minutes until creamy light yellow in color. Add ube, pandan essence and beat until well blended. Add food coloring to desired color intensity. Add flour and blend well. Beat egg whites until stiff but not dry (about 2 minutes or so). Fold into the batter in 3 parts. Transfer to pan. Bake for 12-15 minutes or as soon as top springs back on light tapping of your finger or until toothpick inserted comes out clean.

While baking, prepare a clean flour sack (not towel). Sprinkle a generous amount of confectioner's sugar so cake does not stick to the towel. As soon as cake is done, transfer to towel, peel off wax paper, then roll with the towel starting on the short end. Let cool completely before frosting.


Saturday, February 07, 2009

Maple-Garlic Chicken

From maple glazed chicken
This recipe was shared to me by my Pinay friend who is also married to an American. They also make their own maple syrup, and I might have asked her one time what to cook when maple syrup is just so abundant. This is one that she suggested, which at one point, she brought to one of our Pinay gatherings near a river (tabing-ilog in Ana's property). I loved it, and I asked for the recipe, which she gladly shared, and now I am sharing with you. The only tweaking I made was to thicken the sauce to make it stick more, then brush onto the chickens while grilling during the last 5 minutes; this way they appear "glazed."

From maple chicken
Ingredients:
1 cup maple syrup
1/2 cup brown sugar
2 tsp garlic powder
1/4 cup white vinegar
1 cup soy sauce
1-1/2 lb chicken pieces

Instructions:
Place chicken pieces in the saucepan. Mix well the rest of the ingredients and pour onto the chickens. Boil then lower heat to medium low (#4) and cook for 15 minutes. During the last 5 minutes, start heating up your oven, broil method. Arrange your chicken pieces on a pan, and place the sauce in a small saucepan. Broil chicken for 5 minutes to dry the surfaces. Meanwhile, thicken the sauce with cornstarch+water mix to the desired consistency, and adjust the taste as needed with salt and pepper. Baste the chicken pieces to give them a glaze, and repeat after 2 minutes, then cook further about 2 minutes. turn over the chicken pieces and do the same. When serving, pour some more sauce onto the pieces. Goes very well with mashed potatoes and steamed broccoli. The leftover sauce, if any, will be perfect to flavor your fried rice.

Friday, February 06, 2009

Blueberry Muffins

Out of season, this is a re-posting from my old kusina, with some text revision.


Every year my in-laws would either invite me to pick from their garden, or they would just give me, blueberries amounting to about a gallon. There are times my friend Fe gives me some as well. They are good for eating fresh from the bush, but I freeze them (as is, in freezer bags) if I am not ready to make something with them. I may make them into blueberry jam or a blueberry sourcream coffee cake, or I make muffins with them.


I got the recipe from Sarah's baking911, and that recipe was definitely a keeper. I don't come up at all with high-dome cupcakes (to my disappointment!) but the taste is superb, and they get better after a day or two as the sugar has tamed the tartness of the less ripe blueberries.

Ingredients:

8 tbsp (1 stick) soft unsalted butter
1 1/4 cups sugar, plus more for sprinkling the tops of the muffins
1/2 teaspoon salt
2 large eggs
2 cups all-purpose flour (preferably bleached--gives a whiter color)
2 teaspoons baking powder
1/2 cup buttermilk or milk
1 pint blueberries, rinsed, drained and dried
One 12-cavity muffin pan with paper liners(they are sticky!)

Instructions:


1. Set a rack in the middle of the oven and preheat to 375 degrees F.

2. Cream the butter with the sugar and salt by hand or with an electric mixer until light. Beat in the eggs, one at a time, until smooth. Mix the flour and baking powder together well and stir into the batter alternating with the milk or buttermilk.

3. Crush a quarter of the berries and stir into the batter; fold in the remaining berries whole.

4. Spoon the batter into the muffin pan. Sprinkle the tops with some sugar.

5. Bake the muffins about 30 minutes, until well risen and deep golden. Cool the muffins in the pan.


Custom Search