Thanks to Celia K for her crema de fruta post,
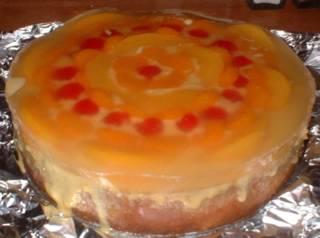 I thought this would be good alternative to the usual chocolate cake that my hubby always prepares for anyone's birthday in our family. I wanted for my in-laws to have something to look forward to during birthday celebrations, and not only to bring their gifts and greetings to the celebrant.
I deviated from CeliaK's method by preparing my own sponge cake. Why? Because when I told hubby about my plan, he grimaced a bit, saying that sponge cake is usually rubbery, chewy, tough and dry...and that he preferred the crumbly type of cakes. BUT he said, "if that's what you want, then go on. It's your birthday anyway."
Good thing I found a sponge cake recipe with this promise: " While most sponge cakes are light and somewhat dry, a sponge cake made with milk, has a softer more tender texture." The recipe is that of Boston Cream Pie which I got from Sarah's baking911 site.
Here's the recipe for the sponge cake:
Milk Sponge Cake
1 cup sifted cake flour
1 teaspoon baking powder
1/8 teaspoon salt
1/3 cup milk
3 tablespoons unflavored vegetable oil
3 large eggs, room temperature
1 egg yolk, room temperature
2/3 cup sugar
1 teaspoon vanilla
Instructions:
Adjust rack in lower third of oven and preheat to 350 degrees. Line a 9-inch springform pan with parchment or waxed paper; do not grease. Sift flour, baking powder and salt. In a small bowl add the the milk and oil; do not be concerned that they do not blend together.
In a large mixing bowl, whisk the eggs, yolk and sugar to combine. Using an electric mixer at medium speed, whip the egg mixture until it is light ivory in color and very fluffy, about 6 minutes. Add the vanilla toward the end of whipping. Using a rubber spatula, fold in the flour mixture in two additions. Pour the milk mixture down the side of the mixing bowl. (It will sink to the bottom of the bowl under the batter.) Gently fold until the milk mixture is thoroughly incorporated. Pour the batter into the pan. Bake 25 to 30 minutes or until the cake is golden on top and it springs back when lightly pressed in the center. Remove pan from oven to a wire rack until cool.
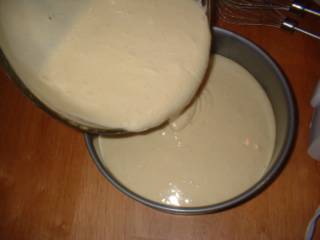

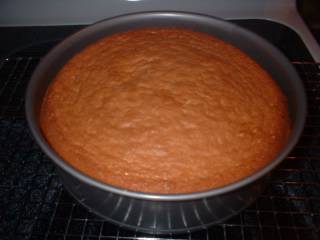
While baking the sponge cake I prepared the custard. Comparing CeliaK's custard filling with that of the Boston Cream Pie Recipe, I noticed the only difference in the ingredients were the amounts, and the inclusion of rum in the latter. I thought it would not hurt to follow that in BCP since I used a springform pan, so that the custard would just be enough to cover the top of the cake. I just eliminated the rum. I leave to you to include it or delete it from this custard filling recipe from baking911.
Boston Cream Filling
Only half of this rich, thick pastry cream, lightened with whipped cream is needed for the dessert. Enjoy the remaining filling with fresh fruit.
In a small bowl whisk to combine the egg yolks and 1/4 cup sugar, then the flour. In a medium saucepan over medium heat, combine the milk and 1/4 cup sugar and heat just until it comes to a boil. Remove, and pour half of the hot liquid over the yolk mixture, stirring to combine. Pour the yolk mixture back into the saucepan, and bring it to a boil again, stirring constantly. When it is thick and smooth, remove the pan from the heat and pour the mixture into a large bowl to cool. Cover surface with plastic and refrigerate. When ready to assemble the dessert, stir in the rum and vanilla until smooth, then fold in the whipped cream.1 cup milk
1/2 cup sugar, divided
3 egg yolks
3 tablespoons flour
1 teaspoon each dark rum and vanilla
1/2 cup heavy cream, whipped


Then while cooling the custard, I sliced the top off the cake as soon as it was cool enough to do so. I just thought this would create more traction for the pudding and the fruits, plus it gave me an excuse to taste the cake. And guess what I discovered: It tasted like that of Special Mamon Tostado (almost like the Goldilocks' Mamon but without that greasy unpleasant film that it leaves on your palate). I had hubby taste it too, and he said it was not what he expected of sponge cakes as it was not tough.
Next I prepared the gelatin. I used Knox unflavored gelatin and then followed the instructions on the packet using 2 envelopes.
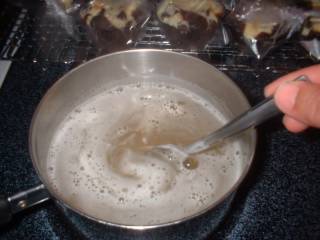
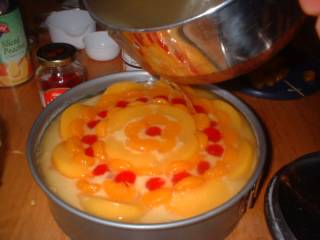
While it was cooling in the fridge, I started assembling the fruits (peaches, Mandarin oranges and Maraschino cherries) over the custard that I poured on top of the sponge cake. Then I placed inside the fridge covered with a plastic wrap to let them chill for about an hour, and then poured a thin film of gelatin. I let that thin film set for about 30 minutes, sort of like laminating the surface, acting like a seal, before I poured more gelatin to cover the fruits completely. Let the gelatin set. (It was a minimum of 3 hours from the approximated time of serving, but feel free to make this several hours earlier). (Note: I made a mistake before of pouring the gelatin while it was still very liquid, and the cake, custard and fruits were room temp. The gelatin seeped through the cake and soaked it, making it tough when the cake cooled completely. Believe me, you don't want to make the same mistake again.)
My visitors were intrigued by it. I served it very informally as such; only separating the sides off from the pan using a small silicone spatula, then gave them each a slice of the cake. No, the number of cherries did not correspond to my age (wish it did!) . They all said it was different and good. None was left (there were 13 of us in all; no leftover on their plates!) at the end of the day (much to my older son's dismay). Any Filipina can hold her head up high when serving this dessert to a foreign crowd.


