Showing posts with label sweet sticky rice. Show all posts

Saturday, May 23, 2009

Ginataang Mais (Corn and Sticky Rice with Coconut)


Ginataang mais was something I used to buy from a vendor in the neighborhood for merienda. Whether the weather was hot or cold, ginataang mais is so comforting. My kids like it, although they vaguely recall having had this in the Philippines.

Ingredients:
sweet corn kernels and cream from 4 cobs (or use 11-oz canned sweet corn kernels plus 1 small can of creamed corn)
6 cups water
1 cup sweet sticky rice
1 cup sugar
1 can coconut milk (Premium)
milk and sugar as desired

Instructions:


Boil rice, sugar and water then turn heat down to simmer for 20 minutes. Meanwhile, cut the kernels off the cob and scrape the cream. Add the corn and coconut cream to the mixture and cook for 10 minutes more or until corn is done. Ladle into bowls and add milk (or cream) and additional sugar as desired.

Sunday, March 01, 2009

Sapin-Sapin


This is my entry for this week's LaPiS theme: Tricolore. Not counting the latik topping, sapin-sapin itself is an interesting layer upon layer of 3 colors and flavors.

I have long been wanting to try making sapin-sapin. With the many recipes calling for rice flour or galapong or coconut milk extract (gata from kinudkod na nyog), it was not clear to me what the proportions were, what exact rice flour to use, etc. So, I chose one recipe to use as a guide, and although it listed rice flour, I used glutinous rice flour instead (hoping my common sense would lead me right). I mixed the base using hand mixer and tasted it first to decide whether I liked the sweetness, which was a bit bland for me, and the batter was quite too dry for me, so I added condensed milk (basing on another recipe which apparently comes up with very runny sapin-sapin). I had canned langka (jackfruit), leftover ube halaya and ube cream cheese filling, and half a pack of frozen shredded young coconut. I shortened the steaming time in between layers to 10 minutes instead of 15, and the final layer I kept at 15 minutes. I brushed the final outcome with coconut oil on top. I loved the taste (although the jackfruit was quite predominant if you taste all layers at once), and the consistency was perfect! Not runny nor too hard. I loved it! My younger son liked it as well (my older son has not tasted it yet to this time, and hubby is not interested (he did not like the texture).

Of course, before I made this, I prepared the latik first.


Ingredients:

The batter base:
3-1/2 cups glutinous (sticky) rice flour
1 cup white sugar (or more according to your taste)
1 can 14-oz coconut milk (Premium, Thai)
1/4 cup milk (I just added to coco milk to total 16 oz)
1/2 can 14-oz sweetened condensed milk

Flavors and colors:
food colorings (yellow and purple)
1/2 cup langka, chopped
1/2 cup shredded young coconut, chopped well
1 cup ube halaya

Instructions:

Prepare latik as previously posted.


Prepare steamer with enough water to not run out by the end of 35 minutes of steaming. Prepare bamboo steamer also by lining with banana leaves, wiped dry and brushed with coconut oil.

In a bowl, beat well the rice flour, coconut milk, sugar and condensed milk until well blended. [Taste with your finger at this point to adjust.] Divide into three and place in separate bowls.

Chop the coconut (I used the chopper). Mix with 1/3 of the batter with a spatula. Place in prepared bamboo steamer, cover (with bamboo steamer cover) and steam (with pot covered) for 10 minutes.

Chop langka. Mix with 1/3 of the batter, add 20 drops of yellow food coloring (McCormick). Mix well with spatula. Place on top of first layer. Steam for 10 minutes.

Using blender, mix the ube well with the third bowl of rice flour mixture. Add purple food coloring (I used concentrated purple coloring for cake icing, Wellington brand, by using toothpick dipped into the food coloring then swirled in the batter. I repeated doing this with fresh toothpick until I achieved the desired color. However, when cooked, I realized I added too much, since the whiteness of uncooked rice flour was gone when it was cooked, so the purple color was too pronounced at the end of cooking!). Add on the second layer and steam for 15 minutes.

Let cool. Brush top with coconut oil. Top with latik and enjoy warm or chilled!

To store: Wrap individual servings tightly with cling wrap. You may opt to chill for consumption within the next few days, or freeze by placing in freezer bag each serving wrapped in cling wrap. Reheat in microwave for 20-30 seconds (timing may vary depending on the size and wattage). Depending on your cling wrap, you may leave it on while you microwave if it is microwaveable. If not, it might melt so remove it prior to reheating, place the piece on a small plate and cover with another plate.

Saturday, June 24, 2006

Palitaw

This is my second entry for the LP 11.

Like I said in my most recent post, palitaw is one Filipino snack item that, as a child bored during summer, I learned to make through the recipe pages of Liwayway Magazine. I can't remember whose column it was, but I liked the recipes featured there. The original recipe called for galapong. I had no idea then what that was, but I asked my mother for money so I could try making this, and off I trekked to the wet market one sunny afternoon when most market vendors were taking their nap. Galapong turned out to be sticky rice soaked overnight (at least 8 hours), then ground as soon as there was a buyer. Once ground, it should be consumed immediately; otherwise it will spoil (panis). I have always loved to make this kakanin because of the ease of finding the ingredients and the simple process of making them. It was a bit of a challenge, though, now that I am here in the US. It took quite some time for me to finally come up with substitutes and the tools.
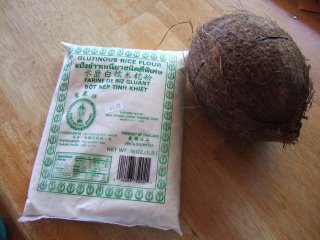
First, I tried to make my own galapong, but I did not know the proper proportion of water to rice, and my first attempt was not successful, I ended up throwing the rice. I was discouraged for a while, until I had an epiphany of using sticky rice flour and water instead! So now I had to start with these two basic ingredients: coconut and sticky sweet rice flour.

When it comes to the freshly grated coconut, I knew matured coconuts were available in Hannaford. I bought one several months ago and tried to grate that with fork. I got tired and swore 99% of the time. I did not want to do that again.

But when my friend Ana went on a vacation to the Philippines, I requested that she buy me a coconut grater. She did get me one for manual grating (left most in this photo), one as an attachment to a machine (middle one). I am hoping hubby could turn it like the Kitchen Aid attachment I have for grinding (right most). But until he could find the time to do that, I will content myself with the manual tool.
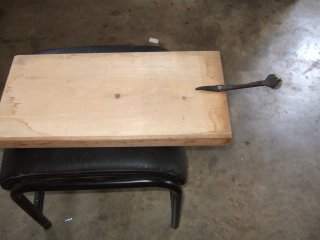
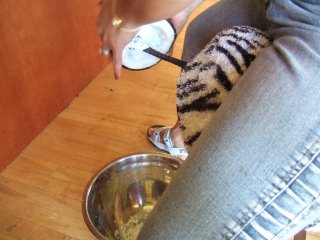
I attached it to a small piece of plank, which I could sit upon when placed on a bench or a chair or an ottoman.

This is my friend Fe doing the grating when we had a lunch as a welcome to Ana.
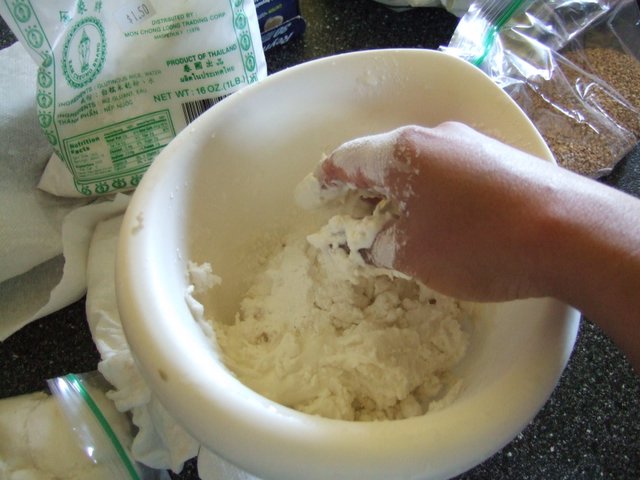
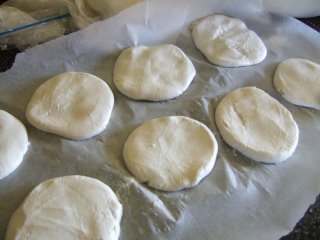
Now, going to the sticky rice patties, first, boil water in a big pot (wider than tall). While waiting for it to boil, prepare the patties by mixing cold water with some flour. I did it by approximating, I wanted to create a smooth dough, not mushy or super sticky, but not too dry. As soon as it is good to shape into balls, make the balls and flatten them into disks. Once the water is boiling briskly, drop these disks one by one, leaving enough space for each patty so they do not stick together.
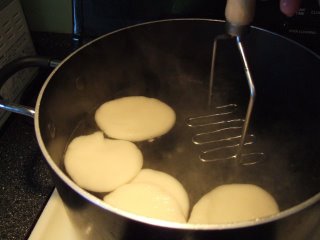
Once they come up to the surface/float (lumitaw sa ibabaw - hence, the name "palitaw"), scoop them out and let the excess water drip.

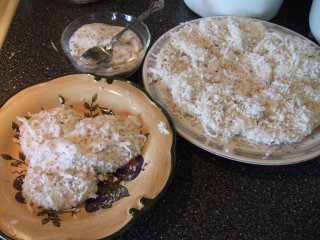
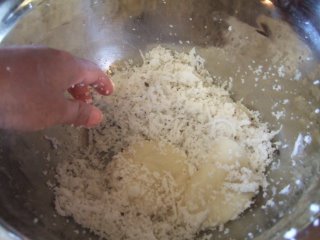
Roll each patty into the freshly grated coconut (I do not like using the dry coconut flakes), then lay on the plate, as illustrated in the first photo. Never add the sugar-sesame seed mixture as this will draw out the water and make it very wet, which will dissolve the sugar. Rather, serve the palitaw with the sugar-sesame in a separate bowl, to be added only once the palitaw pieces are on the eater's plate, to be consumed very soon.

How to prepare the sesame-sugar: toast/roast the sesame seeds (either white or brown are okay) on very low heat. If you are using the white, it will start popping, which heralds that it is almost ready. You must swirl or stir constantly so as not to burn. With the brown one, you just have to go by the smell. Let cool then add the sugar (1:1 proportion, or according to your preference).

I had enough leftover for each of the visitor to take home 3 pieces each (of course I had some too!) What to do with leftovers: Put in the fridge without the sugar-sesame. When you want to eat them, microwave for 30 seconds (if only one patty), then add the sugar-sesame.

My kids still have to develop the taste for this dessert/snack. I plan to serve this during Pinoys' Christmas get together or during my birthday to serve to my in-laws.

I would love to learn how to make pichi-pichi as well (another favorite of mine), and I hope someone can share the how-to's. Maybe it is already featured in past LPs. I gotta have the time to read them...

I also want to be able to find coconut juice (the real coconut juice, even if it is canned) with some young coconut bits so I can make buko-pandan ice candy or drink, and also buko-brown beans popsicle. Any such info?

UPDATE:
JMom posted an easy recipe on pichi-pichi (Yehey!!!), found here.

Wednesday, December 08, 2004

Champorado

Another Filipino comfort food, champorado is among those which I enjoyed not only during cold days in the Philippines, but also during the warm days as snack.


Would you believe that it was my first time to cook this from scratch? In the PI, there were mixes ready to cook. Now, I am just too glad to have the resources I need on the net, not only from recipes already posted, but also from my fellow food bloggers who have proved to be jewels in the cyberspace.


Ingredients:


1 cup glutinous rice

5 cups water(up to 6, depending on the consistency you prefer)

1/2 cup unsweetened cocoa powder

1/2 to 3/4 cup sugar

1/8 tsp vanilla extract

some evaporated milk


Instructions:


Cook rice in a medium saucepan with water on low heat, stirring constantly to avoid scorching. When rice is transparent, add cocoa powder (may add some more depending on how chocolatey you want it to be), sugar and vanilla extract and cook for several minutes more, until rice is soft. Adjust sugar according to taste. Serve in bowls with swirls of evaporated milk on top.Posted by Hello


I was excited to let my hubby try it, for he is one chocoholic. I was hoping it would be another Filipino food that he would like, but....I was disappointed with his reaction...


However, I found a kind of rice that is cooked somewhat like fried rice that my hubby likes. Actually, he was the one who pointed it to me when we were grocery shopping. He said I should try it. I did. Everyone, including my boys, liked it. I will post about it some time later...

Custom Search