Note as of 1-12-09: Please see my labels on the sidebar and look for "ensaymada" for other recipes I have (supersoft and buttery, aside from the earlier bread machine and manual methods). You will also see tips and methods. My favorite, and most popular among my readers, is the super moist, super easy to make, supersoft ensaymada.
~~~~~
Before I left the USA, I baked this bread for supper, which I tweaked with to substitute honey for some of the sugar. Husband said it was so good, so soft and sweet it was almost like a pastry. It reminded me so much of ensaymada.
Now, I am here in Canada as I post this, with my sister and Nanay, and I brought the recipe with me, following the recipe save for changing the proportion of eggyolk and eggs, brushed some with egg glaze and some without, and of course, I shaped them into regular sized ensaymada. My sister tasted it and said, "Ang sarap! Siksik sya, hindi puro ere." (It's delicious, and not full of air.) At first I thought she was trying to tell me it was solid [hard] because it was "siksik" but what she really wanted to say was that it was not the kind that some rolls are - full of airy holes that one would get gas pains due to so much air eaten than the actual bread, which is usually a result of over-rising.
She brought to work two pieces, as she was giving the other piece to her Filipina co-worker. When she got back, she told me, "Sarap na sarap yung kasama ko. Gusto mag-order. Ituro mo nga sa akin kung paano paggawa." (My co-worker liked it so much that she wants to order some. Teach me how to make it.) At last I achieved what I have meaning to -- evoke interest in my sister to learn baking. She was, anyway, exposed to the same bakery and bakers I grew up with.
Hence, that is the reason why I am not (yet) posting the recipe here. My sister might want to sell ensaymada as a sideline, so she does not want me to post my final recipe here. I can only say that I did not use honey, but all the ingredients can be easily bought from the grocery store. And I can only offer, for now, the slideshow and the how-to's below. For those who will be interested, email me (see contact link) and provide me with your physical mailing address.
Procedure: 1. Prepare the dough (this recipe can be refrigerated, which I prefer because the dough is easier to handle/shape when cold). 2. Divide the dough into 24 pieces (you may want to make 12 pieces first and re-place the rest of the dough in the fridge. This dough can be used within 24 hours.). 3. Using both palms and starting from the middle going outward, roll out each piece to make a 1-ft long "rope." 4. Make each piece into a loose coil so that when you place it on the baking sheet, it lies flat, not like a mound. Some space in between can be allowed, since the dough will still have to rise. The mound at the center will form as the dough rises. 5. After placing on the baking sheet, brush with softened or melted butter/margarine. Let rise in a warm, draft-free place for about 10 minutes or until doubled (depending on the warmth of the place). I place mine inside the oven and turn the oven on for one minute just to make it warm inside. If you are going to place them on the countertop, make sure you cover to avoid drying up. 6. Bake at 350 F for about 12-15 minutes or until golden brown. You may brush with egg glaze if you want the top a darker brown for better contrast with the inside. 7. Once cooled enough, brush with softened butter or margarine then dredge in sugar and enjoy. Optional: Sprinkle top with grated cheese. I can tell you, though, that this is so good you don't need anything else aside from the basics of ensaymada to enjoy it. In other words, you don't need cheese or salted egg to make it taste good. It was my sister who labeled my ensaymada "special." That's how pleasurable this is to the palate.
Note: The rolling pin method can also be used. Instead of making "ropes", you can flatten the whole dough using rolling pin to make about 10x15 rectangle and brush with butter, leaving about half an inch on one long end. Start log-rolling from the other long end, then pinch to seal at that end without butter. Cut the log into 24 pieces, lay on the baking sheet at 2-inch intervals and let rise. Proceed as above.
TIPS: When storing, let the buns cool completely then place inside a ziploc bag immediately. It is better to NOT brush them with butter and NOT to sprinkle sugar yet. If you have done so then you have to reheat, the sugar and butter will be quite melted when you microwave, which is not quite appealing to the eyes, but still appealing to the palate. When ready to consume again, just reheat each piece for about 10-15 seconds in the microwave then brush with butter and roll on sugar.
UPDATE: 12-24-08 --
Please see my labels on the sidebar and look for "ensaymada" for other recipes I have (supersoft and buttery). You will also see tips and methods.
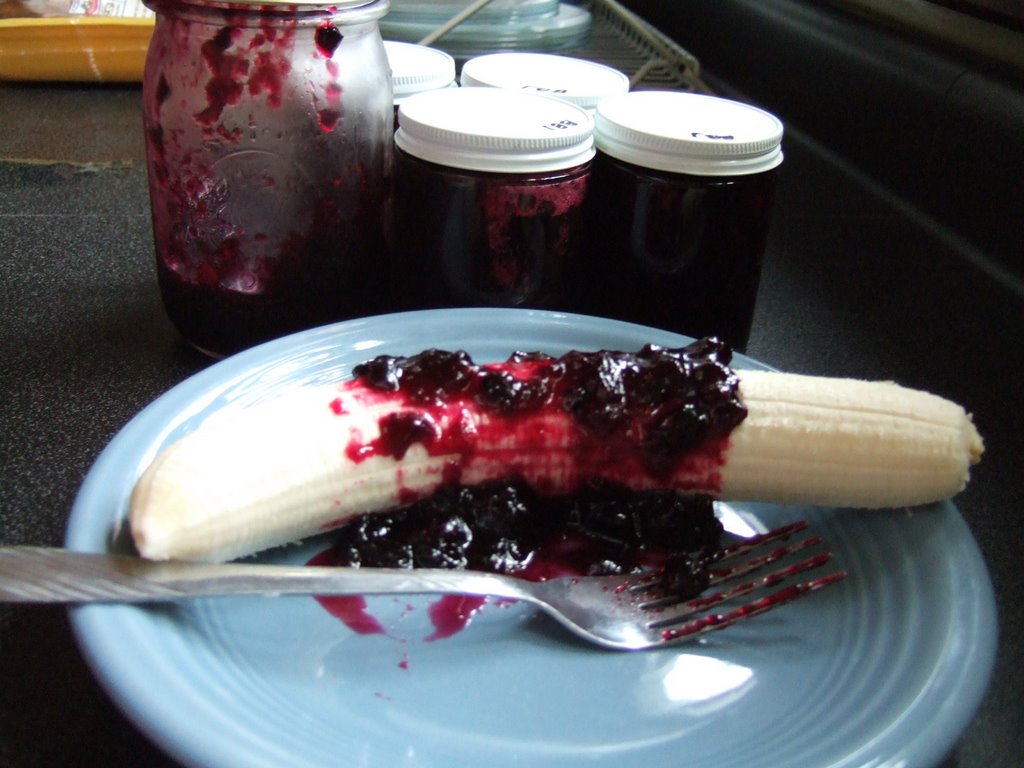
Every year I get about 1 gallon of freshly picked blueberries from my MIL's garden. I make blueberry jam (recipe here), which I store in 3/4 cup jars, and which I love using on bananas, or saltine crackers, or toast...
I also use one such jar for the very tastyStonewall Kitchen's blueberry sourcream coffee cake, the recipe for which is as follows:
Ingredients 2 cups granulated sugar 2 cups all purpose flour 1 Tbsp vanilla extract 1 Tbsp baking powder 1/4 Tsp salt 2 sticks (1 cup) unsalted butter 2 eggs, beaten lightly 1 cup sour cream 1 - 13 oz. jar Stonewall Kitchen Wild Maine Blueberry Jam, stirred well
Directions Pre-heat oven to 350 degrees. Butter a 10” bundt pan and lightly dust the inside with flour. In a mixer, or by hand, cream sugar and butter until light and fluffy. Add eggs, blending well, and then add sour cream. Mix until combined. Gradually fold in flour, vanilla, baking powder, and salt into creamed mixture until just blended. Reserve 1/2 cup of batter and mix with 3/4 of the jar of blueberry jam. Pour 3/4 remaining batter into the prepared pan, smoothing to the edges and creating a slight "trough" with a spatula. Gently spoon the blueberry mix into the batter "trough", being careful not to touch the side of the pan. Pour the remaining batter over the jam and smooth the top. Set pan on middle rack in the oven and bake for about 60 minutes, or until the sides of the cake pull away from the pan and a cake tester (or toothpick) inserted in the center comes out clean. Cool on a wire rack for at least 30 minutes. Turn onto a plate, sprinkle with confectioners sugar, drizzle with remaining jam and enjoy!
I also usually make these blueberry muffins, and though my favorite recipe for that so far does not produce the dome that I would like to have, it does come up with muffins which I like so much, and get better and better on the 2nd, 3rd, and 4th days.
I had been very lazy to blog about food lately, and I have not even started packing for my trip to Canada!
But last night, I somehow got into reading about biofuel and biodiesel.
We all have heard about global warming...many of us want to contribute to delaying if not preventing its catastrophic effects.
I read about how the Philippines has been making biodiesel and how it targets to be a major supplier to developed countries...As usual and as I expected, there is a huge manufacturing company involved, making use of coconut oil. Of course, this does minimal to help alleviate poverty, and while it provides job opportunities for coconut farmers, it does not address the potential of recycling used cooking oil and EMPOWERING the ordinary people. I read in a forum about some Filipinos already homebrewing it, but the latest was 2004. Was there a move by the government to suppress household production of biodiesel?
I PLAN TO SOMEDAY MAKE BIODIESEL out of used cooking oil collected from nearby restaurants (if I can get them for free). But, thinking of how ubiquitous carinderias, eateries, and small restaurants in the Philippines are, I could not help but post about it here. For a start, it will be a very good science project for high school students, not only because of the issue of recycling, but also looking into the issues of alternative fuels and less carbon emission into the environment to lessen global warming, use of resources naturally abundant in the Philippines, and empowering even the common household in my beloved country in that they, too, can lessen their need for fossil fuels and can even start generating income from this (if government allows).
Why I want the high school science project as a starting point -- the high school students usually have the right chemistry background and guidance; they can easily request to "haul away for free" the waste cooking oil used by restaurants (who would be glad to get rid of the "waste" without having to pay for disposal, and who would shy away from charging the students a fee); and they can easily generate funds through solicitation letters for other materials/equipment they would need to make the project.
The diagram for the process is shown here. The biodieselcommunity.org provides a very comprehensive resource for those who want to make it on a small scale (as small as a liter) or on a larger scale.
The small batch making is simple enough to be carried out using ordinary materials (and that's how I plan to start). Families who wish to make it on a larger scale (but still small compared to the big oil manufacturers) might find use of the diagram of the "Appleseed Processor found here (needs some engineering/plumbing know-how - I am expecting that a lot of scientifically-inclined Filipino HS students will find this interesting). Negotiating for Waste Vegetable Oil (WVO) is a very interesting read for gathering the most important raw material, but this will be needed only if families start making their own biodiesel out of WVO from nearby restaurants.
For the common household who want to experiment first to come up with one liter of biodiesel, here is a recipe, from the "World Famous Dr. Pepper Technique." (Dr. Pepper is the soda brand of the bottle they used in this process.)
World Famous DR Pepper Technique (Pat Pend) The idea for the Dr Pepper Technique came about one day many years ago (it seems) when I was trying to figure out an inexpensive way of making my first few test batches of biodiesel.
I will assume that if you are reading this for the information then you are new to Biodiesel making, so just a few words of caution:
THESE ARE DANGEROUS/POISONOUS CHEMICALS. COMMON SENSE MUST BE USED. YOU ARE RESPONSIBLE FOR YOUR ACTIONS AND THE SAFETY OF YOURSELF AND EVERYONE/EVERYTHING AROUND YOU.
METHANOL IS A POISON WHICH CAN BE ABSORBED THROUGH YOUR SKIN, BY INHILATION, OR CONSUMPTION. METHANOL CAN CAUSE BLINDNESS AND DEATH. METHANOL IS AS FLAMMABLE AS GASOLINE/PETROL. CARTRIDGE RESPIRATORS DO NOT WORK WITH METHANOL.
SODIUM HYDROXIDE (Caustic soda, NaOH, lye) can cause severe burns and death. wash off with water.
Long-sleve shirt, full shoes and trousers are recommended, no shorts or sandals. Wear chemical proof gloves, apron, and eye protection. Always have running water available to wash off any splashes. DO NOT INHALE ANY VAPOURS!.
Now that I have managed to scare you, just realize that Methanol is the fuel used in most Model airplanes. In the USA methanol is available in small quantities as HEET brand fuel line antifreeze (Yellow bottle) Lye is an every-day drain cleaner. Both are freely available in most large shopping centres.
MATERIALS REQUIRED 1 litre oil- new or used NaOH (lye/ caustic soda), at least 6g. Used as a drain cleaner and can often be found next to the Drano. Methanol at least 250ml. HEET® Gas- Line Antifreeze in the yellow bottle is methanol and readly available in most auto supply stores in the USA.
EQUIPMENT REQUIRED 1- 2 litre (1.9 in US) Dr Pepper Bottle in sound condition with tight fitting top and dry inside.
1-measuring cup to measure out 250ml methanol 1-scales to measure 6- 7g NaOH OR 1 teaspoon measure metric or imperial.
1- container to mix the methanol and NaOH in which makes methoxide.
1- Funnel
THE TECHNIQUE:
OIL PREPERATION If using waste oil, take one litre and heat to at least 120 deg c to remove all water. If water is present the oil will spit and pop and carry on. If there is a lot of water this could get very violent, so be careful. Once the water is gone (Oil becomes calm and there is no more spitting and popping) let the oil cool.
If you are using new oil from the bottle it should have no water in it, so in this case just heat to 55deg c when you are ready to mix.
MAKING THE METHOXIDE WARNING: METHOXIDE IS A POISON! DO NOT BREATH VAPORS. WASH OFF ANY SPLASHES. DO NOT MIX THE METHOXIDE IN A PLASTIC SOFT DRINK BOTTLE AS THE NaOH ATTACKS THE PLASTIC AND YOU WILL QUICKLY BE SHAKING A BOTTLE FULL OF HOLES WITH METHOXIDE GOING EVERYWHERE.
While the oil is cooling mix your methanol and NaOH(lye) to form the methoxide. Use 250ml of methanol. This is more methanol than most people use but will help insure a successful first batch. If you are using new oil this will require 5g (about half a Teaspoon) NaOH. For used oil, you should do a titration to determine the correct amount of NaOH to use. However, if you do not have the materials to do a titration, just use the imperical quantity of about 7g NaOH as this amount almost always achieves seperation. If you do not have a scales, this is about 1 level teaspoon measure (metric or imperial).
NaOH and Methanol do not readily mix, so if you are doing it by hand a bit of time and patience is required. Don't sniff the fumes. CARTRIDGE RESPIRATORS DO NOT WORK WITH METHANOL For quickest mixing, start with the methanol at JUST body temp (not warm). As you mix, the temp will increase substantially. This is normal. Make sure ALL the NaOH (lye) is disolved. This may take 10 minutes or more. Hand mixing can be accomplished using the back of a spoon to stir/crush the NaOH granules ina coffee cup or glass; OR placing methanol/NaOH in a glass bottle with a tight fitting top and shaking/ swirling until ALL NaOH is disolved. After ALL the NaOH has disolved, top up to 250ml with fresh methanol, as there may be some evaporation during mixing.
MAKING THE BIODIESEL! When the Oil's temp has dropped to 60 deg c or a bit less, using a funnel, pour the litre of oil into a DRY 2 litre Dr Pepper bottle (in a pinch any other brand of bottle will do). Take the mixture of methanol/NaOH (commonly called methoxide on this forum) and pour on top of the oil using the same funnel. Remove funnel. Screw the top down TIGHT onto the bottle. Shake vigerously for about ten seconds/ 40 good shakes. NO appreciable pressure is generated during this mixing.
Now place the bottle on a table. If you were using WVO you will probably observe the oil change colour from a "Light Chocolate milk to a rich, darker brown." Then, as if by magic, within 10 minutes the by-product (commonly refered to as glycerine on this forum) starts to settle out and form an increasing layer on the bottom of the bottle. Be sure to notice that you can see a very definate, slowly sinking line towards the top of the Biodiesel as the glycerine slowly settles. Within an hour, most of the glycerine will be settled out. This is referred to as seperation. NOTE: Neutral has shown through GC tests that although one 10 second shake produces very useable Biodiesel it is in fact not ASTM conversion standard. To produce ASTM conversion biodiesel requires titration and a further four- 5 second shakes over the space of an hour.
If you used New Oil, the colour change is not nearly as great and you may have problems seeing much of a colour change at all.
You should now have a bottle containing lighter coloured biodiesel on top of a layer of darker glycerine. If you reacted New Oil the glycerine layer on the bottom will not be much darker than the oil you started with and the biodiesel will usually be very light in colour. The biodiesel will be very cloudy, and it will take a day or two more for it to clear.
If it does not work out come onto the forum and see if anyone can figure out what went wrong.
And that is all there is to it. Only a little magic is involved.
Remember, after producing in excess of 53,459 litres of biodiesel in any calander year using this process, please make royality check out to Tilly From Paradise and send it to me through your favourite Numbered Swiss bank account.
CARTRIDGE RESPIRATORS DO NOT WORK WITH METHANOL
A few cautions: DON'T mix the methanol and NaOH (lye) in a plastic bottle as NaOH attacks some types of plastic. Once mixed it is quite acceptable to mix your biodiesel in a Dr Pepper plastic bottle. Do NOT store unused methoxide in plastic bottles. Some plastic will degrade over time when in contact with methoxide.
DO NOT allow any WATER into any steps of this procedure.
Methanol boils at about 65 deg c. DO NOT mix until the oil is below 60 deg c.
Again, these are dangerous chemicals and care is necessary, especially if there are children in your home.
YOU ARE RESPONSIBLE FOR YOUR ACTIONS AND YOUR SAFETY AND THE SAFETY OF EVERYONE AROUND YOU.
I have Up-Sized the Dr Pepper technique by using a 20 litre plastic drum (longish and skinny) and make 14 litre batches. I simply lay the drum on a wooden "cradle" and place the center of the cradle on a pipe and rock back and forth for 3 or 4 minutes. I then decant the mixture into a "finishing" container and so am ready to process another 14 litres straight away.
Now that you have a Litre of Finest biodiesel you will probably wish to wash it and this is quite easily accomplished using the World Famous Dr Pepper Wash Technique (Pat Pend).
So now that is added to my list of "Want-To-Do" in the future. I will start with producing a liter, then, if I manage to convince my husband to build me the Appleseed Processor, move on to a higher scale of production, at least for personal consumption, mainly heating our house during winter.
And yes, I am a wannabe homesteader, who wants to take part in the "Sustainable Living" and "Voluntary Simplicity" movement, who wishes to be "off the grid," and who does not share the interests of those whose dreams include "world travel" and whose top hobby is shopping (I am so against commercialism of Christmas and Halloween and other Holidays). I may sound so foreign to a lot of Filipinas now, but I know I am not alone (hi stef!) in this.
My computer had a virus (a free hard drive cleaner pop-up) and I had to re-install my OS (it would not let me do a system restore). That was the reason why I could not post photo-blogposts in the past week. It is okay now...
My husband invited some Jamaican farm workers over at our house for dinner. At first he requested me to make beef pares, but then learned that Jamaicans do not usually eat beef apparently because it was expensive in their country (like in PI), but we were not sure whether there was a religious factor to consider. To be on the safe side, I looked for Jamaican recipes using chicken. Originally titled as Orange and Ginger Chicken using cut portions of a whole chicken, I modified it to cook the whole chicken, using lemon and tangerine orange(what I had in my fridge) as substitute for orange. Everyone was pleased with the results. Here is the original recipe (I would have provided the link to the site but I could no longer find it, although I had a printed Word copy of it. You will notice there is no ginger nor "seasonings" in the list of ingredients.):
Orange and Ginger Chicken
The Plantation Inn, now Royal Plantation, once served this as a specialty of the house. This elegant resort has hosted many celebrity travelers and was the setting for Prelude to a Kiss, starring Meg Ryan.
1 whole chicken, cut into eight pieces 2 cloves garlic 3/4 cup fresh orange juice 2 tsp honey 1 tsp soy sauce 3 tsp sugar 1 green pepper, diced
Preheat oven to 375 deg F. Cut whole chicken into 8 pieces and season with mix of seasoning (I am not sure what they referred to here), garlic and onions. Combine remaining ingredients in a bowl and mix well. Pour sauce over chicken in a shallow baking dish and bake for one hour, basting chicken as often as needed. Serve with rice.
What I used and did:
Citrus and Ginger Chicken
1 whole chicken garlic rosemary paste - 1 whole garlic, roasted, peeled and mashed, plus 1 tsp of dried rosemary - this I placed underneath the skin (just like I do with roast chicken) 1 onion, sliced marinade - made up of 1/2 cup tangerine orange juice (1 whole orange), 1/4 cup lemon juice (1 whole), 2 tsp honey, 1 tsp soy sauce, 3 tsp sugar, 1 diced green pepper, and thumb-sized ginger, pelled, crushed and sliced thin. (Note: Reserve the rinds of orange and lemon to stuff into the cavity) cornstarch-water mixture (1 tbsp:1/2 cup) for thickening the sauce
Be warned that the way I did this required a whole weekend day (well, I really did not care because I was busy preparing other dishes).
Prepare the marinade and garlic-rosemary paste. Apply the paste under the skin of the most meaty parts. Lay the slices of onions at the bottom of foil-lined slow cooker. Pour 1/2 of the marinade into the chicken cavity and 1/4 into the slow cooker. Place the chicken breast side down and then pour the remaining marinade. Cover and let cook on low setting for 3 hours (This allows the chicken to absorb the marinade while already starting to cook the chicken. The three hours will be enough such that you will be able to lift the chicken out onto a rack for browning in the oven without it falling apart. I thought my foil was sturdy enough to assist in that, but I should have used a heavy-duty foil.) Transfer the chicken onto a baking dish breast side up and start to bake at 350 deg F. Gather the sauce and boil. Thicken with cornstarch water mixture. Reserve 1/4 cup for basting and the rest for use as gravy. Baste the chicken and let bake for 30 minutes. Baste again and continue baking for 30 minutes. If it gets too burnt looking, cover with foil (but soy sauce will naturally produce that look. It will be up to you to judge whether that charred look is what you want. To me, this reminds me of grilled chicken in barbecue stands in PI.)
Here was my menu: Arroz ala Valenciana (from the unofficial cook) Escabecheng Tilapia (Fried Tilapia with sweet and sour chili sauce courtesy of JMom -loved it!) Fish Lumpia with Jufran chili sauce Fresh Lumpia with paalat sauce Leche Flan (sorry, not in the pic) Light Wheat Bread (using bread machine) (I boiled one potato for hubby)
The Jamaicans brought beer (we in the family do not drink alcohol). We finished almost everything, but I forewarned the Jamaicans to remove the paper off the fresh lumpia. They ended up not eating even the crepes (waah! sayang pagod ko!). I should have eaten the fresh lumpia first to demonstrate to them how to enjoy it. Oh well...at least they went back to the table at least 3 times (I placed the dishes on a separate table a la buffet style to make space on the dining table).
Hubby was quite surprised at the small feast I prepared (his family of origin usually does not prepare appetizers and side dishes except for Thanksgiving or Christmas), and he was so proud of me. The Jamaicans were all praises as well (I could not understand them because of their strong accent, though. Hubby had to relay the message to me).
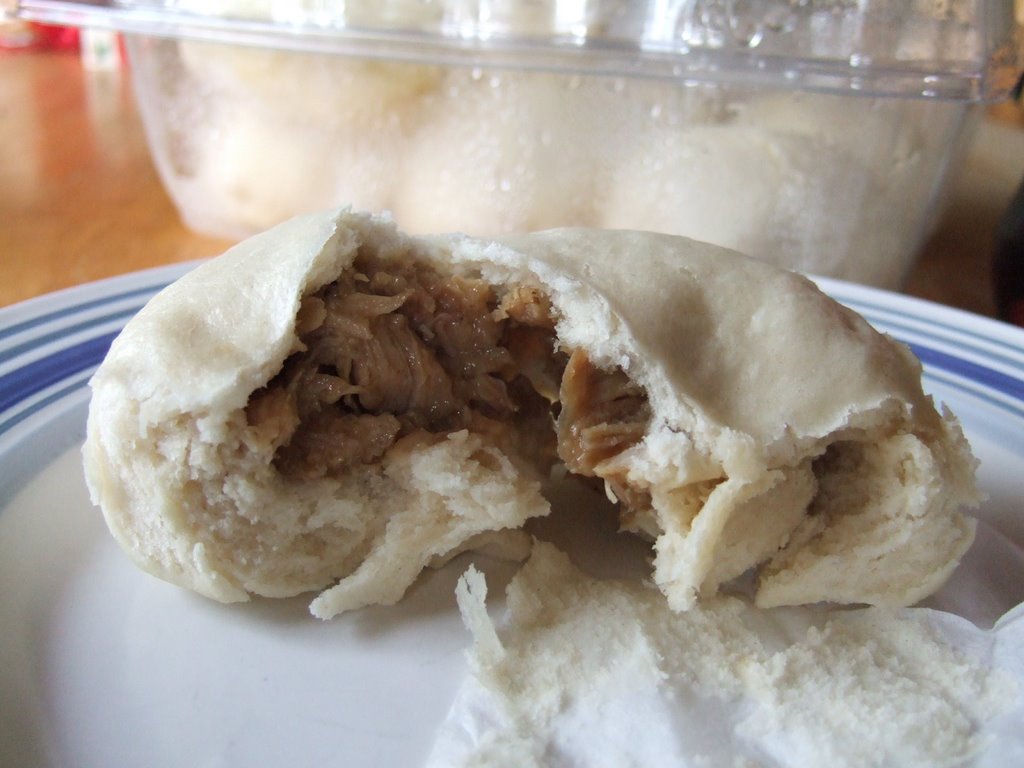
I did have leftover red meat from the chicken, which I chopped roughly and mixed with the leftover sauce, then used as chicken siopao. (More details on how I make siopao can be found here.)
But that does not mean I will not create new posts here.
What HELP am I talking about? Well, I will be leaving for Canada in the first half of December to be with my (visiting) mom and my (immigrant) older sister. ("You must be excited to be with the people who eat the same things you do," hubby said. "Oh yeah!" I replied.)
As such, I will be leaving my boys (big and small) on their own.
Younger son: "We will just cook noodles every morning for our breakfast." Older son: "Ma, you can make more siopao, freeze them so we can have them for snacks." (Which I already did - have 1 dozen chicken siopao and beef asado siopao frozen now, along with a disastrous looking puto pao.) I said: "Hep, hep! You are talking only of food, but you have to think also about your laundry, watering the plants, keeping the house clean, and checking your lights and stove/oven." Younger son: "You should make a list of things to do." Older son: "And you should post instructions on how to do the laundry and everything..."
I have started "training" them for the routine. But I am still composing the daily schedule and instructions.
I am now thinking of what foods I can possibly prepare ahead, freeze, and then just instruct them on how to reheat these. So like I said, I have siopao and puto pao in the freezer. I also have two loaves of beef embutido (recipe by Iska). I am considering preparing poultry stuffing with chicken/mushroom sauce ready to pop in the oven, but I am not sure if this will turn out right. Also considering freezing chicken adobo but not sure if this comes out okay if reheated. What about par-baked rolls and how to make them so I can freeze them and re-bake for final browning? MY kids know how to cook mac and cheese, and hotdogs, but I would not want them to eat the same thing daily for two weeks. Husband is planning to buy pizza and Italian sandwiches more often. (He also said, "I will take care of the laundry while you are gone.")
I will greatly appreciate any suggestions (both on food and other things) that will help me prepare for my brief absence in my boys' lives.
UPDATE as of 12-22-08: A more special pichi-pichi recipe can be found here.
I would have tried stel's recipe, but I did not list down things that I should have gotten from the Asian store when my friend Anna asked if I wanted to go with her. So I forgot to look for the lye water and pandan essence. Good thing, in the comments section, Lani gave her recipe using just the grated cassava, sugar and water. It was very good! Although, I would have still preferred it with some pandan essence. (tita stel, nagpaparamdam po...
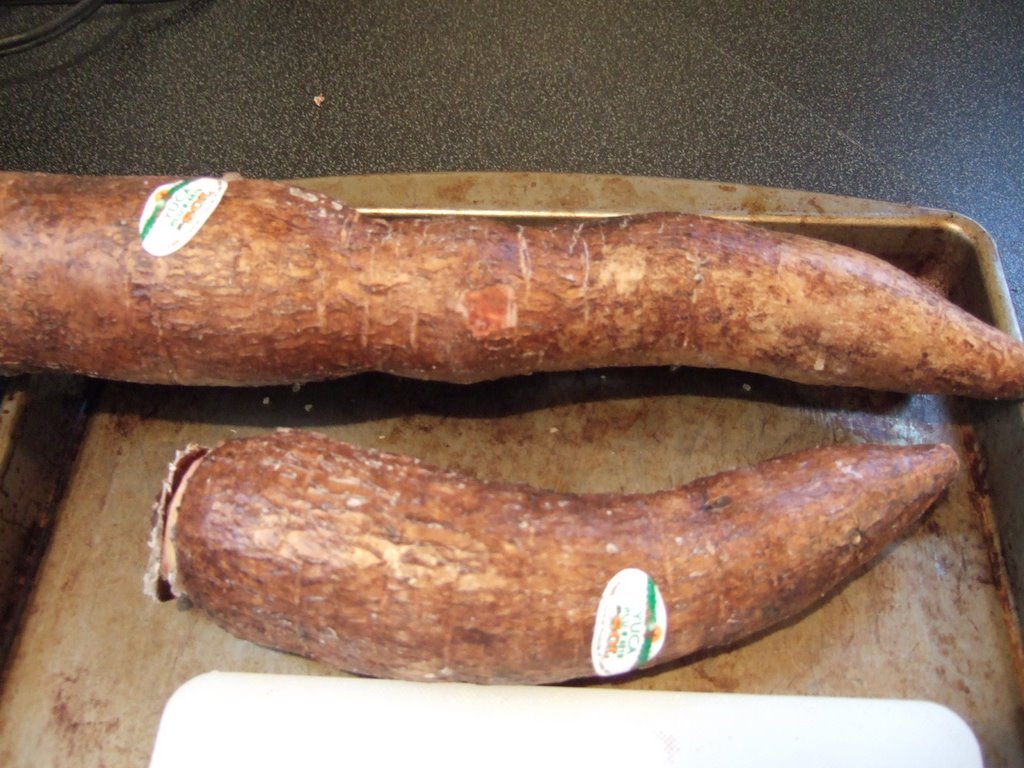
Salamat, tita Lani, for the recipe! We Filipinos use cassava, but I cannot find any cassava here. Yucca is a good substitute. (I typed that on the search engine, and it showed plants different from what I have come to know as "kamoteng-kahoy." I then realized they are not one and the same.). It was my first time to buy yucca from the Asian store (have not seen it sold in the nearest grocery store), and I was quite surprised that it seemed to have been coated with wax...or is it a natural coating of dried up sap?
INGREDIENTS:
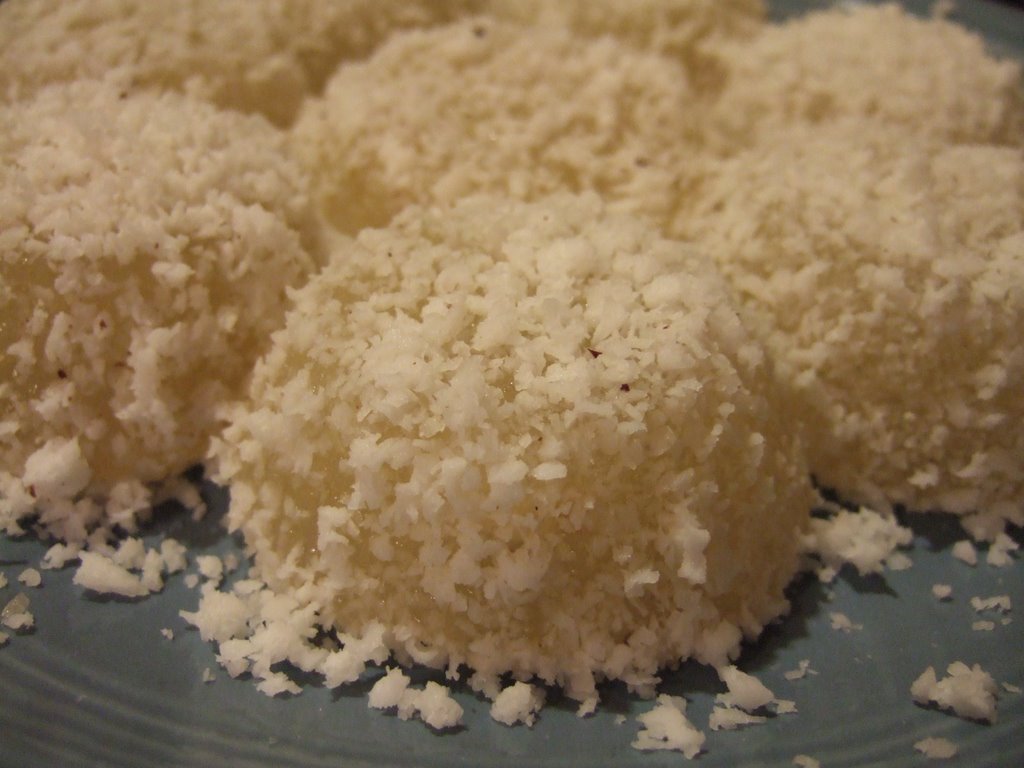
1 cup cassava [or yucca], grated 1 cup sugar 2 cups water 1 coconut, grated
PROCEDURE: Squeeze out juice of cassava [or yucca]using flour sack. Place squeezed cassava in pan with sugar and water. Cook. Stir constantly 10 minutes or until mixture coats spoon. Transfer cooked mixture on silicone muffin cups placed on the steamer pan and steam 10 minutes. Remove from muffin cups, let cool, then coat in grated coconut.
(I love these silicone muffin cups for steaming purposes! Muffin pan just won't fit in the steamer, and these solved that problem. Now I can also experiment on making puto, and I might get big cups also for steamed leche flan.)
My sons and I loved them, and my Filipina friends did, too! Of course, they asked for the recipe and I generously (ahem!) shared it (salamat sa mga foodbloggers!) My Sdaughter loved coating them in the grated coconut, but would not taste them (pretty much like her father). That same day I just had to make a second batch. Refrigerates and microwaves (30 sec) pretty good, too! Perfect munchkin for after-school!
I am still waiting for the day when I will have my pandan essence.
Still on LP's theme, I have here leftover tilapia from a lunchdate with our barkada here. It was a large one, that I had more than 1 cup of flaked fish meat to make into fish lumpia. I was first introduced into fish lumpia by the "balae" of my previous MIL. I liked it so much that I asked how she made it. She said she would buy "galunggong" and steam them then flake the flesh, mix with chopped green/snap/"baguio" beans, carrots, onions, garlic, egg, salt and pepper. Now whenever I have leftover grilled fish, I do the same thing. A nice surprise was when hubby expressed liking it (yes, he did try without me asking him to!).
INGREDIENTS (amounts stated are only approximations):
1 cup flaked cooked fish meat
Chop together then squeeze out excess fluid using flour sack:
1 medium carrot
1 medium onion
2 cloves garlic
handful of (leaftover) green peas
handful of (leftover) grated mozzarella cheese (Of course the ingredients here depend on the availability of veggies and the cook's imagination!)
1 egg
salt and pepper to taste
lumpia wrappers (I like best the TYJ spring roll wrapper)
1 tbsp cornstarch dissolved in 1/4 cup water for making paste
PROCEDURE:
Mix everything together after squeezing out excess fluid of veggies. Prepare cornstarch paste: Mix cornstarch with cold water, microwave for 30 seconds, stir, then microwave again for 30 sec or less, watching closely until you achieve the desired consistency (should be fluid enough to easily brush it onto the wrapper). You may have to add some more water to thin it. This is a cheaper alternative than using egg as sealant. Place about 1 to 1-1/2 tbsp of filling at the center of the wrapper to form a log. Fold over one end then roll tightly. Brush CS paste on the corners to create a good seal. I froze these until two days later when I had visiting friends. While thawing them, I cut them into three parts each and heated about 2 cups of oil on high in a wok. I did not wait for these to thaw completely; I just went ahead and fried them until golden brown (about 5 minutes). Drain on paper towels and serve while still warm (fried lumpia tend to get soggy and chewy when it has cooled down completely). I served these finger foods with Jufran sweet chili sauce (hubby's favorite dip for chicken nuggets).
This month, the LP 15 is entitled "Recycled, Reloaded." Very appropriate for the culture who "waste not, want not." Visions of my recycled foods come into mind, both for re-cooking and for other valuable uses to lessen my contribution to the waste dump. How do I recycle foods? Let me count my ways.
First off, if I can freeze them, I do them in servings of one for quick lunch fix at times I am alone (or for my son who craves for heavy merienda). If I have leftover Korean beef and mashed potatoes or rice, or kare-kare with rice, or adobo with rice, I place them in a foil-lined small loaf pan and wrap, then freeze without the pan. I reheat these in oven toaster for 30 minutes at 350 deg prior to eating.
Second, I "remodel" some grilled or slow cooked meaty dishes to come up with new ones. Pancit, chicken empanada, chicken-veggie egg drop soup, chicken sopas and chicken mami noodles come to mind when I have leftover roasted chicken; special fried rice and ham-veggie omellet when I have leftover veggies and ham; beef siopao and asado roll when I have leftover beef pares; and fish lumpia, escabeche, sarsiado, or dinengdeng when I have leftover grilled/fried fish.
Third, I turn my old bread slices into bread pudding, french toast, biscocho or bread crumbs.
Fourth, I may not re-cook them. All biodegradable scraps (veggie peelings, seeds, or bones) and leftover I produce from my kitchen either go to chicken food bucket (goes to my MIL) or to my compost bucket (goes under the garden dirt). I do not consider them "waste" at all.
That said, I have tons of recipes in mind for this round of LP hosted by Lafang. But I do not have the luxury of time to post the recipes, or I might have posted about them in past entries, and I do not want to be redundant. Hence, I have decided to post two of them: Pandelimon de Patatas is my first entry. The next post will be Fish Lumpia.
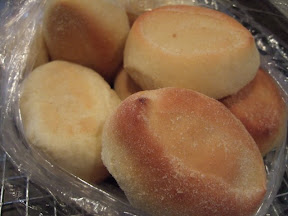
I do not claim originality for this recipe. It so happened that in my wish to make use of leftover boiled potatoes, I looked for recipes for rolls/breads making use of them, as usual, from my fave bread machine recipe source, breadworld.com. I found Potato Dinner Rolls. After it was baked, it reminded me so much of pandelimon; hence , the name I gave it. I just omitted the egg glaze. I can't give you the link to the bread machine recipe because they seem to have deleted that and replaced with the conventional method (that is the link I used). Here is the bread machine version, edited by yours truly. The first time I made it, the dough was too sticky to form into balls. So on my second time (I baked again per husband's and son's request), I added more flour while the BM was kneading, and it solved my problem).
Since my success in making choco crepes (though no success in egg roll wrapper yet), I have been looking for the opportunity to try making fresh lumpia, which means, a time for another Filipino-get-together. Our supposed lunch meeting the previous week was postponed. I actually was no longer in a mood to bring anything (and I told the hostess Fe about that, and she did not mind). But when I still had cabbage from Vengie and some more carrots from my garden (getting quite wrinkly already), plus a scan of my freezer and pantry revealed that I still had that pack of frozen ubod and a small can of water chestnut, I immediately went online to print out that recipe that I saw a long time ago. The best compliment I received was that it was very much like what they ordered in a restaurant that costed $27 each!(Did I hear it right??? Maybe it was in pesos at a PI resto. ) That's expensive! I am now thinking of making and selling this and maybe siopao to Filipinos as a sideline when I start working as a nurse in a nearby hospital that has 5 Filipino doctors, 1 PT, and 1 CNA (who have their own families, of course). I wonder how much I can reasonably price these two Pinoy goodies? Hhmmmm....Any ideas?
Since thess's recipe did not have any amount for the ingredients for the filling, I approximated (read: I did not measure, either) the proportions, and that is what I will post here. Also, I did not have the time to go to the grocery store to buy tofu and roasted peanuts, but I did have 1 small can of water chestnut (my first time to use it) and several pounds of uncooked pecan nuts, which I toasted at 200 deg F for 10 minutes then cooled before I chopped (in the chopper).
INGREDIENTS and PROCEDURE: For the wrapper (crepes) -- 2 cups flour 4 beaten eggs 4 cups water dash of salt 2-3 tbsp melted butter (I omitted the oil since I will be brushing the crepe maker with butter for every crepe) Coffee filters - to place in between crepes
Mix everything well and let stand in room temperature for at least 30 minutes. Plug the crepe maker and brush with melted butter. Place the batter on the plastic pan that went with the crepe maker and stir well, then dip the crepe maker for 2-3 seconds, lift up and swirl while still upside down. Let stand upright to cook for 1-2 minutes (you will notice if the sides are beginning to get drier and start to separate from the pan; this takes practice! I wasted the first 1/4 of the batter to finally find this right technique!). Positioning the pan upside down above the coffee filter, use a silicone spatula or a wooden stirrer to start separating the edge. The crepe will smoothly fall right away. Repeat the process and place coffee filters between each crepe. (I had a layer of parchment paper at the bottom, placed on top of a wire rack to cool the crepes as I add to the stack.) You can then place this stack in a ziplock bag, squeeze out excess air, and refrigerate for up to one week.)
For the filling -- 1-2 tbsp oil 1 clove garlic, minced 1/4 pound pork, sliced into bits 1/4 cup shrimp, sliced into bits 1/4 cup pre-boiled chicken meat, sliced into bits 1/2 head of cabbage, sliced thinly 1 carrot, sliced thinly 1 small can water chestnut, sliced thinly frozen ubod, thawed (I have had it in my freezer for months now, so I did not have to resort to bamboo shoots. I actually have not seen any bamboo shoots here.) salad greens (these are not cooked with the rest of the ingredients, but placed at the bottom before putting the cooked filling)
Heat the oil. Cook the pork. Remove from pan and set aside. Sautee garlic, add chicken and shrimp and cook for 3 minutes, stirring constantly. Add the ubod and water chestnut, cook for a minute, then add carrots and cabbage, 1/2-3/4 cup chicken broth and let simmer for 1 minute.
UPDATE 7-25-09: One of my readers, Toto, offered the following piece of information for those who do not have access to ubod/hearts of palm:
A little info about substitutes. I live in Norway and they don't sell Ubod here. I'm using Yellow Turnip instead. It's almost the same taste. I don't know though if you can find it outside Scandinavia but it's very common here.
Here's how it looks like: http://en.wikipedia.org/wiki/Rutabaga
Thanks, Toto!
For the sauce --
I had to research online for a good sauce because I had a hard time trying to imagine the proportion of the ingredients as described by thess, since she did not have amounts stated, and found one by a Filipino, which I tweaked to achieve what I imagined should be, according to what I recall of Goldilocks' fresh lumpia's paalat sauce. From recall, the sauce had a strong garlicky taste which I loved, but the recipe I found had only 1 clove of garlic. And of course, the peanutty taste. So what I did was to roast 10 cloves of garlic and mash them. Then I chopped roasted pecan nuts, about 1/2 cup. So I sauteed the garlic in peanut oil, then the nuts, then I followed the rest of the recipe. After cooking, I was not satisfied with the taste yet, so I added 1 tbsp white sugar and some more salt. I was quite disappointed with the dark brown color, and thought that maybe I should have used white sugar all the way, and light soy sauce instead of all purpose. I stirred the mashed roasted garlic into the mixture. Then as I tasted, still, something was missing -- the bite of garlic. So I minced one clove of garlic and just stirred those into the sauce. Suddenly I loved the taste! (Although I still did not like the dark brown color). Anyway, because it tasted good, I will share it here, although I think I could have made it look more like how I envisioned it if I used white sugar and light soy sauce. I liked the effects of pecans because the crunch was not too hard on my sensitive teeth, so I guess I will keep that. But as of this posting, I realized too late that there were other fresh lumpia posted a long time ago in other foodblogs: stel's and ting-aling's, which had the recipe for paalat. Oh well, I can try them another time. Maybe the tapioca flour and/or the peanut butter ingredients will give me what I want. Let me just claim (ahem!) that this sauce has turned out to be one of my creations that I am proud of because of its taste (never mind the looks). Here is my final recipe (which I may change in the future):
INGREDIENTS: 10 cloves garlic, roasted for 5 minutes in oven toaster then peeled and mashed 1/2 cup roasted pecans (peanuts if you prefer), roughly chopped
1 tbsp peanut oil 1 clove garlic, crushed 1/2 cup brown sugar (maybe white would be better) + 1 tbsp white sugar 1/2 cup soy sauce (maybe light would be better) 1-1/2 cups water salt, if needed 4 tbsp cornstarch dissolved in 1/3 cup cold water
1 clove garlic, minced (to be added after cooking the sauce) 1 cup chopped roasted pecan nuts for topping
PROCEDURE: Mix the sugar, soy sauce, and water. Sautee the garlic in peanut oil until golden brown then add the chopped nuts and stir to cook for about 30 seconds. Pour the mixture and stir, add 1 tbsp white sugar, and salt as necessary. thicken by pouring the cornstarch-water mixture in a slow stream while stirring, stopping when the desired consistency is achieved.
To serve: The fillings will, of course, occupy the middle part of the crepe/lumpia wrapper. Place a layer of fresh greens at the bottom (lettuce is most preferable), then the filling. You may want to add some sauce here before you fold the sides over the filling. Spoon the sauce over the lumpia, then top with chopped nuts and enjoy!
I will definitely, in the future, try those paalat sauces by stel and ting-aling, and maybe add some things to tweak them according to my taste.
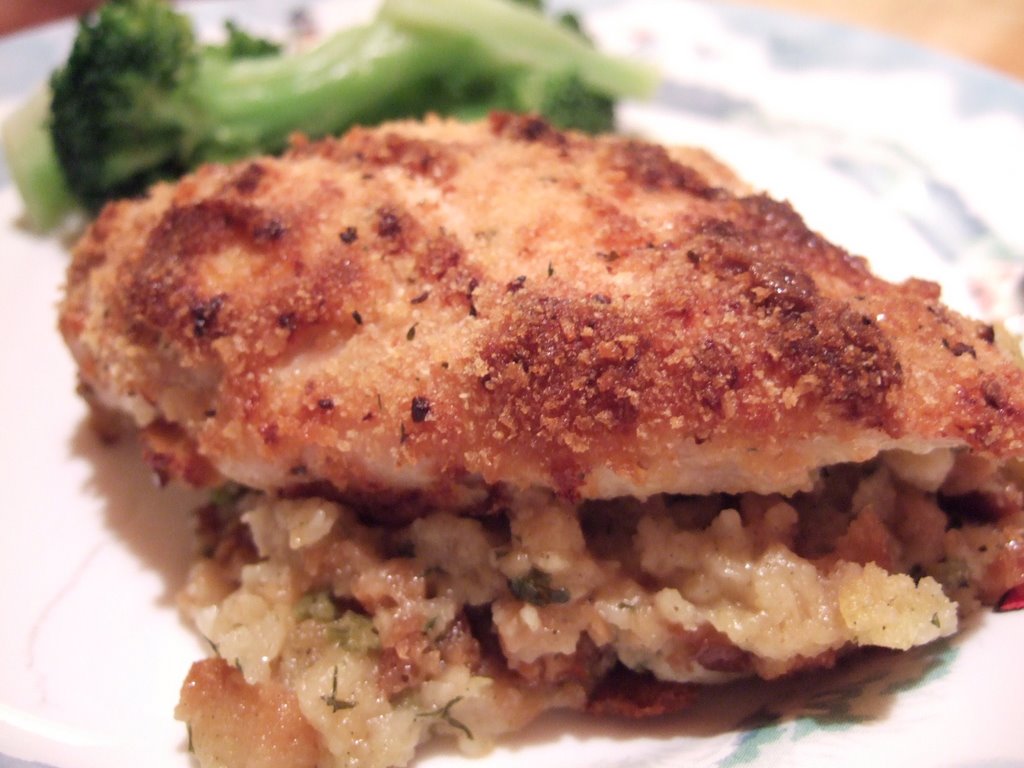
I got the recipe from the label of Helmann's Mayonnaise. But since this is baked and I wanted to bake everything that I will serve with it (to save on electricity and my own energy), I baked it on top of prepared poultry stuffing, and I also baked/steamed brocolli spears placed in oven-proof bowl with some water partially pre-cooked in microwave then covered.
Another husband-approved/"Can I have some for my dinner tomorrow?" dish. (He refers to his take-out lunch as dinner.) It turns out still very good even if reheated in the microwave. INGREDIENTS: For the chicken parmesan -- 1/2 cup Hellmann's ® or Best Foods ® Real Mayonnaise 1/4 cup grated Parmesan cheese 4 boneless, skinless chicken breast halves (about 1-1/4 lbs.) 4 tsp. Italian seasoned dry bread crumbs
INSTRUCTIONS:
1. Preheat oven to 425°. 2. Prepare the stuffing according to package direction and let stand. 3. In medium bowl, combine Hellmann's ® or Best Foods ® Real Mayonnaise and cheese. Brush chicken pieces with the mixture then coat with breadcrumbs. 4. Place chicken breasts on top of the prepared stuffing. 3. Bake 20 minutes or until chicken is thoroughly cooked. (I usually bake such chicken breast cuts for at least 40 minutes to be sure they are throughly cooked. Hubby even says that the drier, the better, but I do not like my chicken dry.)
I still had several chicken backs to make into chicken broth/stock and shredded chicken. Then my MIL gave me 12 zucchini on the day that we expected to have our first real frost (I gave 4 to my friend Ana and 4 to Vengie). This soup is another (healthy) way to make use of all these ingredients that I had, especially with the weather becoming quite chilly. All kids love this, including my fussy stepd, who first liked the crab soup that I previously served, and now looks at all such egg-drop-py soups as one and the same, so she and my boys always gobble it up. Do not be overwhelmed by the amount of zucchini here. Shredded zucchini blends well with the soup that you (or the kids) will hardly notice its presence.
INGREDIENTS: 2 quarts chicken stock/broth (see how I make this here) 2 cups shredded zucchini 1 cup shredded chicken meat salt and pepper to taste 1 tbsp cornstarch dissolved in 1/4 cup cold water 1 egg, lightly beaten
PROCEDURE: (Easy!) Boil broth/stock with the chicken meat. Add shredded zucchini and wait for the soup to come to boil again. Stir in cornstarch-water gradually until desired consistency, then add the beaten egg in a slow stream while stirring. Serve hot!
This recipe was from the recipe book "Chocolate: Cooking with the world's best ingredient" by McFadden and France. The original recipe was for crepes, souffle and pineapple syrup, but since I only wanted to re-serve the leftover chocolate pudding as previously posted, I made only the crepes and used the pudding as filling. I made use of apple jam (given by a friend) instead of the pineapple syrup as topping.
I first coveted making crepes when I saw thess's posts on crepe and fresh lumpia. I knew then that I had to have one. So I ordered one from Villaware sometime in May.
Hubby liked it so much that he had three ("Thanks for introducing me to something new. I have heard of crepes before but just had them today for the first time.") Sweet ba? Me kwento behind that over-expression of appreciation but I am not sure if I should post about it... INGREDIENTS: 3/4 cup all-purpose flour 1 tbsp cocoa powder 1 tsp sugar pinch of salt 1 tsp ground cinnamon 2 eggs 3/4 cup milk 1 tsp vanilla extract 1/4 cup unsalted butter, melted
PROCEDURE: Sift the flour, cocoa, sugar, salt and cinnamon into a bowl. Stir, then make a well in the center. In a bowl, beat the eggs, milk and vanilla. Gradually add to the well in the flour mixture, whisking in flour from the side of the bowl to form a smooth batter. Stir in half the melted butter and pour into a pitcher. Let stand for one hour.
Heat a the crepe pan. Of course, I used my VillaWare crepe maker which I recently bought. (I have not had luck with trying to make egg roll wrapper with it, though. I need to find the right batter recipe that will work with it.) Using this, I just had to dip the gadget into the batter that I placed on the plastic pan that came with it for 2-3 seconds then let stand and cook for about 1-2 minutes. Peeling it off was so easy.
While I cooked the crepes I asked my older son to spread the chocolate pudding on half of each crepe then fold twice to make triangular crepes. The apple jam topping was optional, as is the jam flavor (you may use pineapple, strawberry, blueberry, etc.).
This recipe was emailed to me by my hubby's favorite aunt. She said being the chocoholic that he was, my hubby would surely love this.
and she was right...I made enough to fill about 8 ramekins, and hubby finished his. So did my older son. My younger son and I finished only half of what was in our cups. I liked it, but not too crazy about it. But what's important is that all of us ate (unlike when I do prepare some Filipino desserts, almost always, hubby would not even try...). I had leftover which could fill about 4 more ramekins, but I served it sandwiched in chocolate crepes...(next post).
Martha Stewart's Chocolate Pudding Sift together the dry ingredients: 12 tablespoons sugar 6 tablespoons cornstarch 3 tablespoons cocoa powder 1/2 teaspoon salt
In saucepan whisk together dry ingredients.
Measure the liquid ingredients: 2 1/2 cups heavy cream 2 1/2 cups milk 2 teaspoons vanilla 12 ounces (2 cups) semi-sweet chocolate (I use chocolate bits) 3 tablespoons unsalted butter
In a bowl combine 2 1/2 cups cream with 2 1/2 cups milk and vanilla. Whisk 1 cup cream mixture into dry ingredients until completely dissolved. Whisk in remaining cream mixture until smooth.
Place sucepan over medium heat. Cook, whisking contantly until mixture comes to a boil and thickens - (8 to 10 minutes)
Add chocolate and cook on low, whisking until chocolate is melted, (about one minute).
Remove from heat and whisk in butter until melted.
Using a ladle, pour pudding into about 10 dessert cups.
Whip one cup of heavy cream and serve with pudding.
My bread machine was a wedding gift from my MIL. My husband was ecstatic that I got one, and he was so looking forward to homemade yeast breads. I myself was excited, and I asked my hubby to make the first bread as a demonstration of how to use it, which he did. He picked the recipe in the manual for a bread that could be prepared in just about an hour. We delighted in the smell of the yeast as the dough was rising and baking.
We were disappointed in the outcome (although not in the taste) because it was wrinkled and seemed to have shrunk.
Several tries later, I lost interest in using it, and resorted to going back to using my Kitchen Aid stand mixer and the conventional oven. I was feeling guilty because it was a gift from my beloved MIL. I hated seeing it just occupying a rather big portion of my countertop space (it is not as heavy as KA stand mixer, though). Until I thought of checking out the website written at the label of the Fleischmann's bread machine yeast and looking at their bread machine recipes...
One after another, I tried basic bread recipes the ingredients of which were usually found in my pantry. Some very good outcomes I have achieved were those of Basic Egg Bread, Rich Cheddar Cheese Bread, and Buttery Sweet Bread as they had well-formed dome and good crunchy crust, plus great taste. The Old-Fashioned Buttermilk Bread was superb in taste and crunch, although tended to have wrinkled dome.
Then as I examined the different settings, I added to my list some wheat bread recipes. Then I experimented with the dough setting using any of the above-mentioned recipes to try shaping them and baking them in the conventional oven.
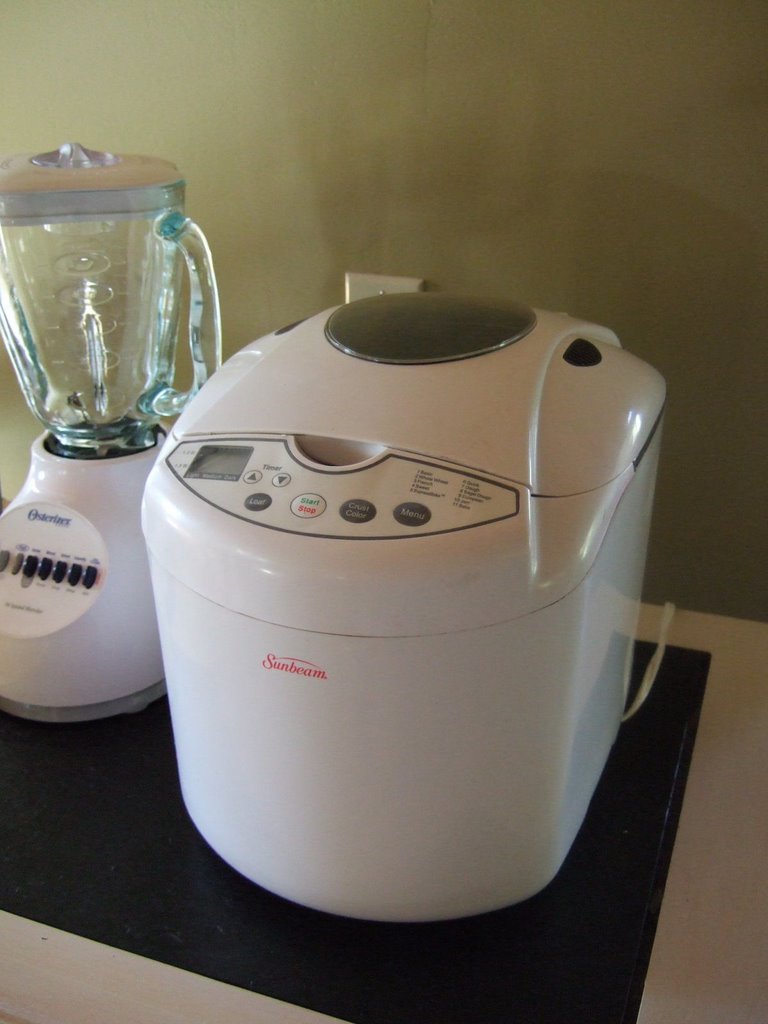
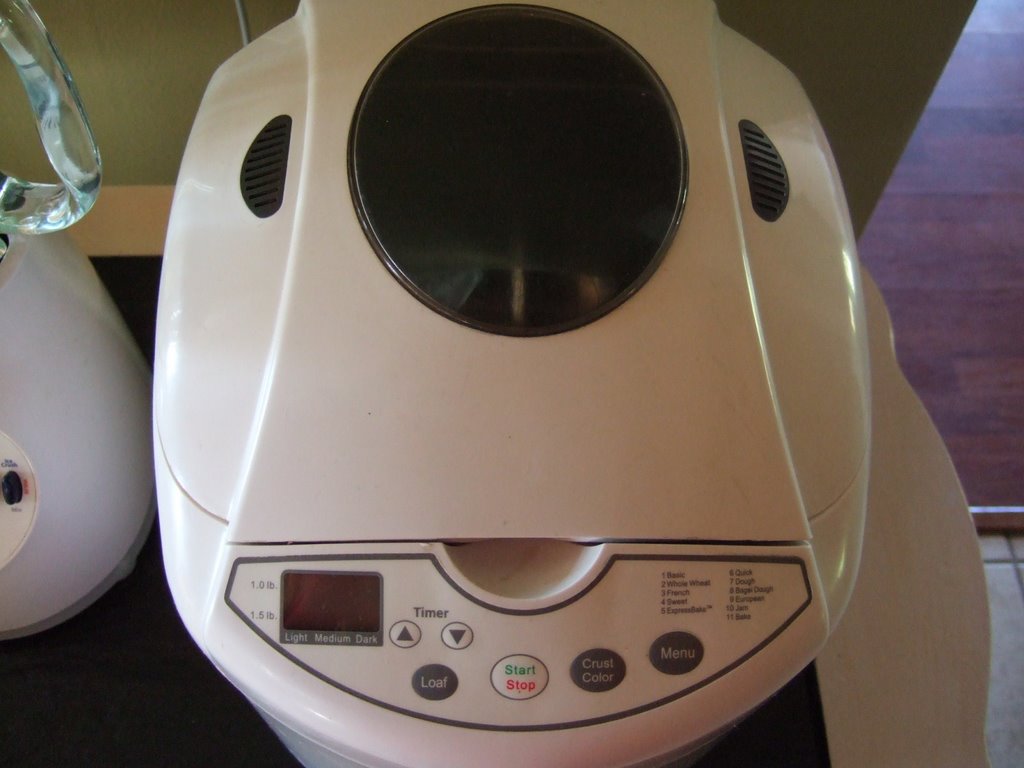
Lately I have been trying to use it just to mix up the dough to the point when it is ready for kneading (which I like because it is less messy). What I like best about these recipes is that the amount is for family size only, usually requiring only 2 cups of flour, so that I do not have to worry about trying to consume the leftovers (I LOVE FRESHLY BAKED YEAST ROLLS, not 1- or 2- or 3-day old ones). My latest experiments include using the bread machine for recipes calling for rapid rise yeast and all purpose flour instead of the usual bread machine yeast and bread machine flour. Right now I am trying to "perfect" (according to my standards) my ensaymada using the bread machine (for minimal mess). Needless to say, if its life comes to its end soon, it would "die" having served its purpose and more. I love my bread machine, and it has been a great kitchen helper for me. The brand I have is a Sunbeam bread machine.
Making a research on bread machines will lead you to poor review of Sunbeam. I think it is mainly because of the same problems I encountered with tmy first usage of it. King Arthur Flour recommends the zojirushi, but it is way too costly (like, 3-6 times more expensive). I am quite satisfied with my Sunbeam.
TIPS for cleaning the...
PAN - Whether you used to make dough or to bake bread, soak in COLD WATER until the dough/bread softens. Then rinse in warm water either plain or a bit soapy. Let air-dry before storing in the bread machine.
BREAD MACHINE - Wipe with damp cloth only.
DO NOT PUT IN THE DISHWASHER! This will damage the non-stick finish (and also will affect the grease in the underside that rotates, according to hubby).
I have long been eating this dish and it is one of my favorites, but since I came to the US, I have cooked it only once.
Thanks to the different foodblogs in my blogroll, I have gotten some ideas. I also apply to this dish the same thing I do with menudo: marinate the chicken pieces first in soy sauce-lemon. I love the effect.
This is another addition to my collection of the dishes that hubby likes so much (as long as he gets the breast part).
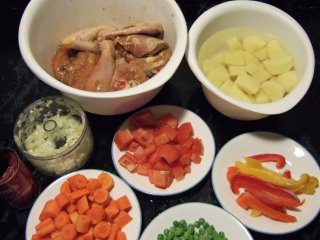
INGREDIENTS: 1 pound chicken stewing cuts, marinated in 1/4 cup soy sauce juice of 1/2 lemon 1 tbsp olive oil 2 cloves of garlic, minced 1 medium onion, chopped 3-5 medium tomatoes, sliced 2-3 carrots, cut into chunks 4-5 potatoes cut in wedges 1/2 cup green peas 1 handful of red/orange/yellow bell peppers (Tip: When you buy bell peppers in packs of 3s but are not able to use up all at once, you may slice the rest and place on baking pan, freeze for 30 minutes, then transfer to a freezer bag and freeze for several more months.)
PROCEDURE: Marinate the chicken pieces in soy sauce-lemon juice for at least 30 minutes. Meanwhile, chop/slice all veggies. On medium heat, sautee garlic then onion, then the tomatoes, followed by the chicken. Increase the heat until juices bubble, then lower to medium low, cover and let simmer for 10 minutes. Uncover, turn heat on medium high and let the juices evaporate, brown the chicken, then add the potatoes, carrots, and bell peppers. Cover, lower heat to medium low and let simmer for 20 minutes or until chicken is done. Add green peas during the last 10 minutes of cooking. From time to time, check to avoid drying and add water in increments of 1/2 cup to the desired consistency of the sauce. Season with salt and pepper. Serve hot with plain rice.
PAHABOL NOTE: I added hotdogs in the end for the sake of my stepd.
This is a re-posting from my old kusina, featuring how to make pan de sal using bread machine/breadmaker for the dough (or use manual method using the same recipe). I have received emails about how their pandesal using this recipe/method has received rave reviews from fellow Pinoys. May I add that I have served this also to Americans and most of them loved this crusty-on -the-outside, soft-on-the-inside buns. There's a slide show of how to shape and cut the dough and then bake them in conventional oven, to make learning easier for those who are going to try this for the first time. Pardon the poem inspired by the smell of the yeast dough as it was rising...
Nung nasa Pilipinas pa ang inyong Manang At dumating ang bayaw na balikbayan, Araw-araw, nagpapabili ng pandesal, Ito kasi ang nami-miss nya sa kanyang almusal.
Ngayon, si Manang, nasa parehong kalagayan, Pero walang panaderyang nagbebenta ng pandesal Nang ipamalita ang "Kusina" sa mga kaibigan, "Ayan! I-feature mo ang paggawa ng pandesal!" (Patay! Ang pandesal, di ko pa nasubukan...)
Kaya sa alaala, pilit na hinalughog Mga panaderong sa masa ay humubog Ipinikit ang mata upang balikan Mahigit dalawang dekada nang nakaraan.
Tulad ni Sassy, humanap ng sweet bread recipe Pang bread machine, mula Fleischmann's Bakery Kasi ang sangkap, pang-family size lang Para pag pumalpak, di nakakahinayang (Mahal kasi grocery eh! At mas madali ubusin.)
Si Manong Ken, me resipi nga, Pero sabi nya, me halong daya Di kasi kanya yun, di sya panadero Ang sangkap at proseso, iba sa alam ko. (Parang mahirap ba...)
Nung bata kasi ako, sa panaderya ni Tatay Sa paghulma at pagsalansan, laging nakaantabay Sa kakahawak ng dough, nahasa ang mga kamay Yung nga lang, resipi't sangkap, di ako nasanay.
Paggamit ng pugon, di rin natutunan Para sa batang patpatin, medyo me kahirapan Pero paglabas dun, alam ko ang gagawin Palamigin, hiwain, balutin, KAININ!
Kaya eto ngayon, aking sinusubukan Papel ng panadero, kaya bang gampanan? Unang subok, sumobra, medyo natusta Pangalawang subok, umubra, tamang-tama ang timpla!
Wish ko lang pandesal ko ay inyong matikman Keso o mantekilya ang gawing palaman Pero ang tangi ko lang kayang gawin Ilagay sa website nang sa inyo ay maihain.
Lika, kusina ko ay iyong bisitahin Paggawa ng pandesal, iyo ring subukin (excited ka na no?) Sana kahit paano, natulungan kita, Kahit araw-araw, me pandesal ka na!
milk large egg(s) butter, cut up salt bread flour sugar bread machine yeast
2/3 cup 2 2 tbsp 1 tsp 3 cups 2 tbsp 2 tsp
DIRECTIONS: Update 7-20-09 - I added the manual method after the bread machine method due to readers asking for recipe if they do not have a bread machine.
BREAD MACHINE METHOD: 1. Use the 1-pound recipe if your machine pan holds 10 cups or less of water. Add ingredients to bread machine pan in the order suggested by manufacturer. 2. Set the bread machine to DOUGH CYCLE and let it do its job. (Saves you from getting your hands messy! 3-4. Wait for the dough cycle to complete the initial rising. While waiting, prepare the table (grease a bit), baking sheet (grease), and breadcrumbs. Grease your hands as well. 5. Punch the dough down (actually, as soon as you try to remove this from the pan, it will deflate.) 6. Lay the dough on the table and stretch as shown in the slide. 7. Using your two hands, roll the dough while squeezing some bubbles to make it more compact and turn it into a log about 2-3 inches in diameter. (Imagine wringing a towel, that is the effect you want to achieve here, only not too tight.) 8. Sprinkle the log on all sides with bread crumbs. (See how I make my own bread crumbs here.) Optional: Cover with plastic and allow to rise for 10 minutes. This will lessen your final rising time.) 9. Using a dough cutter, cut the log at intervals of 1 to 1-1/2 inches. Roll again on bread crumbs to coat the cut sides. (This makes about 20 pieces.) 10. Lay on lightly greased (with shortening) baking pan slightly diagonally, with the cut side up, 1 inch apart or at least one fingerbreadth apart. Cover with Cling wrap (or damp flour sack) and let rise for about 30 minutes (or 10 if you did an earlier optional rising of log) in a draft-free place. Alternatively, you may want to put it inside the oven and turn the oven on bake for 1 minute then turn off. This will make the oven warm and will hasten rising (about 10 minutes only, plus it is draft-free, but if you want fluffier pan de sal you can extend to 30 minutes. Just be careful when you open the door to take it our prior to setting the temp for baking per se. You do not want to create a sudden rush of air or else you might end up with a flat bread.) 11. Bake at 350 deg F for 12-15 minutes or until golden brown (depends on the size, spacing and oven used). If you want it darker, bake at 375 for 10-12 minutes). 12. Let cool (kung makakatiis ka!) for about 1 minute. 13. Enjoy either plain or with your favorite filling! (Mine is Reno liver spread, but I do not have access to that here, so I content myself with butter, jam, or Kraft Old English cheese spread.)
Here is a video of the actual shaping and baking of pandesal. The dough was pre-made using the bread machine.
Taglish version (requested by Jacklyn) 1.Gamitin ang resipi na pang 1 pound kung hanggang 10 cups lang ang kaya ng bread maker. Ilagay ang sangkap ayon sa suhestyon ng gumawa ng bread maker (sa brand na gamit ko, ilagay muna ang mga likido – tubig, gatas, mantekilya, at itlog – sa pan at kelangan ay maligamgam, Pwedeng hayaan sa countertop para maging room temp, o kaya ay i-microwave ng mga 30 segundo, haluin at i-check sa thermometer kung nasa 80-100 deg F. I-microwave pa kung malamig pa.) 2.I-set sa Dough Cycle ang bread maker. 3.Maghintay. Habang naghihintay para matapos ang dough cycle, ihanda ang lamesa o countertop (medyo punasan ng konting mantekilya o shortening para medyo madulas, at budburan ng konting harina), baking sheet/pan (punasan ng shortening), at breadcrumbs. Pahiran din ng mantekilya/shortening ang kamay mo. 4.Alisin ang dough sa pan pag handa na. Magfa-flat ang dough, gaya ng nangyayari pag sinuntok mo. Ganon talaga. Dapat pa nga medyo pitpitin mo. 5.Ilagay sa ibabaw ng lamesa/countertop at ayusin nang pahaba (i-stretch mo para humaba). 6.Gumawa ng baston: irolyo habang pinipitpit ang pandesal para maghugis “log” na mga 2-3 inches ang haba pag cross-section. 7.Budburan ng bread crumbs. Pwedeng takpan ng plastic at hayaan lumaki ng mga 10 minuto bago hiwain. 8.Gamit ang dough cutter, maghiwa (kelangan, mabilis ang kilos ng kamay mo sa paghiwa para hindi parang nahihila yung dough. Parang itak ang bagsak ng dough cutter tapos biglang ilihis para humiwa). Hiwain kada 1-2 inches. Irolyo uli sa bread crumbs bawat pirasong nahiwa. 9.Ilagay sa baking pan. Kelangan yung nahiwang parte ang nakapatong sa pan. 10.Palakihin ng mga 30 minutes o hanggang magdoble (baka mas maikli kung medyo mainit dyan). Eto ang second rising. Dapat ay walang hangin at dapat ay “moist” ang paligid, para hindi matuyot ang pandesal habang lumalaki. Pag walang hangin, hindi sya basta babagsak. Pag nabiglang nahanginan, maaaring bumagsak ang tinapay, lalabas na flat. Pwede mong gamitin ang pugon para sa second rising. Ilagay mo yung pan sa loob, paandarin ang oven ng isang minuto at patayin para yung namuong init sa loob ay makatulong mapabilis ang pagpapalaki ng tinapay, na hindi naiistorbo ng hangin. 11.I-hurno (bake) sa 350 deg F (nasubukan ko na rin hanggang 450 deg F, basta nakaantabay ka). Mas malutong at ma-brown ang ibabaw kung mas mataas ang temperature. Kung gusto mo medyo albino ang dating, ok na yung 350. Hayaan ng mga 10 minuto, paikutin ang pan para uniform ang pagkaluto/pagkabrown, at lutuin pa ng mga 2-4 minuto o hanggang total ng 15 minuto basta maganda ang pagka-brown. Tantayahin mo sa unang pagbake kung gano kainit ang oven mo. 12.Pagkahango sa pugon, alisin agad sa pan at ilipat sa cooling wire rack. Pag wala nang init, pwede na ilagay sa plastic para hindi matuyot at manigaw (pag nagpapawis pa sa plastic, palamigin mo pa, para hindi madali mag-amag).
MANUAL METHOD: 1. In a pyrex measuring cup, microwave the liquid ingredients for about 30 sec to 1 min to make it lukewarm (80-100 deg F or room temp). 2. In a large bowl, place all dry ingredients and make a well at the center. 3. Place liquid ingredients in the well at the center. Using wooden spoon, mix liquid with dry starting from center until all dry ingredients from the sides are incorporated and you have a soft dough. 4. Transfer to a lightly floured surface and knead for about 8 mins. 5. Cover with plastic wrap and let rest for 10 mins. 6. Stretch as shown on slides and form into a tight log. 7. You may opt to sprinkle with breadcrumbs and (1) slice at this point or (2) let rest for another 10 mins before slicing. 8. Coat the sliced dough pieces and placing on greased baking pan. 9. Place in pre-warmed oven (to hasten rising time) and let rise some more for (1) 30 minutes if they were cut right away, or (2) 10-20 mins if they rose before cutting. The point is, get them to a good size before baking (remember that they will do a final rise when you place them in hot oven, so bake them when they reach a size just a little bit smaller than the size of pan de sal you want to eat). 10. Bake at 350 mins (or 365 if you want them darker) for 10-15 mins (keep watching after 10 mins by opening the oven door and looking at how dark they are). IMPORTANT TIPS for beginners in yeast doughs: A bread machine not only makes it less messy for your hands during the initial phase of dough preparation. You can also learn how the dough must feel if you will touch and poke it before it goes into the initial rising phase (that is 30 minutes after you start the dough cycle). Familiarize yourself with that dough and then also after the initial rising (end of dough cycle). Once you have done so, you can then have the courage to do the conventional way of kneading the dough by hand and judging if the initial rising time is enough.
Make sure you don't disturb the initial rising phase and that it is warm and moist and there is no draft (bread machines have that ideal setting).
When checking for brownness, OPEN the door and bring the bread under natural light instead of looking through the oven glass (the yellow light shows the bread being white when in fact it is already brown, you might toast it).
If you want to use the old-fashioned buttermilk recipe, but you don't have buttermilk on hand, you can substitute it with 1 tbsp cider vinegar or lemon juice plus enough fresh milk to make 1 cup, then use the right proportion in preparing the dough as per ingredients. (I saw this tip in the Cooking Pleasures Magazine of CookingClub.com, which sparked the idea of trying that recipe in making pandesal.)
For those without fresh milk (presuming I have followers in the Philippines, but please help our small businesses by patronizing the local bakeries), use 1:1 ratio of evaporated milk and water.
Place the buns right away on a cooling rack so they don't sweat at the bottom and make the bottom soggy.
In STORING pan de sal: Let the buns cool on the wire rack completely but do not overdo that they dry up (this take about 10-30 mins here in my place depending on the weather or season). Then place in ziploc bags or airtight container. If you do this while they are still warm, they will sweat and will invite molds very soon. If you do it too late, they will be hard. VARIATIONS:
Corned Beef Pan de Sal: If you have access to Argentina CB, get a small can and add a small, chopped onion. Without the breadcrumbs, cut the pan de sal into pieces about the size of pingpong ball, flatten and place a tbsp of CB mixture, seal the edges and roll in breadcrumbs. (I used to sell these when I was still studying in Med school, but without the breadcrumbs. They sold fast! Perfect breakfast!)
Hotdog Pan de Sal: Roll pieces to flatten (like in my spanish bread post) then put the hotdog in, wrap the dough around, then roll on breadcrumbs. (This is probably the equivalent of "hoagie" here.)
Yun lang...
This re-posting is so that I can have it labeled properly and make it easier to locate.
UPDATE: Some Americans (my co-workers, friends' friends, relatives) have tried these and absolutely loved the soft interior and the crusty exterior. Just try to offer them to your co-workers or relatives who are open to new things, and I guarantee you, they will see you with new eyes...
Panaderia (bakery), pan de sal (personal bread), pan de coco (bread with coconut), horno (oven), panadero (baker) -- these are all Spanish terms that we have incorporated into our Filipino language. Among the Spanish influences on Filipino foods, the yeast rolls have touched my life the greatest. (The influence on cooking, save for adobo, arroz caldo, and the usual guisado's, came at a much later time of my life, when I was already exposed to my classmates' and friends, and carinderia's dishes such as menudo, mechado, afritada, callos, caldereta, paella, etc.)
My father started "working" in Metro Manila (having come from Cagayan in northern Philippines) as a tricycle driver during the day, and his sideline was to deliver hot pan de sal every morning to houses in the neighborhood in the town of Bagong Pagasa, Quezon City. The panaderia was situated near the church (Our Lady of Hope Parish) and had the old-fashioned brick oven, with a small hole that would only allow the panadero to maneuver his paddle in moving the pans inside. My father would observe then to learn about baking, and dreamed of putting up his own one day. With his income then just being a tricycle driver, he was able to buy one modern commercial oven (the metal kind) that would hold, if I remember it right, 16 baking pans at a time, and some basic baking tools. He was the panadero who prepared the dough, and the rest of the family helped in shaping the dough and laying them on the pans and arranging them on layered shelves for rising, then my father would bake them. I got so adept at shaping balls, that it was common for us siblings to have a contest as to who would make the smoothest one. Of course, my brother (oldest) was the best. And he was also the only child privileged with mastering the skill of shaping the ensaymada and Spanish bread.
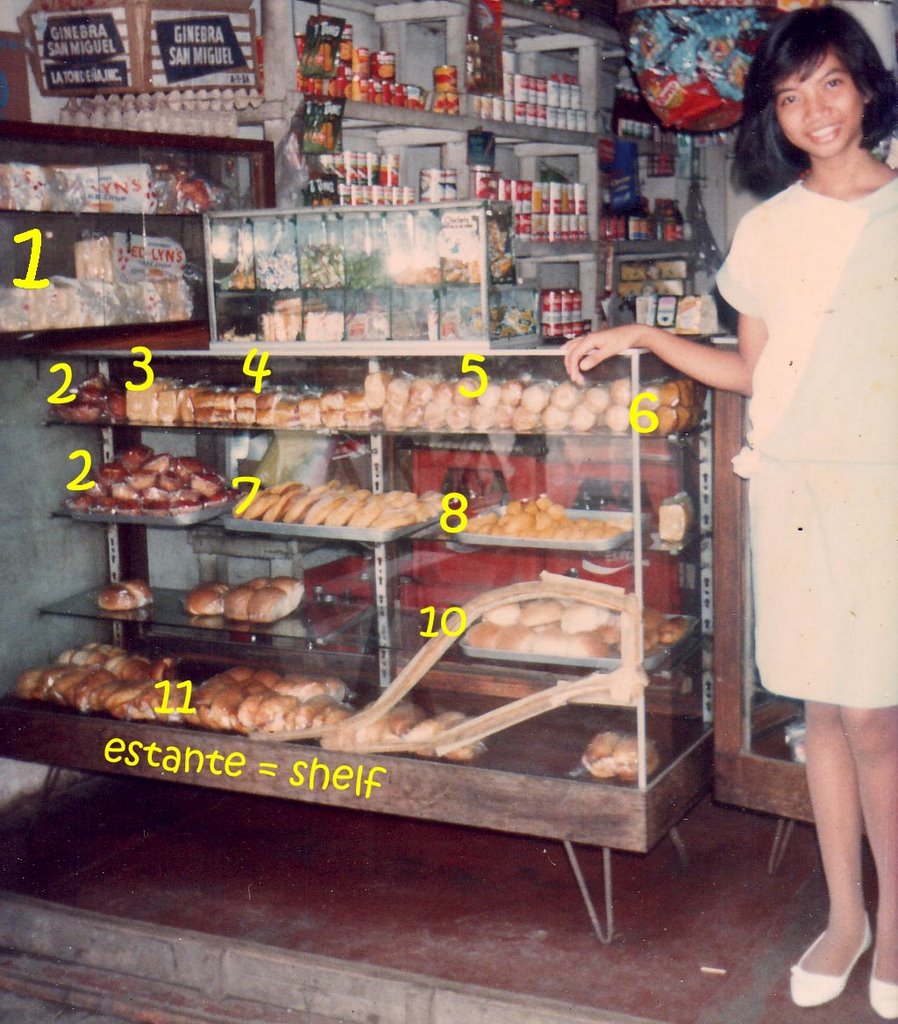
The demand for pan de sal was so great that time, that my father was able to raise some more money to buy additional equipment like a kneading machine with attachment for making breadcrumbs and a slicer to make "Tasty" [1] (equivalent of pan americano); get more ingredients; rent two units of an apartment 3 blocks away from where we actually lived; get another oven; hire more panaderos, and add some more items like pan de coco[5] and pandelimon[unnumbered in the pic] (the latter I am not sure whether it is of Spanish influence, but it is the equivalent of burger buns), then later Spanish bread[11], pudding (from old breads), pan de regla(?) [4](the one with red filling), pianono (this is a muffin batter baked like jelly rolls with sweet filling then sprinkled on top with sugar; one of my favorites), kababayan [6] (one type of muffins), our version of cheesecake [2] (which is actually ordinary muffin with grated cheddar cheese on top), ensaymada [7], monay [10] (very compact and delicious, this is made by kneading very well using the kneading machine; and the big sliced ones were also among my favorite, even plain), biscocho, patigas (a very compact white yeast roll with a crown brushed with eggwash and sprinkled with sugar), banana [9] (biscotti-shaped but nothing like it), hopiang baboy (which did not really contain any pork; just lots of onions sauteed in oil), and some other items which I cannot remember at this moment. My mother took some baking lessons to learn some special pan de sal recipe that contained more eggs, also to bake cakes such as custard cake and egg pie which are another favorites of mine. The problems was, she was not that interested, so that it was a short-lived endeavor on her part, and even if I ask her now, she cannot remember the recipes. She was more interested in sewing curtains and couch covers. (That is me on the picture when I was about age 16. The estante was all worn out by then, that's why it had those cracks. The part of the estante which had lots of space was waiting for some newly baked goods to be placed there. Notice that the pan holding the ensaymada was full; that means the ensaymada was newly baked and placed in the estante. Tip to those who like buying from the neighborhood bakery: choose the pans which are full, and point the ones you like. The store owners usually place the previous day's leftover, if any, on top of the newly baked ones.)
Pan de sal making was started around 2:00 in the morning to make available to consumers as early as 4:30. All the non-yeast dough would be made during the morning from 7:00, then the other yeast doughs would follow. There would be a (smaller) second dough-making for pan de sal that would start at around 7 pm, to be available for those who like midnight snacks, and for packing in cellophane by the dozens for those families who want (cold but soft) pan de sal delivered to their houses early the next morning. (My father is an amicable person and had made friends with some tricycle passengers to whom he offered the delivery service. Thanks to the oven toaster, families could simply reheat the packed pan de sal, sometimes with their favorite cheese or mayonnaise on it.)
On making pan de sal, we had a mini-boat for mixing yeast doughs then, and our panaderos were so muscular (they could compete for bodybuilding contests) because of the extreme work-out of kneading the big doughs, as big as 4 pillows combined, which they would lay on top of a dining table (for 6) that was modified by adding a sheet of aluminum on top, and the dough would be covered with plastic, and later on would be doubled in size almost as wide as the whole surface of the table. Towards the end of this first rising, some small bubbles would form on the dough that we kids would playfully pop. Of course, my father would castigate us when doing so, afraid to disturb the yeast cells in doing their job and might end up giving us flat breads. Bad for business. While waiting, we would apply thin coat of vegetable lard (shortening) on the pans. The other panaderos would take care of cleaning the equipment or washing their laundry and their aprons (made of flour sacks). Some take the time to nap.
The busiest time of the day was around 3:00 in the afternoon. Come time for shaping the dough, we would gather at the sides of the table. My brother (or another panadero) would use a metal dough cutter to cut long portions from the big dough, then form these portions into a log, in the process creating the same effect as "punching" the dough down. The log formed would be compact and soft, then we would roll these on a pan of breadcrumbs, then lay side by side in wooden "pans" (rectangular flat crates about 4 feet long by 2 feet wide and 4 inches deep) and let them rise as we try to finish the rest. Once done with log-making, we would get the first batches, and my brother (or the panadero) would use the wooden dough cutter to cut the logs into 1 to 1-1/2 inches portions, throw these pieces our way on to a pan of breadcrumbs, and we smaller kids would roll these pieces to coat all sides with breadcrumbs, then lay on the flat baking pans diagonally as 6x4 (so 24 pieces per pan), carefully carry the pan toward the shelf and let it rest there for at least 30 minutes (actually while working on the rest of the dough) before baking. (I tried to copy this method now that I am here in the US; see this page for step-by-step photos, using a bread machine recipe for the dough. I blogged about it in my old kusina with a poem inspired by the smell of the dough as it was rising inside the bread machine.) One of the reasons why pan de sal are so spongy is the time of rising. When you make and bake more, the longer the last batches have for rising, and the more airy it becomes. If it sits too long before entering the oven, the result is a somewhat dry, airy, sponge-like bread. So the best batches would be the first 3/4. It is not because the panaderos want to make it appear bigger to justify the cost, for the information of those of you who look at it that way. They usually weigh the first cut portion then approximate the rest by comparing sizes as they proceed with cutting, checking along the way if they are still maintaining the right weight. These panaderos are so skilled that they usually do not need to weigh at all.
I loved the hustle during the early morning hours when neighbors would troop to buy our freshly baked pan de sal, usually with Dari Creme or (my favorite) Reno liver spread. During school days, I would usually have these for my breakfast, especially when we had no maids. I particularly enjoyed the early mornings during misa de gallo, because then more people would make that trip to buy hot pan de sal, and usually at an earlier time of 4:00 in the morning.
Our bakery plus store was a good income source for us, and while we were not rich, we were not deprived; we lived comfortably...until SM city was built, and Goldilocks was there, plus some more baked goods in the grocery shelves, then the SuperSale was born, not to mention the sudden abundance of other neighborhood bakeries. We strived to keep our bakery going. It is rather the same with Wal-Mart versus small town stores. My brother later got a job as a baker in a Japanese-owned outlet in MegaMall, and the rest of us were already in college, so my father was left struggling to keep the bakery going. I sold some baked goods in my Medicine days by using hotdogs as fillings for the Spanish bread dough, Argentina corned beef with onions instead of coconut for pan de coco dough, and also by making chicken and ham sandwiches.
The competition was so great, that my father would often have lots of returned old breads, usually already moldy and not fit for making bread pudding. He resorted to using potassium bromate for what he thought not only prolonged the shelf life but also improved the texture and the taste (cheese-like), but it was later banned because it was found to be carcinogenic (read more here). So even before I left PI, our bakery had stopped operating. It was a sad and gradual event for us, which affected my father greatly. I often would see him lying on the bed, staring at the ceiling, and would sometimes voice regret that my brother did not support him in continuing the business...I felt that part of the problem could be blamed in not teaching us GIRLS to do at least small scale baking (my brother learned all the recipes down to baking per se; we girls only helped shape the dough and place them on pans), but then we had no small oven (which was not uncommon for the typical Filipino family). And I thought then that the heavy workload and the huge machineries and ovens were meant for men. Ironically, when I recently talked to my younger son about how I plan to teach them how to make yeast rolls, he said, "But that's for girls!" My quick reply was, "Annnoooo? Hindi ah!" (What? Of course not!) And I told him the above story, then thought of posting about it here as my entry for the LP 14.
Now that I am here in the US, I am trying to copy those goodies (especially the yeast rolls) and come up with my own baked goods using non-commercial (aka homemade) recipes and ingredients for family consumption (as in, I avoid leftovers) -- e.g., butter instead of margarine or shortening, real pork lard whenever I can have it instead of shortening, lots of eggs depending on the recipe, milk instead of water (also depending on the recipe), buttermilk, sour dough, potatoes and other new ingredients, and NO PRESERVATIVES (I do not let them go beyond 3 days as that would be inviting molds. For those of you who like buying breads from the grocery stores because "they last longer," think again...). While I seldom bother to ask for the recipes my father and brother had for those rolls and buns I grew up with, I do experiment with different recipes online and from books/co-foodbloggers and choose which ones I will use to make my version of pan de sal, pan de coco, ensaymada, etc., and modify accordingly, then I post them here in my foodblog as I learn, in an attempt to chronicle for my children's sake, and to share with other Filipina expats who may be interested. And as my own addition to the usual yeast rolls I had as a child, I am adding to my collection my own versions of other breads/rolls that I had in PI such the siopao, chicken or beef filled bread like beef asado roll (the pocket version of which I used to buy in Goldilocks for heavy merienda back in those times).
I am thankful to the Spaniards for introducing to the Filipino community (I presume it was their legacy to us) the PANADERIA.
 Note as of 1-12-09: Please see my labels on the sidebar and look for "ensaymada" for other recipes I have (supersoft and buttery, aside from the earlier bread machine and manual methods). You will also see tips and methods. My favorite, and most popular among my readers, is the super moist, super easy to make, supersoft ensaymada.