Showing posts with label pasta sauce. Show all posts

Tuesday, May 05, 2009

Chicken A La King in Bread Bowls


When I was still in college, chicken a la king was one favorite lunch I ordered in the cafeteria. I don't recall where I had it served in a bread bowl.

Two days before I cooked this, we had roast chicken (per hubby's request, on a day I was going on a night duty...whew! I put in a frozen un-brined chicken into the oven and baked for 3-1/2 hrs, with 1/2-hr nap while baking). Since hubby and stepd only eat a portion of one breast, and the boys and I eat other parts, we had enough breast meat for another meal (I used the rest of the meat for arroz caldo). A favorite dish I prepare for leftover breast meat is chicken alfredo. This is the first time I tried chicken a la king, and hubby loved it (needless to say, everyone else did). The boys had fun slicing off the tops of the bread and hollowing them out.

I only checked out one recipe for chicken a la king...basically creating a cream of chicken plus mushrooms and bell peppers. Instead of making cream, I decided to use condensed cream of both chicken and mushroom. Yummy!

Ingredients:

1/4 cup butter
2 cups cooked diced chicken
1/2 cup diced red and green bell peppers (I used frozen)
1 can mushrooms, drained (you may use sliced button mushrooms if you want. I had straw mushrooms at the time)
1 can condensed cream of chicken soup
1 can condensed cream of mushroom soup
water as needed
salt and pepper as needed

Instructions:


In a medium saucepan, melt butter. Add chicken, mushrooms and bell peppers and stir about 1-2 minutes. Add the condensed soups and some water to desired consistency. Let simmer on low heat for 10 minutes, taking care to add water ans stir from time to time to avoid scorching. Serve in bread bowls.  (Or you can serve it over plain rice or pasta.)

Monday, October 25, 2004

Canning PASTA SAUCE

I canned a total of 4 bushels of those big heavy deep-red tomatoes (not counting the smaller tomatoes which are better canned whole or used raw in salsa). Quite expectedly I experimented with different recipes for pasta or spaghetti sauces. After several experimentations, I came to the conclusion that the easiest thing is to make them all into standard tomato sauce, then just add the other ingredients to convert them into pasta sauce according to my taste. You see, this recipe here does not give the taste that I really want, because most of the concern of the developer of these recipes is to come up with a mixture that will ensure the pH that will least encourage the growth of Clostridium botulinum. I mixed together 1 pint of standard tomato sauce with a pint of Italian Seasoned Tomato Sauce and came up with the most delicious yummy pasta sauce I have ever had. The procedure is actually quite standard, with variations only in the style of cooking (stewed tomatoes prepared differently from pasta sauces). So for purposes of demonstration, I am featuring this here. My personal preference at the end of my canning season is just to make standard tomato sauce then add ingredients as I cook the meal. The standard tomato sauce is easier to prepare, requires no other veggies so it maintains its acidity and therefore is not subject to dangers of botulism. For more information on preserving tomatoes, click here.

Ingredients

3/4 cup chopped onion
3/4 cup chopped celery
4 cloves garlic, minced
2 tablespoons olive oil
20 pounds tomatoes
3 bay leaves
2 tablespoons brown sugar
2 tablespoons oregano
2 tablespoons parsley
1/4 teaspoon crushed red pepper (I lessened the original amount asked for, for my children's sake)1/2 teaspoon black pepper
Bottled lemon juice

Instructions

Prepare Ball® or Kerr®jars and closures according to instructions found in Canning Basics. Since this is a combination of tomatoes plus other vegetables, it is considered low-acid food, and therefore, caution against development of botulism is warranted.

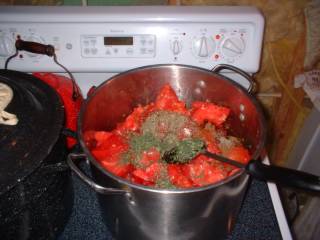
Core and quarter tomatoes.


Cook onion, celery and garlic in olive oil, in a large saucepot, until transparent.

Add some of the tomatoes, then transfer this


and the remaining ingredients to saucepot.

Simmer mixture about 2 hours, stirring occasionally.


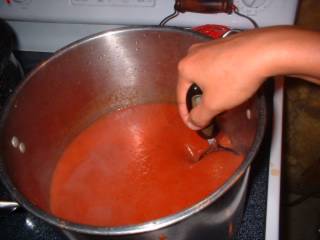
Remove bay leaves. Put tomato mixture through a food mill or sieve to remove seeds and peel.

Return puree to saucepot and cook, uncovered, over medium-high heat until sauce thickens (usually down to half of the original volume of pureed mixture). Stir frequently to prevent sticking.


Add 1 tablespoon bottled lemon juice to each pint jar. Carefully ladle hot sauce into hot jars, leaving 1/4-inch headspace.

Wipe jar rim clean with a damp paper towel or cloth to ensure smooth sealing.


Place lid on jar with sealing compound next to glass.

Screw band down evenly and firmly just until a point of resistance is met-fingertip tight.


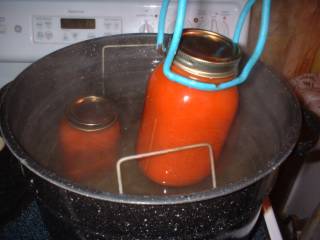
Place in the canning rack and lower into the boiling water. Add more water as needed, making sure that water level is about 2 inches above the lids.

Process at least 40 minutes in a boiling-water canner. Make sure that the water is boiling fully and refrain from opening the canner while processing.


Making sure that there is no draft inside the house, remove the jars one by one from the canner and place on a towel on the countertop, with at least 1 inch space between each jar. Cover with another towel and leave alone for at least 12 hours.

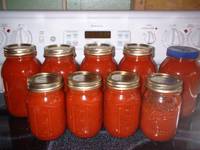
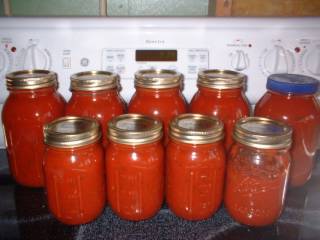
Check for failure to indent, a sign of non-sealing. This photo is a combination of canned pasta sauce and spaghetti sauce that I made. Notice the jars that are less than the required volume, and the jar with a different cover. I don't bother processing that jar with half the content. I use it up right away. A batch of tomatoes that I process that results only in 1 or 2 quart jars I also do not process anymore. Instead, I place it inside the fridge and consume within 2 weeks. Or I may transfer to a freezer bag and use within 1 year.

Here's how I stack them in the freezer. When I transfer into freezer bags, I squeeze out as much air as I can to create vacuum and lessen the chances of freezer burn. Then, once frozen, I lay them flat on a baking sheet for organized stacking. By then I can stand them upright like books or just pile them up higher.

I confronted my hubby about whether the quality of the pasta and tomato sauces rivaled those in the grocery store, because if not, I would rather not spend this much time processing these tomatoes. It can be quite tiring and power-consuming. I wanted to see if it was worth the effort. I might be biased, but I love my home-made sauces. Hubby said they were yummy indeed, but if I tire so much canning them, it might still be more cost-effective to buy from the store. (Quite hard to assess whether it was bola or truth. It might be that he did not want to hurt my feelings.) Then recently we watched on History Channel a documentary on how tomatoes are harvested and processed immediately. Oh well...most of my canning this year was out of curiosity on how it was done, on what would be the result (I have no doubt that home-made jams and jellies are better than store-bought, but I doubt that canning veggies are worth the trouble), and having the produce on hand from my garden. I might plan my garden otherwise next year, probably less tomatoes, more berries, same cucumbers, etc. I will probably plant several other veggies good enough for freezer storage for the whole year.Posted by Hello
Custom Search