I had plenty of mung beans; thanks to my online friends who sent me several packages. Because of this abundance, I once again had that tendency to experiment with them. I thought I'd make my own sprouts.
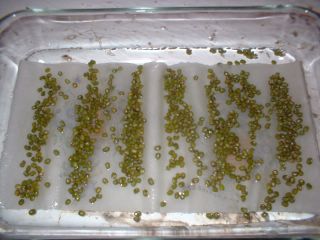
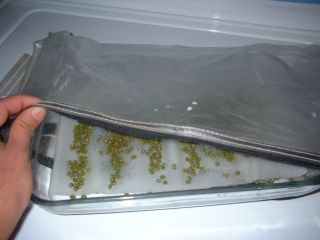
Prepare the baking dish by putting 2-3 layers of paper towel submerged in tepid water that is 1 inch high. Sprinkle 1/4 cup of mung beans to distribute as evenly as you can. Cover loosely with plastic (I use the plastic pouch that came with the traveling bags.) then place on a warm floor (if you don't have a warm floor, use heating pad. Heating pads are used by gardeners when they are starting their seedlings indoors in preparation for spring/summer planting to maximize the warm weather.)
Everyday add 1 cup of water by pouring slowly and carefully as to not displace the sprouts from where they have established their roots in the paper towel (which serves as a substrate much like the soil. Without paper towel, and without anything for the roots to hold on to, the seeds just drown in the water and rot. I know because I tried to eliminate this factor after successful sprouting on the third try, and so failed without it.)
With my experimentations, I came to the conclusion on what were obvious needed factors when sprouting:
1. Paper towel serves as a growing medium like soil.
2. Water to germinate the seeds and feed the seedlings.
3. Plastic to keep the moisture in and the cold air out, not to keep the dust off. (Remember, this is not the Philippines. My area is cold and the air is so dry that humidity levels drop down to 30% in winter time. Without the plastic, the radicle that started to grow after one day just stopped growing. I realized it was because the cold and dry air tended to cool the water enough to inhibit germination and also would dry up the area surrounding the sprouts, making them brown.)
4. Warm floor or heating pad (the optimal temperature would be around 70-80 deg F, which would sound ridiculous for someone living in the PI, where temperature changes are not noted so much because they are pretty much stable, so in PI, one can place this anywhere in the house).
See...I am really learning about gardening.
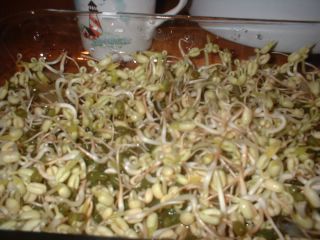
Harvest these sprouts on the third day. Rinse well and refrigerate. Consume on the same day of harvesting. I am guessing that light promotes greening of these sprouts and formation of leaves, but I am not sure. I have done these at least 5 times successfully, and ate these. They tasted good and not at all bitter. I even tried to taste the raw brownish root tips, and they had the pleasant taste of raw greens.
What to do with toge?

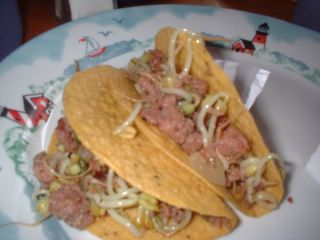
I even used it in leftover tortilla from a taco kit dinner...
I also add it to shredded leftover beef pares.(I reheat the leftover, then sprinkle the sprouts and just get them to the point of blanching.)

So for those of you who like bean sprouts, just give it three days. As long as you store mung beans, you will not have to go to the grocery store to buy mung bean sprouts.
Nutritional value of mung bean sprouts, taken from nutritiondata.com:
The Good
This food is low in Saturated Fat and Sodium, and very low in Cholesterol. It is also a good source of Protein, Thiamin, Niacin, Vitamin B6, Pantothenic Acid, Iron, Magnesium, Phosphorus and Potassium, and a very good source of Dietary Fiber, Vitamin C, Vitamin K, Riboflavin, Folate, Copper and Manganese.
The Bad
A large portion of the calories in this food come from sugars.
Detailed nutritional information can be seen here.