 |
| From ube haleya |
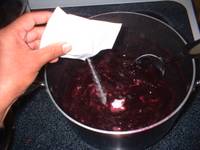
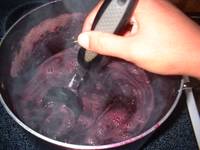
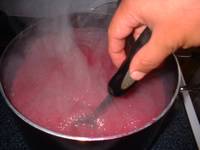
I cooked this again recently, and came up with my own recipe using the grated uncooked ube in the photos below.
Ingredients:
2 (14-oz grated ube, uncooked)
1-15 drops purple coloring
5 drops blue coloring
1/2 stick (1/4 cup) butter
1 can (14-oz) condensed milk
1 can (12-oz) evap milk
1-2 cups sugar (depends on your taste)
Method:
Puree the grated ube. On low heat, melt the butter, add ube, condensed, and evap milk. Stir constantly. Add sugar according to your taste. Cook until sticky/gooey to your desired consistency.
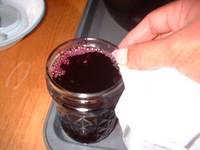
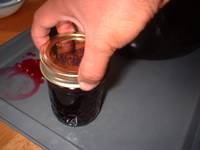
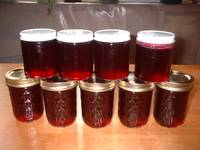
I placed these in sterilized jars and processed in boiling water canner for 30 minutes. I am now experimenting on shelf-life. I have one jar out in room temp and I check daily if it starts to grow mold. After two weeks, I will open it and see if it is not ruined (I hope it won't!). Meanwhile, I have the rest in jars also (I made a total of 5 8-oz jars with some excess to eat) placed in the fridge for future cooking/baking experiments.
This will be my basic ube haleya recipe, which I will use to make ube cream cheese filling, ube cake roll, ube buttercream frosting, ube ice cream, ube ensaymada, and ube hopia in the future.
~~~~~~~~~
I am actually not ready to post about this yet...If not for my promise earlier, I would not post this now. But I want to keep my promise.
I have made ube haleya out of what ingredient I had -- grated uncooked ube -- by trial and error. I have not come up with a good proportion of ingredients to make a final recipe here. (I have not tried making haleya using the powder form...or have I? Maybe I did and failed to achieve a satisfactory result.)
After I made the basic ube haleya, I experimented making ube cake, using both powdered and the haleya I made. It ended up in tragedy, mainly because I was not following a tried and tested recipe. I had my own theories I wanted to prove, and they were proven wrong...teehee! Ngek!
Anyway, out of the ube cake experiment, I made a filling which turned out yummy, enough to make up for the bad turn out of the cake itself. I had some leftover of that which I placed in the fridge.
Then just a while ago, when I had another craving for ube haleya, I took out of the fridge the little haleya that was remaining, and the other jar of the filling which I mistakenly thought of as another unfinished jar of haleya. When I realized it was the filling, I added it to the haleya (instead of the usual butter that I add), 1 part of filling to 2 parts of haleya. Then I reheated in the microwave for 30 seconds...an accidental mistake since I was not really planning on heating up the filling.
Oh well, I thought I would just mix the two together, maybe it would turn out okay anyway...
And what resulted was probably what I would label as the yummiest ube haleya I have ever tasted in my whole life...
Now I am on a quest to come up with a clear recipe to recreate that...And since right now I have no exact measurements, let me just describe to you how I made the basic ube haleya that I came up with...then I will follow with the post of the filling that I made for the cake (never mind the cake! I will experiment again on that later). During these times, I should be coming up with a well-defined recipe for the yummiest ube haleya I have ever had.
So what I will share here with you is the "how" of my ube haleya adventure.
The basics:
Researching the internet for recipes showed me to "boil the ube first then mash." My dilemma was not even knowing whether my grated ube was already boiled then mashed. I took two 14-oz packages of grated ube (pale in color) then cooked it with 1/2 stick of butter, 1 can of condensed milk and some (I added probably a cup) whole milk, all the while stirring the saucepan until the mixture was quite getting dried up...but I would try to taste and it would still be gritty...as if not yet fully cooked (that's the point that I realized the grated ube was uncooked, really). So, I was already considering of just throwing everything away...I just felt it was a disaster...but I thought better of it. My stubborn self just had to seek ways to resolve the dilemma.
I added 1/2 cup plain water to further cook without scorching...then I thought of pureeing the mixture to make the ube more homogenous...I added some more (1/2 cup) cold water, stirred, then dumped into my food processor. I pureed for about 2 minutes each batch (filled to max line). Then I proceeded to cook on the stovetop. When it felt like it was cooked, I adjusted the taste by added more granulated sugar, with 1/2 cup increments, until I was satisfied with the taste. At the same time, I adjusted the purple coloring by adding drops of food coloring. I did not want it to be too intense (it just felt too unnatural for me). Good thing it did not affect the taste. I also added 1 tbsp of butter every now and then until I was satisfied. I stopped when I achieved the consistency that I wanted (I did not want it too pasty. I wanted it to have more body, unlike those in the jar, which to me are too runny/soft, not to mention to artificially tasting.
There...I had ube haleya to enjoy and experiment with to make ube cake for the days that followed...I liked eating it with slathered with butter. My younger son liked it plain. My older son was freaked out with the purple color...(hindi ata nakatikim nung nasa Pinas pa). This will be the same filling I will use for hopiang ube.
Next: How I made that nice ube filling...
For now, let me experiment with my next batch of haleya to come up with a good recipe for it.


