Tuesday, November 11, 2008

FoodSaver

I spent the whole day yesterday packing a
From Food Saver
whole year supply of chickens. My MIL raised them (we provided the money for buying the chicks and grains). We had a total of 32 which we brought to a slaughter house yesterday. As soon as I came home from my interview at another hospital, I spent the rest of my day packing. Packing itself was not tedious. I found it most tasking to clean the gizzards (made me wish i did not ask for those).Now I have fresh supply of chicken roasters. I cut up the smaller chickens for such meals as adobo or tinola (the whole ones I can also cut up later if I have to). I have chicken necks in groups of 6-8, perfect for arroz caldo. The gizzards and hearts I plan to cook adobo style, slow cooked. And of course, Adidas will have to be slow cooked as well...
Freezer full of frozen goods

Tips on freezing:

Freeze as soon as chickens are slaughtered. Make sure you have clean surfaces. I worked them in batches, keeping the rest of the chickens out in the garage where it was cold, and had my hubby throw ice cubes on them while I was still at the interview.

Use freezer grade paper or plastic. I used FoodSaver. I was quite surprised that my biggest chicken could fit in it, although I had some difficulty, but was successful with maneuvering. The less air in, the better. That's why I prefer vacuum packing. Prevents freezer burn.

Place in the freezer right away. Avoid fluctuations in temperatures. Especially avoid prolonging them inside where it is room temp; in that case, try to work quickly so you can place them in the freezer ASAP.

If bag improperly seals because of too much juices from the meat, try to freeze first for 3 hours while in the freezer bag (to solidify the juices) before sealing.

(Filipino) Custard Cake

One of my favorite merienda back when I was still
From Custard Cake
working in PI in a busy Pasay-Makati area, this Custard Cake (Filipino style) was available in the nearby cheap bakeries, NOT in the more expensive ones, yet I loved it. It tasted good and was very affordable. My mother used to make them too when we had our own bakery, although when I ask my Nanay now for how-to's and recipes, she cannot recall anymore because of lack of practice.

In the past few days I had been experimenting with caramelizing sugar using microwave , then I could not take my mind off of what to do with my mini baking pans with caramel. I was considering preparing flans, or making bread pudding, or trying this custard cake. One morning that I woke up too early for my interview at another hospital, I (crazily) proceeded with baking these (and was done in time for preparation for my interview). I did not come up with the familiar taste I would have wanted to recreate, but I got approval from my kids and (most importantly) my hubby, so I will stick to this recipe from now on.

For the flan topping:
Caramelized pan
Leche flan mixture enough to create thin layers of flan for topping (I will show you later what to do with the rest of the leche flan mixture, aside from making them into leche flan)

Pre-heat the oven to 350 deg F. Put caramelized pans into bigger pans with water enough to cover the sides of your smaller pans up to the level of leche flan. Pour a thin layer of leche flan ONLY WHEN THE OVEN IS READY. Bake the flan for 15-20 minutes (depends on how hot the water you use for water bath) until flan is jelly-like wiggly at the center. Meanwhile, prepare your ingredients for the cake.

For the yellow pound cake:(I followed the instructions at the side of the box)
From Custard Cake
1 box Yellow cake mix
1 small vanilla instant pudding and pie filling mix
4 eggs
1 cup water
1/3 cup vegetable oil

Combine dry ingredients in one big bowl. Combine the liquid ingredients in another bowl. MIX ONLY WHEN FLAN IS READY. Beat these together for two minutes at medium speed then pour on top of baked flan. Continue baking these for 25-50 minutes depending on what size pan you used (I made small ones the size of custard cups and a bigger one in an 8-inch round pan so I had two different baking times).

Once done, let rest on a cooling rack for about 10 minutes. Loosen the sides with a spatula and invert onto a plate (or a bigger pan).

Now for your own preference, maybe instead of the pound cake recipe (I found this too heavy for me), you might want to experiment with plain yellow cake.

UPDATE:
Please see a similar and very creative post made by MaMely. Yummy!

Caramelizing Sugar Using Microwave

The daring me...I experimented again with the microwave and tried to caramelize sugar using microwave,
From microwave-caramelized sugar
mainly because there are times I want to put caramelized sugar in small pans and make small individual servings of leche flan. I started experimenting using different power settings. After the 6th attempt, I have a final recipe for making an individual caramel-lined ramekin.

Place two heaping (ordinary) spoonfuls of sugar into the ramekin (I used glass custard cups; Pyrex or Anchor Hocking. DO NOT USE PLASTICS. Sugar can get very hot and will melt plastic containers.). Microwave on high for 1 min 30 seconds then continue in 30 second increments until you see some bubbling begins. From this point, you have to continue microwaving in increments of 10 seconds while stirring with a fork or chopstick in between to avoid scorching/burning at that hot spot (notice in my photo there was one that had darker look. If you want your caramel a bit bitter as if there was some coffee, you might like it this way). After about a total of 4 minutes you will have perfectly golden caramel. USE OVEN MITTS to handle cups. Be careful not to drop caramelized sugar on your skin; it causes second degree burns. I know, because I had them. :)

I did try it on a bigger pan and was not too pleased at the prolonged microwaving time. So I will use this microwave method only for smaller ramekin.

UPDATE as of 2-04-9:
I tried to caramelize 1 cup in a pyrex measuring cup, high power, initially for 5 minutes but I was watching it closely. As soon as it starts melting at one point, stir, then zap and stir at intervals of 30 seconds. By the end of 5 minutes total, I had a perfectly caramelized sugar ready to pour in a round foil pan (downside to foil pan, if it hardens before you distribute, you can't zap to make it fluid again). Better pour in a round baking glass or ceramic pan which you can zap again in case you have to).

What did I end up doing with them? I made custard cakes for the small ones and bread pudding for the larger one(up on my next post...)

Sunday, November 09, 2008

Classic Boston Cream Pie

No, it was not a "Boston" fever for me (having just recently prepared Boston baked beans).
From Boston Cream Pie
It just so happened that I was looking at different chocolate recipes from a Hershey's book to prepare for celebrating Nov 8th. I was planning to make a Florida citrus cake that my co-worker recently brought to work and that I loved, but I asked hubby first.

Me: Honey, would you be interested in a lemon-type cake that I can prepare for our anniversary?
Him: Nah...I am not fond of lemon cakes. Yellow cake with chocolate frosting would be good, though.
Me: Or maybe you would prefer chocolate cake with chocolate frosting?...
Him: That would be even better.

Well, thinking that he was probably referring to the boxed yellow cake and Duncan chocolate frosting when he mentioned that that was what he would like, I was not really looking forward to preparing something from the box when it was a special occasion. Although we plan to go out of town this coming week for a major celebration (no kids!!!), I did want to prepare something special (as in, from scratch) on the day itself.

So I was browsing through the photos in that Hershey's book and this Classic Boston Cream Pie caught my attention. It did look close enough to a yellow cake with chocolate frosting, but it has something else that I LOVE: custard. However, my husband is not a fan of custard like my leche flan (though he likes the custard in eclair, and had been hinting for years that he would love to have those). So, on the day before our anniversary...

Me: Honey, would you be interested in Boston Cream Pie?
Him: Sure. My grandmother used to make those.

Ok, I got the go signal, although his response somewhat appeared lukewarm to me (it might have been because he was tired. He and the boys had been splitting and piling wood, while I cleaned out the upright freezer in preparation for our fresh meat supplies for the coming year).

When it was finally done and served, hubby's face was priceless. He even closed his eyes to savor his slice. Mmmmm...

My boys, needless to say, loved it. Older boy said, "Ma, are we having Christmas or Thanksgiving here? You should make this and show off, errr, ah, let them taste this." Younger son said, "Yeah, Ma, this is really good! Mmmm!!!"

Cake:
1/3 cup shortening
1 cup sugar
2 eggs
1 tsp vanilla extract
1-1/4 cups all-purpose flour
1-1/2 tsp baking powder
1/4 tsp salt
3/4 cup milk

1. Heat oven to 350°F. Grease and flour one 9-inch round baking pan.

2. Beat shortening, sugar, eggs and vanilla in large bowl until fluffy. Stir together flour, baking powder and salt; add alternately with milk to shortening mixture. Pour batter into prepared pan.

3. Bake 30 to 35 minutes or until wooden pick inserted into center comes our clean. Cool 10 minutes; remove from pan to wire rack. Cool completely.

4. Prepare RICH FILLING. Using long serrated knife, cut cake horizontally into two even layers. Place 1 layer on serving plate, cut side up; spread filling over layer. Top with remaining layer, cut side down. Prepare DARK COCOA GLAZE. Pour glaze over top of cake, allowing glaze to drizzle down sides. Refrigerate several hours or until cold. Cover; refrigerate leftover dessert. 8 to 10 servings.

RICH FILLING
1/3 cup sugar
2 tablespoons cornstarch
1-1/2 cups milk
2 egg yolks, slightly beaten
1 tablespoon butter or margarine
1 teaspoon vanilla extract

Stir together sugar and cornstarch in medium saucepan; gradually add milk and egg yolks, stirring until blended. Cook over medium heat, stirring constantly, until mixture comes to a boil. Boil and stir 1 minute. Remove from heat; stir in butter and vanilla. Cover; refrigerate several hours until cold.

DARK COCOA GLAZE
3 tablespoons water
2 tablespoons butter or margarine
3 tablespoons HERSHEY'S Cocoa
1 cup powdered sugar
1/2 teaspoon vanilla extract

Heat water and butter in small saucepan over medium heat until mixture begins to boil; remove from heat. Immediately stir in cocoa. Gradually add powdered sugar and vanilla, beating with whisk until smooth; cool slightly. About 3/4 cup glaze.

Saturday, November 08, 2008

Gadget to Make Empanada Easier

I have posted way earlier in my old kusina about how I made empanadas.
From empanada
Several years later, I am posting this now to show how I made it easier using a dough/dumpling/empanada press, and of course, coming up with more presentable empanadas.

How I make pie crust can be found here.

How I make my empanada filling can be found here.

This is basically a short description of how I make my empanadas nowadays. In using the dough press to shape the circles, use a bigger one as the dough may shrink back once you lift it up. Then use the right size dough to place this on and the filling. You will have some extra dough to pinch off this way.


After several times of making this, I have come up with some more tips:


1. Use plastic to cover dough while rolling. It makes flipping easier.
2. Sprinkle flour from time to time to lessen stickiness.
3. Make sure your dough is quite chilled and not room temp before rolling. It tends to be less sticky, and it tends to help preserve the flakiness. So to do this, take out some dough and leave some while you work on your first batch.
4. The eggwash will make your floury dough seal. Without it, the flour will prevent sealing. The while baking, eggwash makes your empanadas appear golden.

Please take note that I have a new kusina blog

To my old-time visitors and those who have found this site for the first time, kindly take not that I have a newer kusina blog, still named Kusina Ni Manang. I am posting this because I still get visits on this site, but then I understand that a lot of posts here are not in my new kusina, and are found mainly through google search. So for those who will get curious as to new posts, just follow the link provided. Thanks for visiting!

Friday, November 07, 2008

Butter-fried Scallops

One of the three seafood items my husband will eat
From scallops
(and actually loves)...When we do eat at one of our fave restaurants, if he orders scallops, they are the usual batter-coated deep-fried ones, and I usually order the baked with honey and butter ones. This recipe is not an attempt to copy the restaurant recipes. It actually is the way my MIL prepares scallops at home, and I copied her for the love of my hubby. :)

Ingredients:
1-1/2 to 2 lbs scallops
1 stick butter
enough flour to dredge scallops

Instructions:
heat on med high one big or two medium sized iron pan (enough to cook all scallops just at one time. (If you cook more than one batch, the butter tends to make the subsequent batches blackish instead of golden brown). Melt butter and quickly try to dredge the scallops and place on pan. Cook each side (top and bottom) 1-2 minutes. I usually serve these on the pan itself with all the melted butter. Do not overcook.

Thursday, November 06, 2008

Chili

One of my husband's favorites, he tells me,
From chili
"Honey, you make the best chili." My reply: "Thanks to McCormick."

I like preparing chili when I have to go to work (night shift). I usually start thawing 2 lbs ground beef at night. Then in the morning, I prepare it as directed on the package of McCormick Chili seasoning. By suppertime, I just have to have shredded cheddar cheese (or 4-cheese mexican shredded cheese) available as topping (I add chopped onions for myself).

Ingredients:
2 pound lean ground beef
2 packages McCormick® Chili Seasoning Mix, Original or 1 package McCormick® Chili Seasoning Mix 30% Less Sodium
2 cans (15 ounces) kidney beans, drained
2 cans (14 1/2 ounces) diced tomatoes, undrained
2 cans (8 ounces) tomato sauce

Instructions::
1. Cook ground beef in large skillet on medium-high heat 5 minutes, stirring occasionally. Drain fat.

2. Place in 3-qt slow cooker. Stir in Seasoning Mix and remaining ingredients. Bring to boil. Reduce heat to low; cover and simmer 10 minutes, stirring occasionally.

3. Serve with shredded cheese, sour cream and chopped onion, if desired.

Chicken Broccoli Cheese Casserole

My husband mentioned one time about liking
From Chicken-Brocolli Cheese Casserole
this type of dish which his ex used to cook, and told me (He had the nerve to tell me!) he should ask her for the recipe. Of course he (the typical man that he is) forgot about it, but I went ahead and groped my way through making my own recipe. Very simple and easy, we all love it. He basically spoon-fed to me the ingredients: chicken, broccoli florets, Velveeta cheese. I just added what I felt I had to, and cooked it the way I imagined it. This is one of my favorite dish to prepare if I am going to work. I am posting while having a slow time at work, so I am guessing at the proportions as I try to recall how much I use. Make sure you use a baking dish deep enough for this.

From Chicken-Brocolli Cheese Casserole

Ingredients:
1 tbsp oil
1-1/2 lb chicken breasts (or 1 lb, depending on how many are eating; this is for 5 people) cut into bite-size
1 lb frozen broccoli florets
(Please take a look at the photo for the sizes of the cans)
1 can Cream of Chicken
1 can Broccoli Cheese condensed soup
1 package of stuffing prepared as directed on label
Sprinkle of Parmesan Cheese
1/4 oz (?- kindly check the lines on the foil wrap, just one small block/line) Velveeta cheese, cut into small pieces
Sprinkle of grated Parmesan cheese

Instructions:

Preheat oven to 400 deg F. Heat oil and brown chicken then place in the baking dish. Add broccoli florets, cream of chicken, and broccoli cheese condensed soup; mix well. Scatter the Velveeta pieces; top with stuffing and sprinkle with parmesan cheese. Bake for 20-25 minutes.


Tuesday, November 04, 2008

Zyliss Mandolin Slicer; Ground Beef with Green Beans and Corn

This is one of my most useful gadgets/toys in the kitchen.

I use it for mainly making bread and butter pickles, for slicing any vegetable thinly, espcially carrots, cukes, onions. It uses manpower, so less use of electricity, more exercise for the arms.

Last summer, I had lots of green beans and sweet corn that I would harvest daily (kapagod! That's why I told my husband I don't feel like having a veggie garden next year. He said, "Ok, then we will only have cukes and corn. No more tomatoes or beans." Ngek!)

From ground beef with corn and green beans
Well, my kids are not particularly fond of green beans (I love them in bulalo or anything nilaga), until I cooked them this way (which I used to cook back in PI when I was tasked by my aunt/maid as the slicer in the kitchen).

Ingredients:
1 lb ground beef (I browned, seasoned with salt and pepper, separated some for my husband's consumption as he likes them plain served with potatoes and broccoli)
2 cloves garlic, minced
1 small onion, sliced
3 small tomatoes, sliced
2 handfuls of green beans, sliced thinly as shown (quite time-consuming, but the mandolin makes it easier and faster)
1 cup sweet corn kernels (or 1 12-oz can, drained)
some water
basil to taste
salt and pepper to taste

Procedure:
Brown beef; drain excess fat. Add garlic until aromatic, then add onion until translucent. Sprinkle some salt and pepper. Toss the tomatoes in and stir until tomatoes have caramelized. Add the green beans, corn, and some water (maybe 1/4 to 1/2 cup). Let simmer uncovered for 2 minutes. Season with basil. Add salt and pepper to taste.

Monday, November 03, 2008

My Visitors and My Kids...My Inspirations

I seldom have comments on my posts...I do receive emails once in a while. Now that the blogworld is saturated with bloggers, it is quite hard to have an audience that sticks with me. What do I get from blogging anyway?...

As I have said before, I started blogging as a way to make use of my time, and to make myself useful to the society, to somehow lift my self-esteem up especially at the time I was unemployed. It has been a fun ride. I have met (and helped?) a lot of people online.

I do get some from ads since I signed up for them. But what I get from these in 10 months I can earn in one day work as an RN.

So what motivates me? An occasional note of thanks and praise via comment or email does tons. When I do not have any, I have found a way to keep me motivated.

I signed up for statcounter.com a long time ago, but had not been logging on it
From stats
during my more busy RN days so I had forgotten my PW. I recently signed up for a new one and started the # with what I had on my blogs. Interesting to see people getting to my blogs either directly (as in they bookmarked me already) or via google/yahoo search using keywords such as "kusina", "kusina ni manang" or "pandesal", ensaymada, chicken afritada, beef pares, beef asado, siopao, pichi-pichi, etc. Interesting to see "first time visitors" turn to "returning visitors" in the following days. Photos here are snapshots of my visitors both at my new and old kusinas.
From stats
I find it very amusing that I have seen stat map showing visitors in Alaska, Pakistan, South Africa and other less likely places. Seems like there are a lot of Filipinos/Filipinas searching for some of these Filipino goodies.

I guess these stats are enough to keep me motivated.
From stats
Sometimes I am just not sure whether what I post is still interesting to my readers. And whether how I post is the right way to keep them coming back, whether for old posts or new ones.

Then my ultimate motivator is knowing my kids can refer to these pages in the future when they get to the age (or situation) when they will have to prepare foods by themselves. Sometimes they, especially my older son, would even initiate and actually told me that baking/cooking is quite interesting. I tell my boys, they are good looking not only by Western Standards but also by Filipino standards, and they are quite intelligent (not nerdy types, though); knowing how to cook and bake on top of those will surely make girls ga-ga over them.

Boston Baked Beans & Brown Bread

I admit, I don't always cook. During those times, my husband woiuld just take
From boston baked beans
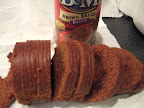
whatever he finds appealing in the pantry. One of his fave canned foods is the baked beans, served with brown bread. My stepd would only eat the beans. Both of them like to eat these with hotdogs. I would eat same but only because so he has someone to share that with. My sons don't like them; they'd rather eat whatever leftovers we have. I'd like to eat what I could before giving the rest to the pigs/chickens.

This baked beans reminds me of Hunt's "pork and beans" back in the Philippines, although that one is more tomato-based, and maybe because I grew up with that, I preferred it over this baked beans.

One time my MIL invited us over for supper, and she prepared baked beans. That was the first time I tasted the homemade baked beans, and I LOVED IT! My husband also loved it, and there really is no comparison between the homemade one and the canned one.
brown bread

Now with our annual trip to Greenville, I saw last year the specific pot used for this purpose in an Indian store, and I vowed to get it the next time we went there, which was late this fall (when all red/orange leaves have fallen off the trees), especially that the sight-seeing purpose of the trip was lost already. I at least should get that pot. And I cooked this for the first time. I asked my husband to
dry mustard
soak the navy/pea beans that night around 9 pm while I was at work and told him to soak with enough water to allow for the beans' expansion. Silly me, I did not check the recipe. It specified 6 cups! So I ended up estimating the amount of water to boil the beans in, and kinda ended up with a soupy dish, which my husband told me he loved better (than drier), and even loved it more the next day when he was eating the leftover. I still served it up with brown bread (which my husband suggested when I mentioned I wanted to make baked beans.) One thing funny as well was when I went to the grocery store to pick up the ingredients and had a hard time finding the dry mustard, and I guessed it was the powdered mustard as there was nothing else that was dry. Good thing I guessed it right!

I used the smoked pork fat back (which I also used for my chicharon) and I loved the effect. Now I just gotta get my kids to start acquiring the taste for baked beans.

This recipe is found in a card that was tied to the beanpot. I made a point of copying that onto this page so that I will not have a hart time looking for it if I lose that card (which is so easy to do!)
Official Recipe:
For 2-1/2 qt Boston Beanpot
Bake at 300 deg for 3-1/2 hours
Serves 8

Ingredients:
1 package (1 lb) navy or pea beans
1/4 pound salt pork, cut in 2 pieces (I used 3/4 lb smoked pork fat back)
1 small whole onion, peeled
1 tsp dry mustard
8 cups water
1/3 cup molasses
1 tsp salt
1/2 tsp baking soda
3 tbsp sugar
1/4 tsp pepper

Instructions:

1. Soak beans overnight in a large suace pan in 6 cups of water. Add baking soda. Heat to boiling and simmer 10 minutes. Drain in colander ove a large bowl. Save liquid.

2. Place beans, salt pork and onion in the beanpot. Add molasses, salt, sugar, dry mustard, pepper and a cup of water. Stir thoroughly. Add enough water to cover the beans. Cover the beanpot.

3. Bake 2 hours at 300 degrees. Add the rest of the water and stir again. Bake additioanl 1-1/2 hours (or until beans are tender.) Uncover last 1/2 hour.

Sunday, November 02, 2008

Sugar Cookies for decorating Graveyard Halloween Cake

This post should have been earlier uploaded,.
From Sugar cookies for Halloween
but I had been working every night since Halloween, and I blog during the slow time of my shift, if any.

I was not able to take a photo of the cake that I made for Halloween. I got the idea of "graveyard" look by browsing kraftfood.com. I brought it to work with only the chocolate glaze on it, planning to top it with crushed Oreos then decorate once I got to work, but I forgot to bring my camera! Anyway, while I found it quite too sweet for my teeth, my coworkers said it was excellent!

The recipe I used for the sugar cookies was courtesy of Liz. My husband hogged the sugar cookies as soon as the first batches were out of the oven. He loved them especially with the sugars. I got different sprinkles and icing colors from Walmart. (Hubby had been hinting to me for years that he likes sugar cookies. I just got discouraged with the flat cookies I have been making using Nestle Toll House choco chip cookies recipe that I did not try sugar cookies too soon.) My sons had some fun trying to shape them cookies and decorating, but I myself had a hard time achieving the effect I wanted (as you can see in the photo). I probably will try to recreate that graveyard cake just so I can take a photo. I still have some sugar cookies in the freezer (we got tired of shaping them).

I will post about the cake recipe itself once I had the gumption to make it again and take a photo of it complete with "graveyard" decors.

Friday, October 31, 2008

Pumpkin Carving

It's Halloween!
From pumpkin carving


One thing we have embraced in the Western Culture is the tradition of pumpkin carving during this holiday. I have to go to work tonight so we did this last night. Too bad my stepd had to be with her mother so she was not able to join in the fun. (We also made sugar cookies and tried to decorate them.) Here's my artwork, and those of my kids can be seen in the slideshow below.

I purchased a cheap pumpkin carving kit from Hannaford a few weeks ago. The boys were quite excited when they saw it (first time to have that at home!) so last night was the opportunity they (we all) have been waiting for. I myself had some fun (I joined in the carving craze since my stepd was not here and my husband never really was interested in this activity. He just likes appreciating our finished products.) Now I am off to find a recipe for the seeds...

Mozarella Sticks

There is a family-friendly restaurant about 45 minutes away from our house that we visit often. Our favorite appetizers is the mozarella sticks.
From Mozarella Sticks

At home one attempt that I have made to come up with something close is to make them using lumpia wrappers instead of batter, then dip in homemade marinara sauce (I'd like to think that I made marinara sauce although I was not looking at a recipe when I cooked it. Basically sauteed lots of tomatoes with other ingredients we usually use. We like the outcome and that's all that matters!). For purposes of simplifying things, I suggest you use the recipe below for marinara sauce.

Then one day, my older son and I thought of trying to really copy those served in that restaurant. I looked up the ingredients and one weekend we tried. We were very satisfied with the outcome, and my son had fun making them. Recipe courtesy of foodnetwork.


Mozzarella SticksPrep Time: 30 min Inactive Prep Time: 2 hr 0 min Cook Time: 10 min Level:
Intermediate Serves:
6 to 8 servings (makes about 56 pieces) 1 1/2 cups Italian-style dried breadcrumbs
1 1/3 cups freshly grated Parmesan
1 teaspoon salt
2 (16-ounce) blocks pasteurized mozzarella cut into 4 by 1/2-inch sticks
4 large eggs, beaten to blend
1 1/2 cups vegetable oil
4 cups Marinara Sauce, recipe follows


Stir the bread crumbs, 1 cup of Parmesan and 1 teaspoon of salt in a medium bowl to blend. Dip the cheese in the eggs to coat completely and allow the excess egg to drip back into the bowl. Coat the cheese in the bread crumb mixture, patting to adhere and coat completely. Place the cheese sticks on a baking sheet. Repeat dipping the cheese sticks in the egg and bread crumb mixture to coat a second time. Cover and freeze until frozen, about 2 hours and up to 2 days.
Heat the oil in a large frying pan over medium heat. Working in batches, fry the cheese until golden brown, about 1 minute per side. Transfer the fried cheese to plates. Sprinkle with the remaining cheese and serve with the Marinara Sauce.


Marinara Sauce:


1/2 cup extra-virgin olive oil
2 small onions, finely chopped
2 garlic cloves, finely chopped
2 stalks celery, finely chopped
2 carrots, peeled and finely chopped
1/2 teaspoon sea salt, plus more to taste
1/2 teaspoon freshly ground black pepper, plus more to taste
2 (32 ounce) cans crushed tomatoes
2 dried bay leaves
In a large casserole pot, heat the oil over a medium-high flame. Add the onions and garlic and saute until the onions are translucent, about 10 minutes. Add the celery, carrots, and 1/2 teaspoon of each salt and pepper. Saute until all the vegetables are soft, about 10 minutes. Add the tomatoes and bay leaves, and simmer uncovered over low heat until the sauce thickens, about 1 hour. Remove and discard the bay leaf. Season the sauce with more salt and pepper, to taste. (The sauce can be made 1 day ahead. Cool, then cover and refrigerate. Rewarm over medium heat before using.)

Yield: 2 quarts
Prep Time: 10 minutes
Cook Time: 1 hour 10 minutes


Thursday, October 30, 2008

Sauteed Pork with Veggies

This one is easy to make, especially when you have Filipina friends to do all the chopping.
From sauteed pork with veggies


We had a get-together last Saturday, when I brought lechon paksiw. We needed veggies and I had most ingredients on hand. But the way we Filipinos cook, we usually have protein-rich ingredient with veggies, and that means bits of either pork, chicken, beef, or shrimp. I brought the veggies, and told the hostess she needed to provide the meat. No problem! So chop they did, and I started cooking.

Ingredients:
2 tbsp oil
3 cloves of garlic, crushed
1 medium onion, sliced
1 lb pork, cut into bite-sized pieces
1 carrot, cut into chunks
1 small upo, cut into chunks (similar to zucchini, only tougher and more solid)
3 tomatoes, sliced
handful of green beans
half cabbage, cut into chunks
salt and pepper to taste
ground dried basil leaves

Instructions:

Sautee garlic and onion in 2 tbsp oil until translucent. Add pork and stir-fry until browned. Add tomatoes until caramelized. Sprinkle some salt and pepper. Add carrots and upo and cook for about 2 minutes then add green beans and cook for another 2 minutes. Finally add the cabbage. Sprinkle with some basil leaves. Enjoy while hot.

Note: Never cover stir-fried veggies (I was told by a friend/classmate from Medicine class). This tend (I observed it as well) to lessen the lively color of veggies that they appear like they are no longer crunchy, although they still are (if you stir-fry them first such that they get coated with oil before they steam from their own juice).

Ginisang Mani (Peanuts Deep-Fried with Garlic)

When I was still in PI, I used to buy freshly cooked
From ginisang mani
peanuts from one of the street vendors, and I would often request to include lots of toasted garlic. Since coming to the US, I have not really had peanut prepared this way. What I often see in the grocery stores are honey-roasted, or plain, and while they are crunchy, they just do not taste the same.

Then I saw some small uncooked peanuts in a natural food stall near me (Spice of Life). So I excitedly got a bag, then tried to cook them FOR THE FIRST TIME in my life. I knew I had to use enough oil to submerge the nuts. I knew I had to stir often. I knew I had to use garlic. What I did not know was the timing. I ended up with burnt (overcooked) peanuts with chewy (undercooked) garlic. Probably because I placed all garlic and peanuts at the same time. Probably I waited too long for the peanuts to brown and get crunchy (I tried to taste them before getting them off the pan).
I chucked them away.

It took a while before I had the gumption to try again. I got a small bag of peanuts from a Chinese store in Portland (2-hr ride from my house!) some months ago. Now I finally had the courage to try again. And I was glad with the outcome.

First I heated the oil to med high (6) for several minutes. I added the garlic to

cook until translucent before I poured in all the peanuts. Now the peanuts lowered the temp right away, so I put the heat on high (10)for about 2 minutes or so then back at med high and kept stirring. When I saw a slight change in color and some bubbles forming on the surface of the peanuts without cover, I started scooping them out with a strainer and placed on paper towels and let them cool off a bit before trying them. This time I ended up with just the right taste and crunch both of the peanuts and garlic. And no, I do not eat the big chunks of garlic. I sliced them big enough so I can easily pick them up when cooked, but breaks off just a little piece to eat with 4-5 peanuts at a time. I love the mingling of flavors that way.

I brought this to work that night and was quite surprised at how others were eating them, even the garlic! I was even warned by my charge nurse that if I did not hide it, she would not be able to stop herself from getting more.

Wednesday, October 29, 2008

Lechon Paksiw

To foreigners: Please be warned: Contents and photos might offend you. If you are the type who cringes at the thought of having ligaments and skins in your food, please leave this page.

Notice my cute halloween background? Saw it first in Liz's blog, and followed the link to download the same background for me!
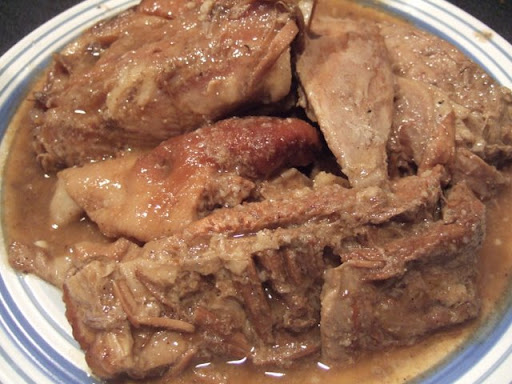
One of my friends roasted pig (lechon) during her birthday. I was on duty that day but I promised to visit her the next day. So I did. She sent home with me a bucketful of leftover lechon. I got to admit I am not a big fan of (tasteless) lechon, except for crunchy skin. But I do love leftovers because I turn them to lechon paksiw. I froze the leftover for a while until my Filipina and friends could get togather again (last week). I did have to browse the net for some basic recipes, and remembering what my Nanay used to do with hers, I added some breadcrumbs to thicken the sauce. I also used the slow cooker, and prepared this the night before the get-together. I had too much (for 4 other Pinays) that even with the take-homes, I still ended up with half the original amount to bring back home. I kept it on keep warm setting at home with occasional stirring and my sons would eat this whenever, for three days! Masarap pero nakakasawa din ha...

Ingredients:
2-3 pounds leftover lechon, cut into big chunks
1/2 cup cider vinegar
1/4 cup soy sauce
3/4 cup brown sugar
1 big onion cut into chunks
3 cloves garlic, crushed
2 star anise
1 cinnamon stick
1 tsp salt (then add more later to taste)
additional water to cover
2 (11.64 oz) jars of Mang Tomas Sarsa ng lechon
additional breadcrumbs for thickening

Procedure:
Place lechon pieces into 3-qt slow cooker. Pour the rest of ingredients except water, sarsa, and breadcrumbs. Cook on slow setting for 2-3 hours. Stir in MT sarsa, add enough breadcrumbs to thicken to desired consistency. Adjust taste with salt as necessary.


Ultimate Melt-In-Your-Mouth Pancakes

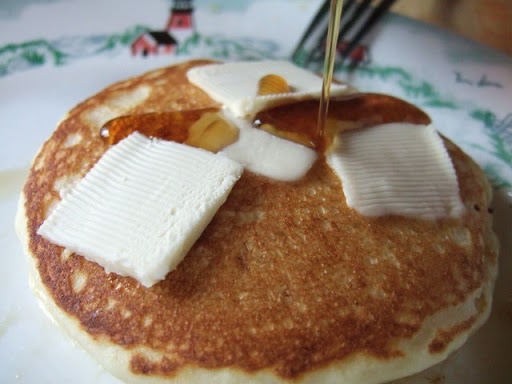
As I have repeatedly said recently, (kulit!!!) I have been using more and more of ready mixes. Bisquick is one of my faves, especially for waffles or pancakes. I particularly love this recipe that they have on the back if you want melt-in-your-mouth fluffy pancake types (achievable by adding the lemon juice and baking powder). My family absolutely loves them!
Below is a copy and paste of the recipe from the offical website of Bisquick.


Ingredients:

2 cups Original Bisquick® mix
1 cup milk
1 tablespoon sugar
2 tablespoons lemon juice
2 teaspoons baking powder
2 eggs

Procedure:

1. Heat griddle or skillet over medium-high heat or electric griddle to 375°F; grease with cooking spray, vegetable oil or shortening. (Surface is ready when a few drops of water sprinkled on it dance and disappear.)
2. Stir all ingredients until blended. Pour by slightly less than 1/4 cupfuls onto hot griddle.
3. Cook until edges are dry. Turn; cook until golden. To keep warm, place in single layer on cookie sheet. Cover with aluminum foil, and place in 200°F oven up to 10 minutes.


Tuesday, October 28, 2008

I had salad for lunch today!

When I am alone at home and it's lunchtime, I graze over fridge contents. I so happened to have leftover from previous night's supper. We had grilled chicken that was marinated in WishBone Robusto Italian dressing, served with iceberg salad and rice (mashed potatoes for my husband). For leftovers, I had a whole chicken breast, which I cut in half (two servings for me) and 1/3 bag of the iceberg salad mix. Then I thought I'd throw in some croutons as well. I used the same dressing as above. I wish I had on hand some cherry tomatoes and crumbled cheese, but I just had to content myself with what I got.
These were my bestfriend today. I prepared another for me to bring to work that night, and I learned that croutons should not be thrown in along with the veggies and chicken and then refrigerated. I knew I had to add the dressing just immediately prior to eating this, but the croutons were soft already! Now I know what not to do for bring-to-work salads.

Monday, October 27, 2008

Beef Stew

How many times have I said that
From beef stew
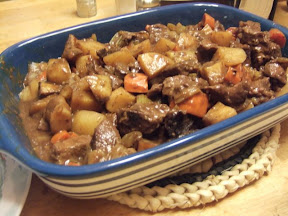
I have been using more and more ready mixes since I started working? Well, this beef stew is a recent addition to those dishes. I particularly like McCormick mixes.

Although my Filipino tongue prefers the tomato-based kaldereta style of beef stew, I figure, if I use these ready mixes, I cannot go wrong in that my husband's palate will probably be familiar with that taste. After all, they are just a mix of spices. As long as I use our home-grown beef, and fresh ingredients from the grocery store, then I am all set.

The ingredients and directions are in the back of the package itself, so I will not post it here anymore.


Chicharon using Smoked Pork Fat Back and a Meat Slicer

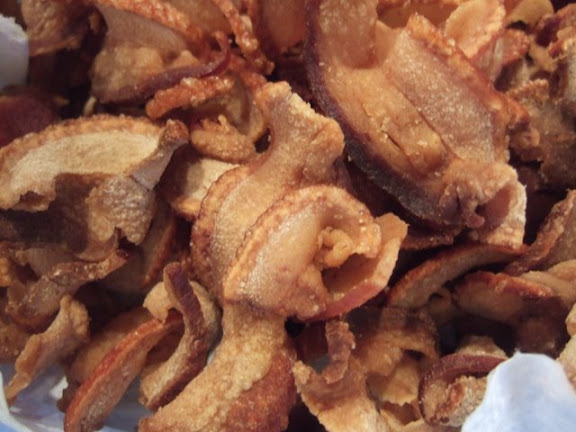
This is the pan fried fat back slices I used in place of bacon. When I made this, it turned out to be like the homemade chicharon; however, the rind part is so tough, my kids did not like those parts. But once they were soaked for a while in the chowder (where I used them), they were tender and added flavor!

I had three slabs of these smoked fat back that my MIL gave to me, and I experimented with the first one by boiling it then broiling, hoping to come up with some sort of crispy lechon, but I only ended up with gallons of oil drippings and chewy rind on top of melting fat...I tossed it away.

Well, this time, after hearing my MIL say that she likes cooking this as she would bacon, I tried the same thing, using my Rival meat slicer that I got several months ago but was just sitting in the uppermost shelf of one of my cupboards. While I was not completely satisfied with the operation of this cheap meat slicer, I was quite content with the outcome of the slices. At least it did the job easier than I if I did it by hand using a (dull and cheap) knife. Clean up was not that easy (and I don't remember seeing the instructions for it. Easy enough to figure out, though.

If I was not too cheap, I should have checked amazon.com first for reviews on top rated meat slicers before buying. The Chef's Choice 610 would have been a good Christmas gift for myself. :) Even hubby says that is not too expensive for a meat slicer. Hmmm....

For those who might be interested on HOW TO MAKE CHICHARON the DOST way, here is their recipe (I have not tried):
CHICHARON

Materials:
1 kilo of pork skin 4 tbsp. vinegar
1 tsp. salt vetsin and pepper

Procedure:

1. Boil the pork skin in a sufficient amount of the prepared solution until tender.

2. After boiling, cool and remove the fat portion.

3. Slice into desired sizes.

4. Dry under the sun until firm.

5. Deep-fry at about 188 C and strain.

6. Pack in plastic bags.

Sunday, October 26, 2008

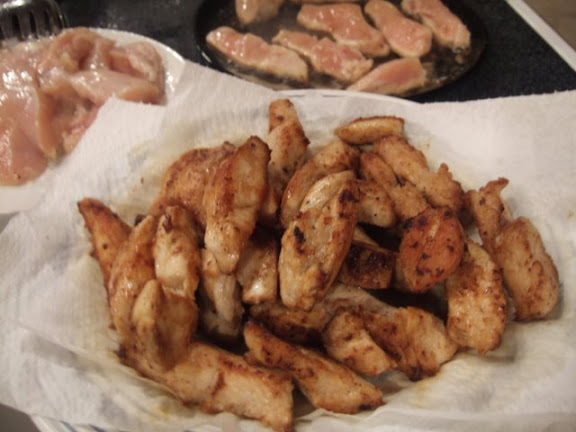
Butter Fried Chicken Strips

My husband loves this simple chicken dish. I first had it when we celebrated a family occasion at my sister-in-law's. She used several pans over several burners to cook all the pieces and serve them at the same time. My husband was so excited when he saw them cooking. So I had been cooking them from time to time since then, using chicken breasts, but I was not really satisfied with the bland taste of the meat until I experimented with brining the pieces first with a mixture of kosher salt and spices. I was in heaven when I bit! My husband noticed the flavor as well, and asked if I used garlic. I admitted, and I asked him if he did not like it. He said he liked the garlic flavor. Whether he really liked it or not (maybe he was just avoiding hurting my feeling?), if I ask him and he hinted approval, then that is how he will get the dish every time in the future. But then, I have had dishes that I modified and he frowned upon tasting the difference from previous, so I would take his word when he said he liked the garlic flavor of this.
For the brining solution, put simply, I use a 1:1 ratio for water and kosher salt. That is, 1 gallon of water to 1 cup of kosher salt. I love the effect of kosher salt. It just brings out a special flavor even in fried rice (if used in place of table salt). I adjust the ratio accordingly. I first learned brining when I had to host a Thanksgiving get-together, and I wanted flavor deep into the meat rather than just on the surface (like how my in-laws usually would have with their turkeys). Everyone loved the flavor of that turkey and my SIL even brought home some for sandwich the next day.

Ingredients:
2 lbs chicken breasts, cut into strips
1 stick butter

Brining solution:
1/4 cup of Kosher salt
1 quart (4 cups) of water
3 cloves garlic, crushed
freshly milled pepper (about 5 turns)
3 bay leaves

Procedure:
Brine the chicken pieces and let sit in the fridge for at least 3 hours.
Drain chicken pieces well.
Using a thick, preferably cast iron pan, melt butter in medium high heat (#6 with my stove). Once butter has clarified, pan fry the chicken pieces. Add more butter as necessary while you turn to cook other sides of the pieces. Drain on paper towels before serving. Serve with salad greens and mashed potatoes or fries.

Saturday, October 25, 2008

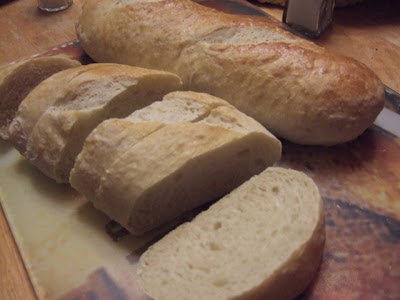
Rustic Italian Bread

I saw this on the packaging of Pillsbury Bread Flour

Type
Ingredients:
1 cup water heated to 100 F to 110 F
2 tbsp oilive oil
3 cups bread flour
2 tsp sugar
1/2 tsp salt
1 (1/4 oz) pkg active dry yeast
cornmeal
1 egg white, beaten

Directions:
Place all ingredients except cornmeal and egg white in bread machine pan according to manufacturer's direction. Process on dough setting.

Sprinkle ungreased cookie sheet with cornmeal. At end of dough cycle, remove dough from machine; place on lightly floured surface. Punch dough down (if dough is sticky, knead in additional flour before shaping.) Cover dough with clean cloth; let rest for 15 minutes. Shape dough into baguette-shaped loaf about 12 inches long. Place loaf on cornmeal-coated cookie sheet. Cover; let rise in warm place (80-85 F/ for 20-25 minutes or until light and doubled in size.
Heat oven to 375 F. With sharp knife, make 1 deep lengthwise slash in top of loaf. Brush loaf with egg white. Bake at 375 F for 25-30 minutes or until loaf sounds hollow when ligtly tapped.

Apple Crisp

One time, after baking two apple pies, I still had extra apples and I was kinda getting tired of making pies, so I searched for another apple recipe, and apple crisp was suggested by my older son, as they sometimes have this at school and likes it. I liked it too when I tried the outcome of the recipe below that I lifted from joyofbaking.com, although it was mainly the topping that I copied. The filling I prepared as I usually do for my apple pie . Hubby liked it as well, especially served while warm, with vanilla ice cream.


Ingredients:
Topping:
1/2 cup all purpose flour
1/4 cup granulated white sugar
1/4 cup light brown sugar
1/2 teaspoon ground cinnamon
1/4 teaspoon ground nutmeg
1/8 teaspoon salt
6 tablespoons unsalted butter, cut into pieces
1/3 cup old-fashioned rolled oats
1/3 cup chopped walnuts

Filling:
8 pcs of apples (I used Cortland) peeled, cored and sliced thinly
2 tablespoons lemon juice
1 cup sugar
1/4 cup all-purpose flour
1 tsp ground cinnamon
1/8 tsp ground nutmeg
1/8 tsp ground cardamom
1/8 tsp allspice
1/4 teaspoon salt

Procedure:


Preheat oven to 375 degrees F (190 degrees C) and place rack in the center of the oven. Butter or spray with a cooking spray, a 9 x 9 inch baking dish. Set aside.

For Topping: Place all the topping ingredients (flour, sugars, spices, butter, oats, and nuts) in a food processor and process until the mixture is crumbly (looks like coarse meal) and there are no large pieces of butter visible. (This can also be done with two knives or your fingertips.) Set aside while you prepare the filling.

For Filling: Place the apple slices in a large bowl. Toss with the lemon juice and the rest of the ingredients. Transfer to your prepared baking dish. Spread the topping evenly over the apples.

Bake for approximately 30-40 minutes or until bubbly and the topping is golden brown. Remove from oven and place on a wire rack to cool for about 30 minutes before serving.

Serve with softly whipped cream or vanilla ice cream. Refrigerate leftovers and reheat before serving.
Makes 4 servings

Friday, October 24, 2008

Lobster & Corn Chowder

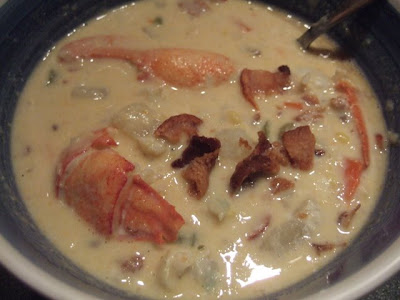
As I mentioned earlier, I used my leftover lobster meat for chowder (my favorite food to make with lobster heads and smaller claws).
From lobster chowder
But since this time I had 3 leftover whole lobsters (that is, after I made my lobster roll for lunch the next day), I had a total of almost 2 lbs meat, and the chowder I came up with was enough for supper, and even for breakfast (I myself brought a bowl to work that night).
I got the idea and tweaked some from the recipe at epicurious. The tweaking depended on what I had on hand, as usual.

Ingredients:
2 lbs leftover lobster meat (previously boiled)
8 slices of smoked pork fat back, pan fried until crispy (I used this in place of bacon)
2 medium potatoes, diced
2 medium carrots, diced (smaller than potatoes)
1 large onion, chopped
1 cup celery stalks, sliced into 1/8 inches
4 cups frozen and thawed sweet corn kernels (I had mine from my garden; feel free to use canned)
6 cups lobster broth (prepared day before))
1-1/2 cups heavy cream
6 tbsp sour cream
2 tbsp butter

Procedure:


Prepare lobster meat. Set aside in the fridge.

Purée 2 cups corn with 1 1/2 cups broth in processor until almost smooth.

Pan fry on medium heat the thin fat back slices (or bacon) until crisp. Place on paper towel to drain excess oil, crumble and set aside. Leave about 3 tbsp of oil drippings in the pan.

Cook partially the diced potatoes and corn. Doing this helps them retain their shape and prevents making them too starchy/pasty. Set aside.

Pour off and discard all but 3 tablespoons drippings from pot. Add onions to pot; sauté until light golden, about 5 minutes. Add potatoes, carrots, and celery; sauté until vegetables soften slightly, about 2 minutes. Add broth; simmer 10 minutes. Stir in corn puré, corn kernels and heavy cream; simmer 5 minutes. Season with salt and pepper. Remove soup from heat; stir in sour cream.

Melt butter in medium nonstick skillet over medium heat. Add lobster meat and sauté just until heated through, about 2 minutes. Ladle soup into bowls. Garnish each serving with lobster pieces, crispy fat back (or bacon bits) and serve.


Thursday, October 23, 2008

Olive Garden Salad Dressing

Type your summary here

1/2 C. Mayonnaise
1/3 C. White Vinegar
1 tsp. Vegetable Oil
2 Tbsp. Corn Syrup
2 Tbsp. Parmesan Cheese
2 Tbsp. Romano Cheese
1/4 tsp. Garlic Salt - or one clove garlic minced
1/2 tsp. Italian Seasoning
1/2 tsp. Parsley Flakes
1 Tbsp. Lemon Juice

Olive Garden Salad Mix

Methods/steps

Mix all ingredients in a blender until well mixed. If this is a little to tart for your own personal tastes please add a little extra sugar.

From copykat.com


Wednesday, October 22, 2008

Lobster Rolls

Last Sunday night we ate the lobsters with my favorite tender rolls, pandelimon. While traditionally, lobster rolls use the typical hotdog buns, I used leftovers of both lobsters and pandelimon to make myself some "lobster rolls" for lunch the next day. Pictured here are two of them (I already ate the first one).

How to:

Slice horizontally and place your rolls in oven toaster at 350 F for about 3-5 minutes. Meanwhile, cut the lobster meat into bite-size pieces, sprinkle with some (real) lemon juice (probably 1/2 tsp), add a dash of salt and pepper (I used Kosher salt and freshly milled pepper). One whole lobster can make 4 of these (or two using hotdog rolls). I was only able to eat 3 as I was stuffed! I saved the remaining lobster filling for later when my sons came home. The first one to see it got to eat it, who happened to be my older son. He loved it! He said, "Now I know how lobster rolls are made!" I did not really know the exact recipe for that, and I just went ahead with my insticts, but it made me try to search for recipes, and what I saw were the same ingredients. I should learn to trust my instincts...


Posted by Picasa

Tuesday, October 21, 2008

Lobster Dinner

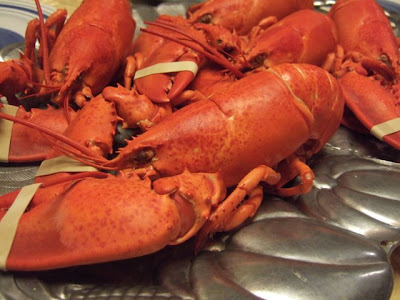
I have posted sometime in the past that our family traditionally has lobster dinner at Boothbay Harbor during summer. Well, we usually do that once a year, since the trip is quite a long one. However, last week, one of my neighbors asked me if I wanted to order some, as her oldest son was going to catch some lobsters. He would set the traps Wednesday and haul them Sunday. He would be back around noontime. At $5 apiece, one lobster weighed around 1.5 lbs. That was super cheap!!! We were scheduled to go leaf peeping (quite late) that day, but I ordered some for me (15 pieces) and asked my friend Ana and my SIL. We ordered a total of 37, and got them as soon as we were back home. I invited my MIL and FIL to have supper with us that night.
From lobster dinner


My in-laws were delighted, of course! Except for my hubby (who never liked lobsters) and daughter (allergic to most seafoods), we were all heartily stuffed that night with this rare (and often expensive) treat. My husband and daughter ate Italian sandwiches. We had melted butter (for FIL and MIL), mayonnaise (MIL), and a mixture of lemon, butter, salt and pepper (for my sons and I). My sons ate these with rice. The rest of us ate pandelimon rolls as starch source. I prepared the leftovers as lobster roll and lobster and corn chowder (upcoming posts).

Things I learned while we were waiting for the lobsters to cook:
1. Never cook a dead lobster. It could make you wicked sick and may even be fatal. Cook only those that are still alive. Chuck the dead ones.
2. Do not eat the greenish part of the lobster. That is the liver and is loaded with mercury.
3. Better to cook them all at once than freeze to cook later.
4. Have water boil first before putting in the lobsters. Once water re-boils, time cooking for 20 minutes.

Sunday, October 19, 2008

Best-Ever Chocolate Fudge Layer Cake

Since having worked as an RN, I have become increasingly reliant on mixes, but I did not particularly like the generic taste of boxed cake mixes. I want my birthday cakes to still have a special taste to it that makes it like I had a special touch. Well, Kraft Foods' food & family magazine I referred to in an earlier post has several wonderful recipes that combine a lot of those mixes and ready-to-use kitchen helpers (like the frozen whipped cream), and the outcome is usually so out of this world! This chocolate cake is now my signature birthday cake for the chocoholics in our family (especially my husband). Rich, but not overly rich, with the right moistness that makes us savor every bite and want more. This cake is gone quickly.
Ingredients:

1 pkg. (8 squares) BAKER'S Semi-Sweet Chocolate, divided
1 pkg. (2-layer size) chocolate cake mix
1 pkg. (4-serving size) JELL-O Chocolate Instant Pudding
4 eggs
1 cup BREAKSTONE'S or KNUDSEN Sour Cream
1/2 cup oil
1/2 cup water
1 tub (8 oz.) frozen COOL WHIP Whipped Topping
2 Tbsp. PLANTERS Sliced Almonds

Procedure:

PREHEAT oven to 350°F. Grease two 9-inch round baking pans. Chop 2 of the chocolate squares; set aside. Beat cake mix, dry pudding mix, eggs, sour cream, oil and water in large bowl with electric mixer on low speed just until moistened. Beat on medium speed 2 min. Stir in chopped chocolate. Spoon into prepared pans.

BAKE 30 to 35 min. or until wooden toothpick inserted in centers comes out clean. Cool in pans on wire racks 10 min. Loosen cakes from sides of pans. Invert onto racks; gently remove pans. Cool cakes completely.

PLACE frozen whipped topping and remaining 6 chocolate squares in microwaveable bowl. Microwave on HIGH 1-1/2 min. or until chocolate is completely melted and mixture is smooth, stirring after 1 min. Let stand 15 min. to thicken. Place one cake layer on serving plate; top with one-fourth of the chocolate mixture and second cake layer. Spread top and side with remaining chocolate mixture. Garnish with almonds. Store leftovers in refrigerator.

See the kraftfoods recipe webpage here.
Posted by Picasa

Monday, October 13, 2008

Chocolate Molten Lava Cake

From Molten Lava Cake
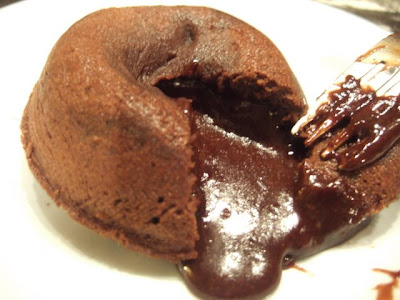
Everyone in our family loves chocolate cakes. I have been seeing photos of this cake in the King Arthur Flour catalog that I always get. They sell the mix and the silicone cups to bake these with. They look so good, but I did not want the extra expense of a shipping charge. One time I was intrigued by the Betty Crocker chocolate molten lava cake mix, which I tried. Something in what I did went wrong, and I did not get the desired result. In any case, it was disheartening, and I never tried that mix again...

Then I saw a recipe in Kraft's Food and Family (free) magazine, and at the time I had all the ingredients on hand. I decided to give it a try and made 6...we were hooked!!! The recipe is good for 4 cups, so if you want to make more, adjust the proportions accordingly.

The recipe can be found here along with a how-to video. If you want to receive such magazines for free, just sign up in their webpage.

To make sure I will not lose this recipe, I have included the recipe here, as adjusted accordingly:


Ingredients:

6 squares BAKER'S Semi-Sweet Chocolate
3/4 cup (1-1/2 stick) butter
1-1/2 cups powdered sugar
3 eggs
3 egg yolks
9 Tbsp. flour
3/4 cup thawed COOL WHIP Whipped Topping

Procedure:

PREHEAT oven to 425°F. Butter four 3/4-cup custard cups or soufflé dishes. Place on baking sheet.

MICROWAVE chocolate and butter in large microwaveable bowl on HIGH 1 min. or until butter is melted. Stir with wire whisk until chocolate is completely melted. Stir in sugar until well blended. Blend in eggs and egg yolks with wire whisk. Stir in flour. Divide batter among prepared custard cups.

BAKE 13 to 14 min. or until sides are firm but centers are soft. Let stand 1 min. Carefully run small knife around cakes to loosen. Invert cakes onto dessert dishes. Serve immediately, topped with whipped topping.

UPDATE: This chocolate molten lava cake was tried and posted about by Zee, complete with her rave review and a beautiful photo.

BM French Bread

Taken from Taste Of Home's website, this was recommended to me by a co-worker. I just changed the yeast from active dry yeast to bread machine yeast. Husband raved about it! We all loved it!

From french bread (BM)


Ingredients:

1-1/4 cups water (70° to 80°)
2 teaspoons sugar
1 teaspoon salt
3-1/2 cups bread flour
1-1/2 teaspoons bread machine yeast
1 tablespoon cornmeal

GLAZE:
1 eggwhite (I had leftover eggwhites, which I used instead of whole egg in the orig recipe)
1 tablespoon water


Directions:
In bread machine pan, place the first five ingredients in the order suggested by the manufacturer. Select dough setting (check dough after 5 minutes of mixing; add 1 to 2 tablespoons of water or flour if needed).
When cycle is completed, turn dough onto a lightly floured surface. Divide in half. Roll each portion into a 10-in. x 8-in. rectangle. Roll up jelly-roll style, starting with a long side; pinch seams to seal.
Sprinkle a greased baking sheet with cornmeal; place loaves seam side down on prepared pan. Cover and let rise in a warm place until doubled, about 20 minutes.
Whisk eggwhite and water; brush over loaves. With a sharp knife, make four shallow slashes across the top of each loaf. Sprinkle with sesame seeds if desired. Bake at 375° for 20-25 minutes or until golden brown. Cool on wire racks. Yield: 2 loaves (16 slices each).

Sunday, October 12, 2008

Beef Pares with an Apple Twist

From 10-06-08 dinner

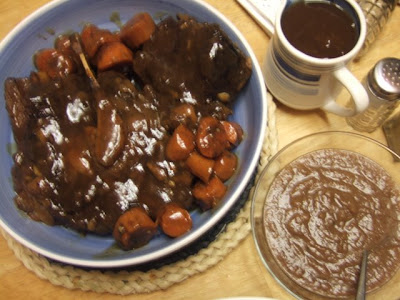
I used the Beef Pares recipe, and added carrots and ginger (per comment of one who tried adding these to my recipe), then instead of using frozen beef broth to top the chuck roast (to avoid drying it up), I used half of the apples I usually use for an apple pie, mixed with the usual spices cinnamon, nutmeg, allspice and ground cloves.


When cooked, I placed the apples in a bowl first and mashed with a fork. Then I strained the sauce (separating the spaces and carrots in the process), then thickened and finalized the gravy the usual way. Then I mixed some of the gravy with the mashed apples, tasted it and adjusted by adding some soy sauce as needed. The resulting applesauce was yummmmmylicious! Hubby liked it as well! (He usually does not use the sauce of beef pares; he likes savoring the flavor infused in the meat itself.)

Then we had very little leftover. At first I was considering making beef asado roll but since I did not have enough meat mixed with remaining applesauce, I decided to use it for fried rice (I had plenty of gravy remaining, perfect for flavoring the rice!)

Saturday, October 11, 2008

Menu for Supper of 10/10/08

Usually after working straight for 3 nights (which usually means quick-fix or TV dinners) and sleeping most of my first day off, I get into a cooking fever the following day. Our supper that day (10/10/08) was a whole-day affair for me. Hubby, starved after working 10 hours that day, said it was supper worth working for...("And what work will you do for me, Honey?"...He gave me a naughty smile...)

We had Beef Pares with an Apple Twist, Mashed Potatoes, Steamed Brocolli, French Bread


and Molten Lava Cake


Recipes to follow...
Posted by Picasa

Thursday, October 02, 2008

Maple Syrup Making

Have you tasted real maple syrup??? We love them, but oddly, my stepdaughter prefers the fake syrup.

My in-laws usually tap maple trees around the month of February to start collecting the clear sap into buckets that will later on be boiled to reduce into what we commonly know as maple syrup.


Any Filipino exposed to the Western influence knows about pancakes and waffles eaten with syrup (usually karo, made with high-fructose corn), but usually do not have a clue that there is such a thing as real maple syrup, and that this is derived from trees! (One of my friends sent me a message telling me that after he saw a webpage I made during the pre-blogger times.)

See more of how maple syrup is prepared on the slideshow below.

A good resource in making your own is found here.
Custom Search