Showing posts with label Lasang Pinoy. Show all posts

Wednesday, November 01, 2006

Fish Lumpia

Still on LP's theme, I have here leftover tilapia from a lunchdate with our barkada here. It was a large one, that I had more than 1 cup of flaked fish meat to make into fish lumpia. I was first introduced into fish lumpia by the "balae" of my previous MIL. I liked it so much that I asked how she made it. She said she would buy "galunggong" and steam them then flake the flesh, mix with chopped green/snap/"baguio" beans, carrots, onions, garlic, egg, salt and pepper. Now whenever I have leftover grilled fish, I do the same thing. A nice surprise was when hubby expressed liking it (yes, he did try without me asking him to!).


INGREDIENTS (amounts stated are only approximations):


1 cup flaked cooked fish meat


Chop together then squeeze out excess fluid using flour sack:

1 medium carrot

1 medium onion

2 cloves garlic

handful of (leaftover) green peas

handful of (leftover) grated mozzarella cheese (Of course the ingredients here depend on the availability of veggies and the cook's imagination!)


1 egg

salt and pepper to taste


lumpia wrappers (I like best the TYJ spring roll wrapper)

1 tbsp cornstarch dissolved in 1/4 cup water for making paste


PROCEDURE:

Mix everything together after squeezing out excess fluid of veggies. Prepare cornstarch paste: Mix cornstarch with cold water, microwave for 30 seconds, stir, then microwave again for 30 sec or less, watching closely until you achieve the desired consistency (should be fluid enough to easily brush it onto the wrapper). You may have to add some more water to thin it. This is a cheaper alternative than using egg as sealant. Place about 1 to 1-1/2 tbsp of filling at the center of the wrapper to form a log. Fold over one end then roll tightly. Brush CS paste on the corners to create a good seal. I froze these until two days later when I had visiting friends. While thawing them, I cut them into three parts each and heated about 2 cups of oil on high in a wok. I did not wait for these to thaw completely; I just went ahead and fried them until golden brown (about 5 minutes). Drain on paper towels and serve while still warm (fried lumpia tend to get soggy and chewy when it has cooled down completely). I served these finger foods with Jufran sweet chili sauce (hubby's favorite dip for chicken nuggets).


This time, there were no leftovers!


Thanks to mikemina for hosting this month's

Sunday, October 29, 2006

Pandelimon de Patatas

This month, the LP 15 is entitled "Recycled, Reloaded." Very appropriate for the culture who "waste not, want not." Visions of my recycled foods come into mind, both for re-cooking and for other valuable uses to lessen my contribution to the waste dump. How do I recycle foods? Let me count my ways.


First off, if I can freeze them, I do them in servings of one for quick lunch fix at times I am alone (or for my son who craves for heavy merienda). If I have leftover Korean beef and mashed potatoes or rice, or kare-kare with rice, or adobo with rice, I place them in a foil-lined small loaf pan and wrap, then freeze without the pan. I reheat these in oven toaster for 30 minutes at 350 deg prior to eating.


Second, I "remodel" some grilled or slow cooked meaty dishes to come up with new ones. Pancit, chicken empanada, chicken-veggie egg drop soup, chicken sopas and chicken mami noodles come to mind when I have leftover roasted chicken; special fried rice and ham-veggie omellet when I have leftover veggies and ham; beef siopao and asado roll when I have leftover beef pares; and fish lumpia, escabeche, sarsiado, or dinengdeng when I have leftover grilled/fried fish.


Third, I turn my old bread slices into bread pudding, french toast, biscocho or bread crumbs.


Fourth, I may not re-cook them. All biodegradable scraps (veggie peelings, seeds, or bones) and leftover I produce from my kitchen either go to chicken food bucket (goes to my MIL) or to my compost bucket (goes under the garden dirt). I do not consider them "waste" at all.


That said, I have tons of recipes in mind for this round of LP hosted by Lafang. But I do not have the luxury of time to post the recipes, or I might have posted about them in past entries, and I do not want to be redundant. Hence, I have decided to post two of them: Pandelimon de Patatas is my first entry. The next post will be Fish Lumpia.


I do not claim originality for this recipe. It so happened that in my wish to make use of leftover boiled potatoes, I looked for recipes for rolls/breads making use of them, as usual, from my fave bread machine recipe source, breadworld.com. I found Potato Dinner Rolls. After it was baked, it reminded me so much of pandelimon; hence , the name I gave it. I just omitted the egg glaze. I can't give you the link to the bread machine recipe because they seem to have deleted that and replaced with the conventional method (that is the link I used). Here is the bread machine version, edited by yours truly. The first time I made it, the dough was too sticky to form into balls. So on my second time (I baked again per husband's and son's request), I added more flour while the BM was kneading, and it solved my problem).


INGREDIENTS:


1 / 2 cup milk

1 / 4 cup potato water

1 / 2 cup boiled and mashed potato

1 / 4 cup butter or margarine

1 large egg

1-1/2 teaspoons salt

3 cups bread flour + 2-3 tbsp while kneading

1/4 cup sugar

2 tsp Fleischmann's bread machine yeast


DIRECTIONS:


Mix the milk, potato water and mashed potatoes and heat in the microwave for 30 seconds or so. Add the butter and egg, beat to mix then check temperature. It should be between 70-80 deg F (room temp). Pour into the bread machine pan. Add the dry ingredients. Set at dough cycle. after about 10 minutes, start adding flour gradually so that the dough is not too sticky (try to poke from time to time with fingers). It should appear relatively smooth and moist, not wet and flaky. The kneading ends on the 30th minute, then it rises for 1 hr.


Transfer the dough on a lightly floured surface (it will shrink). Divide dough into 15 equal portions (around 2 ounces if you are using a scale); form into smooth balls (sprinkle with some flour again as you get a new ball. Shaping this takes practice. The surface should not be too floury or you won't shape effectively, but must not have too little flour so that it becomes sticky and the surface of ball appears very rough). Arrange balls in parchment paper-lined baking pan as shown in the slide. Cover with damp flour sack in a draft-free place until doubled in size, about 1 hour.


Bake at 375oF for 15-20 minutes or until done. Remove from pan and serve hot; cool on wire rack completely then place in ziploc those you will not consume right away. Very good as chicken sandwich or toasted with cheese on top.


Announcement: Breadworld has a bread brigade movement. If you are in the US or Canada and a baking-with-yeast enthusiast like me, join for free recipes and coupons.


LP 15 entry

Saturday, September 30, 2006

LP 14: A La Espanyola - Panaderia

Panaderia (bakery), pan de sal (personal bread), pan de coco (bread with coconut), horno (oven), panadero (baker) -- these are all Spanish terms that we have incorporated into our Filipino language. Among the Spanish influences on Filipino foods, the yeast rolls have touched my life the greatest. (The influence on cooking, save for adobo, arroz caldo, and the usual guisado's, came at a much later time of my life, when I was already exposed to my classmates' and friends, and carinderia's dishes such as menudo, mechado, afritada, callos, caldereta, paella, etc.)

My father started "working" in Metro Manila (having come from Cagayan in northern Philippines) as a tricycle driver during the day, and his sideline was to deliver hot pan de sal every morning to houses in the neighborhood in the town of Bagong Pagasa, Quezon City. The panaderia was situated near the church (Our Lady of Hope Parish) and had the old-fashioned brick oven, with a small hole that would only allow the panadero to maneuver his paddle in moving the pans inside. My father would observe then to learn about baking, and dreamed of putting up his own one day. With his income then just being a tricycle driver, he was able to buy one modern commercial oven (the metal kind) that would hold, if I remember it right, 16 baking pans at a time, and some basic baking tools. He was the panadero who prepared the dough, and the rest of the family helped in shaping the dough and laying them on the pans and arranging them on layered shelves for rising, then my father would bake them. I got so adept at shaping balls, that it was common for us siblings to have a contest as to who would make the smoothest one. Of course, my brother (oldest) was the best. And he was also the only child privileged with mastering the skill of shaping the ensaymada and Spanish bread.

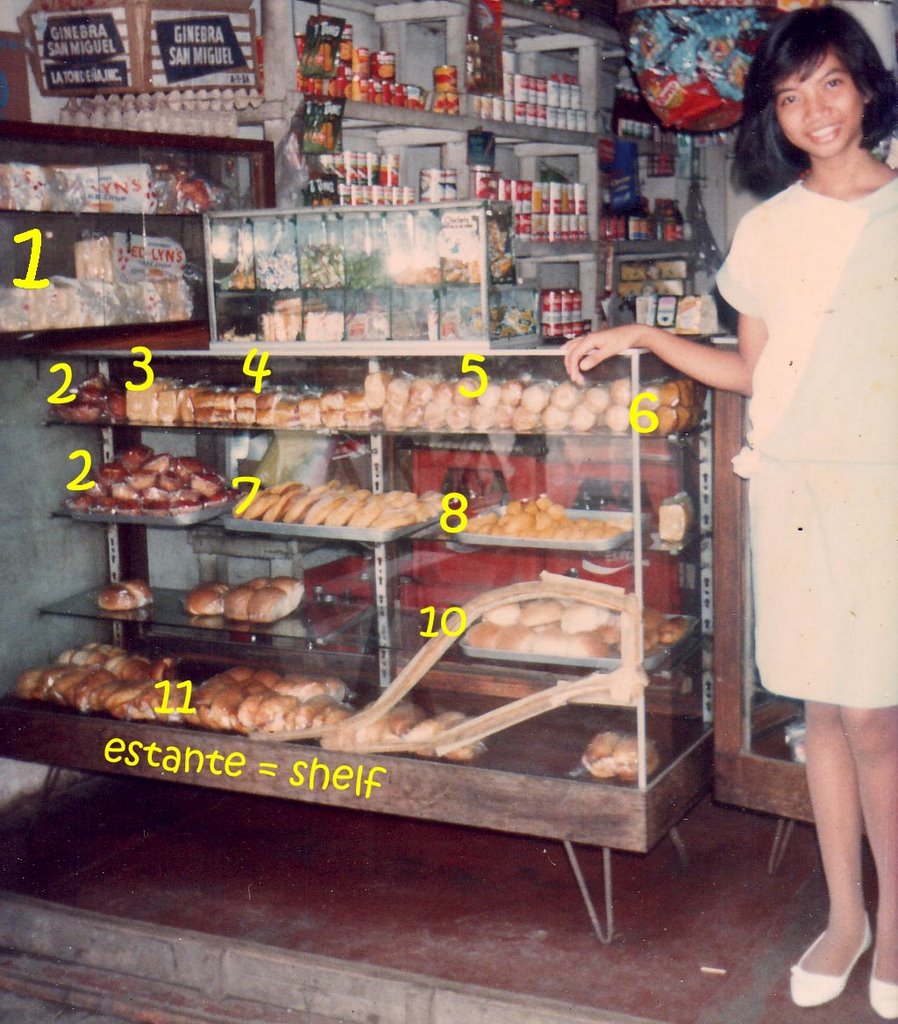
The demand for pan de sal was so great that time, that my father was able to raise some more money to buy additional equipment like a kneading machine with attachment for making breadcrumbs and a slicer to make "Tasty" [1] (equivalent of pan americano); get more ingredients; rent two units of an apartment 3 blocks away from where we actually lived; get another oven; hire more panaderos, and add some more items like pan de coco[5] and pandelimon[unnumbered in the pic] (the latter I am not sure whether it is of Spanish influence, but it is the equivalent of burger buns), then later Spanish bread[11], pudding (from old breads), pan de regla(?) [4](the one with red filling), pianono (this is a muffin batter baked like jelly rolls with sweet filling then sprinkled on top with sugar; one of my favorites), kababayan [6] (one type of muffins), our version of cheesecake [2] (which is actually ordinary muffin with grated cheddar cheese on top), ensaymada [7], monay [10] (very compact and delicious, this is made by kneading very well using the kneading machine; and the big sliced ones were also among my favorite, even plain), biscocho, patigas (a very compact white yeast roll with a crown brushed with eggwash and sprinkled with sugar), banana [9] (biscotti-shaped but nothing like it), hopiang baboy (which did not really contain any pork; just lots of onions sauteed in oil), and some other items which I cannot remember at this moment. My mother took some baking lessons to learn some special pan de sal recipe that contained more eggs, also to bake cakes such as custard cake and egg pie which are another favorites of mine. The problems was, she was not that interested, so that it was a short-lived endeavor on her part, and even if I ask her now, she cannot remember the recipes. She was more interested in sewing curtains and couch covers. (That is me on the picture when I was about age 16. The estante was all worn out by then, that's why it had those cracks. The part of the estante which had lots of space was waiting for some newly baked goods to be placed there. Notice that the pan holding the ensaymada was full; that means the ensaymada was newly baked and placed in the estante. Tip to those who like buying from the neighborhood bakery: choose the pans which are full, and point the ones you like. The store owners usually place the previous day's leftover, if any, on top of the newly baked ones.)

Pan de sal making was started around 2:00 in the morning to make available to consumers as early as 4:30. All the non-yeast dough would be made during the morning from 7:00, then the other yeast doughs would follow. There would be a (smaller) second dough-making for pan de sal that would start at around 7 pm, to be available for those who like midnight snacks, and for packing in cellophane by the dozens for those families who want (cold but soft) pan de sal delivered to their houses early the next morning. (My father is an amicable person and had made friends with some tricycle passengers to whom he offered the delivery service. Thanks to the oven toaster, families could simply reheat the packed pan de sal, sometimes with their favorite cheese or mayonnaise on it.)

On making pan de sal, we had a mini-boat for mixing yeast doughs then, and our panaderos were so muscular (they could compete for bodybuilding contests) because of the extreme work-out of kneading the big doughs, as big as 4 pillows combined, which they would lay on top of a dining table (for 6) that was modified by adding a sheet of aluminum on top, and the dough would be covered with plastic, and later on would be doubled in size almost as wide as the whole surface of the table. Towards the end of this first rising, some small bubbles would form on the dough that we kids would playfully pop. Of course, my father would castigate us when doing so, afraid to disturb the yeast cells in doing their job and might end up giving us flat breads. Bad for business. While waiting, we would apply thin coat of vegetable lard (shortening) on the pans. The other panaderos would take care of cleaning the equipment or washing their laundry and their aprons (made of flour sacks). Some take the time to nap.

The busiest time of the day was around 3:00 in the afternoon. Come time for shaping the dough, we would gather at the sides of the table. My brother (or another panadero) would use a metal dough cutter to cut long portions from the big dough, then form these portions into a log, in the process creating the same effect as "punching" the dough down. The log formed would be compact and soft, then we would roll these on a pan of breadcrumbs, then lay side by side in wooden "pans" (rectangular flat crates about 4 feet long by 2 feet wide and 4 inches deep) and let them rise as we try to finish the rest. Once done with log-making, we would get the first batches, and my brother (or the panadero) would use the wooden dough cutter to cut the logs into 1 to 1-1/2 inches portions, throw these pieces our way on to a pan of breadcrumbs, and we smaller kids would roll these pieces to coat all sides with breadcrumbs, then lay on the flat baking pans diagonally as 6x4 (so 24 pieces per pan), carefully carry the pan toward the shelf and let it rest there for at least 30 minutes (actually while working on the rest of the dough) before baking. (I tried to copy this method now that I am here in the US; see this page for step-by-step photos, using a bread machine recipe for the dough. I blogged about it in my old kusina with a poem inspired by the smell of the dough as it was rising inside the bread machine.) One of the reasons why pan de sal are so spongy is the time of rising. When you make and bake more, the longer the last batches have for rising, and the more airy it becomes. If it sits too long before entering the oven, the result is a somewhat dry, airy, sponge-like bread. So the best batches would be the first 3/4. It is not because the panaderos want to make it appear bigger to justify the cost, for the information of those of you who look at it that way. They usually weigh the first cut portion then approximate the rest by comparing sizes as they proceed with cutting, checking along the way if they are still maintaining the right weight. These panaderos are so skilled that they usually do not need to weigh at all.

I loved the hustle during the early morning hours when neighbors would troop to buy our freshly baked pan de sal, usually with Dari Creme or (my favorite) Reno liver spread. During school days, I would usually have these for my breakfast, especially when we had no maids. I particularly enjoyed the early mornings during misa de gallo, because then more people would make that trip to buy hot pan de sal, and usually at an earlier time of 4:00 in the morning.

Our bakery plus store was a good income source for us, and while we were not rich, we were not deprived; we lived comfortably...until SM city was built, and Goldilocks was there, plus some more baked goods in the grocery shelves, then the SuperSale was born, not to mention the sudden abundance of other neighborhood bakeries. We strived to keep our bakery going. It is rather the same with Wal-Mart versus small town stores. My brother later got a job as a baker in a Japanese-owned outlet in MegaMall, and the rest of us were already in college, so my father was left struggling to keep the bakery going. I sold some baked goods in my Medicine days by using hotdogs as fillings for the Spanish bread dough, Argentina corned beef with onions instead of coconut for pan de coco dough, and also by making chicken and ham sandwiches.

The competition was so great, that my father would often have lots of returned old breads, usually already moldy and not fit for making bread pudding. He resorted to using potassium bromate for what he thought not only prolonged the shelf life but also improved the texture and the taste (cheese-like), but it was later banned because it was found to be carcinogenic (read more here). So even before I left PI, our bakery had stopped operating. It was a sad and gradual event for us, which affected my father greatly. I often would see him lying on the bed, staring at the ceiling, and would sometimes voice regret that my brother did not support him in continuing the business...I felt that part of the problem could be blamed in not teaching us GIRLS to do at least small scale baking (my brother learned all the recipes down to baking per se; we girls only helped shape the dough and place them on pans), but then we had no small oven (which was not uncommon for the typical Filipino family). And I thought then that the heavy workload and the huge machineries and ovens were meant for men. Ironically, when I recently talked to my younger son about how I plan to teach them how to make yeast rolls, he said, "But that's for girls!" My quick reply was, "Annnoooo? Hindi ah!" (What? Of course not!) And I told him the above story, then thought of posting about it here as my entry for the LP 14.

Now that I am here in the US, I am trying to copy those goodies (especially the yeast rolls) and come up with my own baked goods using non-commercial (aka homemade) recipes and ingredients for family consumption (as in, I avoid leftovers) -- e.g., butter instead of margarine or shortening, real pork lard whenever I can have it instead of shortening, lots of eggs depending on the recipe, milk instead of water (also depending on the recipe), buttermilk, sour dough, potatoes and other new ingredients, and NO PRESERVATIVES (I do not let them go beyond 3 days as that would be inviting molds. For those of you who like buying breads from the grocery stores because "they last longer," think again...). While I seldom bother to ask for the recipes my father and brother had for those rolls and buns I grew up with, I do experiment with different recipes online and from books/co-foodbloggers and choose which ones I will use to make my version of pan de sal, pan de coco, ensaymada, etc., and modify accordingly, then I post them here in my foodblog as I learn, in an attempt to chronicle for my children's sake, and to share with other Filipina expats who may be interested. And as my own addition to the usual yeast rolls I had as a child, I am adding to my collection my own versions of other breads/rolls that I had in PI such the siopao, chicken or beef filled bread like beef asado roll (the pocket version of which I used to buy in Goldilocks for heavy merienda back in those times).

I am thankful to the Spaniards for introducing to the Filipino community (I presume it was their legacy to us) the PANADERIA.

Entry to Lasang Pinoy 14 hosted by purplegirl.

Thursday, September 07, 2006

Lasang Pinoy 1st year Anniversary

The theme is to come up with Filipino dish(es) that define(s) what being a Pinoy is all about. With the dishes I am presenting here, I am defining what being Pinoy is all about by generalizing that:

Filipinos who grew up in PI are usually raised to avoid waste.

I remember when I was still a child and in those times when I could not finish my food, my parents (or aunts, or yaya) would often go on guilt-tripping by telling me to think of those hungry children in Africa, or even the streetchildren in PI roaming the streets and scavenging for food, and to be thankful that we had something to eat at least 3 x a day, and that the best way to show appreciation is to not waste any...So I would gulp down the last spoonful of food on my plate although I was almost turning green from having had too much.

This kind of upbringing is reflected on the advertisement of Max's Fried Chicken that says "Sarap to the bones" (which is kinda the equivalent of A1 Steak Sauce's commercial where the consumer could not let the last drop be wasted). It is very usual for us Filipinos to scrape the meat completely off the bone.

This is also the reason why our street foods in the Philippines showcase not only meaty grilled/deep fried chicken thighs/legs, or pork, but also the isaw (both chicken and pork), adidas, cubed pork blood, chicken neck, deep fried small intestines with the intact mesentery (chicharong bulaklak), chicken head, pig ears, etc. And when we do cook fish, whether fried, steamed, grilled, boiled, or smoked, we do include the head. (Photo courtesy of Victor Paul Borg of fiery-foods.com)

A lot of Westerners shake their head that we eat such things, sometimes grossed out, but often feel sorry that we "had to make the most" of what we had because we "did not have plenty." What they do not realize is that, many of us have a choice and can afford to get the meaty parts instead of the "useless" parts. However, while we do have that choice, we have also developed the taste for these exotic dishes that we cook using the "rejects" (by the foreigners) and that we actually look for them. Now that a lot of us are scattered all over the world, we often would spend the money to get such items as frozen pork blood, pig head, etc., if at all we had access to these.

I consider myself lucky in that respect. Because while I am already here in rural Maine, my in-laws like raising chickens, pigs, and cattle (they find the grocery-sold hard to take). Every year we have one cow slaughtered, they have several chickens, and at least one pig chopped up and frozen immediately for a whole year's supply (I would like to learn from them in the near future how to raise these animals). After knowing what I was "willing" to take home what they can't consume yet do not wan't to waste as much as possible, I am now the regular recipient of such parts, so that I get the chance to try cooking exotic delicacies (which I previously just bought when I was still living in PI), and I am also coming up with new westernized dishes using them.

So, let me re-phrase what to me defines being a Filipino when it comes to food: Nothing is wasted.

While Market Manila shows the items typically found in a Filipino pantry, I am showing here what I tend to stock in my freezer to make use of these "rejects" (rejected by the typical Westerner), and the dishes I come up with.

Due to my SIL's recent slaughtering of chickens for a whole year's supply, I now have these parts ( I did not ask for the intestines not because of embarrassment but because I dreaded the work that would be needed to prepare them, when it was most likely only me who will enjoy them):
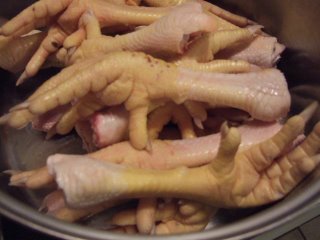
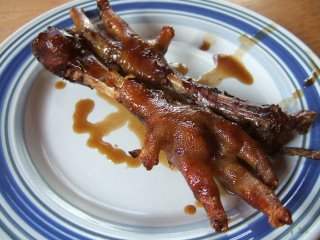
chicken feet, which I slowcooked adobo+pares style until almost fall-off-the-bone tender, then broiled. I had it for lunch today, and reminded me of those times when I, as a 4th grader, would walk home with my classmate, stopped by her house to have adidas for my merienda. (I will post later about how to clean them, for the benefit of those who have access to them but do not know how to prepare them.)
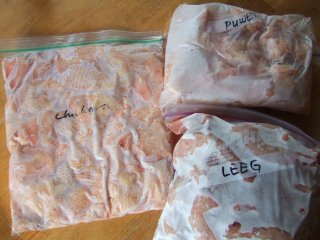


I froze these chicken skin (labeled chicharon, uncooked still), chicken neck (labeled leeg), and chicken a** (labeled puwet; I will grill these on skewers; they're my fave part in a roasted chicken, but I managed to keep it a secret from my husband up to now...shhh!). I had to label them in Tagalog so as not to gross out my husband in case he happens to raid the freezer for an ice cream.
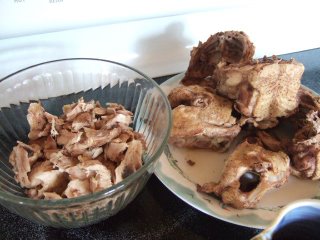
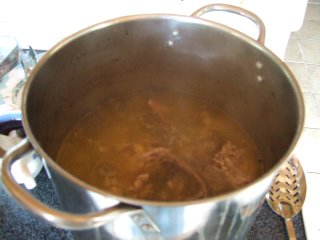


chicken backs (from those chickens my SIL cut up). I have boiled some of them here (seasoned with garlic, peppercorn, salt and pepper). I removed the meat that clung to the bones (in a bowl here, shredded) then placed the bones back to the pot to continue boiling for at least an hour to extract the flavor.


I can do a lot with the shredded meat and the stock. The following are things that I have made before, and again and again, not only today (for sauteeing as instructed below, use 1-2 tbsp oil, 2 cloves minced garlic, 1 medium sliced onion, 1 sliced medium tomato):
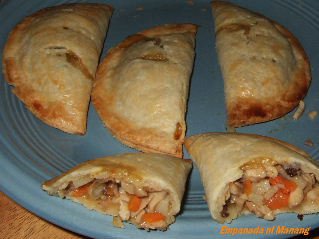
empanada


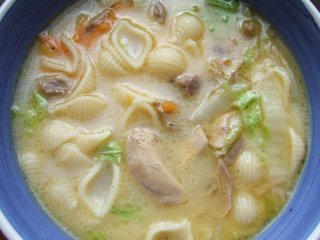
chicken sopas (I sometimes use leftover Mac & Cheese instead of shell macaroni because my husband and stepdaughter love M&C, so we tend to have leftover very often, but it seldom gets eaten when just reheated in the microwave, so this is one creative way to make use of that). Sautee garlic, onion, tomatoes and chicken shreds, add stock (4 cups), let boil, add the pasta (1/2 cup), add carrots, then add chinese cabbage. Season with salt and pepper. Turn off heat. Add some cream and stir.
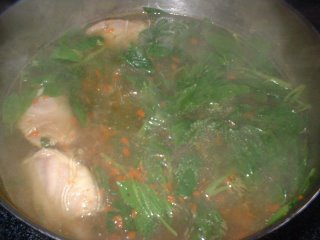


chicken sotanghon soup. Boil the stock with some chicken pieces. Add enough sotanghon (a small package for 2 quarts of broth) and cook until soft (about 2 minutes), add spinach (I used to use bittermelon leaves or thin slices of the fruit when I was in PI). Consume right away lest the noodles will soak up the soup.
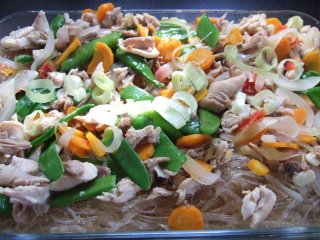


pancit sotanghon. Sautee, in order, garlic, onion, tomatoes, chicken pieces, carrots, pea pods, and bell peppers, add stock and let boil. Season with salt, pepper, and soy sauce. Add shrimp as desired and cook for 1 minute followed by greens to blanch (regular cabbage or chinese cabbage), dish out the ingredients and add sotanghon to the simmering stock (approximately 1 big package to 2 quarts broth). Let cook until tender (about 2 minutes). Place noodles onto a dish, drizzle with sesame oil and mix well, then top with the other ingredients. Serve with patis-mansi.
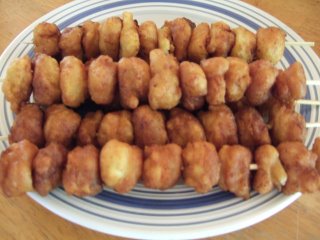


chicken balls (a variation of fish balls, homemade by making a batter with the finely chopped chicken meat, chopped carrots, onions, and garlic, using egg, flour, and milk, baking powder and baking soda, and seasoned with salt and pepper, then deep fried)
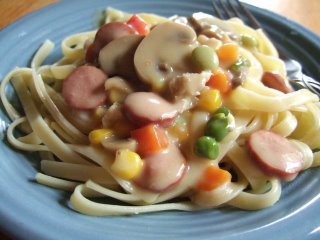


chicken fettuccine (adaptation of an Italian dish, but enriched with veggies as shown, so I have "Filipinized" it). Cook fettuccine according to package directions and drain. Meanwhil, sautee garlic, onion, chicken pieces, and optional mushroom, corn, carrots, and peas. Add 1 tbsp flour to the oil and stir to make a paste, then add stock in thin stream to make it creamy. Add (optional) thin slices of hotdogs. Serve atop pasta.
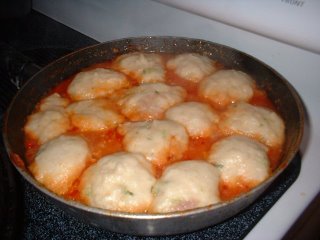


chicken dumplings (made with the same batter as chicken balls, only dropped in boiling stew of seasoned tomatoes; another adaptation). Prepare stewed tomatoes by sauteeing garlic, onion, and lots of peeled, cored, and chopped tomatoes (about 30 pieces medium, simmered then blenderized and simmered again. Add dried basil and oregano, salt and pepper to taste. Into the boiling stew, drop the batter by the teaspoon, with enough space in between. Cover and let simmer for about 5-10 minutes.)
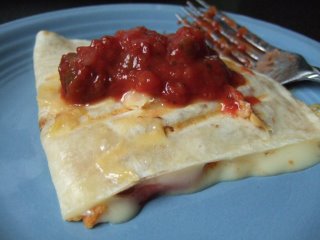


or as quesadilla. I now use the George Foreman grill to make individual servings of quesadilla. I like using lots of mozzarella cheese and American white cheese along with chopped bell peppers and onions, sandwiched by a folded flour tortilla and heated for about 7 minutes, the topped by homemade tomato salsa.


(added today, sep. 8)
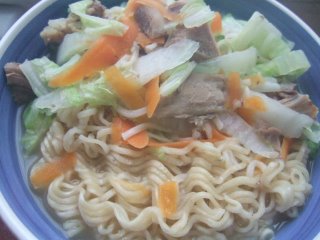
chicken mami. Boil the stock, add the mami noodles and cook for 3 minutes. Dish out the noodles, then add chicken pieces and sliced stems of chinese cabbage, let re-boil. Turn off the heat then add slices of the soft parts of the chinese cabbage and thin slices of carrots. Serve immediately.


Other uses: arroz caldo, chicken roll (sorry, no photo, but it is like making the usual dinner roll but using chicken mixed with cream of chicken soup or cream of mushroom as a filling; makes it like siopao but baked instead of steamed).

These are just some examples of the Filipino's no-waste attitude when it comes to food. I also have frozen pork blood in my kitchen, for what else but dinuguan.

Allow me to reiterate what to me defines being a Pinoy when it comes to food: The ability to come up with dishes utilizing all edible parts of the food so that NOTHING IS WASTED.

Saturday, June 24, 2006

Palitaw

This is my second entry for the LP 11.

Like I said in my most recent post, palitaw is one Filipino snack item that, as a child bored during summer, I learned to make through the recipe pages of Liwayway Magazine. I can't remember whose column it was, but I liked the recipes featured there. The original recipe called for galapong. I had no idea then what that was, but I asked my mother for money so I could try making this, and off I trekked to the wet market one sunny afternoon when most market vendors were taking their nap. Galapong turned out to be sticky rice soaked overnight (at least 8 hours), then ground as soon as there was a buyer. Once ground, it should be consumed immediately; otherwise it will spoil (panis). I have always loved to make this kakanin because of the ease of finding the ingredients and the simple process of making them. It was a bit of a challenge, though, now that I am here in the US. It took quite some time for me to finally come up with substitutes and the tools.

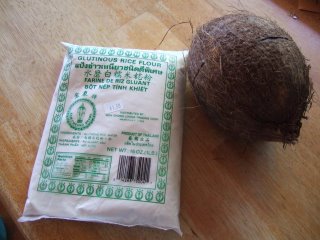
First, I tried to make my own galapong, but I did not know the proper proportion of water to rice, and my first attempt was not successful, I ended up throwing the rice. I was discouraged for a while, until I had an epiphany of using sticky rice flour and water instead! So now I had to start with these two basic ingredients: coconut and sticky sweet rice flour.

When it comes to the freshly grated coconut, I knew matured coconuts were available in Hannaford. I bought one several months ago and tried to grate that with fork. I got tired and swore 99% of the time. I did not want to do that again.

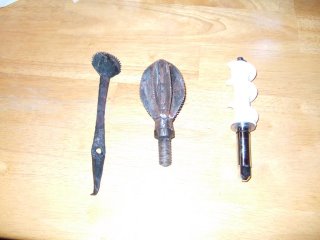
But when my friend Ana went on a vacation to the Philippines, I requested that she buy me a coconut grater. She did get me one for manual grating (left most in this photo), one as an attachment to a machine (middle one). I am hoping hubby could turn it like the Kitchen Aid attachment I have for grinding (right most). But until he could find the time to do that, I will content myself with the manual tool.

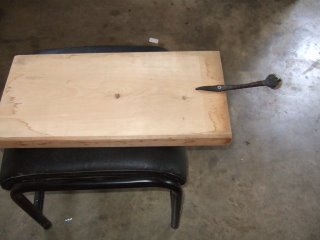
I attached it to a small piece of plank, which I could sit upon when placed on a bench or a chair or an ottoman.

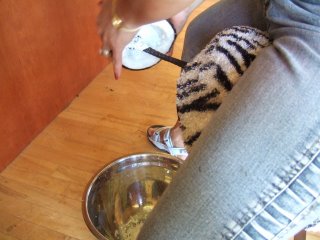
This is my friend Fe doing the grating when we had a lunch as a welcome to Ana.

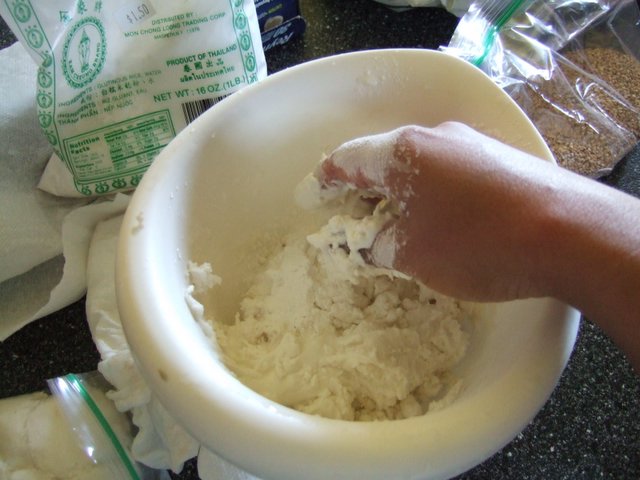
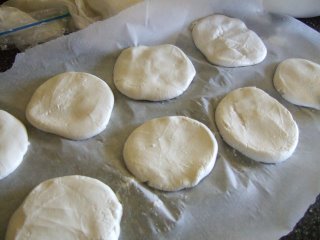
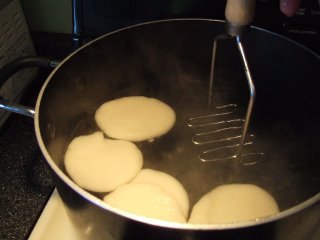
Now, going to the sticky rice patties, first, boil water in a big pot (wider than tall). While waiting for it to boil, prepare the patties by mixing cold water with some flour. I did it by approximating, I wanted to create a smooth dough, not mushy or super sticky, but not too dry. As soon as it is good to shape into balls, make the balls and flatten them into disks. Once the water is boiling briskly, drop these disks one by one, leaving enough space for each patty so they do not stick together.

Once they come up to the surface/float (lumitaw sa ibabaw - hence, the name "palitaw"), scoop them out and let the excess water drip.

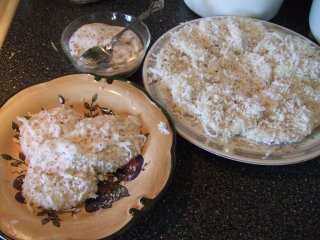
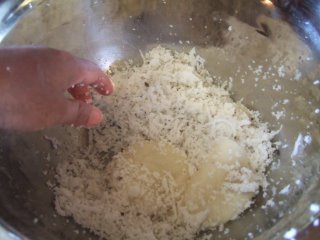
Roll each patty into the freshly grated coconut (I do not like using the dry coconut flakes), then lay on the plate, as illustrated in the first photo. Never add the sugar-sesame seed mixture as this will draw out the water and make it very wet, which will dissolve the sugar. Rather, serve the palitaw with the sugar-sesame in a separate bowl, to be added only once the palitaw pieces are on the eater's plate, to be consumed very soon.

How to prepare the sesame-sugar: toast/roast the sesame seeds (either white or brown are okay) on very low heat. If you are using the white, it will start popping, which heralds that it is almost ready. You must swirl or stir constantly so as not to burn. With the brown one, you just have to go by the smell. Let cool then add the sugar (1:1 proportion, or according to your preference).

I had enough leftover for each of the visitor to take home 3 pieces each (of course I had some too!) What to do with leftovers: Put in the fridge without the sugar-sesame. When you want to eat them, microwave for 30 seconds (if only one patty), then add the sugar-sesame.

My kids still have to develop the taste for this dessert/snack. I plan to serve this during Pinoys' Christmas get together or during my birthday to serve to my in-laws.

I would love to learn how to make pichi-pichi as well (another favorite of mine), and I hope someone can share the how-to's. Maybe it is already featured in past LPs. I gotta have the time to read them...

I also want to be able to find coconut juice (the real coconut juice, even if it is canned) with some young coconut bits so I can make buko-pandan ice candy or drink, and also buko-brown beans popsicle. Any such info?

UPDATE:
JMom posted an easy recipe on pichi-pichi (Yehey!!!), found here.

LP 11: Summertime Coolers and Memories of Summer


Wow! After a long hiatus from blogging, this is my first time to participate in the Lasang Pinoy Series. Thanks to JMom for the invitation.

As the title implies, it's about what I used to indulge in during those summers when I was younger (and now I am sharing with my children).

In the LP 10, it had the same theme, and Tina posted about the same thing I made last night and which I am posting about today -- ice candy. This is just one of those delicious and thirst-quenching ways by which Filipinos (kids especially) try to beat the summer heat.

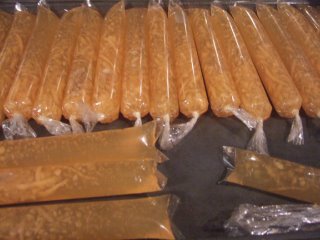
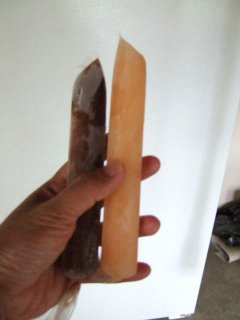
I made chocolate (using my untouched-for-months Nesquick) and melon. I have to share one technique that I have learned from I-can't-remember-who on how to make the ice candy (that's what we call the equivalent of icee or ice pops in the US) easy to bite (I still remember the first time I tried making ice candy, it was so hard that it was annoying to eat it!). It just involves boiling the water (that you are going to use for the mix) first then adding a little bit of cornstarch-water combination to the boiling water, like making it thick as in soups, but not too thick. Let's say for a big pot of boiling water, you add half a cup of cold water in which you have dissolved 2 tbsp of cornstarch. I have long been wondering about how it could bring about the desired effect, and in my "scientific" kuno mind, it seems that the complex starchy colloidal suspension hinders the lattice formation via the strong hydrogen bonds that form when water turns to ice, such that, instead of ice-like consistency of the ice candy, it becomes like packed snow. Once I mastered to do the trick, I even tried selling ice candies in our subdivision when I was in high school. Bad thing was, I did not use a tray, so the sticky substance oozed out of the plastic with small holes, that it stuck to the gadget of the freezer door, nasira!

Anyway, back to making my chocolate ice candy, I just poured Nesquick into 1 liter of the cooled-to-RT pre-boiled water, tasted as I went along, making it a bit sweeter than I could tolerate, because I had to add milk by taste, and of course, I had to provide allowance for the freezing. You know how ice makes sweet taste less sweet, and how heat tends to amplify the sweetness.

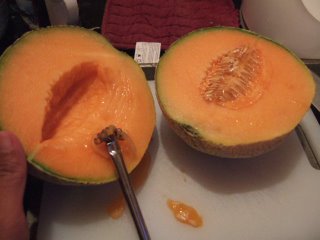
For melon, I did not add milk, because in recalling how chilled melon+condensed milk resulted in a bittery mettalic taste, I did not attempt to add milk here; just sugar. So, 1 liter of the same water, plus 1/4 melon processed in a blender, plus sugar to taste and a bit more, then I poured the whole thing into a bowl and added melon strips (kinayod).

After an hour, my younger son was eager to try it, but I could not give him any because it was not yet solid. I told him to wait til the next morning, which was today.

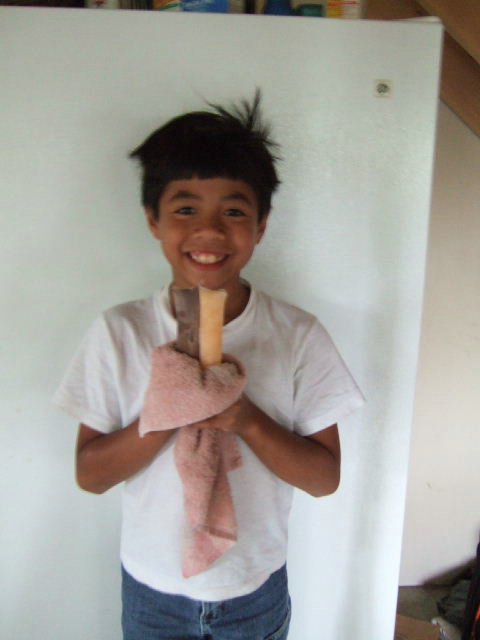
He woke up very early and asked for these ice candies first thing.

As you can very well see in the right photo, he still had that bed-head, but already was excited with the frozen goodies, and upon tasting, finally exclaimed, "Oh, I know these! I had these in the Philippines!"

Another memory from my childhood days is the Palitaw...it is one of those things I learned to make (experimented with) during the boring summer days, when I always looked for something to do aside from watching TV or reading or biking or trekking. But I will post on that next time (my photos are all ready).
Custom Search