Showing posts with label Pinoy. Show all posts

Saturday, April 03, 2010

Rice Puto


I would have said "Putong Puti" on the title, but because I used several flavorings to come up with bite-size puto to bring tomorrow to my SIL's for Easter celebration, these mini-puto have pastel colors,and will be the right way to Filipinize Easter, I would say!

I used rice flour (to save time), and added coconut milk instead of plain water just because I love the flavor imparted by it. I also added fresh pandan leaves to the boiling water for additional flavor.

My kids liked them, tasting each and seeing which flavor they liked best. Hubby was likewise delighted.

I also experimented with using additional tapioca starch (added 1 tsp to 1 tbsp to one of the 4 colors) to see whether it would help prevent the "eruption"; I also tried to lessen the heat as soon as I placed the bamboo steamer, so as not to make "gulat" and create that erupted look. Not that I don't like the erupted top; I was just wondering how some puto vendors manage not to have any on theirs. These seem effective, and tapioca subtly changes the consistency to make it a little bit chewier (almost rubber-like, but not tough, whereas pure rice would result to a more crumbly texture, especially if batter is not thin enough, or if rice did not soak long enough).

I will have to make special mention of MaMely of PinoyAmericanRecipes for the puto molds and the wonderful Pinoy flavorings she sent to me. Thanks, MaMely!

Ingredients:
1 package (16 oz or 1 lb) rice flour (regular, red writings on package)
1-1/2 cup water
1 can (14 oz or 13.5 oz) premium coconut milk (unsweetened, first pressing)
1-1/2 cup sugar
a dash or two of salt
1 tbsp baking powder
few drops of McCormick flavorings (langka, ube, pandan)

Optional:
tapioca starch (1 tbsp for the whole batch, or 1 tsp for each after dividing)
pandan leaves for the boiling water

Instructions:

In a plastic container, blend rice flour with water very well. Cover and let rest in room temp overnight.


Next morning, add everything else except flavorings and mix very well until smooth. Batter will be very very thin. Do not be tempted to add any more flour.

Prepare water for steaming. Add pandan leaves if desired.

Divide batter into 4. Add a few drops of the flavorings to 3, leaving one white, so you end up with 4 different colors. You may add tapioca (1 tsp each) to each of these, or try one with tapioca and see if you like the result. If you don't, leave the rest alone.

Lay the puto molds on top of cloth lining as shown (I use the ones in the photo below; I bought it from Walmart, where the housekeeping/building stuff are). Pour the batter almost to the brim of the molds. When water is briskly boiling, steam the puto and time for 10 minutes for these bite-size puto (muffin size will probably take 15-20 minutes). If using metal pan, line the lid also with dry cloth to absorb moisture and prevent condensation. Do not steam the puto too long that the excess moisture gets absorbed by the cooked puto that might result to sogginess. In trying to figure out the right steaming time for your size of puto, try a few, steam for about 10 minutes, try it (or break in half to see the middle), before you proceed with the rest of the batter.

Once done, remove right away from the mold and cool on wire rack so excess moisture evaporates. These puto molds easily releases the puto; I just had to slip the tip of a toothpick at one side, the gently pull it out and drop onto the cooling rack. Store (what you will not eat right away) in airtight container when cooled completely.


Monday, March 01, 2010

Sugar Twists/Siakoy/Pilipit/Linubid


Another recipe from Leslie Ruelan. He shared three of his favorite Filipino snack recipes with me (after he added my supersoft ensaymada to his favorite recipes).  Thanks, Leslie!

Ingredients:

5 tbsp. yeast
1 tsp. sugar
1/2 c warm water (to be used with the yeast)
1/2 c oil
1/2 c sugar
2 tsp. salt
6 ~ 7 c bread flour
1 c milk
3/4 c water

Instructions:
1.) mix yeast with the 1/2 c warm water (set aside)
2.) mix all dry ingredients first before placing all the remaining ingredients
3.) knead the dough for about 10 mins. (if using the manual method)
4.) cover the dough and let it rest for 10 mins.
5.) cut and roll the dough like you're making ensaymada then twist it as shown in the picture
6.) let rise for 1/2 hour or more depending on the size you want
7.) deep fry the twists on medium heat until golden brown
8.) remove and let the oil drip by placing it in a wire rack
9.) when its not too hot anymore, you can dip in a bowl of sugar* or use a zip lock with sugar then shake.

*Note from me: You can make vanilla sugar by placing a vanilla bean pod (cut in half) inside a jar of sugar.

Saturday, February 27, 2010

Torta Mamon Cebuano


The photo above and the recipe below are courtesy of my online/fb friend Leslie Ruelan (I did have the same recipe shared to me long ago by another online friend/ED nurse Glenn A. through email he sent me, but he did not have photos, and I lost my photos of it when I made them. They are so good!).  Thanks for these generous people who were willing to pass on recipes handed to them through generations. I never really heard of torta cebuana until I met friends online. Just a reminder for those who do not know what to do with the egg whites, turn them into lengua de gato or sans rival (both recipes available in this kusina).

Ingredients:

1 c sugar
10 egg yolks
1/2 c water
1 1/2 tbsp. baking powder
3 c all purpose flour
1/2 tsp. anise powder
1/2 c butter, melted
1/2 c vegetable oil
1 can 300 ml. condensed milk

Procedure:
1.) boil sugar and water for 5 mins. to make a syrup. Set aside to cool.
2.) combine flour and anise powder in a bowl.
3.) pour in melted butter, prepared syrup, oil, condensed milk and egg yolks
4.) stir using mixer until smooth
5.) sift in baking powder
6.) pour into wax paper-lined torta molds and
7.) bake at 350F for 22 mins. or until inserted toothpick comes out clean
8.) brush the top with margarine and sprinkle with refined sugar; enjoy with prepared syrup.

Friday, February 26, 2010

Lukban Hardinera


Please welcome Jun Avila as my guest blogger for this post...Everything below is his own words...I got his permission to share this recipe. While I am too busy at the moment, I figure I'd post recipes shared by my online friends (with their permission, of course!) and probably blog about some gadgets of mine.  Bookmark it for your next handaan with your Pinoy friends because this one sure sounds like a winner!

Description:
WHILE most meat loaves have ground meat as base, there’s a kind of meat loaf in Lucban that instead uses diced pork. Called hardinera, it’s unique in other ways as well. For one thing, it’s cooked in a llanera, an oval pan commonly used for leche flan. For another, it is not baked in an oven, like most meat loaves, but is instead steamed.

What also makes it different is the garnishing of hard-boiled eggs, bell pepper strips and pineapple slices that go into the bottom of the pan. When inverted onto a serving platter, these garnishings form a colorful topping. The beaten raw eggs poured into the llanera form a coating that gives the hardinera the look of an aspic.

Ingredients:

¼ c cooking oil, divided
1 onion, chopped
2-3 cloves garlic, chopped
1 kilo pork kasim, diced into cubes
(See tips.)
1 tbsp salt
½ tsp pepper
1-2 c pork broth (See tips.)
1 c tomato sauce
1 c finely diced sweet mixed pickles or pickle relish
½ c diced frankfurters
1/3 c raisins
1 c canned pineapple tidbits, well drained
1 small can red pimiento, drained and diced
1 85-g can liver spread (1/3 c)
½ c grated Cheddar cheese
1 c bread crumbs
2 hard-boiled eggs, sliced
3-4 canned pineapple slices, each cut into 3-4 pieces
1 small green bell pepper, cut into fine strips
1 small red bell pepper, cut into fine strips
3 uncooked eggs

Directions:
Grease 3-4 small llaneras and line with banana leaves or with nonstick baking paper. Set aside.

Heat 2 tbsp oil in a large pan and sauté onions and garlic about one minute (do not let garlic burn).

Heat remaining 2 tbsp oil and add pork. Season with salt and pepper and stir-cook pork until brown.

Pour in pork broth and tomato sauce and simmer until pork is tender, about 15-20 minutes. Remove from heat and let cool.

Meanwhile, mix together pickles, frankfurters, raisins, pineapple tidbits, red pimiento, liver spread, cheddar cheese and bread crumbs. Add the cooked pork. Do not include the sauce in which it was cooked. (See tips.) Mix until well combined.

Arrange slices of hard-boiled eggs, pineapple, and green and red pepper strips on the bottom of the prepared llaneras. Beat the 3 eggs and pour into llaneras, dividing equally. Spoon the pork mixture equally among the llaneras, pressing top to smoothen.

Cover tops of llaneras with foil and steam in a large steamer for about 45 minutes or until firm. If the four llaneras do not fit into the steamer, cook them in batches (two at a time).

To serve: Run a spatula or the dull edge of a knife along the sides of llaneras to loosen the jardinera. Invert onto a serving platter and tap llaneras lightly to release the jardinera. Remove llaneras and peel off banana leaves or baking paper before serving.

TIPS

Llaneras are small, oval-shaped aluminum pans often used for making leche flan. This recipe makes enough to fill four small llaneras.

If llaneras are not available, you can use loaf pans. The recipe can probably fill two loaf pans.

The pork should be diced into pieces slightly smaller than that used for menudo.

To make pork broth: boil one pork broth cube (or one pork bouillon cube) in 2 c water until cube dissolves. Use as per direction above.

Instead of pork broth, you can use plain water.

If desired, use the broth and the tomato sauce in which the pork was tenderized as sauce: Simmer in a small saucepan. Dissolve 1 tbsp cornstarch in ¼ c water and pour into sauce. Season to taste with salt, pepper and liquid seasoning. Simmer until slightly thick. Add one to 2 tbsp butter and heat until butter dissolves. Serve with the hardinera.

Drain the canned pineapple tidbits and the canned pineapple slices very well so mixture doesn’t become soggy.

Thanks for sharing this recipe, Jun!

Saturday, January 02, 2010

Pinoy-Style Fruit Salad


Sorry for the blurry pic...

I made this to bring fruits to the New Year Party we had yesterday at my friend Cecilia's house. I also brought frozen almond brazo de mercedes that went untouched during the Christmas Dinner I hosted (because my MIL brought cheesecake so I did not bother to bring the BDM out).

Although some of the fruits were not typically added in the usual fruit salad I used to have back in the Philippines, I just gathered the canned fruits I had in my pantry and made the dressing as close as I could get to the taste of that dressing my Nanay used to make. Cream cheese is a good substitute for Nestle Cream that is not available here.

I have not offered this to my American family/relatives, because I doubt they will like it. But my kids, including stepd, like this salad.


Ingredients:
Canned fruits
4 oz (1/2 package) cream cheese
1 can (14 oz) sweetened condensed milk
a dollop of mayonnaise

Instructions:
Let cream cheese sit out at room temp to soften.
Drain the fruits.
Using hand mixer, blend cream cheese and condensed milk, add a little of mayonnaise and blend. Taste and see if you like the balance of sweetness (condensed milk), saltiness (cream cheese), and creaminess (cream cheese and mayo). Adjust as needed. (I usually don't need any more than the ingredients I listed above).

Blend gently using a silicone spatula the fruits and the dressing. Place in a covered container and chill.

Serve chilled after at least 3 hours.

Sabi ng friends ko as they introduced me to new Pinay friends, "Lagi namin inaabangan ang dala nyan kasi masarap!"

I came home with empty containers of the fruit salad and BDM. I brought home containers filled with leftovers of anything else in the party.

Wednesday, September 13, 2006

Biscocho

As a young child who grew up in a small neighborhood bakery, I had the privilege of making some special versions of our commercial goodies. One of which is biscocho, made from bread slices which were returned to us after not being sold for 3 days. When the regular ones are made with just one side of the bread slathered with a thin layer of margarine not quite covering the whole surface then coated with sugar, I made my own special batch (1 pan) of slices well covered with a thin layer of margarine on both sides, then coated with lots of sugar (I made sure sugar covers the whole area that had margarine). It was one of my favorite snacks.

One time I had craving, and it popped into my head to make some. I was with hubby then, and I asked him to try. He liked it and requested that I make some for him too, with a sprinkle of cinnamon after toasting (and he did not like it too toasted). Whoa! Another discovery for my hubby!

Then yesterday, my younger son was looking for something to eat, but he was getting tired of the usual pan de pizza that we make using homemade pizza sauce, slices of ham or pepperoni, and mozzarella cheese. I thought of offering to make biscocho for him. He was not sure what it was but he was ready for a new kind of delight. He was not disappointed, and he asked that I make some for his breakfast today. So I made some for both my sons, and the older one told me I should have doubled his share. But I have used up all the bread slices. I told him I would get more next time I go to the grocery store.

Here's how:


I usually use stale bread or hotdog rolls for this purpose, and the oven toaster. I watch carefully as I bake, because if I overdo it, the caramelized sugar burns and gets bitter. I also want to cool it down a bit before biting to it, as the caramelized sugar can be very very hot.

Don't be tempted to use a thick layer of butter or margarine, as this will only get the bread soggy, then you won't get the crunchy result that you want. A thin layer is enough, and you won't get disappointed with the crunch and the taste.

I think the best tasting biscocho would be one that is made from leftover sponge cake (but who would have leftover sponge cakes? They are too good freshly baked!)

Wednesday, August 30, 2006

Pork Menudo

This is a reposting from my old kusina.

I have cooked this only twice this time, because I only cook it when . craving hits me. Why? 1 - Hubby is not a big fan of pork. 2 - Hubby does not really care for cubed meat. 3 - Hubby usually leaves out the veggies save for the potatoes. 4 - Kids and hubby leave out the liver (I think they are only grossed out by the thought, but beef liver tastes pretty good compared to pork liver, and especially better than chicken liver. I can only tolerate chicken liver when mashed to thicken sauces and gravy.)

But, I LOVE MENUDO.

So I cook it despite the above-mentioned reasons, then freeze the rest in a foil, then whenever craving kicks in, I reheat the pack in the oven toaster at 450 deg F for about 20 minutes. I can re-freeze the rest and repeat the procedure whenever I want menudo. So if you want, you can do the same, but make sure that you freeze within 2 hours of cooking/reheating.

I marinate my pork pieces overnight prior to cooking, because that was the tip given to me by my sister's MIL (a Kapampangan - I bow to the Kapampangans for most dishes I love to eat during fiesta, of which menudo is one) when I asked her during a fiesta how she made her menudo so tasty. She used soy sauce-kalamansi combi. I made mine now using lemon instead of kalamansi.

My recipe:

INGREDIENTS:
1 pound lean pork cut in cubes, marinated overnight in
juice of 1/2 lemon and
1/4 cup soy sauce

2 tbsp oil
1 clove of garlic, minced
1 medium onion, minced
3 medium tomatoes, cubed (the more, the better)
1/2 bell pepper (whatever color; tip on what to do with the rest found below)
1/4 cup raisins
2 medium potatoes, cubed
1 carrot, cubed
water as needed

1/2 cup green peas

a handful of cubed beef liver (I have cut into cubes one whole pack of beef liver and placed them in separate plastics by the handful, for such cooking purposes as this)
1 chicken liver, mashed or finely chopped
two hotdogs cut into pieces equivalent in size to the pork pieces
salt and pepper to taste

PROCEDURE:
Heat oil. Sautee garlic for 10 seconds then the onions until transluscent. Add the tomatoes and sautee until they caramelize. Add the pork and stir until browned. Lower the heat and cook covered for 5 minutes.

Add the bell peppers, raisins, potatoes, and carrots, stir and cook covered in another 10 minutes. Add water in increments of 1/8 cup to keep it from drying, if needed. Meanwhile, you can chop the livers and hotdogs while waiting.

Check for doneness of potatoes and carrots. When almost done, add livers. Stir to thicken sauce. You may add more water depending on the consistency you want. Add the hotdogs and let simmer for 2 minutes. Adjust taste with salt and pepper.

Serve with hot plain rice and enjoy!


Tip on storing bell peppers:

One of our problems when buying bell peppers is that we often want two colors at least. I sometimes buy the 3-in-1 pack of yellow, red, and orange bells. But I usually just slice 1/4 of each pepper then use the rest at some point in time later. What I do is slice them longitudinally, layer them on a baking pan, freeze for 30 minutes, then pack into freezer bags. When I need them again, I just shake or bang against the countertop to loosen some pieces and grab some, then return to the freezer the rest. I do the same with fresh ginger (I can't use all in arroz caldo or tinola or chicken curry). Posted by Picasa

Monday, January 03, 2005

Crema de Fruta

I am back to regular programming....Happy New Year to all!

This post is a continuation of my birthday kusina escapades.

Thanks to Celia K for her crema de fruta post, I thought this would be good alternative to the usual chocolate cake that my hubby always prepares for anyone's birthday in our family. I wanted for my in-laws to have something to look forward to during birthday celebrations, and not only to bring their gifts and greetings to the celebrant.

I deviated from CeliaK's method by preparing my own sponge cake. Why? Because when I told hubby about my plan, he grimaced a bit, saying that sponge cake is usually rubbery, chewy, tough and dry...and that he preferred the crumbly type of cakes. BUT he said, "if that's what you want, then go on. It's your birthday anyway."

Good thing I found a sponge cake recipe with this promise: " While most sponge cakes are light and somewhat dry, a sponge cake made with milk, has a softer more tender texture." The recipe is that of Boston Cream Pie which I got from Sarah's baking911 site.

Here's the recipe for the sponge cake:

Milk Sponge Cake

1 cup sifted cake flour
1 teaspoon baking powder
1/8 teaspoon salt
1/3 cup milk
3 tablespoons unflavored vegetable oil
3 large eggs, room temperature
1 egg yolk, room temperature
2/3 cup sugar
1 teaspoon vanilla

Instructions:

Adjust rack in lower third of oven and preheat to 350 degrees. Line a 9-inch springform pan with parchment or waxed paper; do not grease. Sift flour, baking powder and salt. In a small bowl add the the milk and oil; do not be concerned that they do not blend together.

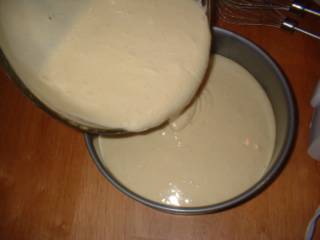
In a large mixing bowl, whisk the eggs, yolk and sugar to combine. Using an electric mixer at medium speed, whip the egg mixture until it is light ivory in color and very fluffy, about 6 minutes. Add the vanilla toward the end of whipping. Using a rubber spatula, fold in the flour mixture in two additions. Pour the milk mixture down the side of the mixing bowl. (It will sink to the bottom of the bowl under the batter.) Gently fold until the milk mixture is thoroughly incorporated. Pour the batter into the pan. Bake 25 to 30 minutes or until the cake is golden on top and it springs back when lightly pressed in the center. Remove pan from oven to a wire rack until cool.poouring the batter into the prepared springform pan Posted by Hello
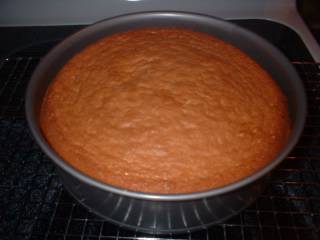
cooling the cake

While baking the sponge cake I prepared the custard. Comparing CeliaK's custard filling with that of the Boston Cream Pie Recipe, I noticed the only difference in the ingredients were the amounts, and the inclusion of rum in the latter. I thought it would not hurt to follow that in BCP since I used a springform pan, so that the custard would just be enough to cover the top of the cake. I just eliminated the rum. I leave to you to include it or delete it from this custard filling recipe from baking911.

Boston Cream Filling
Only half of this rich, thick pastry cream, lightened with whipped cream is needed for the dessert. Enjoy the remaining filling with fresh fruit.

1 cup milk
1/2 cup sugar, divided
3 egg yolks
3 tablespoons flour
1 teaspoon each dark rum and vanilla
1/2 cup heavy cream, whipped
In a small bowl whisk to combine the egg yolks and 1/4 cup sugar, then the flour. In a medium saucepan over medium heat, combine the milk and 1/4 cup sugar and heat just until it comes to a boil. Remove, and pour half of the hot liquid over the yolk mixture, stirring to combine. Pour the yolk mixture back into the saucepan, and bring it to a boil again, stirring constantly. When it is thick and smooth, remove the pan from the heat and pour the mixture into a large bowl to cool. Cover surface with plastic and refrigerate. When ready to assemble the dessert, stir in the rum and vanilla until smooth, then fold in the whipped cream.

preparing the custard top of the cake sliced off
Then while cooling the custard, I sliced the top off the cake as soon as it was cool enough to do so. I just thought this would create more traction for the pudding and the fruits, plus it gave me an excuse to taste the cake. And guess what I discovered: It tasted like that of Special Mamon Tostado (almost like the Goldilocks' Mamon but without that greasy unpleasant film that it leaves on your palate). I had hubby taste it too, and he said it was not what he expected of sponge cakes as it was not tough.

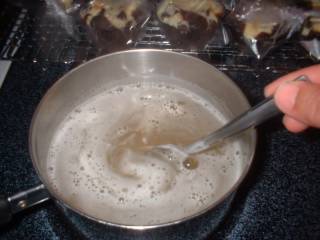
Next I prepared the gelatin. I used Knox unflavored gelatin and then followed the instructions on the packet using 2 envelopes. Posted by Hello
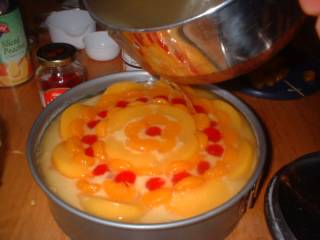
cooking the gelatin pouring the cool gelatin on top of assembled cake-pudding-fruits
While it was cooling in the fridge, I started assembling the fruits (peaches, Mandarin oranges and Maraschino cherries) over the custard that I poured on top of the sponge cake. Then I placed inside the fridge covered with a plastic wrap to let them chill for about an hour, and then poured a thin film of gelatin. I let that thin film set for about 30 minutes, sort of like laminating the surface, acting like a seal, before I poured more gelatin to cover the fruits completely. Let the gelatin set. (It was a minimum of 3 hours from the approximated time of serving, but feel free to make this several hours earlier). (Note: I made a mistake before of pouring the gelatin while it was still very liquid, and the cake, custard and fruits were room temp. The gelatin seeped through the cake and soaked it, making it tough when the cake cooled completely. Believe me, you don't want to make the same mistake again.)

ready to slice and serve!My visitors were intrigued by it. I served it very informally as such; only separating the sides off from the pan using a small silicone spatula, then gave them each a slice of the cake. No, the number of cherries did not correspond to my age (wish it did!) . They all said it was different and good. None was left (there were 13 of us in all; no leftover on their plates!) at the end of the day (much to my older son's dismay). Any Filipina can hold her head up high when serving this dessert to a foreign crowd.
Custom Search