I was watching "V" at home one night (for the second time) and I again saw this part where V was cooking egg-in-a-hole. The first time I saw that, I did not know how it was called. Then sometime later I read in a blog (I cannot remember now which one) about this style of cooking egg and toast. It is called several names, but I stuck to this name, easiest to remember and does not make it seem to mystical. Egg-in-a-hole apparently has its origins in the UK (and the movie "V" is set in England).
I tried it and loved it! Perfect for breakfast!
What you need are:
biscuit cutter, skillet, cover slices of bread eggs butter salt and pepper (optional) ground basil (or whatever spices you want)
How to: Heat the skillet on medium. Melt some butter. Make a hole in the bread slice using a biscuit cutter. Place bread slice on the skillet. Add some more butter into the hole. Crack an egg and carefully place into the hole. Sprinkle spices. Cover to hasten cooking (time will depend on how done you want it). Flip and briefly cook the other side. You might also want to brown the round bread piece sliced off the center. Enjoy with a cup of freshly brewed coffee.
Every Filipino child most likely has been exposed to chicken sopas. It is one of our favorite breakfast or merienda. I loved the way my Nanay made sopas. When I was an adult already, I would buy chicken sopas from carinderia and it would have mostly the pasta, very little of meat, veggies, and usually no milk.
Well, in an attempt to recreate my Nanay's sopas, here is my method:
Ingredients: 8 cups (or 2 quarts) chicken stock 1 lb pasta (either shell or elbow, medium size) 1-2 cups pre-cooked strips/cubes of chicken(leftover roast chicken, for example) 1/4 cabbage, cut into strips 1 medium carrot, peeled, then prepare "thin slices" using peeler 1/4 to 1/2 cup heavy cream or milk (depends on how creamy you want it) salt and pepper to taste Instructions: Boil chicken stock. Maintain on high heat. Add pasta, stir frequently during first few minutes and let cook for about 8 minutes with occasional stirring. Add pre-cooked meat and veggies. Adjust taste with salt and pepper. Turn off heat (for conduction cooktop) or turn heat to lowest (for flame stovetop) and add the heavy cream or milk while still hot, continuously stirring. DO NOT ALLOW TO BOIL. It should only be steamy but not boiling, or else milk will coagulate and soup won't be creamy. Stop when you have achieved your desired consistency, and completely removed from heat source.
I, however, never did develop any liking to it, and neither have my kids... Problem is, my husband can only drink about a cup or so, then he will not finish a whole jug (even if one as small as this). I thought of other ways to use it. I thought it would probably be good used for making french toast, since french toast is basically made from stale bread dipped in a mixture of egg, milk, nutmeg and cinnamon. I looked at the ingredients of eggnog once, and it was not too different.
Making french toast this way made me tolerate eggnog...even my kids like them.
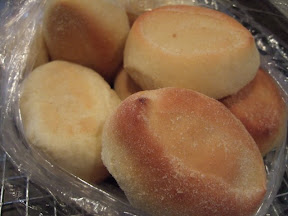
This is a re-posting from my old kusina, featuring how to make pan de sal using bread machine/breadmaker for the dough (or use manual method using the same recipe). I have received emails about how their pandesal using this recipe/method has received rave reviews from fellow Pinoys. May I add that I have served this also to Americans and most of them loved this crusty-on -the-outside, soft-on-the-inside buns. There's a slide show of how to shape and cut the dough and then bake them in conventional oven, to make learning easier for those who are going to try this for the first time. Pardon the poem inspired by the smell of the yeast dough as it was rising...
Nung nasa Pilipinas pa ang inyong Manang At dumating ang bayaw na balikbayan, Araw-araw, nagpapabili ng pandesal, Ito kasi ang nami-miss nya sa kanyang almusal.
Ngayon, si Manang, nasa parehong kalagayan, Pero walang panaderyang nagbebenta ng pandesal Nang ipamalita ang "Kusina" sa mga kaibigan, "Ayan! I-feature mo ang paggawa ng pandesal!" (Patay! Ang pandesal, di ko pa nasubukan...)
Kaya sa alaala, pilit na hinalughog Mga panaderong sa masa ay humubog Ipinikit ang mata upang balikan Mahigit dalawang dekada nang nakaraan.
Tulad ni Sassy, humanap ng sweet bread recipe Pang bread machine, mula Fleischmann's Bakery Kasi ang sangkap, pang-family size lang Para pag pumalpak, di nakakahinayang (Mahal kasi grocery eh! At mas madali ubusin.)
Si Manong Ken, me resipi nga, Pero sabi nya, me halong daya Di kasi kanya yun, di sya panadero Ang sangkap at proseso, iba sa alam ko. (Parang mahirap ba...)
Nung bata kasi ako, sa panaderya ni Tatay Sa paghulma at pagsalansan, laging nakaantabay Sa kakahawak ng dough, nahasa ang mga kamay Yung nga lang, resipi't sangkap, di ako nasanay.
Paggamit ng pugon, di rin natutunan Para sa batang patpatin, medyo me kahirapan Pero paglabas dun, alam ko ang gagawin Palamigin, hiwain, balutin, KAININ!
Kaya eto ngayon, aking sinusubukan Papel ng panadero, kaya bang gampanan? Unang subok, sumobra, medyo natusta Pangalawang subok, umubra, tamang-tama ang timpla!
Wish ko lang pandesal ko ay inyong matikman Keso o mantekilya ang gawing palaman Pero ang tangi ko lang kayang gawin Ilagay sa website nang sa inyo ay maihain.
Lika, kusina ko ay iyong bisitahin Paggawa ng pandesal, iyo ring subukin (excited ka na no?) Sana kahit paano, natulungan kita, Kahit araw-araw, me pandesal ka na!
milk large egg(s) butter, cut up salt bread flour sugar bread machine yeast
2/3 cup 2 2 tbsp 1 tsp 3 cups 2 tbsp 2 tsp
DIRECTIONS: Update 7-20-09 - I added the manual method after the bread machine method due to readers asking for recipe if they do not have a bread machine.
BREAD MACHINE METHOD: 1. Use the 1-pound recipe if your machine pan holds 10 cups or less of water. Add ingredients to bread machine pan in the order suggested by manufacturer. 2. Set the bread machine to DOUGH CYCLE and let it do its job. (Saves you from getting your hands messy! 3-4. Wait for the dough cycle to complete the initial rising. While waiting, prepare the table (grease a bit), baking sheet (grease), and breadcrumbs. Grease your hands as well. 5. Punch the dough down (actually, as soon as you try to remove this from the pan, it will deflate.) 6. Lay the dough on the table and stretch as shown in the slide. 7. Using your two hands, roll the dough while squeezing some bubbles to make it more compact and turn it into a log about 2-3 inches in diameter. (Imagine wringing a towel, that is the effect you want to achieve here, only not too tight.) 8. Sprinkle the log on all sides with bread crumbs. (See how I make my own bread crumbs here.) Optional: Cover with plastic and allow to rise for 10 minutes. This will lessen your final rising time.) 9. Using a dough cutter, cut the log at intervals of 1 to 1-1/2 inches. Roll again on bread crumbs to coat the cut sides. (This makes about 20 pieces.) 10. Lay on lightly greased (with shortening) baking pan slightly diagonally, with the cut side up, 1 inch apart or at least one fingerbreadth apart. Cover with Cling wrap (or damp flour sack) and let rise for about 30 minutes (or 10 if you did an earlier optional rising of log) in a draft-free place. Alternatively, you may want to put it inside the oven and turn the oven on bake for 1 minute then turn off. This will make the oven warm and will hasten rising (about 10 minutes only, plus it is draft-free, but if you want fluffier pan de sal you can extend to 30 minutes. Just be careful when you open the door to take it our prior to setting the temp for baking per se. You do not want to create a sudden rush of air or else you might end up with a flat bread.) 11. Bake at 350 deg F for 12-15 minutes or until golden brown (depends on the size, spacing and oven used). If you want it darker, bake at 375 for 10-12 minutes). 12. Let cool (kung makakatiis ka!) for about 1 minute. 13. Enjoy either plain or with your favorite filling! (Mine is Reno liver spread, but I do not have access to that here, so I content myself with butter, jam, or Kraft Old English cheese spread.)
Here is a video of the actual shaping and baking of pandesal. The dough was pre-made using the bread machine.
Taglish version (requested by Jacklyn) 1.Gamitin ang resipi na pang 1 pound kung hanggang 10 cups lang ang kaya ng bread maker. Ilagay ang sangkap ayon sa suhestyon ng gumawa ng bread maker (sa brand na gamit ko, ilagay muna ang mga likido – tubig, gatas, mantekilya, at itlog – sa pan at kelangan ay maligamgam, Pwedeng hayaan sa countertop para maging room temp, o kaya ay i-microwave ng mga 30 segundo, haluin at i-check sa thermometer kung nasa 80-100 deg F. I-microwave pa kung malamig pa.) 2.I-set sa Dough Cycle ang bread maker. 3.Maghintay. Habang naghihintay para matapos ang dough cycle, ihanda ang lamesa o countertop (medyo punasan ng konting mantekilya o shortening para medyo madulas, at budburan ng konting harina), baking sheet/pan (punasan ng shortening), at breadcrumbs. Pahiran din ng mantekilya/shortening ang kamay mo. 4.Alisin ang dough sa pan pag handa na. Magfa-flat ang dough, gaya ng nangyayari pag sinuntok mo. Ganon talaga. Dapat pa nga medyo pitpitin mo. 5.Ilagay sa ibabaw ng lamesa/countertop at ayusin nang pahaba (i-stretch mo para humaba). 6.Gumawa ng baston: irolyo habang pinipitpit ang pandesal para maghugis “log” na mga 2-3 inches ang haba pag cross-section. 7.Budburan ng bread crumbs. Pwedeng takpan ng plastic at hayaan lumaki ng mga 10 minuto bago hiwain. 8.Gamit ang dough cutter, maghiwa (kelangan, mabilis ang kilos ng kamay mo sa paghiwa para hindi parang nahihila yung dough. Parang itak ang bagsak ng dough cutter tapos biglang ilihis para humiwa). Hiwain kada 1-2 inches. Irolyo uli sa bread crumbs bawat pirasong nahiwa. 9.Ilagay sa baking pan. Kelangan yung nahiwang parte ang nakapatong sa pan. 10.Palakihin ng mga 30 minutes o hanggang magdoble (baka mas maikli kung medyo mainit dyan). Eto ang second rising. Dapat ay walang hangin at dapat ay “moist” ang paligid, para hindi matuyot ang pandesal habang lumalaki. Pag walang hangin, hindi sya basta babagsak. Pag nabiglang nahanginan, maaaring bumagsak ang tinapay, lalabas na flat. Pwede mong gamitin ang pugon para sa second rising. Ilagay mo yung pan sa loob, paandarin ang oven ng isang minuto at patayin para yung namuong init sa loob ay makatulong mapabilis ang pagpapalaki ng tinapay, na hindi naiistorbo ng hangin. 11.I-hurno (bake) sa 350 deg F (nasubukan ko na rin hanggang 450 deg F, basta nakaantabay ka). Mas malutong at ma-brown ang ibabaw kung mas mataas ang temperature. Kung gusto mo medyo albino ang dating, ok na yung 350. Hayaan ng mga 10 minuto, paikutin ang pan para uniform ang pagkaluto/pagkabrown, at lutuin pa ng mga 2-4 minuto o hanggang total ng 15 minuto basta maganda ang pagka-brown. Tantayahin mo sa unang pagbake kung gano kainit ang oven mo. 12.Pagkahango sa pugon, alisin agad sa pan at ilipat sa cooling wire rack. Pag wala nang init, pwede na ilagay sa plastic para hindi matuyot at manigaw (pag nagpapawis pa sa plastic, palamigin mo pa, para hindi madali mag-amag).
MANUAL METHOD: 1. In a pyrex measuring cup, microwave the liquid ingredients for about 30 sec to 1 min to make it lukewarm (80-100 deg F or room temp). 2. In a large bowl, place all dry ingredients and make a well at the center. 3. Place liquid ingredients in the well at the center. Using wooden spoon, mix liquid with dry starting from center until all dry ingredients from the sides are incorporated and you have a soft dough. 4. Transfer to a lightly floured surface and knead for about 8 mins. 5. Cover with plastic wrap and let rest for 10 mins. 6. Stretch as shown on slides and form into a tight log. 7. You may opt to sprinkle with breadcrumbs and (1) slice at this point or (2) let rest for another 10 mins before slicing. 8. Coat the sliced dough pieces and placing on greased baking pan. 9. Place in pre-warmed oven (to hasten rising time) and let rise some more for (1) 30 minutes if they were cut right away, or (2) 10-20 mins if they rose before cutting. The point is, get them to a good size before baking (remember that they will do a final rise when you place them in hot oven, so bake them when they reach a size just a little bit smaller than the size of pan de sal you want to eat). 10. Bake at 350 mins (or 365 if you want them darker) for 10-15 mins (keep watching after 10 mins by opening the oven door and looking at how dark they are). IMPORTANT TIPS for beginners in yeast doughs: A bread machine not only makes it less messy for your hands during the initial phase of dough preparation. You can also learn how the dough must feel if you will touch and poke it before it goes into the initial rising phase (that is 30 minutes after you start the dough cycle). Familiarize yourself with that dough and then also after the initial rising (end of dough cycle). Once you have done so, you can then have the courage to do the conventional way of kneading the dough by hand and judging if the initial rising time is enough.
Make sure you don't disturb the initial rising phase and that it is warm and moist and there is no draft (bread machines have that ideal setting).
When checking for brownness, OPEN the door and bring the bread under natural light instead of looking through the oven glass (the yellow light shows the bread being white when in fact it is already brown, you might toast it).
If you want to use the old-fashioned buttermilk recipe, but you don't have buttermilk on hand, you can substitute it with 1 tbsp cider vinegar or lemon juice plus enough fresh milk to make 1 cup, then use the right proportion in preparing the dough as per ingredients. (I saw this tip in the Cooking Pleasures Magazine of CookingClub.com, which sparked the idea of trying that recipe in making pandesal.)
For those without fresh milk (presuming I have followers in the Philippines, but please help our small businesses by patronizing the local bakeries), use 1:1 ratio of evaporated milk and water.
Place the buns right away on a cooling rack so they don't sweat at the bottom and make the bottom soggy.
In STORING pan de sal: Let the buns cool on the wire rack completely but do not overdo that they dry up (this take about 10-30 mins here in my place depending on the weather or season). Then place in ziploc bags or airtight container. If you do this while they are still warm, they will sweat and will invite molds very soon. If you do it too late, they will be hard. VARIATIONS:
Corned Beef Pan de Sal: If you have access to Argentina CB, get a small can and add a small, chopped onion. Without the breadcrumbs, cut the pan de sal into pieces about the size of pingpong ball, flatten and place a tbsp of CB mixture, seal the edges and roll in breadcrumbs. (I used to sell these when I was still studying in Med school, but without the breadcrumbs. They sold fast! Perfect breakfast!)
Hotdog Pan de Sal: Roll pieces to flatten (like in my spanish bread post) then put the hotdog in, wrap the dough around, then roll on breadcrumbs. (This is probably the equivalent of "hoagie" here.)
Yun lang...
This re-posting is so that I can have it labeled properly and make it easier to locate.
UPDATE: Some Americans (my co-workers, friends' friends, relatives) have tried these and absolutely loved the soft interior and the crusty exterior. Just try to offer them to your co-workers or relatives who are open to new things, and I guarantee you, they will see you with new eyes...
As I mentioned in my "diet" post, I sometimes eat oatmeal for breakfast. I like the fast effects of its fibers (won't elaborate further, hehe...).
My favorite is the Quaker Instant Oatmeal Maple & Brown Sugar flavor. I eat it plain or with slices of banana, or fresh berries (blue/black, strawberries), or even cantaloupe.
There is another oatmeal "preparation that I like so much especially during the summer season --- the Aveeno Colloidal Oatmeal bath.
I have had no prior history of allergies to medications nor to food. When I would have rashes, usually it would be to an unknown allergen.
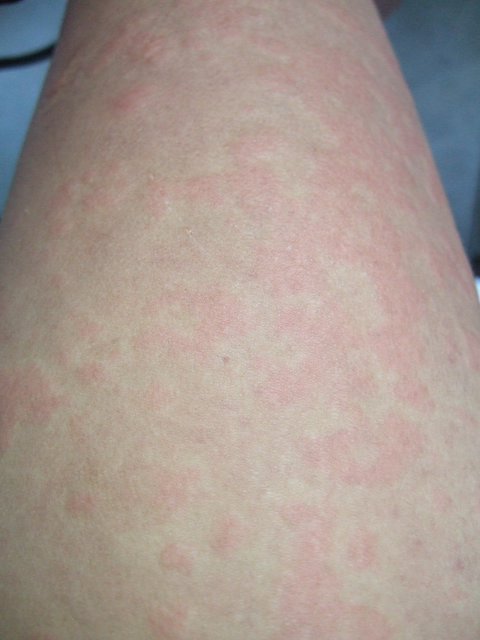
Last year, I had my first ever attack of "urticaria," where rashes are welts, wheal, appearing like maps all over. It lasted three days, during which I just took Benadryl and Alavert. On the third day, which was Friday, I decided to see a doctor for a prescription in case I will need a drug that worked better than those I was already taking. He prescribed prednisone, and suggested Aveeno oatmeal bath.
That oatmeal bath was something new to me. I tried it, and as early as the first bath, my rashes resolved gradually over the day, and I woke up the next day without rashes. Whether it was that the attack was really at its conclusion or not, I was not sure whether oatmeal bath really had the desired effect.
This year, my attack was worse and different. It did not occur all day, appearing mostly at night and getting worst in the wee hours of the morning, usually waking me up with intense pruritus (itchiness) and burning sensation, despite having taken both Benadryl and 24-hr Claritin the night before, that I could not help but take another dose of Benadryl then continue my sleep. This pattern continued for more than two weeks, with the worst attack around the 10th day. The offending agent, I was sure, was not due to a food item. But there are foods that are to be avoided in such a condition, including strawberries, tomatoes, shrimps, eggplants, spinach, tuna, etc., as these have histamine-releasing actions (histamine causes the itch).
I was having daily oatmeal baths upon waking up, taking my Benadryl and Claritin at night, sometimes experimenting on skipping them to see what the effect would be. It appeared that no matter what I took or not took, the pattern was the same, only with varying severity, with the most severe attack at the middle of the whole duration, during which (2nd week), I was actually worried that it might turn out to be a chronic case (6 weeks minimum). I am glad that during the past several days, I woke up with less and less of them. Yesterday was the first day I woke up with NONE. Hooray!
I did not use up all the pepperoni for the callos, and I was contemplating on making a home-made pizza, but then I saw the Italian eggplant which I meant to use for kare-kare, so what I did was to cook it a la tortang talong with pepperoni.
Ingredients:
1 Italian aggplant, broiled then peeled
3 eggs, slightly beaten
salt and pepper to taste
few slices of pepperoni (enough to cover the torta)
Instructions:
Heat the skillet on mod-high heat (#7). Using a fork and holding on to the stem, mash gently with a fork to flatten the eggplant. Pour the beaten egg and sprinkle with salt and pepper to taste. Lower the heat to #3 and slide the eggplante-egg onto the skillet. Quickly distribute the pepperoni slices on top, cover and let cook for another5-7 minutes.
Children loved it, and so did I. I served it during lunch with plain rice when hubby was not here. I knew my hubby would not even try because when it comes to vegetables (except potatoes, tomatoes and carrots), he usually prefers them just boiled, or creamed, or as salads served with Wish-Bone Robusto Italian dressing. Nothing else.
Thanks to the internet and the gift of blogging by Blogger, I have found quite a few friends online. Though I have not met them in person yet, they are already treasures. Amongst them are my fellow Pinay foodbloggers. Some are quiet friends (they read/scan my blogs and email me about it). One of them is Joe from NY (not NJ!). Siguro naawa sya kasi malayo ako sa Pinoy/Asian store (gaya ni stel at ni Ting), he sent me some familiar items.
Sinigang mixes, tocino mixes, a bottle of patis (fermented fish sauce), pancit luglug (I have yet to find a recipe for that), tuyo in a jar, and mung beans.
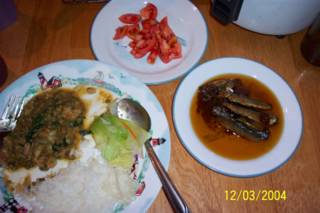
I wasted no time, the night (gabi, ha! hindi umaga) after we went grocery shopping, my sons and I were so eager to eat the tuyo with tomatoes, and munggo guisado was also part of it (I had to remember to take a photo before they were wiped out by us!). Tsalap-tsalap!
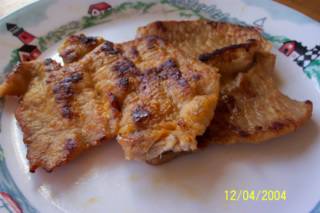
Then, the next morning I sliced in half (butterfly style) the pork steak cuts that I bought and marinated them in the tocino mix. I was not sure if hubby would like them (I actually have served it once before and he did, but to make sure it was not just bola, I try serving it again without saying anything, then watching his reaction. He was out splitting wood when I called him to lunch, but he was not quite ready to quit his task, so me and my sons ate our share. When we were piling up the firewood, my husband finally had his lunchbreak, and to my surprise, he did eat what I left for him (tocino and rice). He even asked me if we had it before, because it was really good!
If my fussy husband likes it, so will most Americans. So for get-togethers, tocino will most probably be well-accepted by non-Filipinos.
Another Filipino comfort food, champorado is among those which I enjoyed not only during cold days in the Philippines, but also during the warm days as snack.
Would you believe that it was my first time to cook this from scratch? In the PI, there were mixes ready to cook. Now, I am just too glad to have the resources I need on the net, not only from recipes already posted, but also from my fellow food bloggers who have proved to be jewels in the cyberspace.
Ingredients:
1 cup glutinous rice
5 cups water(up to 6, depending on the consistency you prefer)
1/2 cup unsweetened cocoa powder
1/2 to 3/4 cup sugar
1/8 tsp vanilla extract
some evaporated milk
Instructions:
Cook rice in a medium saucepan with water on low heat, stirring constantly to avoid scorching. When rice is transparent, add cocoa powder (may add some more depending on how chocolatey you want it to be), sugar and vanilla extract and cook for several minutes more, until rice is soft. Adjust sugar according to taste. Serve in bowls with swirls of evaporated milk on top.
I was excited to let my hubby try it, for he is one chocoholic. I was hoping it would be another Filipino food that he would like, but....I was disappointed with his reaction...
However, I found a kind of rice that is cooked somewhat like fried rice that my hubby likes. Actually, he was the one who pointed it to me when we were grocery shopping. He said I should try it. I did. Everyone, including my boys, liked it. I will post about it some time later...
Not too long ago, Ting sent me misua, which was very timely, because now it is really getting too cold here. And what better way to enjoy misua than as a soup! One of the comfort foods I used to love when I was a kid. I still love it now, and so do my boys.
Ingredients (good for 2-3 servings):
4 cups chicken broth
a handful of shredded cooked chicken meat
a handful of misua
salt and pepper to taste
shredded veggies (I use the ones for tacos)
Instructions:
Boil the broth and the meat. Adjust the taste with salt and pepper. Add the misua and boil for about 2 minutes more. Remove from heat and serve in bowls topped with shredded veggies.