"Kusina" = kitchen; "Manang" (aka Ate in Tagalog)= Ilokano term for older sister.
A Filipina's adaptation in an American Kitchen
Showing posts with label gadgets. Show all posts
Monday, February 15, 2010
Manang's Lechon Manok
Syempre hindi kumpleto ang Pinoy food cravings ko kung walang lechon manok. That is the main reason why I got myself a rotisserie. Actually, my friend Ana has it, and cooked lechon manok in it using cornish hens. That's what gave me the idea of getting myself this rotisserie.
My favorite back when I was in Pinas was the Baliwag style, although Andok's was more ubiquitous. But I had a different experience when I bought some at one of the MRT stations near JR Memorial Hospital (can't remember the name of the stall). The outlet was small, yet the machine was more high tech, and I love the spicy taste (although it was a bit too hot for my kids). I think the different spice flavor was due to the five-spice, which I tried below. And I added some other spices to experiment. If you notice, the two chickens below have different colors. That's because of different flavors. The chickens were the smallest ones among our very own homegrown chickens. Love them with atsarang papaya and steamy rice, plus sarsa ni Mang Tomas, of course. Hubby had the potato with it, and does not care for veggies.
Ingredients:
Whole chickens (that will fit in the rotisserie)
5 cloves garlic each
1 onion each
lemongrass stalks
celery stalks
whole peppers
several fenugreek seeds (I love the smell of it)
kosher salt to taste (in the cavity and on the skin)
various spices (I experimented with five spice, paprika, curry powder, ground pepper, etc -- up to you to experiment. Use your nose to see what you think will give you superb flavor)
Blocks of butter to keep skin moist.
Instructions:
Photos below pretty much self-explanatory. Cooking time depends on weight of chicken (about 2 hours for these two small chickens to make sure they are done. You can always check by prying with a fork or using a thermometer).
Add the veggies one hour before done.
Let sit on the platter for about 10 minutes before attacking to allow for the juices to redistribute.
Saturday, January 16, 2010
Marcato Biscuits (Cookies)
I bought a cookie press sometime last year, foreseeing some cookie-making for cookie swap come Christmas...but in the busy-ness of the Holidays, I did not actually get to practice with my new gadget until after Christmas.
The motivation I had to get myself a cookie press was when hubby previously commented on lengua de gato that made me recall this neat gadget which my Nanay used to have (although I never actually saw her use it).
I got one that I realized now is too pricey, it seems, as I perused amazon.com for the same item. (Probably, amazon did not have the $14.99 at the time I purchased mine). But I guess, with this price and the good reviews as to how sturdy it is, I think I made a good choice nevertheless. Just out of curiosity, I got myself this $14.99 to see if it is the same sturdy construction. Then I will update you readers who might be interested to get it.
My first cookies were overbaked, tough, and brown. I let hubby try one and he suggested I bake them for a shorter time. He then liked the ones baked only up to the point that edges start to turn brown. I also had to get used to pumping out the dough, and to try not greasing the baking sheet. Probably oven temps and environmental conditions and baking pan differences accounted for my initial results despite following the recipe in the manual. After I adjusted the baking time and omitted greasing the baking sheets (I used insulated nonstick aluminum), my hubby now has a new favorite homemade cookie. He can finish a whole batch in two days. (Sadly, my kids and I are not that crazy over this; we like the lengua de gato better.)
This is the first recipe I will post for cookie press.
Basic dough recipe:
500 g (~ 1 lb) flour
250 g (~1/2 lb) sugar
250 g (~ 1/2 lb or 2 sticks) butter
pinch of salt
2-3 oz milk
3 egg yolks
Instructions:
Preheat the oven to 350 deg F and place the rack at the middle.
Melt the butter in the microwave for about a minute and stir; set aside in room temp. Place the flour into a bowl mixing it with the sugar and a pinch of salt. Pour the egg yolks in the center and mix the dough with a fork. Add the butter previously melted, then the milk, and knead with your hands until completely uniform and soft.
Coming up is another recipe that I and the kids preferred, but my husband likes ok (he still prefers the more dense recipe above).
The motivation I had to get myself a cookie press was when hubby previously commented on lengua de gato that made me recall this neat gadget which my Nanay used to have (although I never actually saw her use it).
I got one that I realized now is too pricey, it seems, as I perused amazon.com for the same item. (Probably, amazon did not have the $14.99 at the time I purchased mine). But I guess, with this price and the good reviews as to how sturdy it is, I think I made a good choice nevertheless. Just out of curiosity, I got myself this $14.99 to see if it is the same sturdy construction. Then I will update you readers who might be interested to get it.
My first cookies were overbaked, tough, and brown. I let hubby try one and he suggested I bake them for a shorter time. He then liked the ones baked only up to the point that edges start to turn brown. I also had to get used to pumping out the dough, and to try not greasing the baking sheet. Probably oven temps and environmental conditions and baking pan differences accounted for my initial results despite following the recipe in the manual. After I adjusted the baking time and omitted greasing the baking sheets (I used insulated nonstick aluminum), my hubby now has a new favorite homemade cookie. He can finish a whole batch in two days. (Sadly, my kids and I are not that crazy over this; we like the lengua de gato better.)
This is the first recipe I will post for cookie press.
Basic dough recipe:
500 g (~ 1 lb) flour
250 g (~1/2 lb) sugar
250 g (~ 1/2 lb or 2 sticks) butter
pinch of salt
2-3 oz milk
3 egg yolks
Instructions:
Preheat the oven to 350 deg F and place the rack at the middle.
Melt the butter in the microwave for about a minute and stir; set aside in room temp. Place the flour into a bowl mixing it with the sugar and a pinch of salt. Pour the egg yolks in the center and mix the dough with a fork. Add the butter previously melted, then the milk, and knead with your hands until completely uniform and soft.
Coming up is another recipe that I and the kids preferred, but my husband likes ok (he still prefers the more dense recipe above).
Thursday, January 14, 2010
How to Use the Cookie Press
I bought a cookie press last December, triggered by a my husband's comment in relation to lengua de gato. Somehow, the image of my Nanay's plastic cookie press flashed in my mind, and I knew I had to get myself this toy.
At the time I got mine, it was the $41, chosen because of some good reviews on amazon. Then as of typing this, I saw the $14.39. I was intrigued by the cheap price. The gadget itself seemed the same. So I decided to order this just to see if it was made of the same material, and if constructed the same. Will update this post once I got a hold of the cheaper one.
I never saw my mother use hers. So I looked at some videos on how to use the cookie press. Got some ideas from Wilton's.
I used the ONLY recipe (coming up next) that came with the gadget, and while it said to grease the baking sheet, I found out that if I don't, the dough stays on the sheet after coming out of the press. If I did grease the baking sheet, the dough just would not stay on it. The Wilton video I saw suggested ungreased sheet anyway. I also had to shorten the baking time, and I placed the rack at the middle of the oven to not burn the cookies. After I developed the rhythm of pressing and baking, my husband is now a happy cookie muncher.
The baking pan I used is a nonstick insulated aluminum pan as pictured below in the link from amazon.
How to use the cookie press:
Unscrew the closing ring and raise the piston. Fill the entire cylinder with part of the dough prepared. Insert the desired die-plate into the closing ring.
The raised part of the die-plate must be facing downwards. Screw the closing ring onto the cylinder. Grrease a cookie sheet evenly. Choose the size of the biscuits you wish to obtain by rotating the regulator (1=small biscuits; 2=large biscuits).
Turn the knob so that the jack on the lever meets the notches on the rod. Pump the lever a few times until the dough comes out of the holes of the die-plate evenly. Remove this first dough so that the die-plate stays clean.Place the machine on the cold cookie sheet and push the lever downwards.
Raise the lever and move the machine to make another biscuit.
Bake the oven for approximately 12-15 minutes (or until the edges start to brown). You might have to rotate the pan to brown the cookies evenly.
Take the sheet out of the oven and let cool for about a minute before transferring the cookies onto the cooling rack.
Here's a video of me pressing the cookie out onto sheets. Sorry I am not a good video editor. No words here. But you will get the gist anyway...Pardon the mess, please. I was also making empanada at the time; hence, I had flour and bowls around.
At the time I got mine, it was the $41, chosen because of some good reviews on amazon. Then as of typing this, I saw the $14.39. I was intrigued by the cheap price. The gadget itself seemed the same. So I decided to order this just to see if it was made of the same material, and if constructed the same. Will update this post once I got a hold of the cheaper one.
I never saw my mother use hers. So I looked at some videos on how to use the cookie press. Got some ideas from Wilton's.
I used the ONLY recipe (coming up next) that came with the gadget, and while it said to grease the baking sheet, I found out that if I don't, the dough stays on the sheet after coming out of the press. If I did grease the baking sheet, the dough just would not stay on it. The Wilton video I saw suggested ungreased sheet anyway. I also had to shorten the baking time, and I placed the rack at the middle of the oven to not burn the cookies. After I developed the rhythm of pressing and baking, my husband is now a happy cookie muncher.
The baking pan I used is a nonstick insulated aluminum pan as pictured below in the link from amazon.
How to use the cookie press:
Unscrew the closing ring and raise the piston. Fill the entire cylinder with part of the dough prepared. Insert the desired die-plate into the closing ring.
The raised part of the die-plate must be facing downwards. Screw the closing ring onto the cylinder. Grrease a cookie sheet evenly. Choose the size of the biscuits you wish to obtain by rotating the regulator (1=small biscuits; 2=large biscuits).
Turn the knob so that the jack on the lever meets the notches on the rod. Pump the lever a few times until the dough comes out of the holes of the die-plate evenly. Remove this first dough so that the die-plate stays clean.Place the machine on the cold cookie sheet and push the lever downwards.
Raise the lever and move the machine to make another biscuit.
Bake the oven for approximately 12-15 minutes (or until the edges start to brown). You might have to rotate the pan to brown the cookies evenly.
Take the sheet out of the oven and let cool for about a minute before transferring the cookies onto the cooling rack.
Here's a video of me pressing the cookie out onto sheets. Sorry I am not a good video editor. No words here. But you will get the gist anyway...Pardon the mess, please. I was also making empanada at the time; hence, I had flour and bowls around.
Thursday, August 13, 2009
KNB: Icy Treats Snowcone and Slushie Maker
As I said in my halo-halo post, my older son suggested we order a snowcone maker. So I searched amazon.com for snowcone maker, slushie maker, and ice shaver, and found some that reminded me of those I saw in some stalls in the Philippines.
The Paragon brand was very expensive, and yet I knew that it produces crushed ice too
chunky for me to consider for halo-halo, just a bit finer than the crushed ice my fridge makes. So on to the next...
I seriously considered the New Hawaiian Ice Shaver, because not only was it familiar (I saw it in action in one of the vendors in the Philippines), I also knew that the ice shavings produced by it was perfect for halo-halo. But when I placed it in my cart, the shipping cost was prohibitive! It was so heavy that the
S&H would have been a whooping $45! So I scratched it off...
Next I considered something made in Japan (because they make excellent blades), but the plastic body (of the pink one) seemed so flimsy that it reminded me of my sister's ice shaver when she was still in the Philippines, which when cranked threatened to fall apart. The gray one looked like metal, but the make was not specified and I did not dare try.
So I just checked out those that had high reviews, and settled for Hamilton Icy Treats after reading the negative reviews versus the positive reviews.
My very own experience with it? It definitely faster than my mandolin slicer-made shaved ice, and the only negative thing I can say about it is I have to pause and rearrange the ice so they don't stick together and get stuck that way. Otherwise, the gadget is sturdy for the purpose, the shaved ice has two settings - slushie (coarser) and snowcone (finer). Sometimes I just switch from one to the other just to dislodge the stuck ice and keep it going. The on and off switch is the cover itself (which I think is an excellent precaution to avoid cuts in children). And it is compact enough that it does not occupy too much countertop space (unlike if I bought the New Hawaiian brand).
But if I lived in Hawaii, I would have settled for that...
Thursday, April 30, 2009
Brioche Molds
I finally got my brioche molds which I ordered week before the Lenten season! I got the size shown here (5.5 inch for the widest diameter. I think that's the perfect size for mamon and special ensaymada. These molds that I got are heavy tin and sturdy, to my surprise, unlike the molds I got from a friend which she bought in the Philippines. They are made in France (oh, and brioche is a French bread).
Now I can make supersoft ensaymadas flavored with fillings - ube, yema (will experiment on this, per Bobong's suggestion), hazelnut cream filling, etc.
I just need to find the time...it's hard during summer...gardening season, outing season, vacation time (not that we plan to go anywhere far this year). Sigh....
Thursday, March 05, 2009
Thanks to Mely for these Puto Molds!
I came home very tired from work today, and I still have to go to work early tomorrow morning, then I have the weekend off, and I will be able to update my blog and do some bloghopping.
Mely had told me about her sending these puto molds to me and I have been waiting excitingly for them.
I finally got them today! They were like mini muffin cups! But the good thing about these (in contrast to muffin cups) is that they do not have ridges, so clean up (and brushing with butter) will be much easier!
Thanks, Mely!!! Like you said, I will put these puto molds to good use...you can count on me for that!
Mely is a very good cook and has got lots of excellent recipes in her food blog.
For those who might be interested to purchase puto molds, the tartlet pans on the right will probably do (they are like shorter versions of muffin cups without the ridges).
Sunday, February 15, 2009
Amco Swing A-Way Grease Separator
src="http://pagead2.googlesyndication.com/pagead/show_ads.js">
For the past 5 years my cheap 1-cup fat separator had served me well enough. But many times I wish I had one with bigger capacity, with a wide mouth and stable base, such that pouring the sauce off from pan would not be too much of a hassle. So I browsed amazon.com again to look for one with good reviews. This particular brand and style caught my attention, not only because of its strainer that would get rid of big chunks of veggies and meat or bones left there and still retain some small bits that add flavor, but also of its bottom-release feature, which allows for minimal, if at all, inclusion of fat when you are pouring that gravy to saucepan. The cover of the tiny hole at the bottom is released with a squeeze of a silicone part at the handle.
However, despite buying myself this gadget for the purpose of separating fat from the sauce, I found an additional use for it. As a matter of fact, I used it first as a batter dispenser before I even had the chance to use it for fat separation when making gravy (which I haven't done to this day since I got this wonderful gadget). This photo shows the kutsinta batter being poured effortlessly and with minimal mess into individual muffin cups. I love it, and I just hope it lasts.
So even if it was more pricey than most fat separators, the two-in-one feature (which I did not foresee when I made the decision to buy it) makes it worth the price.
src="http://pagead2.googlesyndication.com/pagead/show_ads.js">
Wednesday, January 07, 2009
Boiling Water Canner and Bamboo Steamer
I have posted during my earlier blogging days about
canning, and this is where I use my boiling water canner
primarily (It was a birthday gift from my mother-in-law after I have borrowed hers several times to can my produce during my first year of garden harvest). But through years now of using the canner and with my bamboo steamers
also now available whenever I want to prepare steamed pinoy goodies such as puto, siopao, or siomai, I resort to this, especially if it requires oven-like environment as in the case of puto or siopao, which requires the high moist heat of steam. Leche flan can also be prepared in this way, if you cover the llanera with foil, place in the bamboo steamer atop the canning rack, steamed in MODERATE heat for 30 minutes for the typical llanera size, or longer for 8x8 round pans (if you try using high heat, it will result to big holes; less heat will take longer cooking time).
Although the bamboo steamers
can be used on top of a
wok for siomai and dumplings, which do not require sudden rising of dough, the canner provides a better effect of sudden heat to assist in rising of dough for such recipes as puto or siopao ("ginulat" kumbaga). The canning rack allows for proper elevation so you don't boil the goodies, and the handles also provide an easy way to place and remove what you are cooking. Of course you can use these for the individual purposes they were intended to be used for. I am just showing here how I marry the use of some distinct tools to prepare some Filipino favorites. The bamboo steamer I use is a 10-in size. If larger, it won't fit in my canner. There are larger sizes of bamboo steamers
available, though.
To properly care for bamboo steamers
, spray with oil after each use and thoroughly dry when storing.
To properly care for your boiling water canner
, just promptly remove the water after each use and wipe to avoid rusting.
| From boiling water canner & bamboo steamer |
Although the bamboo steamers
wok for siomai and dumplings, which do not require sudden rising of dough, the canner provides a better effect of sudden heat to assist in rising of dough for such recipes as puto or siopao ("ginulat" kumbaga). The canning rack allows for proper elevation so you don't boil the goodies, and the handles also provide an easy way to place and remove what you are cooking. Of course you can use these for the individual purposes they were intended to be used for. I am just showing here how I marry the use of some distinct tools to prepare some Filipino favorites. The bamboo steamer I use is a 10-in size. If larger, it won't fit in my canner. There are larger sizes of bamboo steamers
To properly care for bamboo steamers
To properly care for your boiling water canner
Saturday, January 03, 2009
My Humble Coconut Grater
Ana gave me a possible attachment to kitchen aid or a motor to come up with a motorized grater, but I have never gotten around to asking a machinist(?) to see whether it can be re-shaped to fit my kitchen aid. In any case, since I grate only 1-2 coconuts at a time, which takes about 5-10 minutes of grating (using my son power), this humble manual grater, which I attached to a plank then place on a seat during use, serves the purpose for which it was intended. This way, I can easily hide it out of sight when not in use, by squeezing it into a slim cupboard.
A manual coconut grater can be bought here for $5, but I could only imagine how hard that one is for the wrist and hand. A seat version is also available for $16, but storage would be the problem here, not to mention shipping costs for the wooden part. If only they sell something like mine, only with screw to attach it to a plank like I did, with the option to get a plank as well, I bet they would sell better. Maybe I should ask for someone to make these for me, then maybe I can sell them at amazon.com...hmmmm....
Thursday, December 18, 2008
KNB - Katas ng Blogging
I am hosting a Filipino Christmas party this Saturday...
and I have been busy preparing for that. Good thing I have these early Christmas gifts: kitchen helpers -- which are KNBs.
I signed up for google adsense in 2006(? can't remember exactly when) and more frequently have been receiving my "blogger's compensation" in the past years. I used the previous ones for personal wants (a trip to Splashtown, etc.). (I also, at some point, signed up for kontera.) This time I thought...why not get things for my kitchen since the money is a fruit of my foodblogging hobby (In other words, katas ng blogging)?
So I did...
You can very well tell that I am a big fan of slow cooking. Well, there is another reason why I got more slowcookers when I already have a 6-qt and a 2-qt. As I was thinking of preparing several main entrees for the Filipino Christmas party I am hosting this Saturday, I wanted to have a means to keep them warm after preparing ahead (before guests arrive). Actually, I have cooked and frozen some of them since last week, and I plan to just start thawing and keeping them warm by morning of Saturday. I looked at chafing dishes and boy! Aren't they super expensive???? Beautiful and pleasing to the eyes were those that ranged $300+, and the ordinary looking ones were in the $40++, so I opted for slowcookers. The digital one I got from walmart at $30 (and may I say elegant). Plus I don't have to look for fuel to keep the food warm. Just plug them in. Well, I plan to use my countertop space (I have a lot if I keep it tidied up!) and my several outlets (I have them every 2 feet, as I requested to hubby to make them available for all my small kitchen appliances when he was building my kitchen). So my plan is to line up the dishes on the countertop and use the dining table solely for eating our food. The slowcookers are a good solution. I might have to borrow my friend's and my MIL's for some more entrees.
I have had an irrational fear (aka, phobia) of pressure cookers because I always imagine they would explode in front of my face. (Oh please don't lecture me about how easy it is to use, because, despite my phobia, I perfectly understand the scientific principles, aka physics, of pressure cooking. Maybe the same knowledge is responsible for my phobia...knowing if my kids topple this while on high pressure, they might end up with wrecked and severely burned face. Hence, I should never leave this alone while I am using it!) My Nanay used to own one, with the old-fashioned metal sitting on top regulating the pressure inside. I still remember our maid rushing to the sink to run cold water over it to quickly lower the pressure before she would open it. I was always afraid she was not intelligent enough to use the thing and was just thankful she never got injured. Well, after several years, the gasket gave up and my Nanay was never able to get a replacement. So it primarily served then as a thick-gauged stockpot. It was so heavy I was not sure whether the make was aluminum with something else, but it was not shiny as my stainless steel is.
I got this Fagor pressure cooker from amazon.com (I am a great customer of amazon).
I would have wanted to get the 10-qt pressure cooker so I could also do canning in it but it was so pricey my KNB will not be able to cover the cost! This 8-qt was $90 and just the right size for most of my cooking anyway. I finally summoned up the courage to get one because of my plan to serve lengua with mushroom sauce, and as stel had a post about how to peel the lengua, I thought I would need one! And she was right on that!!! It was sooo much easier to peel (not to mention so fast to cook to tenderness) the beef tongue. Why Fagor? Well, I googled the best pressure cooker reviews, and this had very good reviews, plus they had stainless steel ones! (They have cheaper aluminum ones too, but I have this irrational fear again that aluminum just might not be able to withstand the pressure). I made sure I watched to DVD first before I used it. Gives me security during my first try. Now that I have actually used it and have successfully overcome my phobia, I guess I will have more experimental cooking using the pressure cooker...more to blog about in the future.
And yeah, from now on, I will purchase kitchen gadgets, tools, etc. with my blogger's comp.
| From KNB |
I signed up for google adsense in 2006(? can't remember exactly when) and more frequently have been receiving my "blogger's compensation" in the past years. I used the previous ones for personal wants (a trip to Splashtown, etc.). (I also, at some point, signed up for kontera.) This time I thought...why not get things for my kitchen since the money is a fruit of my foodblogging hobby (In other words, katas ng blogging)?
So I did...
You can very well tell that I am a big fan of slow cooking. Well, there is another reason why I got more slowcookers when I already have a 6-qt and a 2-qt. As I was thinking of preparing several main entrees for the Filipino Christmas party I am hosting this Saturday, I wanted to have a means to keep them warm after preparing ahead (before guests arrive). Actually, I have cooked and frozen some of them since last week, and I plan to just start thawing and keeping them warm by morning of Saturday. I looked at chafing dishes and boy! Aren't they super expensive???? Beautiful and pleasing to the eyes were those that ranged $300+, and the ordinary looking ones were in the $40++, so I opted for slowcookers. The digital one I got from walmart at $30 (and may I say elegant). Plus I don't have to look for fuel to keep the food warm. Just plug them in. Well, I plan to use my countertop space (I have a lot if I keep it tidied up!) and my several outlets (I have them every 2 feet, as I requested to hubby to make them available for all my small kitchen appliances when he was building my kitchen). So my plan is to line up the dishes on the countertop and use the dining table solely for eating our food. The slowcookers are a good solution. I might have to borrow my friend's and my MIL's for some more entrees.
I have had an irrational fear (aka, phobia) of pressure cookers because I always imagine they would explode in front of my face. (Oh please don't lecture me about how easy it is to use, because, despite my phobia, I perfectly understand the scientific principles, aka physics, of pressure cooking. Maybe the same knowledge is responsible for my phobia...knowing if my kids topple this while on high pressure, they might end up with wrecked and severely burned face. Hence, I should never leave this alone while I am using it!) My Nanay used to own one, with the old-fashioned metal sitting on top regulating the pressure inside. I still remember our maid rushing to the sink to run cold water over it to quickly lower the pressure before she would open it. I was always afraid she was not intelligent enough to use the thing and was just thankful she never got injured. Well, after several years, the gasket gave up and my Nanay was never able to get a replacement. So it primarily served then as a thick-gauged stockpot. It was so heavy I was not sure whether the make was aluminum with something else, but it was not shiny as my stainless steel is.
I got this Fagor pressure cooker from amazon.com (I am a great customer of amazon).
I would have wanted to get the 10-qt pressure cooker so I could also do canning in it but it was so pricey my KNB will not be able to cover the cost! This 8-qt was $90 and just the right size for most of my cooking anyway. I finally summoned up the courage to get one because of my plan to serve lengua with mushroom sauce, and as stel had a post about how to peel the lengua, I thought I would need one! And she was right on that!!! It was sooo much easier to peel (not to mention so fast to cook to tenderness) the beef tongue. Why Fagor? Well, I googled the best pressure cooker reviews, and this had very good reviews, plus they had stainless steel ones! (They have cheaper aluminum ones too, but I have this irrational fear again that aluminum just might not be able to withstand the pressure). I made sure I watched to DVD first before I used it. Gives me security during my first try. Now that I have actually used it and have successfully overcome my phobia, I guess I will have more experimental cooking using the pressure cooker...more to blog about in the future.
And yeah, from now on, I will purchase kitchen gadgets, tools, etc. with my blogger's comp.
Tuesday, December 16, 2008
Drunken Steamed Shrimps (Nilasing na Hipon)
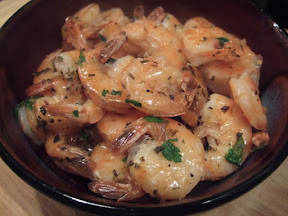
I think I overcooked these drunken steamed shrimps (you can tell by the shrinkage of the shrimps compared to the shells).
I was trying to cook a lot of things at the same time. I was baking boxed scalloped potatoes and the spinach-feta cheese chicken rolls, and making fried rice (for my sons and I). Since I had only 4 chicken breasts and there were 5 of us, I was worried there might not be enough to feed my
family, so I steamed some shrimps as a back-up. I was sure I was not going to eat a whole chicken breast, nor would my stepdaughter and husband, but each of my two sons eat like big men (more than my husband does) so to make sure they would not be bitin, I prepared steamed shrimps. This steamer comes in handy on such occasions because I just throw the shrimps in after tossing in some sesame oil, sprinkle some spices (parsley, pepper, paprika, ground basil), add some white wine to the water, and set the timer. The whole bag of shrimps was frozen, and I set the timer for like 20 minutes, although my other dishes took a while longer to cook, so I extended the steaming time just to make sure the shrimps stayed warm. I think I overcooked them, but they still turned out not rubbery (thank God!)
Here is my plate with a little of everything.
Steamed shrimps, scalloped potatoes, SFC Chix roll, and fresh baby spinach. I tried not to put a lot on my plate as I did not want to gain too much weight. My husband and stepdaughter do not eat shrimps, so these are mainly for my sons and I.
Everyone was full at the end of mealtime.
| From drunken steamed shrimp |
I was trying to cook a lot of things at the same time. I was baking boxed scalloped potatoes and the spinach-feta cheese chicken rolls, and making fried rice (for my sons and I). Since I had only 4 chicken breasts and there were 5 of us, I was worried there might not be enough to feed my
| From drunken steamed shrimp |
Here is my plate with a little of everything.
| From drunken steamed shrimp |
Everyone was full at the end of mealtime.
Saturday, November 08, 2008
Gadget to Make Empanada Easier
I have posted way earlier in my old kusina about how I made empanadas.
Several years later, I am posting this now to show how I made it easier using a dough/dumpling/empanada press, and of course, coming up with more presentable empanadas.
How I make pie crust can be found here.
How I make my empanada filling can be found here.
This is basically a short description of how I make my empanadas nowadays. In using the dough press to shape the circles, use a bigger one as the dough may shrink back once you lift it up. Then use the right size dough to place this on and the filling. You will have some extra dough to pinch off this way.
After several times of making this, I have come up with some more tips:
1. Use plastic to cover dough while rolling. It makes flipping easier.
2. Sprinkle flour from time to time to lessen stickiness.
3. Make sure your dough is quite chilled and not room temp before rolling. It tends to be less sticky, and it tends to help preserve the flakiness. So to do this, take out some dough and leave some while you work on your first batch.
4. The eggwash will make your floury dough seal. Without it, the flour will prevent sealing. The while baking, eggwash makes your empanadas appear golden.
| From empanada |
How I make pie crust can be found here.
How I make my empanada filling can be found here.
This is basically a short description of how I make my empanadas nowadays. In using the dough press to shape the circles, use a bigger one as the dough may shrink back once you lift it up. Then use the right size dough to place this on and the filling. You will have some extra dough to pinch off this way.
After several times of making this, I have come up with some more tips:
1. Use plastic to cover dough while rolling. It makes flipping easier.
2. Sprinkle flour from time to time to lessen stickiness.
3. Make sure your dough is quite chilled and not room temp before rolling. It tends to be less sticky, and it tends to help preserve the flakiness. So to do this, take out some dough and leave some while you work on your first batch.
4. The eggwash will make your floury dough seal. Without it, the flour will prevent sealing. The while baking, eggwash makes your empanadas appear golden.
Tuesday, November 04, 2008
Zyliss Mandolin Slicer; Ground Beef with Green Beans and Corn
This
is one of my most useful gadgets/toys in the kitchen.
I use it for mainly making bread and butter pickles, for slicing any vegetable thinly, espcially carrots, cukes, onions. It uses manpower, so less use of electricity, more exercise for the arms.
Last summer, I had lots of green beans and sweet corn that I would harvest daily (kapagod! That's why I told my husband I don't feel like having a veggie garden next year. He said, "Ok, then we will only have cukes and corn. No more tomatoes or beans." Ngek!)
Well, my kids are not particularly fond of green beans (I love them in bulalo or anything nilaga), until I cooked them this way (which I used to cook back in PI when I was tasked by my aunt/maid as the slicer in the kitchen).
Ingredients:
1 lb ground beef (I browned, seasoned with salt and pepper, separated some for my husband's consumption as he likes them plain served with potatoes and broccoli)
2 cloves garlic, minced
1 small onion, sliced
3 small tomatoes, sliced
2 handfuls of green beans, sliced thinly as shown (quite time-consuming, but the mandolin makes it easier and faster)
1 cup sweet corn kernels (or 1 12-oz can, drained)
some water
basil to taste
salt and pepper to taste
Procedure:
Brown beef; drain excess fat. Add garlic until aromatic, then add onion until translucent. Sprinkle some salt and pepper. Toss the tomatoes in and stir until tomatoes have caramelized. Add the green beans, corn, and some water (maybe 1/4 to 1/2 cup). Let simmer uncovered for 2 minutes. Season with basil. Add salt and pepper to taste.
is one of my most useful gadgets/toys in the kitchen.I use it for mainly making bread and butter pickles, for slicing any vegetable thinly, espcially carrots, cukes, onions. It uses manpower, so less use of electricity, more exercise for the arms.
Last summer, I had lots of green beans and sweet corn that I would harvest daily (kapagod! That's why I told my husband I don't feel like having a veggie garden next year. He said, "Ok, then we will only have cukes and corn. No more tomatoes or beans." Ngek!)
![]() |
| From ground beef with corn and green beans |
Ingredients:
1 lb ground beef (I browned, seasoned with salt and pepper, separated some for my husband's consumption as he likes them plain served with potatoes and broccoli)
2 cloves garlic, minced
1 small onion, sliced
3 small tomatoes, sliced
2 handfuls of green beans, sliced thinly as shown (quite time-consuming, but the mandolin makes it easier and faster)
1 cup sweet corn kernels (or 1 12-oz can, drained)
some water
basil to taste
salt and pepper to taste
Procedure:
Brown beef; drain excess fat. Add garlic until aromatic, then add onion until translucent. Sprinkle some salt and pepper. Toss the tomatoes in and stir until tomatoes have caramelized. Add the green beans, corn, and some water (maybe 1/4 to 1/2 cup). Let simmer uncovered for 2 minutes. Season with basil. Add salt and pepper to taste.
Monday, October 27, 2008
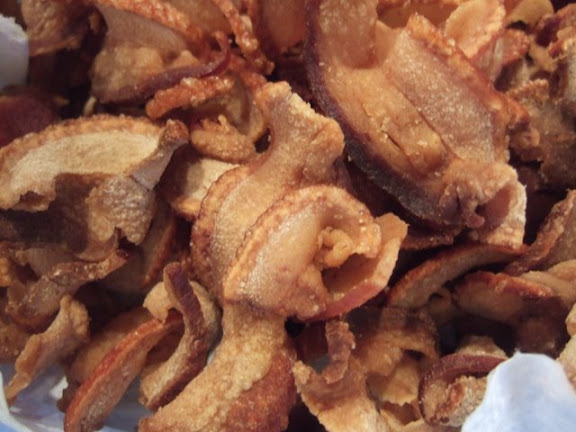
Chicharon using Smoked Pork Fat Back and a Meat Slicer
I had three slabs of these smoked fat back that my MIL gave to me, and I experimented with the first one by boiling it then broiling, hoping to come up with some sort of crispy lechon, but I only ended up with gallons of oil drippings and chewy rind on top of melting fat...I tossed it away.
If I was not too cheap, I should have checked amazon.com first for reviews on top rated meat slicers before buying. The Chef's Choice 610 would have been a good Christmas gift for myself. :) Even hubby says that is not too expensive for a meat slicer. Hmmm....
For those who might be interested on HOW TO MAKE CHICHARON the DOST way, here is their recipe (I have not tried):
CHICHARON
Materials:
1 kilo of pork skin 4 tbsp. vinegar
1 tsp. salt vetsin and pepper
Procedure:
1. Boil the pork skin in a sufficient amount of the prepared solution until tender.
2. After boiling, cool and remove the fat portion.
3. Slice into desired sizes.
4. Dry under the sun until firm.
5. Deep-fry at about 188 C and strain.
6. Pack in plastic bags.
Friday, October 06, 2006
Bread Machine
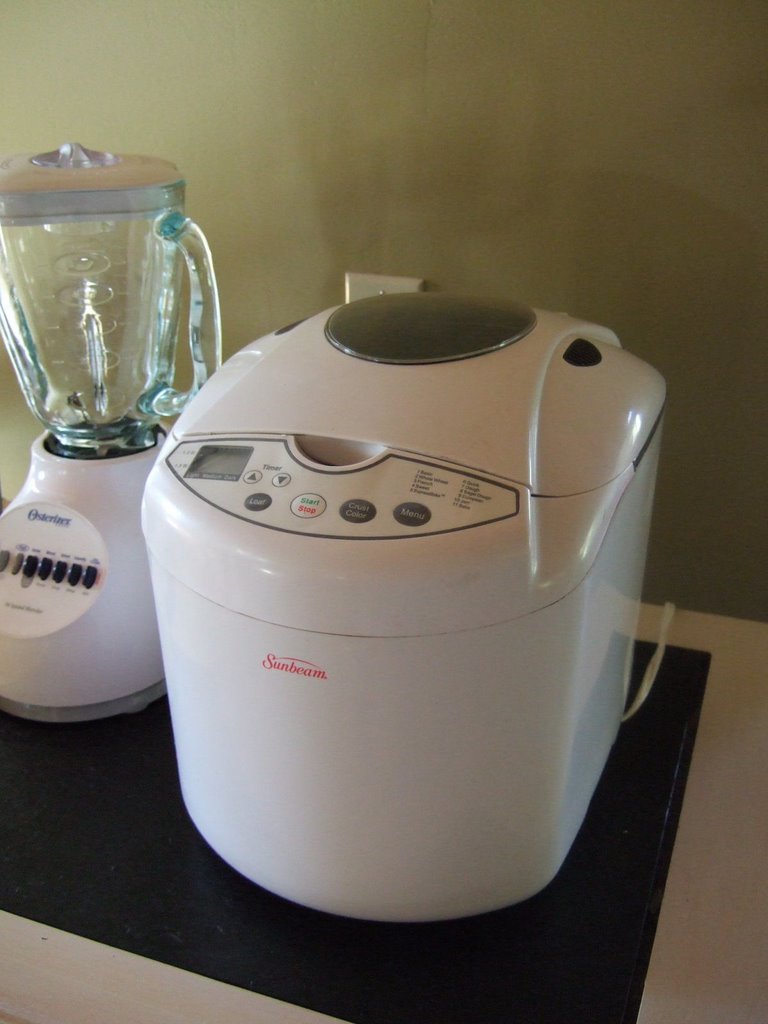
For stel...My bread machine was a wedding gift from my MIL. My husband was ecstatic that I got one, and he was so looking forward to homemade yeast breads. I myself was excited, and I asked my hubby to make the first bread as a demonstration of how to use it, which he did. He picked the recipe in the manual for a bread that could be prepared in just about an hour. We delighted in the smell of the yeast as the dough was rising and baking.
We were disappointed in the outcome (although not in the taste) because it was wrinkled and seemed to have shrunk.
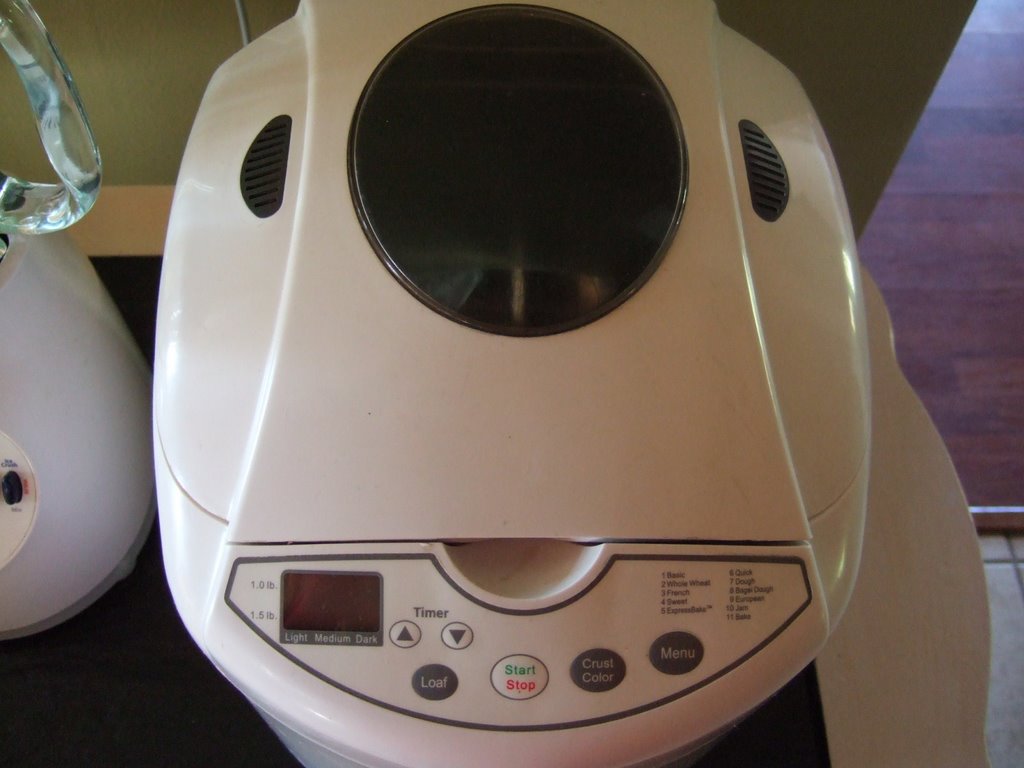
Several tries later, I lost interest in using it, and resorted to going back to using my Kitchen Aid stand mixer and the conventional oven. I was feeling guilty because it was a gift from my beloved MIL. I hated seeing it just occupying a rather big portion of my countertop space (it is not as heavy as KA stand mixer, though). Until I thought of checking out the website written at the label of the Fleischmann's bread machine yeast and looking at their bread machine recipes...
One after another, I tried basic bread recipes the ingredients of which were usually found in my pantry. Some very good outcomes I have achieved were those of Basic Egg Bread, Rich Cheddar Cheese Bread, and Buttery Sweet Bread as they had well-formed dome and good crunchy crust, plus great taste. The Old-Fashioned Buttermilk Bread was superb in taste and crunch, although tended to have wrinkled dome.Then as I examined the different settings, I added to my list some wheat bread recipes. Then I experimented with the dough setting using any of the above-mentioned recipes to try shaping them and baking them in the conventional oven.
Lately I have been trying to use it just to mix up the dough to the point when it is ready for kneading (which I like because it is less messy). What I like best about these recipes is that the amount is for family size only, usually requiring only 2 cups of flour, so that I do not have to worry about trying to consume the leftovers (I LOVE FRESHLY BAKED YEAST ROLLS, not 1- or 2- or 3-day old ones). My latest experiments include using the bread machine for recipes calling for rapid rise yeast and all purpose flour instead of the usual bread machine yeast and bread machine flour. Right now I am trying to "perfect" (according to my standards) my ensaymada using the bread machine (for minimal mess). Needless to say, if its life comes to its end soon, it would "die" having served its purpose and more. I love my bread machine, and it has been a great kitchen helper for me. The brand I have is a Sunbeam bread machine.
Making a research on bread machines will lead you to poor review of Sunbeam. I think it is mainly because of the same problems I encountered with tmy first usage of it. King Arthur Flour recommends the zojirushi, but it is way too costly (like, 3-6 times more expensive). I am quite satisfied with my Sunbeam.
TIPS for cleaning the...
PAN - Whether you used to make dough or to bake bread, soak in COLD WATER until the dough/bread softens. Then rinse in warm water either plain or a bit soapy. Let air-dry before storing in the bread machine.
BREAD MACHINE - Wipe with damp cloth only.
DO NOT PUT IN THE DISHWASHER! This will damage the non-stick finish (and also will affect the grease in the underside that rotates, according to hubby).
More tips on bread machine here.
Saturday, June 24, 2006
Palitaw
This is my second entry for the LP 11.Like I said in my most recent post, palitaw is one Filipino snack item that, as a child bored during summer, I learned to make through the recipe pages of Liwayway Magazine. I can't remember whose column it was, but I liked the recipes featured there. The original recipe called for galapong. I had no idea then what that was, but I asked my mother for money so I could try making this, and off I trekked to the wet market one sunny afternoon when most market vendors were taking their nap. Galapong turned out to be sticky rice soaked overnight (at least 8 hours), then ground as soon as there was a buyer. Once ground, it should be consumed immediately; otherwise it will spoil (panis).
I have always loved to make this kakanin because of the ease of finding the ingredients and the simple process of making them. It was a bit of a challenge, though, now that I am here in the US. It took quite some time for me to finally come up with substitutes and the tools.
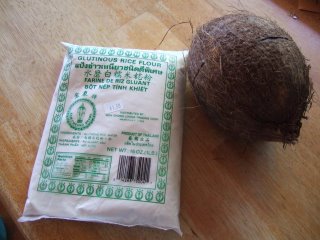
First, I tried to make my own galapong, but I did not know the proper proportion of water to rice, and my first attempt was not successful, I ended up throwing the rice. I was discouraged for a while, until I had an epiphany of using sticky rice flour and water instead! So now I had to start with these two basic ingredients: coconut and sticky sweet rice flour.When it comes to the freshly grated coconut, I knew matured coconuts were available in Hannaford. I bought one several months ago and tried to grate that with fork. I got tired and swore 99% of the time. I did not want to do that again.
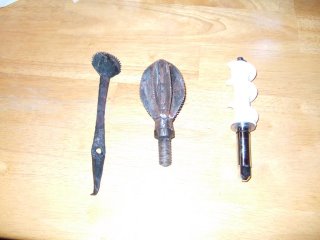
But when my friend Ana went on a vacation to the Philippines, I requested that she buy me a coconut grater. She did get me one for manual grating (left most in this photo), one as an attachment to a machine (middle one). I am hoping hubby could turn it like the Kitchen Aid attachment I have for grinding (right most). But until he could find the time to do that, I will content myself with the manual tool.
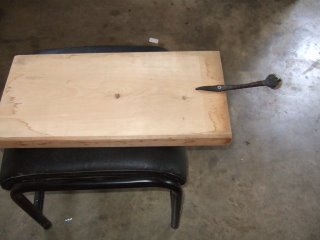
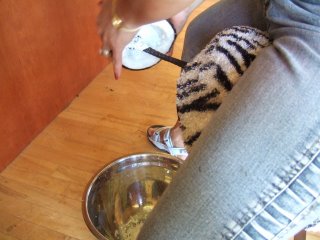
I attached it to a small piece of plank, which I could sit upon when placed on a bench or a chair or an ottoman.This is my friend Fe doing the grating when we had a lunch as a welcome to Ana.
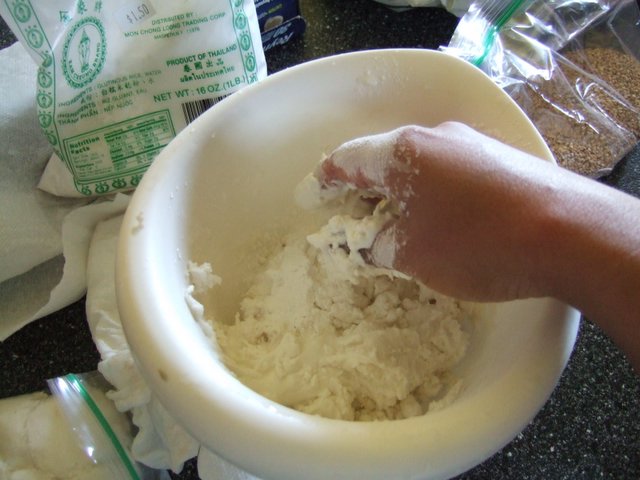
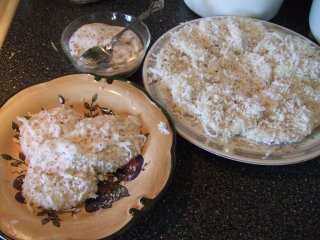
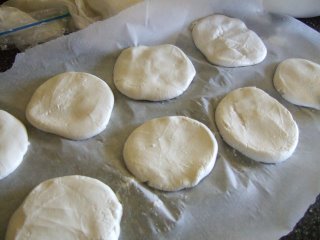
Now, going to the sticky rice patties, first, boil water in a big pot (wider than tall). While waiting for it to boil, prepare the patties by mixing cold water with some flour. I did it by approximating, I wanted to create a smooth dough, not mushy or super sticky, but not too dry. As soon as it is good to shape into balls, make the balls and flatten them into disks. Once the water is boiling briskly, drop these disks one by one, leaving enough space for each patty so they do not stick together.
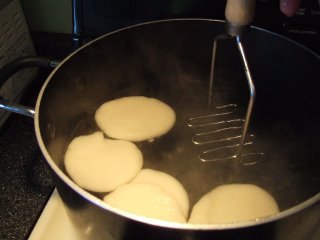
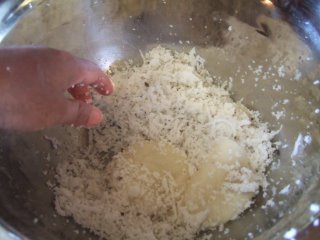
Once they come up to the surface/float (lumitaw sa ibabaw - hence, the name "palitaw"), scoop them out and let the excess water drip.Roll each patty into the freshly grated coconut (I do not like using the dry coconut flakes), then lay on the plate, as illustrated in the first photo. Never add the sugar-sesame seed mixture as this will draw out the water and make it very wet, which will dissolve the sugar. Rather, serve the palitaw with the sugar-sesame in a separate bowl, to be added only once the palitaw pieces are on the eater's plate, to be consumed very soon.
How to prepare the sesame-sugar: toast/roast the sesame seeds (either white or brown are okay) on very low heat. If you are using the white, it will start popping, which heralds that it is almost ready. You must swirl or stir constantly so as not to burn. With the brown one, you just have to go by the smell. Let cool then add the sugar (1:1 proportion, or according to your preference).
I had enough leftover for each of the visitor to take home 3 pieces each (of course I had some too!) What to do with leftovers: Put in the fridge without the sugar-sesame. When you want to eat them, microwave for 30 seconds (if only one patty), then add the sugar-sesame.
My kids still have to develop the taste for this dessert/snack. I plan to serve this during Pinoys' Christmas get together or during my birthday to serve to my in-laws.
I would love to learn how to make pichi-pichi as well (another favorite of mine), and I hope someone can share the how-to's. Maybe it is already featured in past LPs. I gotta have the time to read them...
I also want to be able to find coconut juice (the real coconut juice, even if it is canned) with some young coconut bits so I can make buko-pandan ice candy or drink, and also buko-brown beans popsicle. Any such info?
UPDATE:
JMom posted an easy recipe on pichi-pichi (Yehey!!!), found here.
Subscribe to:
Posts (Atom)
Custom Search