Today I used our grill for the first time this year. Because I had been meaning to try this 7-Up Citrus Marinade on pork chops. I got the marinade from Hannaford sometime last winter (the 7-up caught my attention, since Pinoy style barbecues and even fried chicken are usually marinated or cooked with 7-up. Unfortunately, the fried chicken pre-cooked with 7-up was not well-accepted by hubby. He said it was too sweet.)
I had 8 pieces of pork chops. I marinated 6 pieces in this 7-Up Citrus Marinade for 1.5 hours (Meanwhile, I was transplanting seedlings that I bought from a greenhouse into hanging baskets). I left two pieces unmarinated just in case hubby would not like the marinated ones, just like he did not like the 7-up cooked fried chicken. These I just flavored with salt and pepper, basted with bacon drippings.
I fired up the grill (it's now officially summer in my book!), and cooked the chops, basting with bacon drippings from time to time until I was satisfied with the doneness (I just gauge by the looks...no thermometer, no timing).
Served them while hot...oriented hubby which ones were plain and the marinated. To my surprise, he tried both, and tried the marinated ones first, and loved it! Maybe because the flavor was more of citrus, and that the flavor did not overpower the chops (since they were marinated less than two hours). Then he had a plain one and liked it too...Maybe it was the bacon drippings used for basting...
What a satisfying meal on this hot summery spring day!
Last week I was emailed by a reader requesting for a post on Binangkal, which is popular in Cebu. I had no idea what it was, but I was intrigued enough, especially with some craving to make some munchies soon because I was not making any the past weeks due to the dust all over the house as my husband was working on our sunroom.
Plus, I needed a break too. Cooking/baking has always been therapeutic for me. So I tried this recipe I had been eyeing since last week. I wanted to decrease the ingredients but the list makes it hard to do that. So I followed the recipe. I had a lot of dough to start with, but since I had no idea what binangkal was, except that it was pretty much like doughnut in that it was fried dough, I thought it would be just fine as the first batches could be a learning phase for me.
True enough, pingpong-sized round dough dropped into the medium hot oil gave me darkly browned binangkal with uncooked middle dough. How could I come up with cooked middle without burning the outside? I came up with this solution: smaller dough, flattened somehow into discs. Rationale: Flatter dough means the heat will be close enough to the middle to cook that part well. The smaller dough ensures cooking the middle part without burning the outer.
I had the extra advantage of having the puffing up of the middle part as a visual cue that the middle is getting done. That was quite unexpected but very effective means of assessing the doneness (aside from brown color at the outside).
Kids approved it, and especially enjoyed these treats with maple syrup. Hubby tried it and said it was different, then got a can of Pepsi and had some more binangkal. So I guess he kinda liked it, although it was "different." It is wonderfully crunchy on the outside (Hey, Claire, you will not break your teeth with this one, I promise!)
Ingredients:
5 Cups All Purpose Flour 5 1/2 Teaspoon Baking Powder (preferably Calumet) 1 Box Dark Brown Sugar GH (2 1/2 cups) 3 While Eggs 1 Small Can Evaporated Milk (2/3 cup) + 2 tbsp milk (whole milk or if you have extra evap milk) 1 tsp Vanilla
Instructions:
Mix dry ingredients thoroughly until fine (I used the food processor in pulses.) Mix remaining ingredients: eggs, vanilla, milk. Combine all dry and liquid ingredients by hand. Add more milk if it is too dry until you obtain the correct consistency. The dough should be stiff enough to mold into a ball. Don't make it too wet (read on and you will see why). (Adjust to your preferred Binangkal size). Lay the pinched dough on aluminum foil. Get a cup of tap or filtered water as preferred (this is why you should not make the dough too wet in the first place). Dip two fingers of your hand and wet the palm of the other hand for molding the dough. Pick up each dough and roll between both palms of your hand to shape into balls. Roll dough in a bowl of sesame seeds then press between fingers to make them flat (depressed more at the middle than at the sides). When done, you are ready to fry. Heat your frying pan in high heat then lower to Medium-LOW when you begin frying because the pan must be very hot to start. You can try one first to gauge your own stove and adjust in the next batches. Start with few, try to open some and see if you already like what you have before going full blast with more per batch. Place only about 6-8 pieces per batch. Once all have floated, wait until the top parts puff up and crack, then tip over to cook the other side. Count about 30 seconds once you have tipped over all pieces. Take note of which ones are the first, as they are the ones to get out first. Check to see doneness of the underside (should be uniformly browned, not whitish in the cracks. (My video below is quite different at I tipped too soon just by counting. It will be more reliable to wait for puffing up of the middle before tipping over.) Prepare a cooling wire rack over a cookie sheet to hold cooked Binangkal for cooling purposes and to let excess oil drip. Line your storage container with paper towel. Store in airtight container when completely cool. The Binangkal will keep for a week (according to recipe source).
I bought a cookie press sometime last year, foreseeing some cookie-making for cookie swap come Christmas...but in the busy-ness of the Holidays, I did not actually get to practice with my new gadget until after Christmas.
The motivation I had to get myself a cookie press was when hubby previously commented on lengua de gato that made me recall this neat gadget which my Nanay used to have (although I never actually saw her use it).
I got one that I realized now is too pricey, it seems, as I perused amazon.com for the same item. (Probably, amazon did not have the $14.99 at the time I purchased mine). But I guess, with this price and the good reviews as to how sturdy it is, I think I made a good choice nevertheless. Just out of curiosity, I got myself this $14.99 to see if it is the same sturdy construction. Then I will update you readers who might be interested to get it.
My first cookies were overbaked, tough, and brown. I let hubby try one and he suggested I bake them for a shorter time. He then liked the ones baked only up to the point that edges start to turn brown. I also had to get used to pumping out the dough, and to try not greasing the baking sheet. Probably oven temps and environmental conditions and baking pan differences accounted for my initial results despite following the recipe in the manual. After I adjusted the baking time and omitted greasing the baking sheets (I used insulated nonstick aluminum), my hubby now has a new favorite homemade cookie. He can finish a whole batch in two days. (Sadly, my kids and I are not that crazy over this; we like the lengua de gato better.)
This is the first recipe I will post for cookie press.
Basic dough recipe:
500 g (~ 1 lb) flour 250 g (~1/2 lb) sugar 250 g (~ 1/2 lb or 2 sticks) butter pinch of salt 2-3 oz milk 3 egg yolks
Instructions:
Preheat the oven to 350 deg F and place the rack at the middle.
Melt the butter in the microwave for about a minute and stir; set aside in room temp. Place the flour into a bowl mixing it with the sugar and a pinch of salt. Pour the egg yolks in the center and mix the dough with a fork. Add the butter previously melted, then the milk, and knead with your hands until completely uniform and soft.
Coming up is another recipe that I and the kids preferred, but my husband likes ok (he still prefers the more dense recipe above).
Tender, juicy, and glazed tocino without the burn (go ahead and click on the photo to see a closer and bigger look at it). My husband loves this so much that he can eat as much as 3 chops even if he is not really a big eater. I am not talking about a recipe. Rather, I am talking about the method that I have been using to cook pork tocino to perfection (according to my standards, that is). This is my method on how to cook tocino without burning them and without turning my pan into a burnt mess. (If you want to know the recipe from DOST teknotulong website, I pasted it down below, so scroll down some more. But please be aware that I have not tried it.)
Method: Whether or not you use your own recipe, maybe you will like this method as well. I still am using my Mama Sita tocino mix (I got tons of them since my husband expressed loving this pork "casino" -- he could not remember the right term).
I marinate 8 pork chops using 2 packets at least overnight to 1 day, keeping them in the chiller bin of my fridge, with frequent turning. Then I place them all, including the marinade, in a big saucepan, cover and boil. As soon as it boils, I turn down the heat to #2 or #3 and simmer for about 25 minutes. About 5 minutes before simmering ends, I heat up the oven on broil (hi), place the griddle on the rack at the upper third of the oven. I spray with just a little bit of oil to prevent the chops from sticking, then I dish out the chops and place them on the griddle. While waiting for the surface to dry up a bit, I reduce the sauce on the saucepan by boiling further on high until it is almost like runny sauce (If it is too thick and sticky already, it will be harder to brush on the chops and it might not be enough). I watch this carefully because it can easily burn. The resulting sauce has enough fat drippings so I still create the same effect as when I fry them in some oil, especially when the excess water finally evaporates while I broil. Then I brush this sauce on top of the chops, broil for about 1-2 minutes or until Isee the tops bubbly and the sugar is caramelizing, which makes the chops appear glazed, and the fatty parts kinda turn like charred. Then I flip over and do the same on the other side. This way, you get a nice browning, nice glaze, without scorching and without making it taste burnt! I guarantee you can proudly serve this to any fussy American meat-eater like my husband. (If you serve some burnt tocino, be prepared to have most of it thrown away. I have done so in the past, and it does not feel good to see my husband eat a few tiny pieces, with the scorched parts left on his plate, even if the meat underneath is still good. It even feels worse when I myself have to admit that it is unpalatable. I used to cook tocino on stovetop with conduction burner instead of flame, and it is hard to control the heat, especially if I want indirect low heat like when cooking tocino or rice. It is impossible not to burn because I cannot place my pan away from the heat; it is always in direct contact. If you have flame burners, it is more possible not to burn tocino even when cooked on saucepan alone, but browning every piece equally is better achieved through broiling.)
Now if you use chicken breast, butterfly the breast so it is thinner, cook for only about 15 minutes before broiling since chicken cooks faster than pork.
Sarap talaga ng tocino!
Now for the PORK TOCINO RECIPE from DOST Teknotulong website: TOSINO (SALTED PORK)
Materials (see Procedure below for amounts): Pork Salt Sugar Salitre
Utensils: Kitchen knife Bowl with cover Measuring spoon
Procedure:
1. Slice pork into 1 cm. thickness.
2. For every kg. of meat, mix the following ingredients and rub on both sides of the pork;11/2 tbsp. salt, 4-5 tbsp. sugar, 1/3 tsp. Salitre.
3. Place salted pork in a clean covered container and keep in a cool place or in a refrigerator for 3-5 days.
4. Wash a little and cook. Tocino will last for 1/2 month when kept in a refrigerator.
I got this set of hawaiian shaved ice's snow cone syrups upon the kids' request...and guess what, the big boy (hubby) also likes it, cherry being his favorite flavor! Stepd's fave is the blue raspberry...I just ordered two sets of 3-flavor packs to replenish cherry and blue raspberry flavors.
Why hawaiian shaved ice brand? It got the best reviews on amazon.com...the other brands apparently are not packed with real flavors. We were not disappointed.
This set includes: Banana Watermelon Root Beer Lemon-Lime Pina Colada Grape Cherry Tiger's Blood (whatever that is!) Blue Raspberry Strawberry UPDATE 9-5-09: During one pool party celebrating my older son's birthday, my kids had fun showing it off to friends and they all had a blast making their snow cones. Today, when celebrating his birthday with relatives, my SIL and her kids had fun making snow cones and asked me where I got the machine and the syrups. This is one of the best fun food stuff to make during summer!
I did not make this. My MIL did. She makes this about once a year and gives us a big bag of them freshly made. So, even though I have the recipe, I thought I'd let myself look forward to having this at least once a year from her, just as I like looking forward to having paris brest made by my SIL every Christmas or Thanksgiving, whenever it was her turn to host a major holiday. Moreover, I am still trying to learn how to bake full-bodied cookies (instead of flat ones) using the Tollhouse recipe.
Everyone in our family loves them, including my husband who always look forward to getting treats from his mom (and he loves traditions, so this is one traditional food for him).
Recipe is from Hershey's Classic Recipes book; also in their website.
For more photos of actual making of these delights, please refer to the chef's wife's post here.
Ingredients: 2 cups granulated sugar 3/4 cup vegetable oil 3/4 cup HERSHEY'S Cocoa or HERSHEY'S SPECIAL DARK Cocoa 4 eggs 2 teaspoons vanilla extract 2-1/3 cups all-purpose flour 2 teaspoons baking powder 1/2 teaspoon salt Powdered sugar
Directions: 1. Combine granulated sugar and oil in large bowl; add cocoa, beating until well blended. Beat in eggs and vanilla. Stir together flour, baking powder and salt; gradually add to cocoa mixture, beating well.
2. Cover; refrigerate until dough is firm enough to handle, at least 6 hours.
3. Heat oven to 350°F. Grease cookie sheet. Shape dough into 1-inch balls; roll in powdered sugar to coat. Place about 2 inches apart on prepared cookie sheet.
4. Bake 11 to 13 minutes or until almost no indentation remains when touched lightly and tops are crackled. Cool slightly. Remove from cookie sheet to wire rack. Cool completely. About 4 dozen cookies.
After 6 years of marriage, only now did I learn of hubby asking for this type of open sandwich that he used to make for himself when he was still living alone.
He said just set the oven on low broil (or high; just keep looking), lay the bread slices on the pan, place sliced cheeses then top with bacon. He said the cheese would be toasted or burnt and that was inevitable. (Actually I like toasted cheese on pan de sal reheated in oven toaster.) I experimented by adding egg on mine near the end of broiling the second batch (which was not too successful as it slid down right away; I had to scoop the cooked egg from the pan).
No embellishments except for salt and pepper to taste, and the olive oil used to grease the pan for frying. Although hubby likes pork tocino, he also loves the pure pork taste, ONLY when it is home-raised pork. He never likes the ones coming from the grocery store except when it is the smoked pork chops.
Easy to prepare, I sprinkled the salt and pepper to both sides of the pork chops, let them sit on a plate while I heated the pan up.
I heated the griddle on medium (#6) for about 5 minutes then sprayed with olive oil and placed the chops. I cooked one side for 2 minutes, flipped, turned heat to medium low (#4), covered the chops and cooked for 3-4 minutes more (or until juices run clear).
I served them to hubby with boiled potatoes and broccoli. He savored every bite with his eyes closed.
I ate mine with fried rice, and dipped in vinegar with garlic and jalapeno pepper. (drool!)
This is a combination of my MIL's recipe for potato dill salad, and Hellman's "Original Potato Salad." Hubby loves the dill flavor and sliced eggs from his mom's recipe and the celery in the Hellman's recipe. He gives this recipe a thumbs up, and always requests it during summer when "it is too hot". I had a portion with some shredded chicken (from roast chicken I recently prepared) because I grew up knowing potato salad as one with shredded chicken meat. Hubby likes his without chicken.
Boiling the potatoes is kinda critical for me. I have to cook it enough so hubby eats it, but I should not overcook that it crumbles once cut and mixed in with the rest of the ingredients. So I cook for about 20 minutes counting the boiling time, then check with fork for doneness. I cook the eggs at the same time, boiling for 12 minutes.
For the onion, I chopped about 1 tbsp then placed in cheesecloth then extracted the juice. Hubby likes just a hint of onion flavor and does not like munching on onions.
Ingredients: 2 lbs potatoes (5-6 medium), boiled, peeled and cut into 3/4 inch thick chunks 1 cup mayonnaise 2 tbsp vinegar 1-1/2 tsp salt 1 tsp sugar 1/4 tsp ground black pepper 1 cup thinly sliced celery extracted juice from 1 tbsp chopped onion 2 hard-cooked eggs, chopped (optional) dill
Instructions:
1. In 4-qt saucepot, cover potatoes with water; sprinkle some salt and boil over medium high heat for 20 minutes or until done. Drain and cool slightly before peeling and cutting into chunks.
2. In a large bowl, combine mayonnaise, vinegar, sugar, celery, onion extract, eggs and pepper. Add potatoes and sprinkle dill. Toss gently. Chill for at least 8 hours before serving.
I once asked my hubby (knowing how he loves having "traditions" in the family) that if he would have to choose what bread to have for a meal, what would it be. "Give me either whole wheat bread or white bread and I'll be happy."
Well, I have not really made white bread (thinking it was too boring and basic), and I personally preferred basic egg bread and buttery sweet bread over white bread. White bread would be the equivalent of pan de americana (or what we referred to as "Tasty" bread in the Philippines) so I have somehow subconsciously equated it to the commercial white bread that I never considered making it at home...until that conversation with hubby. We all liked it, and despite it being baked in the bread machine itself, it had a nice crunchy yet soft crust.
Smoked Pork Chops is the only pork I buy from the grocery store (if you have been reading my blog for quite some time now, you know that we raise our own pig). This is because my husband loves this stuff. We all do, actually. We get the Smithfield brand, which has 5 thin pieces. During those days when I am on duty and not having anything cooking in the slow cooker, smoked pork chops served with green peas and potatoes or rice is one easy meal I can prepare within 10-15 minutes, as long as I remember to tell the kids to cook rice before I come home (or I tell them to do so while on my way). I wash a potato or two (for hubby and/or stepd), sprinkle with salt, cover with wet paper towel then cling wrap and microwave (each takes about 4 minutes). I start the peas and start heating up the pan. I butter the pan and cook each side of chop for about 4 minutes or until nicely browned.
Tangled Noodle and Savor the Thyme posted this challenge to "write" or "spell" using food or drink. I thought it would be fun to join, although initially I could not think of what to "write."
Well, two nights ago, I was on duty, and my charge nurse warned me about the possibility of being RIF'ed after 10 PM (RIF=reduction in force, a cost-cutting measure where employees are asked not to come to work or go home if there are not enough patients). So when I came home after that duty, I resolved to sleep only 4 hours, thinking I must be able to sleep with my husband that night. However, as soon as I got to work, I learned that somebody else called out. That meant, I would have to stay and work the whole shift. Darn...
I told my charge nurse and the other nurse, "I feel sad that I can't go home....boohoo...my husband and I were planning on making whoopie tonight." And they laughed...Suddenly I knew what to "write" about.
You see, Mainers (or probably New Englanders) know the meaning of whoopie that is not the whoopie pie pictured above surrounded by the spelled whoopie.
Whoopie pies are my husband's favorite sweet snack, the reason why he gave me my Kitchen Aid stand mixer. He cannot eat the ones available in stores because "they don't make it the way Mom does." The difference being that his mom's recipe makes use of fresh egg whites for the filling; those sold in stores use fluff. His request then was for me to learn how to make whoopie pies from his mom, and I gladly obliged. Now I am making them as well, although I tweaked the recipe to make double batch, and to make use of egg yolks in the batter instead of throwing them away after making the filling.
While baking these, my husband was eagerly waiting, and as soon as I took the above photo, he was standing beside me and saw it, laughed, and asked if he could have that one in the middle (the first one assembled as whoopie pie), which of course he could. He took a bite and said, "You make the best whoopie pies." Now the letters are sandwiched and hidden...My fridge is stocked with them whoopie pies, which will probably last 2-3 days...Hubby and older son particularly like eating them with milk, I with coffee.
Whoopie pies are very popular here in Maine, but I make them only about twice a year or so because they are heavy on cholesterol and sugar...and this way, they are a real treat when I do make them.
And yes, hubby and I are making whoopies tonight. :)
src="http://pagead2.googlesyndication.com/pagead/show_ads.js"> I am at work right now...I needed something to keep me awake...coffee...still sleepy.
Blogging...sure way to keep my mind going...so here I am.
I was reviewing my old posts from my old kusina that I transferred here. Most of the posts then had recipes on geocities webpage that I tied up with my blog posts because photoblogging then was not yet "in" at the time. I (painstakingly) made separate webpages to show step-by-step photos of things I was doing then. I was quite surprised to find out I did make one for homemade strawberry jam, but which was not tied to a blog post. So I am making one for that now. Though strawberry season is quite far away... src="http://pagead2.googlesyndication.com/pagead/show_ads.js"> I make strawberry jams whenever my MIL tells me she has had enough for her own use. My kids would pick them, we would eat some, and the rest I would make into strawberry jams. Strawberry jams and raspberry jams are our favorites. Very good on rolls, Club crackers, over cheesecake, etc. I have brought several jars of these for munchin during work, and my British and American co-workers loved my homemade jams. "Cannot compare with them commercial ones!"
Ingredients:
5 1/2 cups mashed strawberries 1 box pectin (Her preference is Sure-Jell) 7 cups sugar 8 jars for canning
Instructions:
Boil water for sterilizing jars then let simmer until ready for sterilizing jars. Wash jars and screw bands in hot, soapy water; rinse with warm water.
Prepare strawberries by removing the stems and mashing thoroughly with fork. (I think you can also use chopper batch by batch.) Put in a big saucepan and heat to boil, constantly stirring while gradually adding the pectin until fully dissolved and bring to full rolling boil (A boil that does not stop bubbling when stirred) on high heat, stirring constantly.Add 1/2 tsp butter or margarine to reduce foaming, if desired.
Stir in sugar quickly. Return to full rolling boil and boil EXACTLY 1 MINUTE, stirring constantly. Remove from heat.
Skim off any foam with metal spoon.
Pour quickly into prepared jars, filling to within 1/8 inch of tops. Wipe jar rims and threads.
Cover with two-piece lids. Screw bands TIGHTLY.Turn upside-down right away, then turn upright again after 5 minutes (This process is to ensure that minimal (unsterile) air is trapped, and that the hot jam will sterilize that space by inversion. Setting it upright after 5 minutes will ensure proper setting where the jam does not stick to the lid.)
Let stand at room temperature 24 hours. You may store unopened jams in cool, dry dark place up to 1 year. Refrigerate opened jams up to 3 weeks.
You may use strawberry jams on rolls/bread, Ritz crackers or saltine crackers.
Note: Upon setting, if you are using a larger jar, you may notice separation of layers. Above is the jam with all the bits of strawberries, and below a clear layer, which is the jelly.
Also, after the strawberry season comes the raspberry. When picking, the stems easily detach from the ripe fruits. Wash the raspberries just before the procedure, then proceed as with the strawberry jam procedure.
Tips:
Freshly picked strawberries should be washed ONLY when you are ready to consume/use it, otherwise it will spoil easily.
Pick only red and plump strawberries. When picked too soon, it won't have a sweet taste.
When in full rolling boil, you may lessen the foaming by adding 1/2 tsp butter.
Follow closely the timing of pouring boiling water into the jars and of removing the water and of closing the jars with the lids. Also minimize the air incorporated in the jar. Leaving a small space for air will result in popping in of the lid when the jam cools down, a sign of successful technique to ensure sterile procedures.
Additional info on jams and jellies available at www.surejell.com .
stored in our freezer, I seldom cook them, or like I am almost always prepared to get disappointing results. The thing that makes it worse is that, to my husband, steaks+potatoes+boiled veggies is the equivalent to us Filipinos eating fried fish, sinangag, and ensaladang kamatis with camote tops. My husband just misses this type of meal if I get into the "more fancier" (as he sees it when I prepare something else) cooking. It seems no matter how I cook steaks, they always end up tough and chewy, except for the tenderloins. Until I started to try Adolph's tenderizer, the main meat tenderizing ingredient of which is papain...yeah, that enzyme you get from papaya (I remember having papain as a subject of our Science Project in High School). Ingredients are so simple:
olive oil porterhouse steaks freshly milled (or ground) pepper to taste Adolph's tenderizer [ADD salt only after cooking!]
Equipment:
Iron cast pan Iron cast griddle
Instructions:
After thawing steaks, wipe surface with paper towels and sprinkle pepper.
Heat the pan on high. Start the broiler on high, with the griddle on rack placed on the upper most level. The ridges of the griddle should be facing up.
Once pan is hot, spray (or wipe) with olive oil.
Sprinkle the tenderizer on the surface to be cooked and place on pan. Cook for 2 mins.
Sprinkle the raw surface with tenderizer and flip and cook for another 2 mins.
Place on the griddle and broil for additional 4-6 mins.
Serve with A1 steak sauce (hubby's fave; an acquired taste for me and my boys), potatoes and steamed veggies. Dont' forget the butter, salt and pepper!
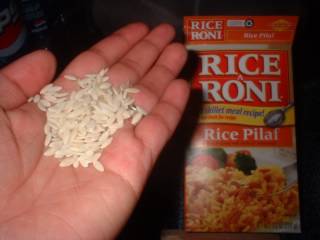
my earlier posts now that I have somewhat established family favorites and regulars, I see that some earlier food combinations to make a menu are now changed. Like the old post of mine on haddock had creamed butter and french fries as sides. Now, we regularly eat butter-fried haddock with fresh baby spinach and Rice-A-Roni. If we deviate from that combination, my husband (who is a sucker for "traditions" likes sticking to something once he really finds it good) seems lost. Haha! Very easy to prepare, we have this menu almost every two weeks. Ingredients:
2 lbs haddock fillets, cut into serving pieces (I have extra for lunch-dinners the next day) spices: salt, pepper and paprika, sprinkled onto cut pieces flour for dredging right before frying 1 stick butter for frying
Rice-A-Roni (2 boxes for a family of 4-5 with boys who eat like men, and a man who eats like a boy) butter (see package for directions; I use 4 tbsp for two boxes) water (I usually use 3&1/2 cup for two boxes RAR)
fresh baby spinach
Instructions:
Start cooking the rice first. Using the stovetop, I melt the butter, add rice and stir, add water and flavoring then stir. Then I place in rice cooker to finish (takes about 30 minutes to cook). I wait for about 15 minutes before starting cooking the fish.
Meanwhile, I prepare the fish. After cutting, I sprinkle with spices and let them
sit for a while. 20 minutes before the rice is done, I start heating the griddle, flat side up, on two burners, at #6 setting. After about 5 minutes, I start melting the butter. Once butter has cleared (no more bubbles; it looks more like oil), I increase heat to 8, dredge chicken pieces in flour, and place them in the pan to cook one side for two minutes, then flip over, making sure there is enough melted butter underneath (or I slice some more butter to place there before the fish piece lands on it), and cook for another two minutes, or longer (3-4 mins) for thicker pieces. At this point, I shout to my kids, "Set the table please!" and instruct them about the baby spinach and dressing (hubby loves Wish-Bone Robusto Italian), and the RAR.
Roast Chicken with homemade gravy Baked Potatoes French Bread
(No dessert! We usually do not have space in our tummy for dessert after a heavy hearty meal like this). I meant to serve steamed broccoli as well but I totally forgot to prepare it towards the last 30 minutes of baking the chicken, potatoes, and bread.
In preparing these, I started about 3-1/2 hrs prior to my targeted time for meal. The photos in my slideshow below are from my first year of roasting chicken, as I blogged about in my old kusina. I have prepared this numerous times now and I have developed my method to come up with menus that would maximize the use of oven and time.
I used one of our very own homegrown chickens. For the potatoes, I used big Russet potatoes, which might have been 1-pounder each. This is my second attempt at baking potatoes. The first was a disaster in that it was not fully cooked. This time I made sure the potatoes were cooked by baking them for two hours.
I was not quite organized with my how-to's below, because I proceeded as I would with actual preparation. Roast Chicken:
1 whole garlic, cloves separated 1 tbsp rosemary 1 whole chicken (3-4 lbs) 1 bunch lemongrass 1 whole onion (optional) 1 lemon rind (use the juice in something else) coarse kosher salt, sprinkled onto wet chicken skin garlic salt, sprinkle onto chicken 1 onion, cut into chunks 3 carrots, cut into chunks 1 cup celery stalks cut into chunks 2 bay leaves 10 or so peppercorns 1-1/4 cup water (or enough to cover the veggies)
Roast the garlic cloves (I now use a whole garlic to prepare the paste) for about 7 minutes in the oven toaster (broil setting) or until skin cracks open and you smell the aroma. Make a paste by mashing (I now use the garlic press for that purpose) and add rosemary.
Pre-heat oven to 350 deg F. Separate skin from underlying meat using blunt instruments. Insert some paste underneath and massage over the skin to distribute. Wipe cavity with paper towel and apply garlic paste as well.
Insert lemongrass (tanglad), lemon rind, and whole onion into the cavity. Sprinkle kosher salt all over chicken.
In a baking dish, place the chunks of onion, carrots, and celery. Add the water.
Preferably using a wire rack, place the chicken above the veggies. Cover with foil. Bake at lower 3rd rack of oven for 30 minutes.
Meanwhile, prepare the french bread in the bread machine.
Once BM has started, start preparing the potatoes.
After 30 minutes has passed since baking chicken, remove foil. If skin is relatively dry now, spray with olive oil and sprinkle garlic salt. Continue baking uncovered for browning. Baked Potatoes
4-5 big Russet potatoes (mine was about almost a pound each) olive oil, sprayed (can be bought from grocery store) kosher salt
Wash the potatoes gently with a brush. Pat dry with paper towels. Pierce with fork at 1.5 inch intervals for the steam to escape while baking. Spray with olive oil. Sprinkle all over with kosher salt. Place on a wire rack (cookie cooling rack) then onto a cookie sheet.
When the chicken has been cooking for an hour, reposition to make space and place the potatoes beside the chicken. Set your timer for 1-1/2 hrs to announce baking the french bread.
Once dough cycle of bread machine is over, shape the dough and let rise for about 30 minutes, covered with plastic, in a warm and draft-free place (I just place the pan on the stovetop where steam from chicken being baked keeps the area moist and warm).
For the last 30 minutes of baking (after the 1-1/2 hr alarm), remove chicken from oven, get the liver, and transfer the chicken (using the rack) onto a shallow baking pan to catch drippings while you continue baking. Place chicken back into the oven, then place your french bread on upper third rack of oven and bake for about 20-25 minutes or until brown.
Meanwhile, if you do remember and if you plan to offer steamed broccoli, do so now using a steamer or your cooktop.
Homemade Gravy Chicken/veggie juice Chicken drippings 1/4 cup white wine
Prepare your gravy. Remove veggies from pan and transfer to a bowl and keep warm. Place juice, liver and some onions into a small saucepan and let boil. Adjust taste by adding salt and pepper. Thicken with flour-water mixture. Set aside.
Once everything is done and removed from oven, place the chicken back to the original baking pan and surround with the veggies. (Ask your husband and/or children to set the table and slice the bread.)
Pour the white wine onto the 2nd baking pan that caught the chicken drippings (this has the flavor of roasted chicken if the drippings have browned but not burnt). Add this to the prepared gravy and mix well. Transfer to gravy boat.
Going back to the baked potatoes, cut longitudinal slits onto top. Using silicone mitts, press at both ends to crack open at the middle. Put slices of butter on top. You may want to enjoy this with gravy as well.
Have gourmet pepper (using pepper mill) and butter sticks ready on the table.
(and actually loves)...When we do eat at one of our fave restaurants, if he orders scallops, they are the usual batter-coated deep-fried ones, and I usually order the baked with honey and butter ones. This recipe is not an attempt to copy the restaurant recipes. It actually is the way my MIL prepares scallops at home, and I copied her for the love of my hubby. :) Ingredients: 1-1/2 to 2 lbs scallops 1 stick butter enough flour to dredge scallops
Instructions: heat on med high one big or two medium sized iron pan (enough to cook all scallops just at one time. (If you cook more than one batch, the butter tends to make the subsequent batches blackish instead of golden brown). Melt butter and quickly try to dredge the scallops and place on pan. Cook each side (top and bottom) 1-2 minutes. I usually serve these on the pan itself with all the melted butter. Do not overcook.
this type of dish which his ex used to cook, and told me (He had the nerve to tell me!) he should ask her for the recipe. Of course he (the typical man that he is) forgot about it, but I went ahead and groped my way through making my own recipe. Very simple and easy, we all love it. He basically spoon-fed to me the ingredients: chicken, broccoli florets, Velveeta cheese. I just added what I felt I had to, and cooked it the way I imagined it. This is one of my favorite dish to prepare if I am going to work. I am posting while having a slow time at work, so I am guessing at the proportions as I try to recall how much I use. Make sure you use a baking dish deep enough for this.
Ingredients: 1 tbsp oil 1-1/2 lb chicken breasts (or 1 lb, depending on how many are eating; this is for 5 people) cut into bite-size 1 lb frozen broccoli florets (Please take a look at the photo for the sizes of the cans) 1 can Cream of Chicken 1 can Broccoli Cheese condensed soup 1 package of stuffing prepared as directed on label Sprinkle of Parmesan Cheese 1/4 oz (?- kindly check the lines on the foil wrap, just one small block/line) Velveeta cheese, cut into small pieces Sprinkle of grated Parmesan cheese
Instructions:
Preheat oven to 400 deg F. Heat oil and brown chicken then place in the baking dish. Add broccoli florets, cream of chicken, and broccoli cheese condensed soup; mix well. Scatter the Velveeta pieces; top with stuffing and sprinkle with parmesan cheese. Bake for 20-25 minutes.
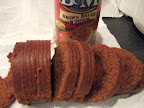
whatever he finds appealing in the pantry. One of his fave canned foods is the baked beans, served with brown bread. My stepd would only eat the beans. Both of them like to eat these with hotdogs. I would eat same but only because so he has someone to share that with. My sons don't like them; they'd rather eat whatever leftovers we have. I'd like to eat what I could before giving the rest to the pigs/chickens.
This baked beans reminds me of Hunt's "pork and beans" back in the Philippines, although that one is more tomato-based, and maybe because I grew up with that, I preferred it over this baked beans.
One time my MIL invited us over for supper, and she prepared baked beans. That was the first time I tasted the homemade baked beans, and I LOVED IT! My husband also loved it, and there really is no comparison between the homemade one and the canned one.
Now with our annual trip to Greenville, I saw last year the specific pot used for this purpose in an Indian store, and I vowed to get it the next time we went there, which was late this fall (when all red/orange leaves have fallen off the trees), especially that the sight-seeing purpose of the trip was lost already. I at least should get that pot. And I cooked this for the first time. I asked my husband to
soak the navy/pea beans that night around 9 pm while I was at work and told him to soak with enough water to allow for the beans' expansion. Silly me, I did not check the recipe. It specified 6 cups! So I ended up estimating the amount of water to boil the beans in, and kinda ended up with a soupy dish, which my husband told me he loved better (than drier), and even loved it more the next day when he was eating the leftover. I still served it up with brown bread (which my husband suggested when I mentioned I wanted to make baked beans.) One thing funny as well was when I went to the grocery store to pick up the ingredients and had a hard time finding the dry mustard, and I guessed it was the powdered mustard as there was nothing else that was dry. Good thing I guessed it right!
I used the smoked pork fat back (which I also used for my chicharon) and I loved the effect. Now I just gotta get my kids to start acquiring the taste for baked beans.
This recipe is found in a card that was tied to the beanpot. I made a point of copying that onto this page so that I will not have a hart time looking for it if I lose that card (which is so easy to do!) Official Recipe: For 2-1/2 qt Boston Beanpot Bake at 300 deg for 3-1/2 hours Serves 8
Ingredients: 1 package (1 lb) navy or pea beans 1/4 pound salt pork, cut in 2 pieces (I used 3/4 lb smoked pork fat back) 1 small whole onion, peeled 1 tsp dry mustard 8 cups water 1/3 cup molasses 1 tsp salt 1/2 tsp baking soda 3 tbsp sugar 1/4 tsp pepper
Instructions:
1. Soak beans overnight in a large suace pan in 6 cups of water. Add baking soda. Heat to boiling and simmer 10 minutes. Drain in colander ove a large bowl. Save liquid.
2. Place beans, salt pork and onion in the beanpot. Add molasses, salt, sugar, dry mustard, pepper and a cup of water. Stir thoroughly. Add enough water to cover the beans. Cover the beanpot.
3. Bake 2 hours at 300 degrees. Add the rest of the water and stir again. Bake additioanl 1-1/2 hours (or until beans are tender.) Uncover last 1/2 hour.
These, in my opinion, are more like soft cookies, or small cakes, instead of pies.
The photos shown below were taken way back in 2004 (payat pa ako nun). One picture shows my niece when I was receiving the lesson from my MIL and we were in my SIL's house then. The rest of the photos were during my first try to bake them.
Whoopie Pies are a favorite of my in-laws, and my husband gave me a Kitchen Aid standing mixer on our first Christmas together that I may learn how to make them for him. "You can never buy them the same from any store around," he says. And I guess the reason is that we use fresh egg whites for the creamy filling. The commercial ones taste like plain lard mixed with confectioner's sugar and vanilla (yuck!).
Caution: If you do not trust the freshness of the eggs, I do not recommend that you try this recipe. If you can get fresh eggs from a neighboring farm, then by all means, make these! (that is, if you are not allergic to eggs nor is your tummy squeamish) Ingredients: Filling - 2 1/4 cup shortening 6 cups confectioner's sugar 6 egg whites 3 tsp vanilla
Instructions: Filling - 1. Cream (beat together) the shortening and sugar well under moderate speed. 2. Add egg whites one at a time under slow setting, gradually increasing in speed until high. 3. When fluffy and forms soft peaks, turn speed to moderate then add vanilla and increase speed again until the right spreading consistency is achieved. Place in a ziploc bag then put inside the fridge until ready to use.
Dough - 1. Pre-heat oven to 350 deg F. 2. Cream the shortening and sugar first. Beat well. 3. Mix all dry ingredients in a separate bowl. 4. Add eggs/egg yolks one at a time to the creamed sugar and shortening and beat on low going to medium until lemony creamy. 5. Alternately add the dry ingredients and the milk-vinegar mixture under low setting into the cream. Scrape bowl with spatula from time to time. 6. Add vanilla. 7. Place in ziploc bag. Cut one corner of the bag and squeeze out about 1 tbsp of dough onto baking pan lined with aluminum foil (makes it easier to change pans if you make bigger batches), 2 inches apart. 8. Bake for 10 minutes. 9. Cool on wire rack for 10 minutes. 10. Put the filling and sandwich between two cookies. 11. Refrigerate those which you will not consume right away. (Remember, there are raw egg whites there).