My older son was intrigued because of some anime cartoon show that featured this pastry. So I went on to search for a recipe, and got one from a Japanese site, which luckily has an English translation. I modified the dough by looking at the ingredients and finding a similar one from breadworld.
Ingredients & Instructions:
Dough --
Place in bread machine the liquid ingredients at room temp.
1/4 cup + 2 tbsp + 1 tsp (that's 95 ml) of water
2 large eggs
3 tbsp butter
Add the dry ingredients.
3/4 tsp salt
2-1/4 cup bread flour
2 tbsp sugar
1-1/2 tsp BM yeast
Run on dough cycle.
Transfer to lightly floured surface. Flatten with palm of your hand and divide in two (sprinkle flour as needed for easier handling). Fold the ends of each so that you make 2 layers and create a square. Fold each lengthwise, then cut into 6 portions each (so you have a total of 12 pieces).
Starting at the middle going outwards with your hands and the surface well greased, roll with your palms to make into ropes.
Wrap around the greased cornets (I found it easier to do if I let the rope stay on the table and start wrapping by rolling the horn mold along the rope).
Place on baking sheet lined with parchment paper.
Let rise about 20 minutes (or 10 in warmed oven)
Brush with egg wash*.
Bake at 400 °F for 10 minutes.
Remove from molds and place on cooling rack. Cool completely (maybe 10 mins or more).
Pipe custard into the cooled cornets.
*Egg Wash --
1 large egg, lightly beaten
1 tbsp sugar
Chocolate Custard Cream --
Whip together --
2 tbsp sugar divided
2 egg yolks
Sift together --
3 tbsp Cake flour
2 tbsp + 1 tsp Cocoa powder
Heat up until steamy –
¾ cup milk
4 tbsp sugar
Add some of this to yolk mixture and blend well,
Pour the yolk-milk mix to hot milk mixture.
Continue cooking on low until creamy thick.
Add –
1 tbsp butter
1/2 tsp vanilla
½ tsp chocolate syrup
2 oz (1 square) Baker’s bittersweet baking chocolate
Cool and beat with ½ pkg (4 oz) of softened cream cheese.
Place in Ziploc bag and cool completely until cornets are ready.
Showing posts with label yeast rolls. Show all posts
Showing posts with label yeast rolls. Show all posts
Monday, February 15, 2010


Tuesday, March 24, 2009
Sweet Potato Pockets

Sweet Potato Pockets is my 5th and final entry for the NC Sweet Potatoes contest.
I made these sweet potato pockets as snack version of the Sweet Potato Bake wrapped around by the dough of Sweet Potato Cinnamon Rolls. One or two pieces make for a perfect solution to a hungry tummy in between meals. It is almost like hopia.
I would like to thank sweetbytes for this contest and giving us a boost to explore the possibilities of sweet potatoes.
Ingredients:
Filling from Sweet Potato Bake
Dough from Sweet Potato Cinnamon Rolls
Egg wash (1 egg beaten + 1 tbsp milk)
Instructions:


The slide show pretty much explains what to do. Place the leftover sweet potato bake in a ziploc bag and cut one corner so you will squeeze this out when you fill the dough.
Cut the dough into several pieces until you have about pingpong-sized ones. Flatten each piece with the heel of your hand, and put about 1 tbsp or so of the sweet potato bake filling.
Gather the edges of the dough and seal. Roll in between your palms to get an oblong shape. Place on greased baking pan and let rise for about 30 minutes in a draft-free moist and warm environment (like inside an oven that is warmed up for 1 minute). Brush with egg wash and create slits using a sharp blade. Bake at 350 deg F for 12 minutes.
Monday, March 23, 2009
Sweet Potato Cinnamon Rolls

Sweet Potato Cinnamon Rolls is my 4th entry for the NC Sweet Potatoes contest. I would like to thank sweetbytes for this contest and giving us a boost to explore the possibilities of sweet potatoes.
Since I and a lot of my site visitors have liked the supersoft ensaymada recipe which uses regular potatoes, I thought I'd try using the sweet potatoes this time, with only a slight variation in the recipe - I omitted the feta cheese and one egg, and used 4 yolks instead of 3. Then I kneaded the dough before resting it inside the fridge. This dough can be prepared a day ahead, kept in the fridge to rise, shaped only when ready to bake. Or can be frozen for use a week after.
What resulted of my sweet potato cinnamon roll was one that was super soft, smooth, and had the nice yellowish color imparted by the extra yolks and, of course, the sweet potatoes. Instead of turning this dough into another ensaymada, I used it to make a more popular type of sweet bread that is more commonly known amongst Americans; hence I present to you Sweet Potato Cinnamon Rolls (at least, that's what I made of the first 1/3 of the dough I made. Then I made 1/3 into Sweet Potato Pockets, and the remaining 1/3 went into the freezer formed into a log, which I will later make into sweet potato version of supersoft ensaymada. After enjoying the cinnamon rolls, I think this is even better than the one I made for supersoft ensaymada.
Ingredients:
5 cups bread flour (separate 1 + 1 + 3)
1/2 cup sugar
2 envelopes Fleischmann’s RapidRise Yeast
1 tablespoon salt
1 cup milk
1/2 cup water
2/3 cup shortening
1 cup mashed sweet potato
1 egg
4 egg yolks
softened butter (about 1/2 stick)
cinnamon-sugar mixture (1/4 cup granulated sugar + 1-1/2 teaspoons ground cinnamon)
melted butter (about 1/2 stick)
Instructions:


Combine 1 cup flour, sugar, undissolved yeast and salt. Heat milk, water and shortening until very warm (120º to130ºF). Gradually add to dry ingredients. Beat 2 minutes at medium speed of electric mixer, scraping bowl occasionally. Stir in mashed sweet potato, egg and 1 cup flour; beat 2 minutes at high speed, scraping bowl occasionally. Stir in remaining flour to make a soft batter. Place on a floured surface and knead for about 8 minutes. Let rest for 10 minutes covered with cling wrap.
Mix in 4 egg yolks into the dough. Refrigerate at least 2 hours prior to shaping.
Divide dough into 3 (Note: Dough is sticky so generously flour the surface). (1/3 will be used for another recipe; the other 1/3 will be frozen as a log for another type of roll to be prepared about a week later).
For 1/3 of this dough, flatten with a rolling pin about 8 inches x 12 inches. Brush surface with softened butter. Sprinkle with cinnamon-sugar mixture, sparing the edges for sealing. Roll tightly from the long end.
Butter-grease a baking pan.
Using dough cutter, with swift moves, slice the log's ends off, and cut every 1 inch to 1-1/2 inches. Dip bottom in melted butter. Place on pan. Do the same for all pieces. Brush the sides and tops with melted butter. Let rise for at least 30 minutes.
Bake at 375 deg F for 12-15 minutes or until golden brown. Let cool for about 10 minutes. Meanwhile, prepare the frosting.
FROSTING:
Ingredients:
5 tbsp softened butter
3 cups powdered/confectioner's sugar
2 tbsp half n half (or milk)
Instructions:
Beat with hand mixer the softened butter and sugar. When crumbly, add half and half by increments of 1 tbsp (I probably used 3-4 tbsp only). Continue beating and adding the half and half until you achieve the desired consistency.
Friday, March 13, 2009
Camote (Sweet Potato) Pandesal and Pandelimon
 Several days ago, I got an email from sassysweets inviting me to join a contest to come up with recipes using sweet potatoes, for anything easy and quick enough to be a part of everyday family meal. The contest is hosted by NC Sweet Potatoes and there is unlimited number of entries. I don't know exactly how I got invited, but I welcome the opportunity to explore cooking and baking with potatoes. You can read more about the contest in the sweetbytes blog. This post will be the first in my camote series. You will see more in the following days on camote, but I will also post about other things in between.
 Because of this contest, I thought I would experiment more on the use of sweet potatoes. While we Filipinos are used to incorporating sweet potatoes (camote) in our dishes, we never really explored its potential in baking until recently, in an attempt to lessen the use of wheat in flour and beat the high price of yeast breads/rolls.
I first made pandesal and pandelimon, two of the mostly consumed yeast rolls in the Philippines. Although I have posted in the past about pandesal using just regular flour, I will feature it here with the use of sweet potato. Pandesal is a Filipino breakfast staple, eaten plain or with fillings such as jams, cheese, butter/margarine, peanut butter, or even meats (corned beef and liver spread being the most popular), along with a cup of coffee or a mug of milk. I already have a post here on my favorite pandesal recipes using the bread machine. Now I have made the dough using sweet camote, still with the use of the bread machine, to come up with super soft pandesal and pandelimon. Bread machine has been a friend of mine as it helps making yeast rolls a breeze even for a working mother like me. Pandelimon, when made larger, is excellent for burger buns, but I love eating the small one plainly served during dinner. It can rival, if it's not better than, the rolls served in one of the major family restaurants here in our town. The only difference in the two is the bread crumbs used to coat pandesal, and their shape. I love the pleasant yellowish color the sweet potato imparts, as this creates the impression that extra egg yolks were added.
Even if I end up not winning the first prize for the said contest, I will be just as happy to be able to come up with recipes here using camote/sweet potatoes that Philippine-based readers of my blog could make use of as a resource for a potential business in that country. Camote is very cheap in the Philippines compared to flour, and the soft yellowish rolls they create will probably boost up sales and profit.
Ingredients:
1 / 2 cup milk
1 / 4 cup water
1 / 2 cup boiled and mashed sweet potato
1 / 4 cup butter or margarine
1 large egg
1-1/2 teaspoons salt
3 cups bread flour + 2-3 tbsp while kneading
1/4 cup sugar
2 tsp Fleischmann's bread machine yeast
Instructions:


Mix the milk, water and mashed sweet potatoes and heat in the microwave for around 1-1/2 minutes. Add the butter and egg, beat to mix then check temperature. It should be between 70-80 deg F (room temp). Pour into the bread machine pan. Add the dry ingredients. Set at dough cycle. after about 10 minutes, start adding flour gradually so that the dough is not too sticky (try to poke from time to time with fingers). It should appear relatively smooth and moist, not wet or flaky. The kneading ends on the 30th minute, then it rises for 1 hr.
Transfer the dough on a lightly floured surface (it will shrink). Make a log out of the dough, cut some to form into smooth balls (sprinkle with some flour again as you get a new ball. Shaping this takes practice. The surface should not be too floury or you won't shape effectively, but must not have too little flour so that it becomes sticky and the surface of ball appears very rough). Arrange balls on greased baking sheet as shown in the slide. Cover with damp flour sack in a draft-free place until doubled in size, about 45 minutes. For the remaining log of dough, cut at intervals of 1 to 1-1/2 inch for pandesal. Roll in bread crumbs and arrange on greased baking pan. Let rise for 30 minutes. I like placing them inside the oven, then turn on the oven for a minute and turned off to create that warm draft-free environment.
Bake at 375oF for 12-15 minutes or until done, first the pandesal followed by the pandelimon. Remove from pan and serve hot; cool on wire rack completely then place in ziploc after about 30 minutes those you will not consume right away. To enjoy hot the next days, use oven toaster and bake at 350 deg F for 3 minutes.
 My next post will be on the sinfully delicious almond sans rival, which I will also post as a series, interspersed with camote series.
Tuesday, November 25, 2008
Coconut-Cinnamon Rolls & Pan de Coco-Cinni
This post is especially dedicated to Susan of Guam, who sent me an email yesterday about MY pan de coco recipe...She is one of those who give me inspiration.
Okay, here's the recipe for my Coconut-Cinnamon Rolls
that made my husband close his eyes savoring his bite as he taste-tested this the night I baked them. I guarantee you this is gonna be a hit to any cinnamon and coconut lover.
Ingredients:
Prepared dough (I used half of my buttery ensaymada dough for two logs)
Mix and put in the fridge overnight -
8-oz grated coconut (that's about 1 cup packed?)
1 cup white sugar
1 cup packed brown sugar
Add to the above mixture the following prior to filling the dough:
2 tbsp ground cinnamon (you may add up to 4 tbsp depending on how cinn-y you want it)
5 tbsp flour
2 tbsp milk to brush on dough prior to filling
Directions (the slideshow is pretty much self-explanatory:
Prepare filling.
Roll dough to about 8x 13 in; make sure you sprinkle flour on the countertop and on your rolling pin. The dough gets stickier as it stays in room temp.
Brush milk onto the dough. Spread the filling thinly. Spare the edges that should make the seam.
Roll tightly into a log. You may have to use the dough cutter (dipped occasionally into a mound of flour) to lift up the dough as you roll.
Cut at 1-inch intervals using dough cutter (wipe the blade before every slice). Fix the roundness of the cut piece with your fingers before you place onto a greased pan.
Let rise for one hour inside the oven warmed by "baking" for 1 minute then turned off.
Take out of the oven; start heating up the oven for real baking at 350 deg F.
bake for 15-20 mins or until the middle dough is browned.
Loosen edges from the pan and invert onto a plate to remove.
Place on a cooling wire rack. If not eating right away, cool completely and wrap in plastic. May store at room temp for up to 3 days. (I guarantee you this is better than store-bought canned cinnamon rolls!).
Basically the same recipe for Pan de Coco-Cinni --
Ingredients:
Prepared dough (I used 1/4 of my buttery ensaymada dough)
Remaining filling (not sure how much was there; probably a cup)
Egg white for glaze
Instructions:
Cut dough into pieces (I cut them just so I could barely close my hand around each piece- yields pieces that are quite big one can fill you up quickly)
Flatten to disks.
Put about 1 tbsp filling at the center. Fold over the edges to seal.
Flatten the pieces. Place on greased baking sheet.
Bake at 350 deg F for 20 minutes or until browned to your liking (I should have baked this at 400 to bake at 12 minutes but since I baked this along with the coco-cinnamon roll, I used 350. End product seems too light (and uncooked) to my eyes, but actually they are done. My older son can eat two of these at a time.
I think I am gonna submit my coconut-cinnamon roll recipe to a baking contest...huwag nyo ako unahan/agawan...:)
Okay, here's the recipe for my Coconut-Cinnamon Rolls
 |
| From Coconut-cinnamon rolls |
Ingredients:
Prepared dough (I used half of my buttery ensaymada dough for two logs)
Mix and put in the fridge overnight -
8-oz grated coconut (that's about 1 cup packed?)
1 cup white sugar
1 cup packed brown sugar
Add to the above mixture the following prior to filling the dough:
2 tbsp ground cinnamon (you may add up to 4 tbsp depending on how cinn-y you want it)
5 tbsp flour
2 tbsp milk to brush on dough prior to filling
Directions (the slideshow is pretty much self-explanatory:
Prepare filling.
Roll dough to about 8x 13 in; make sure you sprinkle flour on the countertop and on your rolling pin. The dough gets stickier as it stays in room temp.
Brush milk onto the dough. Spread the filling thinly. Spare the edges that should make the seam.
Roll tightly into a log. You may have to use the dough cutter (dipped occasionally into a mound of flour) to lift up the dough as you roll.
Cut at 1-inch intervals using dough cutter (wipe the blade before every slice). Fix the roundness of the cut piece with your fingers before you place onto a greased pan.
Let rise for one hour inside the oven warmed by "baking" for 1 minute then turned off.
Take out of the oven; start heating up the oven for real baking at 350 deg F.
bake for 15-20 mins or until the middle dough is browned.
Loosen edges from the pan and invert onto a plate to remove.
Place on a cooling wire rack. If not eating right away, cool completely and wrap in plastic. May store at room temp for up to 3 days. (I guarantee you this is better than store-bought canned cinnamon rolls!).
Basically the same recipe for Pan de Coco-Cinni --
Ingredients:
Prepared dough (I used 1/4 of my buttery ensaymada dough)
Remaining filling (not sure how much was there; probably a cup)
Egg white for glaze
Instructions:
Cut dough into pieces (I cut them just so I could barely close my hand around each piece- yields pieces that are quite big one can fill you up quickly)
Flatten to disks.
Put about 1 tbsp filling at the center. Fold over the edges to seal.
Flatten the pieces. Place on greased baking sheet.
Bake at 350 deg F for 20 minutes or until browned to your liking (I should have baked this at 400 to bake at 12 minutes but since I baked this along with the coco-cinnamon roll, I used 350. End product seems too light (and uncooked) to my eyes, but actually they are done. My older son can eat two of these at a time.
I think I am gonna submit my coconut-cinnamon roll recipe to a baking contest...huwag nyo ako unahan/agawan...:)
Monday, November 24, 2008
Buttery Ensaymada
I should call this buttery eggyolk-y ensaymada.
I am getting so ensaymada'ed out already I could puke (excuse me!), but I just gotta be able to compare the two recipes which vary only in the fat content (shortening versus butter) and the eggyolks.
Honestly, I cannot really choose between the two recipes (Supersoft using shortening and just whole eggs versus Buttery using butter, of course, and 5 eggyolks in addition to 1 whole egg).
Supersoft has the familiar taste of the ensaymada I used to get from bigger bakeries in PI. By itself (without topping), it is okay, but since it is not sweet, the flavor is greatly enhanced once the topping is there, and a bite becomes heavenly. Lasts 2 days or even 3 without getting tough as long as it is kept in plastic at room temp.
Buttery is strikingly special flavored by itself mainly by its very nature...buttery and yolky. Once with the usual topping, it is as heavenly as supersoft, although it is not the taste I was familiar with when it comes to ensaymada bought from the likes of goldilocks. I have yet to observe how long it lasts. It is still soft after a day even when cold.
Now, since i have made lots of ensaymada dough, I thought I'd use some of it for something else special I can create for the Holidays. I came up with pan de coco-cinni (or Coconut-cinnamon rolls) because I accidentally left a pack of grated coconut on the warm floor when I was rearranging my meats in the freezer). I am not assigned to any of the winter holidays, so I will just bring to the gathering some desserts like this or leche flan or egg pie. I will next post the coconut-cinnamon roll and pan de coco-cinni, which my poor husband had to taste-test last night, and he bit with that familiar closing-of-the-eyes expression for something sooo good.
Ingredients:
3+1 +1 + 1 cups bread flour (total 6)
1/2 cup sugar
2 envelopes RapidRise Yeast
1 tablespoon salt
1 cup milk
1/2 cup water
1/2 cup butter + 1/2 cup softened butter (total 1)
1 cup mashed potato
1 egg
2 + 3 eggyolks (total 5 yolks)
Melted butter (about 1/4 cup) for brushing
Directions
Combine 1 cup flour, sugar, undissolved yeast and salt. Heat milk, water and butter until very warm (120º to130ºF). Gradually add to dry ingredients. Beat 2 minutes at medium speed of electric mixer, scraping bowl occasionally. Stir in mashed potato, 1 egg and 2 egg yolks and 1 cup flour; beat 2 minutes at high speed, scraping bowl occasionally. Gradually stir in 3 cups flour to make a stiff batter. Detach dough hook from mixer. Cover dough with the hook loosely with plastic wrap; refrigerate 1 hour. Meanwhile, soften 1/2 cup butter by leaving it out at room temp.
Remove dough from fridge and attach dough hook to mixer. Stir in 3 egg yolks and 1/2 cup softened butter (cut into bits), gradually add 1 cup flour and blend well. Place in greased bowl and cover loosely with plastic and refrigerate for additional 2-24 hours prior to baking (put simply, shape and bake the next day).
Use a GENEROUS amount of flour on the countertop, your hands, and your rolling pin when you start working to shape this dough because it is so STICKY. Shape accordingly (coiled or rolled method -- please see previous post). Brush with (or dip in) melted butter. Let rise for about an hour in a draft-free, warm and preferably moist environment (oven works best - place pans of ensaymada inside, along with a bowl of hot water, turn oven on for one minute then turn off and let the trapped heat hasten the rising. Don't forget to remove from oven once you are ready to bake and you are heating up the oven to the right baking temp.) (This whole batch will probably give you 32-40 pieces depending on the size you want. I suggest you think of ways to use this as master dough for other special desserts/pastries, like pan de coco-cinni up on my next post, or use ube haleya as filling, or make monggo bread which I plan to experiment on sometime later).
Bake at 350 deg F for 12-15 minutes (rotate pans after the first 10 minutes to even out browning) until done and browned to your preference. Take out from oven and brush again with melted butter (helps keep them moist). Enjoy with preferred topping.
If not consuming right away, let cool on wire rack completely then place in ziploc bags without the toppings. For individual servings, zap in microwave for 15 secs, add softened butter, sugar, and cheese. For family servings, cover loosely with foil and bake at 350 deg for 10 minutes.

UPDATE: 9-07-09
Ritchie made and blogged about these ensaymada buns, saying,
I left a comment there thinking it was the supersoft, and she emailed me back:
Thanks, Ritchie!

I am getting so ensaymada'ed out already I could puke (excuse me!), but I just gotta be able to compare the two recipes which vary only in the fat content (shortening versus butter) and the eggyolks.
Honestly, I cannot really choose between the two recipes (Supersoft using shortening and just whole eggs versus Buttery using butter, of course, and 5 eggyolks in addition to 1 whole egg).
Supersoft has the familiar taste of the ensaymada I used to get from bigger bakeries in PI. By itself (without topping), it is okay, but since it is not sweet, the flavor is greatly enhanced once the topping is there, and a bite becomes heavenly. Lasts 2 days or even 3 without getting tough as long as it is kept in plastic at room temp.
Buttery is strikingly special flavored by itself mainly by its very nature...buttery and yolky. Once with the usual topping, it is as heavenly as supersoft, although it is not the taste I was familiar with when it comes to ensaymada bought from the likes of goldilocks. I have yet to observe how long it lasts. It is still soft after a day even when cold.
Now, since i have made lots of ensaymada dough, I thought I'd use some of it for something else special I can create for the Holidays. I came up with pan de coco-cinni (or Coconut-cinnamon rolls) because I accidentally left a pack of grated coconut on the warm floor when I was rearranging my meats in the freezer). I am not assigned to any of the winter holidays, so I will just bring to the gathering some desserts like this or leche flan or egg pie. I will next post the coconut-cinnamon roll and pan de coco-cinni, which my poor husband had to taste-test last night, and he bit with that familiar closing-of-the-eyes expression for something sooo good.
Ingredients:
3+1 +1 + 1 cups bread flour (total 6)
1/2 cup sugar
2 envelopes RapidRise Yeast
1 tablespoon salt
1 cup milk
1/2 cup water
1/2 cup butter + 1/2 cup softened butter (total 1)
1 cup mashed potato
1 egg
2 + 3 eggyolks (total 5 yolks)
Melted butter (about 1/4 cup) for brushing
Directions
Combine 1 cup flour, sugar, undissolved yeast and salt. Heat milk, water and butter until very warm (120º to130ºF). Gradually add to dry ingredients. Beat 2 minutes at medium speed of electric mixer, scraping bowl occasionally. Stir in mashed potato, 1 egg and 2 egg yolks and 1 cup flour; beat 2 minutes at high speed, scraping bowl occasionally. Gradually stir in 3 cups flour to make a stiff batter. Detach dough hook from mixer. Cover dough with the hook loosely with plastic wrap; refrigerate 1 hour. Meanwhile, soften 1/2 cup butter by leaving it out at room temp.
Remove dough from fridge and attach dough hook to mixer. Stir in 3 egg yolks and 1/2 cup softened butter (cut into bits), gradually add 1 cup flour and blend well. Place in greased bowl and cover loosely with plastic and refrigerate for additional 2-24 hours prior to baking (put simply, shape and bake the next day).
Use a GENEROUS amount of flour on the countertop, your hands, and your rolling pin when you start working to shape this dough because it is so STICKY. Shape accordingly (coiled or rolled method -- please see previous post). Brush with (or dip in) melted butter. Let rise for about an hour in a draft-free, warm and preferably moist environment (oven works best - place pans of ensaymada inside, along with a bowl of hot water, turn oven on for one minute then turn off and let the trapped heat hasten the rising. Don't forget to remove from oven once you are ready to bake and you are heating up the oven to the right baking temp.) (This whole batch will probably give you 32-40 pieces depending on the size you want. I suggest you think of ways to use this as master dough for other special desserts/pastries, like pan de coco-cinni up on my next post, or use ube haleya as filling, or make monggo bread which I plan to experiment on sometime later).
Bake at 350 deg F for 12-15 minutes (rotate pans after the first 10 minutes to even out browning) until done and browned to your preference. Take out from oven and brush again with melted butter (helps keep them moist). Enjoy with preferred topping.
If not consuming right away, let cool on wire rack completely then place in ziploc bags without the toppings. For individual servings, zap in microwave for 15 secs, add softened butter, sugar, and cheese. For family servings, cover loosely with foil and bake at 350 deg for 10 minutes.

UPDATE: 9-07-09
Ritchie made and blogged about these ensaymada buns, saying,
Thank God for Kusina ni Manang she has the recipe for ensaymada (brioche) without too much work. Not that I want to eat ensaymada a lot, but because of the challenge in making it and getting the desired result, it became a monkey on my back, until now. You are da bomb manang.
I left a comment there thinking it was the supersoft, and she emailed me back:
Hi Ritchie,
Thanks for trying my recipe and actually liking it. :)
I presumed it was the supersoft ensaymada that you made?...I edited my post on it to include a link to this post.
Actually, it is the buttery one. OMG, it is the best I have ever made in my life. I gave some to my friends today and they said this is the best they have eaten too...hahaActually, it is the buttery one. OMG, it is the best I have ever made in my life. I gave some to my friends today and they said this is the best they have eaten too...haha
Thanks, Ritchie!
Sunday, November 23, 2008
Supersoft Ensaymada
NOTE as of 2/23/09:
This has become a favorite of many of my readers, as well as mine. Easy to make, super moist and supersoft. Satisfaction guaranteed. :)
UPDATE: Sorry I was not able to come back yesterday to posting.
I got busy cooking, (and experimenting yet again with my ensaymada recipe below. I am quite satisfied with the outcome I got with the recipe I am posting here, but I am currently waiting for the newest experiment to rise prior to baking. Once I get the results, I will post later today about comparison...)
This is dedicated to all homemakers like me, who have a life outside of the kitchen...I have tried to make my recipes easy to make and follow, with ingredients easy to find and not gourmet types which you will find in God-only-knows-what-specialty-store (and therefore they are very affordable) and which would not demand your whole day to make (unless you make several batches), yet will give you fulfillment and definitely will wow your friends, brown- or white-skinned. As one of my white co-workers told me after I made her taste a pinch of this roll minus the sugar and butter, "Hmmm, how come your rolls are always moist and pillow soft???".
But of course, if you have easy access to specialty items (like special cheeses) and you have the financial means, go ahead and do your own experiment in trying different ingredients.
Just kindly do me favor, my dearest readers/followers, if you know of people with whom you might like to share the recipes I have here, please point them to my website instead of giving them a copy of the recipe. I appreciate increased traffic to my website.
11-22-08
An absolute welcome give-away in any Filipino Christmas Party supersoft ensaymada that melts in your mouth(soft even without heating up in the microwave, even after two days. Yeah, we finished them after two days because I made a big batch trying to experiment with other ways to use the dough.)
The secrets:
(1) Potatoes
(2) Lots of butter
(3) No kneading!!! (You read that right!)
I have been telling some of those who have been emailing me that I have been experimenting with this ensaymada. I am posting this right before the Holidays, in time for preparing giveaways made with love. The recipe to be posted later...Gotta go grocery shopping first.
(I can hear you say..."Bummer! Whatta teaser!")
Ingredients:
5 cups bread flour (separate 1 + 1 + 3)
1/2 cup sugar
2 envelopes Fleischmann’s RapidRise Yeast (1 envelope is 0.25 oz = 2-1/4 tsp)
1 tablespoon salt
1 cup milk
1/2 cup water
2/3 cup shortening (also known as lard, purico in Philippines, strutto in Italy)
1 cup mashed potato
2 eggs
3 egg yolks
2-oz grated sharp cheddar cheese, added to the 3-cup flour above(I used Helluva Good brand, because it comes closest to the kind of cheese paired with ensaymada that I grew up with. It's up to you to experiment with other cheeses.)- [UPDATE 12-23-08: I tried 2-oz crumbled feta cheese and it was wonderful! I loved the cheesy effect on the dough. Save your cheddar cheese for topping instead.]
melted butter (approximately 1 stick)
softened butter (approximately 1 stick to 1-1/2)(for rolled method)
(Note: Before you turn your nose up with the shortening here, wait for my next post comparing the two).
Directions
Combine 1 cup flour, sugar, undissolved yeast and salt. Heat milk, water and shortening until very warm (120º to130ºF). Gradually add to dry ingredients. Beat 2 minutes at medium speed of electric mixer, scraping bowl occasionally. Stir in mashed potato, eggs and 1 cup flour; beat 2 minutes at high speed, scraping bowl occasionally. Stir in remaining flour to make a stiff batter. Detach dough hook and cover dough plus hook loosely with plastic wrap; refrigerate 2 hours. Remove from fridge and add the 3 egg yolks, stir setting on the mixer. Remove hook from the dough this time and cover loosely again with plastic then refrigerate for another 1-22 hours.
The next stage will make use of a method depending on how hardworking you are or how time pressed you are.
Coiled: If you got lots of time, do the old-fashioned way of coiling like katol by pinching off pieces from the chilled dough about the size of a small pandesal. Get only a few at a time and chill the rest of the dough again because it becomes harder to handle when warmer; it becomes too sticky. Sprinkling flour on work surface helps lessen the stickiness. Shape the dough into a long rope about a foot long and coil as previously illustrated in older posts. Place on greased baking pan and brush with melted butter. See this post for step-by-step slideshow on how to shape into coils.
Rolled (para sa tinatamad): Get a chunk of dough about the same as one that you have for 2-lb recipes of bread (or about the size of a grapefruit or suha). Flatten to disk, fold over the four edges like that of an envelope, and roll to make a rectangle about 8 x 10 inches. Place a generous layer of softened butter except near the edges. Roll tightly from the long end. Cut in 1 to 1-1/2 inch intervals. Dip one end of cut side in melted butter then place on baking pan. Brush the rest of the surfaces with melted butter. [UPDATE 12-23-08: This whole batch can be divided into 3. When shaped into logs after you place your filling, wrap tightly in cling wrap and freeze. After freezing, let stand in room temp for about 15-20 minutes and cut with a knife to end up with 8-9 pieces minus the ends. Place in baking pan, preferably where they will crowd together to compress so they rise upward; ex., in 8x8 or 9x9 or round pans. Brush with butter. Let rise in warmed oven for about 45 mins to 1 hr, or until doubled in size. Bake as directed below. Cool down some or completely before applying topping of choice.]
Let rise in warm, draft-free place until doubled in size, about 1 hour. (My favorite thing to do is place them in the oven and "start" baking then turn off after one minute then let rise for 30 mins to 1 hr. Once puffy enough, remove from oven and start heating up the oven).
Bake at 350ºF for 12-15 minutes or until done. Remove from pans; cool on wire rack for about 30 minutes or until completely cool if not consuming immediately, and store in ziploc bag.
To enjoy ensaymada the traditional Filipino way:
Brush softened butter to warm ensaymadas (not too hot that it melts the butter), dunk in a bowl of sugar (or sprinkle the sugar on top), and top with finely grated cheese (the finer grater gives you soft looking curls of the cheese like in the photo above).
TAGALOG VERSION:
Variations for topping:
A. glaze/frosting
1 cup confectioners' or glazing sugar
2 tablespoons melted butter
1 tablespoon milk
better recipe from Spice Islands (good for 24 rolls)
# 6 1/2 cups powdered sugar
# 6 tablespoons butter, softened
# 6 tablespoons milk
# 1 teaspoon Spice Islands® Pure Vanilla Extract
# 1 teaspoon Almond Extract
B. cinnamon-flavored frosting
1/2 cup (1 stick) butter, room temperature
2 cups confectioners' sugar
1/2 teaspoon ground cinnamon
3/4 teaspoon salt
grated zest and juice of 1/2 orange
1 to 1 1/2 tablespoons hazelnut liqueur, such as Frangelico, or almond liqueur, such as Amaretto)
Why do I like this recipe aside from it giving me those tender, light-colored ensaymadas that very much reminds me of red ribbon or goldilocks (my previous recipes were only a bit more special than the ensaymada I grew up with, made by my Tatay or Manong)? Well, aside from those reasons mentioned above, this recipe also is pretty much like a slow cooker. Prepare then forget for a while until you are ready to cook. This recipe gives you a whole 24 hours to finally get going with the baking stage. Prepare today, put in the fridge, shape, rise and bake tomorrow. Or you can prepare today, shape hours later and refrigerate, bake the next day. Your choice. Just don't let 24 hours pass before you bake.
TIPS: For those who have a cellar with temps almost like that of a fridge, and you would like to bake several batches of this, I suggest you get a shelf (maybe 5-tier aluminum) and a damp sheet to wrap around the shelves once you have pans with the buns shaped already to keep them moist. You might want to experiment with just one or two pans and see how it turns out.
To those planning to give these away for Christmas (or maybe making a business out of it?), may I suggest baking them in Christmas baking boxes like those by KAF (star or tree).
UPDATE (12/11/08)
I tried to freeze some of the dough after rolling like a log, then tried to cut with a knife after about 20 minutes out of the freezer, as shown in the additional photos in the slideshow. I let it rise in room temp after brushing some more with melted butter, which maybe took one hour before I baked them. Taste-wise, they turned out perfect still, if not for the fact that placing them on baking sheet made them expand laterally so they looked flat. They probably would look better if placed in 8x8 or a tree-shaped pan, where they would be compressed and forced to rise upward.
Happy Holidays!
UPDATE as of 12-21-08:
I baked them in tree-shaped pan after freezing, and they rose after about 1-1/2 hour (would have been faster if I let them rise inside a warm oven, but I was baking something else that time). So this is how they looked like after baking. Beautiful, ain't it? Just add toppings of softened butter, sugar and grated cheese just before giving to your friends/relatives.
UPDATE: 1-24-09
Does this task seem daunting to you? Don't feel intimidated. Wena has tried making this and was very pleased with the results, too. And as you will see with the comments by Crystal, she found this very satisfactory as well. So shake off you fear and JUST DO IT!
UPDATE: 1-29-09

Anonymous EQ, a pastry chef, tried this recipe and states it is better than the ensaymada of goldilocks or red ribbon. Here's a photo of what pastry chef made. Pwedeng pang-business! Click on the photo to see a larger picture. Basing on his story in the comments section below, seems like he played with the dough (like it was Play-Doh, haha!), especially that he did not have his Kitchen Aid Mixer to prep the dough. I remember when I was just learning to bake from scratch (not play with dough, as that is something I have done since I was a kid), I was soooo scared to handle the dough that I myself produced, and it took time for me to get comfortable again to handle it like it was clay.
To EQ, Thanks a lot for your comment. It means a lot to me!
 UPDATE as of 3-15-09: Joy L. also made these today and was very satisfied with the results. She is going to bring them the next day to her homeschooling group.
The next day she again emailed me about how these were received by his husband. "My husband said:"WoW! It's one of your best bread ever!! I can easily eat more but I have to watch my carb." My husband is diabetic but is addicted to bread and chocolates My 6 years old boy ate 2 for merienda while my little girl ate one whole piece too!! They want me to pack ensaymada for their lunch tomorrow."
Thanks Joy L for letting me know about your outcome!
 UPDATE as of 4/3/09: Mai also baked these (first time for her to bake!),
  and was so nervous before placing the dough inside the oven to bake. The results brought joy both to her and to her husband. Her husband said, "masarap pa to kesa Goldilocks."
Thanks, Mai, for trusting me and giving this recipe a try!
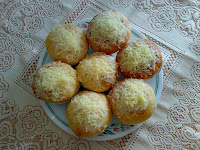 UPDATE as of 4/21/09: I was at work when I received this email of Marlene's ensaymada photos.Truly inspiring! Thanks for sharing this photo of your gorgeous ensaymadas, Marlene! Glad your family enjoyed them!
This has become a favorite of many of my readers, as well as mine. Easy to make, super moist and supersoft. Satisfaction guaranteed. :)
UPDATE: Sorry I was not able to come back yesterday to posting.
 |
| From supersoft ensaymada |
This is dedicated to all homemakers like me, who have a life outside of the kitchen...I have tried to make my recipes easy to make and follow, with ingredients easy to find and not gourmet types which you will find in God-only-knows-what-specialty-store (and therefore they are very affordable) and which would not demand your whole day to make (unless you make several batches), yet will give you fulfillment and definitely will wow your friends, brown- or white-skinned. As one of my white co-workers told me after I made her taste a pinch of this roll minus the sugar and butter, "Hmmm, how come your rolls are always moist and pillow soft???".
But of course, if you have easy access to specialty items (like special cheeses) and you have the financial means, go ahead and do your own experiment in trying different ingredients.
Just kindly do me favor, my dearest readers/followers, if you know of people with whom you might like to share the recipes I have here, please point them to my website instead of giving them a copy of the recipe. I appreciate increased traffic to my website.
11-22-08
An absolute welcome give-away in any Filipino Christmas Party supersoft ensaymada that melts in your mouth(soft even without heating up in the microwave, even after two days. Yeah, we finished them after two days because I made a big batch trying to experiment with other ways to use the dough.)
The secrets:
(1) Potatoes
(2) Lots of butter
(3) No kneading!!! (You read that right!)
I have been telling some of those who have been emailing me that I have been experimenting with this ensaymada. I am posting this right before the Holidays, in time for preparing giveaways made with love. The recipe to be posted later...Gotta go grocery shopping first.
(I can hear you say..."Bummer! Whatta teaser!")
Ingredients:
5 cups bread flour (separate 1 + 1 + 3)
1/2 cup sugar
2 envelopes Fleischmann’s RapidRise Yeast (1 envelope is 0.25 oz = 2-1/4 tsp)
1 tablespoon salt
1 cup milk
1/2 cup water
2/3 cup shortening (also known as lard, purico in Philippines, strutto in Italy)
1 cup mashed potato
2 eggs
3 egg yolks
2-oz grated sharp cheddar cheese, added to the 3-cup flour above(I used Helluva Good brand, because it comes closest to the kind of cheese paired with ensaymada that I grew up with. It's up to you to experiment with other cheeses.)- [UPDATE 12-23-08: I tried 2-oz crumbled feta cheese and it was wonderful! I loved the cheesy effect on the dough. Save your cheddar cheese for topping instead.]
melted butter (approximately 1 stick)
softened butter (approximately 1 stick to 1-1/2)(for rolled method)
(Note: Before you turn your nose up with the shortening here, wait for my next post comparing the two).
Directions
Combine 1 cup flour, sugar, undissolved yeast and salt. Heat milk, water and shortening until very warm (120º to130ºF). Gradually add to dry ingredients. Beat 2 minutes at medium speed of electric mixer, scraping bowl occasionally. Stir in mashed potato, eggs and 1 cup flour; beat 2 minutes at high speed, scraping bowl occasionally. Stir in remaining flour to make a stiff batter. Detach dough hook and cover dough plus hook loosely with plastic wrap; refrigerate 2 hours. Remove from fridge and add the 3 egg yolks, stir setting on the mixer. Remove hook from the dough this time and cover loosely again with plastic then refrigerate for another 1-22 hours.
The next stage will make use of a method depending on how hardworking you are or how time pressed you are.
Coiled: If you got lots of time, do the old-fashioned way of coiling like katol by pinching off pieces from the chilled dough about the size of a small pandesal. Get only a few at a time and chill the rest of the dough again because it becomes harder to handle when warmer; it becomes too sticky. Sprinkling flour on work surface helps lessen the stickiness. Shape the dough into a long rope about a foot long and coil as previously illustrated in older posts. Place on greased baking pan and brush with melted butter. See this post for step-by-step slideshow on how to shape into coils.
Rolled (para sa tinatamad): Get a chunk of dough about the same as one that you have for 2-lb recipes of bread (or about the size of a grapefruit or suha). Flatten to disk, fold over the four edges like that of an envelope, and roll to make a rectangle about 8 x 10 inches. Place a generous layer of softened butter except near the edges. Roll tightly from the long end. Cut in 1 to 1-1/2 inch intervals. Dip one end of cut side in melted butter then place on baking pan. Brush the rest of the surfaces with melted butter. [UPDATE 12-23-08: This whole batch can be divided into 3. When shaped into logs after you place your filling, wrap tightly in cling wrap and freeze. After freezing, let stand in room temp for about 15-20 minutes and cut with a knife to end up with 8-9 pieces minus the ends. Place in baking pan, preferably where they will crowd together to compress so they rise upward; ex., in 8x8 or 9x9 or round pans. Brush with butter. Let rise in warmed oven for about 45 mins to 1 hr, or until doubled in size. Bake as directed below. Cool down some or completely before applying topping of choice.]
Let rise in warm, draft-free place until doubled in size, about 1 hour. (My favorite thing to do is place them in the oven and "start" baking then turn off after one minute then let rise for 30 mins to 1 hr. Once puffy enough, remove from oven and start heating up the oven).
Bake at 350ºF for 12-15 minutes or until done. Remove from pans; cool on wire rack for about 30 minutes or until completely cool if not consuming immediately, and store in ziploc bag.
To enjoy ensaymada the traditional Filipino way:
Brush softened butter to warm ensaymadas (not too hot that it melts the butter), dunk in a bowl of sugar (or sprinkle the sugar on top), and top with finely grated cheese (the finer grater gives you soft looking curls of the cheese like in the photo above).
TAGALOG VERSION:
Sangkap:
5 tasang "bread flour" (paghiwa-hiwalayin 1 + 1 + 3) = hula ko, eto yung primera sa Pilipinas
1/2 tasang asukal
2 pakete Fleischmann’s RapidRise Yeast (instant yeast din to)
1 kutsarang asin
1 tasang gatas
1/2 tasang tubig
2/3 tasang purico
1 tasang "mashed potato" (maaaring gumamit ng purong nilagang patatas, o yung tirang mashed potato)
2 itlog
3 pula ng itlog
2-oz ginadgad na sharp cheddar cheese o kaya ay gumamit ng "crumbled feta cheese" at ihalo ito dun sa nakahiwalay na tatlong tasa ng harina (pwedeng gamitin ang food processor para mabiyak nang husto ang feta cheese at mahalong maige sa harina)
tinunaw na "butter" (mga 1 stick, pampahid bago i-bake)
pinalambot butter (mga 1 stick to 1-1/2)(para sa nirolyong dough)
Paraan:
Paghaluin ang 1 tasang harina, asukal, yeast (lebadura) at asin (eto ang tuyong sangkap). Pagsamahin at initin ang gatas, tubig, at purico hanggang 120º to130ºF. Unti-unting ihalo ang mga likidong sangkap sa tuyong sangkap. Paandarin ang electric mixer sa medium speed ng 2 minuto (paminsan minsan ay kaskasin sa gilid ang bowl para mahalong maigi). Idagdag ang mashed potato, itlog, at 1 tasang harina at i-beat uli ng 2 minuto sa high speed (pinakamabilis); kaskasin uli para mahalo maige.Unti-unting ibuhos ang natitirang harin (na me halong keso) habang umaandar ang mixer. Sa puntong ito, kung hindi kaya ng mixer maghalo ng makapal na dough, pwedeng gamitin ang wooden spoon o kamayin hanggang maging malambot na dough. Takpan ng plastic (cling wrap) at ilagay sa ref nang 2 oras.
Ihalo ang 3 pula ng itlog. takpan uli at ilagay sa ref. Maghintay ng 2 oras o kahit abutin ng 22 oras pa bago ihulma.
Sa paghulma, pwedeng hugis katol o nirolyo. Kung tinatamad ka, irolyo mo. Kung matyaga ka, gawing parang katol.
Wisikan ang countertop/lamesa ng maraming harina. Ilagay ang dough. Budburan ang ibabaw ng maraming harina. Gamit ang rolling pin, i-flat ang dough (Budburan lang na harina sa madikit na parte.). (Mas mabilis ito kesa paisa-isang piraso na pinahaba ng kamay).
(1) Katol: Gamit ang "dough cutter", maghiwa nang pahaba para makagawa ng "lubid" na kasingtaba ng hinlalaki na 1 ft ang haba.. Eto ang gawing parang katol. Ilagay sa baking sheet na pinahiran ng manipis ng purico. Yung dulo ng katol ay dapat nasa ilalim, para hindi hihiwalay habang umaalsa. Maglaan ng 2 inches na pagitan bawat piraso. (Pwedeng i-freeze sa puntong ito: ilagay sa freezer ng 3 oras, ilabas at ilagay sa makapal ng plastic bag/ziploc. Alisin ang hangin hanggang kaya. Pag handa na paalsahin, ilabas sa freezer, ilagay sa mold na me pahid ng purico, at paalsahin ng mga 4 na oras sa countertop/room temp, o ilagay sa pinainit (1 minuto) na oven para mas mabilis umalsa.)
(2) Nirolyo:
Itupi ang apat na gilid para makagawa ng parihaba (8x10 inches). Pahiran ng pinalambot na butter maliban sa pinakagilid para magselyo pag nirolyo. Irolyo nang mahigpit mula sa mahabang gilid. (Pwede i-freeze sa puntong ito: Balutin nang cling wrap nang mahigpit. Pag handa na paalsahin, ilabas sa freezer, palipasin ang 15 minuto bago hiwain.) Hiwain na mga 1 inch hanggang 1-1/2 inches ang kapal. Ilagay sa ensaymada mold na pinahiran ng purico/pinalambot na butter.
Pahiran ng tinunaw na butter. Hayaang umalsa sa lugar na mainit-init at kelangan, walang malakas na hangin (draft); takpan ng plastic na pinahiran ng purico. Pwedeng ilagay sa oven. Ganito: Painitin ang oven ng isang minuto, saka ilagay ang baking sheet (hindi na kelangan takpan ng plastic). Hayaang umalsa hanggan dumoble ang laki. Pahiran uli ng tinuna na butter. Ihorno (bake) sa 350 F ng 12-15 minuto or hanggang maging golden brown ang ibabaw. Pagka-alis sa oven, ilagay agad sa wire rack para lumamig nang mga 30 minuto. Kung hindi kakainin agad, ilagay sa ziploc.
Kung kakainin agad, pahiran ng pinalambot na butter ang ibabaw (ang iba ay gustong gawin to habang mainit pa ang ensaymada, kaya natutunaw ang butter. Ako, ang gusto ko ay makapal yung malabot na butter, hindi tunaw.) Maglagay ng asukal sa mangkok (bowl) at idukdok ang ensaymada na may butter. (Maaaring paghaluin ang malabot na butter at asukal, tapos eto ang ipahid sa ensaymada. Mas kakapit ang keso pag ganito.)
Kung gusto mo na me keso, maggadgad ng cheddar cheese sa ibabaw.
Variations for topping:
A. glaze/frosting
2 tablespoons melted butter
1 tablespoon milk
better recipe from Spice Islands (good for 24 rolls)
# 6 1/2 cups powdered sugar
# 6 tablespoons butter, softened
# 6 tablespoons milk
# 1 teaspoon Spice Islands® Pure Vanilla Extract
# 1 teaspoon Almond Extract
B. cinnamon-flavored frosting
1/2 cup (1 stick) butter, room temperature
2 cups confectioners' sugar
1/2 teaspoon ground cinnamon
3/4 teaspoon salt
grated zest and juice of 1/2 orange
1 to 1 1/2 tablespoons hazelnut liqueur, such as Frangelico, or almond liqueur, such as Amaretto)
Why do I like this recipe aside from it giving me those tender, light-colored ensaymadas that very much reminds me of red ribbon or goldilocks (my previous recipes were only a bit more special than the ensaymada I grew up with, made by my Tatay or Manong)? Well, aside from those reasons mentioned above, this recipe also is pretty much like a slow cooker. Prepare then forget for a while until you are ready to cook. This recipe gives you a whole 24 hours to finally get going with the baking stage. Prepare today, put in the fridge, shape, rise and bake tomorrow. Or you can prepare today, shape hours later and refrigerate, bake the next day. Your choice. Just don't let 24 hours pass before you bake.
TIPS: For those who have a cellar with temps almost like that of a fridge, and you would like to bake several batches of this, I suggest you get a shelf (maybe 5-tier aluminum) and a damp sheet to wrap around the shelves once you have pans with the buns shaped already to keep them moist. You might want to experiment with just one or two pans and see how it turns out.
To those planning to give these away for Christmas (or maybe making a business out of it?), may I suggest baking them in Christmas baking boxes like those by KAF (star or tree).
UPDATE (12/11/08)
I tried to freeze some of the dough after rolling like a log, then tried to cut with a knife after about 20 minutes out of the freezer, as shown in the additional photos in the slideshow. I let it rise in room temp after brushing some more with melted butter, which maybe took one hour before I baked them. Taste-wise, they turned out perfect still, if not for the fact that placing them on baking sheet made them expand laterally so they looked flat. They probably would look better if placed in 8x8 or a tree-shaped pan, where they would be compressed and forced to rise upward.
Happy Holidays!
UPDATE as of 12-21-08:
 |
| From Holiday tree baking pan |
I baked them in tree-shaped pan after freezing, and they rose after about 1-1/2 hour (would have been faster if I let them rise inside a warm oven, but I was baking something else that time). So this is how they looked like after baking. Beautiful, ain't it? Just add toppings of softened butter, sugar and grated cheese just before giving to your friends/relatives.
UPDATE: 1-24-09
Does this task seem daunting to you? Don't feel intimidated. Wena has tried making this and was very pleased with the results, too. And as you will see with the comments by Crystal, she found this very satisfactory as well. So shake off you fear and JUST DO IT!
UPDATE: 1-29-09

To EQ, Thanks a lot for your comment. It means a lot to me!
UPDATE as of 3-15-09: Joy L. also made these today and was very satisfied with the results. She is going to bring them the next day to her homeschooling group.The next day she again emailed me about how these were received by his husband. "My husband said:"WoW! It's one of your best bread ever!! I can easily eat more but I have to watch my carb." My husband is diabetic but is addicted to bread and chocolates My 6 years old boy ate 2 for merienda while my little girl ate one whole piece too!! They want me to pack ensaymada for their lunch tomorrow."
Thanks Joy L for letting me know about your outcome!
 UPDATE as of 4/3/09: Mai also baked these (first time for her to bake!),
  and was so nervous before placing the dough inside the oven to bake. The results brought joy both to her and to her husband. Her husband said, "masarap pa to kesa Goldilocks."
Thanks, Mai, for trusting me and giving this recipe a try!
 UPDATE as of 4/21/09: I was at work when I received this email of Marlene's ensaymada photos.Truly inspiring! Thanks for sharing this photo of your gorgeous ensaymadas, Marlene! Glad your family enjoyed them!
Tuesday, September 11, 2007
Spanish Bread
 I managed to take photos the last time I made spanish bread, so here goes the step-by-step how-to's. For some reason, my computers (both PC with Windows XP and laptop with Linux) do not currently work well with slide.com. I have not had the gumption to make a new account with Flickr to attempt making slide shows, so I resorted to posting a series of photos here instead.
This is another kid-favorite rolls, they like these more than they do ensaymada, although I made both using the same dough (see my posts on Ensaymada).
RECIPE: Please see the BM ensaymada recipe here for the ingredients list and to prepare the dough on the bread machine. The following is the step-by-step guide on how to actually make the rolls.
For the butter-sugar mixture: 1 stick of softened butter (1/2 lb) + 1 cup white sugar.
Instructions:
Prepare the dough. Divide into portions the size of a golf ball. Mix sugar (your choice: brown or white. I prefer white.) and softened butter/margarine (I can't specify the proportions because I approximated. I just kept adding sugar and mixing until I got a consistency that was gritty yet spreadable.)
 Flatten each piece with a rolling pin as shown. Go ahead, don't be afraid...Start from the middle outward up and down, especially adding pressure at the ends so they stick to the table. That way, they don't roll back or spring up.
 Spread a good layer of sugar-butter mixture. Avoid the ends so you can seal properly.
 Roll tightly. Make sure end seals.
 Coat with breadcrumbs.
 Place on baking pans with seam side down. Cover with plastic. Let rise for 15-30 minutes (depending on what yeast you used and the humidity/temperature of environment). Bake at 350 deg F for 12-15 minutes or until golden brown. (If you have too much for one-time serving and want to reheat these in the future, bake only for about 10 minutes initially, so when you reheat they won't look burnt. I reheat 2-3 pieces for merienda in an oven toaster at 350 deg F for about 3 minutes or so.). Transfer to cooling wire rack right away.
STORING: When you cannot eat all freshly baked spanish bread, after cooling in the wire rack for about 30 minutes, they should be warm (not hot) or almost room temp. That is the perfect timing to place them in ziploc bags and close. Observe after several minutes if they sweat. If they do, open the bag and let the excess moisture evaporate some more, wipe the sweat inside the bag with paper towel. Whey they do not sweat anymore, close bag tightly. When done at the right timing, your spanish bread will remain soft for 3 days without having to reheat them. But then, I myself prefer heating them up in oven toaster for about 3 minutes. And these do not last more than 3 days (or even a day!) for my family.
Saturday, July 21, 2007
(Best?) Ensaymada Recipe #2 (Bread Machine)
UPDATE (11/16/08): Just for fun I googled ensaymada recipe and found a yahoo answers webpage that voted this particular recipe as best answer to the question pertaining to ensaymada. Two yahoo users posted a copy-paste of my recipe and how-to's below, although they did not provide reference to my kusina (which, I think, is a disservice for those whose question they answered, and was quite unfair to me not being credited, but it's okay. As long as it gives me the satisfaction that there are those who have tried this recipe and actually recommend it to others, even without letting me know, I still feel honored...
 After getting tired of kneading using the first recipe I posted about earlier, I experimented twisting some other similar recipes for bread machine, and came up with this recipe. I now prefer this (less messy) method. It still gives me that familiar taste of ensaymada I used to eat from our cheap bakery when I was a kid (This ensaymada is NOT goldilocks or red ribbon-type, but it is the type I used to eat a lot when I was a kid. If you want the soft, fluffy, light-colored ensaymada that will remind you of Goldilocks or Red Ribbon, try the supersoft ensaymada). Everyday when it was being baked, I would eagerly wait for the first batch to come out, and would wait patiently until I could brush it with margarine without melting, then dip into a bowl of sugar. Yum-yum!
As a bonus, I am using part of the dough to make mini-Spanish bread, which my kids (including stepd) are crazy about, they're gone in minutes!
Ensaymada Recipe #2: Bread Machine Method using bread machine yeast
URGENT NOTE as of 07/21/07: I am making this recipe while editing this post. I should have included this note before any of you tries making this recipe. If your BM is like mine with tall bucket instead of horizontally long (loaf-shaped), this recipe might HAVE TO BE CUT IN HALF. (The ingredients here are for a total of 3-lb loaf, and my BM can only accommodate up to 2-lb loaf without problems for dough cycle.) If you do use the same proportions here,make sure you stay with your BM, initially put only 4 cups of bread flour, help mix the dough using silicone spatula, then add the rest of the flour when you already have the soft dough (takes about 15 minutes). Keep watching, as you might have to add more flour by the tbsp (I had to add 4-5 tbsp at this time) depending on the size of egg you used. You have to poke with your finger a bit to see if the dough will NOT stick to your finger to know you have enough. Do not add too much that the dough appears flaky, because then it becomes tougher and dry.
So if you want not to worry about guarding the BM while it does its job, cut the recipe in half (1-1/2 lb loaf), or use the alternate recipe below.
If your BM is horizontally long with 2 paddles, I do not think it will be a problem to prepare the 3-lb recipe.
Ingredients (3-lb dough):
1 cup milk
3/4 cup water
1 egg
4 egg yolks
1/2 cup (1 stick) butter
2 tsp salt
6-3/4 cups bread flour (plus some more; see note above)
3/4 cup sugar
2 tsp BM yeast
(2-lb dough) - [This yielded 9 ensaymadas and 12 pcs spanish bread]
2/3 c milk
1/2 c water
1 egg
2 egg yolks
6 tbsp butter
1-1/2 tsp salt
4-1/2 c bread flour
1/2 c sugar
1-1/2 tsp BM yeast
Topping: softened butter, granulated sugar (or sugar-cinnamon, which hubby prefers), and optional grated cheese.
Directions:
 Add ingredients to bread machine pan in the order suggested by manufacturer. Set in dough cycle.
Once done, punch dough, lay on the table and roll with a rolling pin to make it flat. (NOTE: To keep the surface of dough from drying up, cover with plastic while you work on the ropes.)
Using dough cutter, make long ropes (about a foot long) about 3/4 of an inch wide, and coil.
Apply melted butter on coils and let rise for 10-15 minutes (or up to 30 if you want them really fluffy) in a draft-free moist enough area (I like putting them in oven with a bowl of hot water).
You may apply egg glaze prior to baking (if you want it darker brown upon baking).
Bake at 350 for 12-15 minutes (depending on your oven).
You may apply melted butter as soon as they get out of the oven. Helps keep them soft by preventing too much moisture loss. Then apply softened butter and roll in sugar when ready to consume. (Please see slideshow for step-by-step how-to's).
Bonus: I use the smaller sides of the flattened disk of dough to make mini-spanish bread. Just mix together softened butter and sugar (approximate - butter should have enough sugar to make it super gritty but still spreadable), and apply a not-so-thin layer leaving about 1/4 inch at the edges for sealing(if too generous, it becomes gooey caramelly when baking and overflows out of the buns and make the bread quite tough when they get colder. So when you do make them like so, eat right away while they are still soft and fresh from the oven.) Roll tightly as shown. Then coat with bread crumbs. Put on baking pans seam side down. Bake at 350 deg F for about 8-10 minutes.
Sorry no pics for the finished spanish bread. They were gone too quickly before I had a chance to take photos.
After getting tired of kneading using the first recipe I posted about earlier, I experimented twisting some other similar recipes for bread machine, and came up with this recipe. I now prefer this (less messy) method. It still gives me that familiar taste of ensaymada I used to eat from our cheap bakery when I was a kid (This ensaymada is NOT goldilocks or red ribbon-type, but it is the type I used to eat a lot when I was a kid. If you want the soft, fluffy, light-colored ensaymada that will remind you of Goldilocks or Red Ribbon, try the supersoft ensaymada). Everyday when it was being baked, I would eagerly wait for the first batch to come out, and would wait patiently until I could brush it with margarine without melting, then dip into a bowl of sugar. Yum-yum!As a bonus, I am using part of the dough to make mini-Spanish bread, which my kids (including stepd) are crazy about, they're gone in minutes!
Ensaymada Recipe #2: Bread Machine Method using bread machine yeast
URGENT NOTE as of 07/21/07: I am making this recipe while editing this post. I should have included this note before any of you tries making this recipe. If your BM is like mine with tall bucket instead of horizontally long (loaf-shaped), this recipe might HAVE TO BE CUT IN HALF. (The ingredients here are for a total of 3-lb loaf, and my BM can only accommodate up to 2-lb loaf without problems for dough cycle.) If you do use the same proportions here,make sure you stay with your BM, initially put only 4 cups of bread flour, help mix the dough using silicone spatula, then add the rest of the flour when you already have the soft dough (takes about 15 minutes). Keep watching, as you might have to add more flour by the tbsp (I had to add 4-5 tbsp at this time) depending on the size of egg you used. You have to poke with your finger a bit to see if the dough will NOT stick to your finger to know you have enough. Do not add too much that the dough appears flaky, because then it becomes tougher and dry.
So if you want not to worry about guarding the BM while it does its job, cut the recipe in half (1-1/2 lb loaf), or use the alternate recipe below.
If your BM is horizontally long with 2 paddles, I do not think it will be a problem to prepare the 3-lb recipe.
Ingredients (3-lb dough):
1 cup milk
3/4 cup water
1 egg
4 egg yolks
1/2 cup (1 stick) butter
2 tsp salt
6-3/4 cups bread flour (plus some more; see note above)
3/4 cup sugar
2 tsp BM yeast
(2-lb dough) - [This yielded 9 ensaymadas and 12 pcs spanish bread]
2/3 c milk
1/2 c water
1 egg
2 egg yolks
6 tbsp butter
1-1/2 tsp salt
4-1/2 c bread flour
1/2 c sugar
1-1/2 tsp BM yeast
Topping: softened butter, granulated sugar (or sugar-cinnamon, which hubby prefers), and optional grated cheese.
Directions:
Add ingredients to bread machine pan in the order suggested by manufacturer. Set in dough cycle.Once done, punch dough, lay on the table and roll with a rolling pin to make it flat. (NOTE: To keep the surface of dough from drying up, cover with plastic while you work on the ropes.)
Using dough cutter, make long ropes (about a foot long) about 3/4 of an inch wide, and coil.
Apply melted butter on coils and let rise for 10-15 minutes (or up to 30 if you want them really fluffy) in a draft-free moist enough area (I like putting them in oven with a bowl of hot water).
You may apply egg glaze prior to baking (if you want it darker brown upon baking).
Bake at 350 for 12-15 minutes (depending on your oven).
You may apply melted butter as soon as they get out of the oven. Helps keep them soft by preventing too much moisture loss. Then apply softened butter and roll in sugar when ready to consume. (Please see slideshow for step-by-step how-to's).
Bonus: I use the smaller sides of the flattened disk of dough to make mini-spanish
bread. Just mix together softened butter and sugar (approximate - butter should have enough sugar to make it super gritty but still spreadable), and apply a not-so-thin layer leaving about 1/4 inch at the edges for sealing(if too generous, it becomes gooey caramelly when baking and overflows out of the buns and make the bread quite tough when they get colder. So when you do make them like so, eat right away while they are still soft and fresh from the oven.) Roll tightly as shown. Then coat with bread crumbs. Put on baking pans seam side down. Bake at 350 deg F for about 8-10 minutes.Sorry no pics for the finished spanish bread. They were gone too quickly before I had a chance to take photos.
Sunday, July 08, 2007
Ensaymada Recipe #1 (Manual)
 Quite late, but here it is as promised.
As with the bread machine method, the ensaymada resulting from this recipe is like the ones I used to eat a lot when I was a kid, the kind of ensaymada you can get from the nearby bakery in the Philippines, not from goldilocks or red ribbon. This is only made more special by virtue of its very ingredients: more eggyolks and butter.
I have tried both manual and bread machine methods. I still prefer using the bread machine, but the manual was my first attempt, so here goes the recipe.
Recipe #1: Manual method using Rapid Rise Instant Yeast
6 to 6-1/2 cups all-purpose flour – (measure separately and put in 3 separate bowls 2 cups first then 1/2 cup then 4 cups to make a total of 6-1/2; reserve the last ½ cup for dusting while kneading)
3/4 cup sugar
2 envelopes FLEISCHMANN'S RapidRise Yeast - If you do not have this, just look for anything equivalent to instant yeast (this is mixed with the flour before the hot liquid. 1 envelope = 2-1/4 tsp )
1-1/2 teaspoons salt
1 cup milk (You may want to experiment using buttermilk instead of milk)
1/2 cup water
1/2 cup butter or margarine
1 large egg
3 egg yolks (reserve 1 egg white for Egg Glaze – optional; if you are wondering what to do with egg whites, you can use it for meringue or just use for tortang talong and the likes)
about 1/2 cup melted butter for brushing prior to rising
Topping:
Softened (not melted) butter or margarine
Granulated sugar
grated white cheese or any other cheese you fancy (optional)
Directions (See earlier post for slide presentation)
In a large bowl, combine 2 cups flour, sugar, undissolved yeast, and salt. Heat milk, water, and butter until very warm (120o to 130o F). Gradually add to flour mixture. Beat 2 minutes at medium speed of electric mixer, scraping bowl occasionally. Add egg, egg yolks, and 1/2 cup flour. Beat 2 minutes at high speed. Stir in enough remaining flour to make a soft dough (leave about ½ cup for dusting while kneading). Knead on lightly floured surface until smooth and elastic, about 8 to 10 minutes. Cover; let rest 10 minutes. (If preparing one night ahead, you can refrigerate at this point, a method I prefer because it is then easier to manipulate the dough. Grease a big bowl with shortening, put the dough in it and turn it over so that the dough is covered with grease all over. Cover with plastic wrap then refrigerate. The plastic wrap will prevent the dough from drying up on the exposed surface.)
Divide dough into 24 equal pieces (I do it by halves - cut in half first then cut each half into another half so that I have 4 big pieces. Then I cut each into half again, then cut into 3 to make 6 pieces for each of the 4 big pieces). Using both your hands, roll each piece to make ropes about 1 foot long or more, with the diameter about the same as your middle finger. Make a loose coil with each rope (parang katol; you can even give more allowance for rising), tuck the end under and lay flat on the greased baking sheet (or use parchment paper). Brush each piece right away with a generous amount of softened margarine or melted butter (so that the coil’s grooves are more pronounced. If you don’t, the dough sticks at the grooves and it appears as pyramid instead of a nice mound). Let rise until doubled. (I usually place them inside the oven, along with a bowl filled with hot water, then I heat the oven for 1 minute then turn it off and let the warm air speed up the rising process. Usually they are ready after 15-20 minutes, but you may extend some more if you want puffier buns. I then open the oven door carefully and gradually so as to avoid creating draft then take out the sheets carefully to avoid jarring them -- these might flatten the dough if you are not careful; what we term as "bumagsak.") Put the baking sheets on the countertop where there is no draft.
You might have to prolong the rising time to more than 40 minutes depending on the level of humidity and the temperature where you are (I was told by some that theirs did not rise too much so the buns turned out quite too solid). Keep eyeballing if the buns have doubled in size. You can now start heating the oven.
Brush with Egg Glaze (optional). Bake at 375o F for 12-15 minutes or until done and top is golden dark brown if with glaze or golden light brown if without. (I usually start checking periodically after 10 minutes for the individual rolls. Remove from baking sheets (this avoids sweating at the bottom part so it won’t turn soggy there); cool on wire racks until lukewarm just so that the softened butter or margarine will not melt when brushed. Dip in a bowl of granulated sugar to coat (or you can just sprinkle on top). If storing some pieces, it is better not to put butter/margarine and sugar yet. Cool them completely (about 10 minutes or so; keep touching them) then immediately store in an airtight Ziploc bag to avoid sweating (which will make them soggy and also will encourage faster mold growth). If you live in an area where humidity is too low, avoid exposing to air beyond the time for complete cooling, or the buns will dry out and will be hard. When reheating, place in the microwave for 10-15 seconds (depending on the microwave) to make it lukewarm before applying butter/margarine and sugar. As advised by breadworld.com, leftover breads are better left in room temp instead of inside the fridge. Refrigerating makes them stale faster.
 Egg Glaze: Combine 1 egg white and 1 tablespoon water; beat
 lightly until well blended. This will create a very dark golden brown top. (I like the contrast. For those who usually think a dark crust means overdone, it will be such a surprise to bite into the softness of the ensaymada, and that wonderful first bite will reveal a yellowish-whitish interior).
You may want to bake them braided or in rounded pans if you want to wrap them as gift (as I did for Christmas) to friends.
Tuwang-tuwa sila!
UPDATE as of 4/2/09: Vincent posted his own take of ensaymada on thefreshloaf, with changes involving omission of milk and adding an extra yolk. Hmmmm....yum!
Friday, December 08, 2006
Special Ensaymada
 Note as of 1-12-09: Please see my labels on the sidebar and look for "ensaymada" for other recipes I have (supersoft and buttery, aside from the earlier bread machine and manual methods). You will also see tips and methods. My favorite, and most popular among my readers, is the super moist, super easy to make, supersoft ensaymada.
~~~~~
Before I left the USA, I baked this bread for supper, which I tweaked with to substitute honey for some of the sugar. Husband said it was so good, so soft and sweet it was almost like a pastry. It reminded me so much of ensaymada.

Now, I am here in Canada as I post this, with my sister and Nanay, and I brought the recipe with me, following the recipe save for changing the proportion of eggyolk and eggs, brushed some with egg glaze and some without, and of course, I shaped them into regular sized ensaymada.
My sister tasted it and said, "Ang sarap! Siksik sya, hindi puro ere." (It's delicious, and not full of air.) At first I thought she was trying to tell me it was solid [hard] because it was "siksik" but what she really wanted to say was that it was not the kind that some rolls are - full of airy holes that one would get gas pains due to so much air eaten than the actual bread, which is usually a result of over-rising.
She brought to work two pieces, as she was giving the other piece to her Filipina co-worker. When she got back, she told me, "Sarap na sarap yung kasama ko. Gusto mag-order. Ituro mo nga sa akin kung paano paggawa." (My co-worker liked it so much that she wants to order some. Teach me how to make it.) At last I achieved what I have meaning to -- evoke interest in my sister to learn baking. She was, anyway, exposed to the same bakery and bakers I grew up with.
Hence, that is the reason why I am not (yet) posting the recipe here. My sister might want to sell ensaymada as a sideline, so she does not want me to post my final recipe here. I can only say that I did not use honey, but all the ingredients can be easily bought from the grocery store. And I can only offer, for now, the slideshow and the how-to's below. For those who will be interested, email me (see contact link) and provide me with your physical mailing address.
Procedure:
1. Prepare the dough (this recipe can be refrigerated, which I prefer because the dough is easier to handle/shape when cold).
2. Divide the dough into 24 pieces (you may want to make 12 pieces first and re-place the rest of the dough in the fridge. This dough can be used within 24 hours.).
3. Using both palms and starting from the middle going outward, roll out each piece to make a 1-ft long "rope."
4. Make each piece into a loose coil so that when you place it on the baking sheet, it lies flat, not like a mound. Some space in between can be allowed, since the dough will still have to rise. The mound at the center will form as the dough rises.
5. After placing on the baking sheet, brush with softened or melted butter/margarine. Let rise in a warm, draft-free place for about 10 minutes or until doubled (depending on the warmth of the place). I place mine inside the oven and turn the oven on for one minute just to make it warm inside. If you are going to place them on the countertop, make sure you cover to avoid drying up.
6. Bake at 350 F for about 12-15 minutes or until golden brown. You may brush with egg glaze if you want the top a darker brown for better contrast with the inside.
7. Once cooled enough, brush with softened butter or margarine then dredge in sugar and enjoy. Optional: Sprinkle top with grated cheese. I can tell you, though, that this is so good you don't need anything else aside from the basics of ensaymada to enjoy it. In other words, you don't need cheese or salted egg to make it taste good. It was my sister who labeled my ensaymada "special." That's how pleasurable this is to the palate.
Note: The rolling pin method can also be used. Instead of making "ropes", you can flatten the whole dough using rolling pin to make about 10x15 rectangle and brush with butter, leaving about half an inch on one long end. Start log-rolling from the other long end, then pinch to seal at that end without butter. Cut the log into 24 pieces, lay on the baking sheet at 2-inch intervals and let rise. Proceed as above.
TIPS:
When storing, let the buns cool completely then place inside a ziploc bag immediately. It is better to NOT brush them with butter and NOT to sprinkle sugar yet. If you have done so then you have to reheat, the sugar and butter will be quite melted when you microwave, which is not quite appealing to the eyes, but still appealing to the palate.
When ready to consume again, just reheat each piece for about 10-15 seconds in the microwave then brush with butter and roll on sugar.
UPDATE: 12-24-08 --
Please see my labels on the sidebar and look for "ensaymada" for other recipes I have (supersoft and buttery). You will also see tips and methods.
Merry Christmas!
Sunday, October 29, 2006
Pandelimon de Patatas

 This month, the LP 15 is entitled "Recycled, Reloaded." Very appropriate for the culture who "waste not, want not." Visions of my recycled foods come into mind, both for re-cooking and for other valuable uses to lessen my contribution to the waste dump. How do I recycle foods? Let me count my ways.
First off, if I can freeze them, I do them in servings of one for quick lunch fix at times I am alone (or for my son who craves for heavy merienda). If I have leftover Korean beef and mashed potatoes or rice, or kare-kare with rice, or adobo with rice, I place them in a foil-lined small loaf pan and wrap, then freeze without the pan. I reheat these in oven toaster for 30 minutes at 350 deg prior to eating.
Second, I "remodel" some grilled or slow cooked meaty dishes to come up with new ones. Pancit, chicken empanada, chicken-veggie egg drop soup, chicken sopas and chicken mami noodles come to mind when I have leftover roasted chicken; special fried rice and ham-veggie omellet when I have leftover veggies and ham; beef siopao and asado roll when I have leftover beef pares; and fish lumpia, escabeche, sarsiado, or dinengdeng when I have leftover grilled/fried fish.
Third, I turn my old bread slices into bread pudding, french toast, biscocho or bread crumbs.
Fourth, I may not re-cook them. All biodegradable scraps (veggie peelings, seeds, or bones) and leftover I produce from my kitchen either go to chicken food bucket (goes to my MIL) or to my compost bucket (goes under the garden dirt). I do not consider them "waste" at all.
That said, I have tons of recipes in mind for this round of LP hosted by Lafang. But I do not have the luxury of time to post the recipes, or I might have posted about them in past entries, and I do not want to be redundant. Hence, I have decided to post two of them: Pandelimon de Patatas is my first entry. The next post will be Fish Lumpia.
I do not claim originality for this recipe. It so happened that in my wish to make use of leftover boiled potatoes, I looked for recipes for rolls/breads making use of them, as usual, from my fave bread machine recipe source, breadworld.com. I found Potato Dinner Rolls. After it was baked, it reminded me so much of pandelimon; hence , the name I gave it. I just omitted the egg glaze. I can't give you the link to the bread machine recipe because they seem to have deleted that and replaced with the conventional method (that is the link I used). Here is the bread machine version, edited by yours truly. The first time I made it, the dough was too sticky to form into balls. So on my second time (I baked again per husband's and son's request), I added more flour while the BM was kneading, and it solved my problem).
INGREDIENTS:
1 / 2 cup milk
1 / 4 cup potato water
1 / 2 cup boiled and mashed potato
1 / 4 cup butter or margarine
1 large egg
1-1/2 teaspoons salt
3 cups bread flour + 2-3 tbsp while kneading
1/4 cup sugar
2 tsp Fleischmann's bread machine yeast
DIRECTIONS:
Sunday, October 01, 2006
Pan de Sal
This is a re-posting from my old kusina, featuring how to make pan de sal using bread machine/breadmaker for the dough (or use manual method using the same recipe). I have received emails about how their pandesal using this recipe/method has received rave reviews from fellow Pinoys. May I add that I have served this also to Americans and most of them loved this crusty-on -the-outside, soft-on-the-inside buns. There's a slide show of how to shape and cut the dough and then bake them in conventional oven, to make learning easier for those who are going to try this for the first time. Pardon the poem inspired by the smell of the yeast dough as it was rising...
Nung nasa Pilipinas pa ang inyong Manang
At dumating ang bayaw na balikbayan,
Araw-araw, nagpapabili ng pandesal,
Ito kasi ang nami-miss nya sa kanyang almusal.
Ngayon, si Manang, nasa parehong kalagayan,
Pero walang panaderyang nagbebenta ng pandesal
Nang ipamalita ang "Kusina" sa mga kaibigan,
"Ayan! I-feature mo ang paggawa ng pandesal!"
(Patay! Ang pandesal, di ko pa nasubukan...)
Kaya sa alaala, pilit na hinalughog
Mga panaderong sa masa ay humubog
Ipinikit ang mata upang balikan
Mahigit dalawang dekada nang nakaraan.
Tulad ni Sassy, humanap ng sweet bread recipe
Pang bread machine, mula Fleischmann's Bakery
Kasi ang sangkap, pang-family size lang
Para pag pumalpak, di nakakahinayang
(Mahal kasi grocery eh! At mas madali ubusin.)
Si Manong Ken, me resipi nga,
Pero sabi nya, me halong daya
Di kasi kanya yun, di sya panadero
Ang sangkap at proseso, iba sa alam ko.
(Parang mahirap ba...)
Nung bata kasi ako, sa panaderya ni Tatay
Sa paghulma at pagsalansan, laging nakaantabay
Sa kakahawak ng dough, nahasa ang mga kamay
Yung nga lang, resipi't sangkap, di ako nasanay.
Paggamit ng pugon, di rin natutunan
Para sa batang patpatin, medyo me kahirapan
Pero paglabas dun, alam ko ang gagawin
Palamigin, hiwain, balutin, KAININ!
Kaya eto ngayon, aking sinusubukan
Papel ng panadero, kaya bang gampanan?
Unang subok, sumobra, medyo natusta
Pangalawang subok, umubra, tamang-tama ang timpla!
Wish ko lang pandesal ko ay inyong matikman
Keso o mantekilya ang gawing palaman
Pero ang tangi ko lang kayang gawin
Ilagay sa website nang sa inyo ay maihain.
Lika, kusina ko ay iyong bisitahin
Paggawa ng pandesal, iyo ring subukin (excited ka na no?)
Sana kahit paano, natulungan kita,
Kahit araw-araw, me pandesal ka na!
*************
On to pan de sal making...
INGREDIENTS (using Basic Egg Bread recipe from Breadworld.com. Other suggested recipes are Old Fashioned Buttermilk Bread and Buttery Sweet Bread.):

DIRECTIONS: Update 7-20-09 - I added the manual method after the bread machine method due to readers asking for recipe if they do not have a bread machine.
BREAD MACHINE METHOD:
1. Use the 1-pound recipe if your machine pan holds 10 cups or less of water. Add ingredients to bread machine pan in the order suggested by manufacturer.
2. Set the bread machine to DOUGH CYCLE and let it do its job. (Saves you from getting your hands messy!
3-4. Wait for the dough cycle to complete the initial rising. While waiting, prepare the table (grease a bit), baking sheet (grease), and breadcrumbs. Grease your hands as well.
5. Punch the dough down (actually, as soon as you try to remove this from the pan, it will deflate.)
6. Lay the dough on the table and stretch as shown in the slide.
7. Using your two hands, roll the dough while squeezing some bubbles to make it more compact and turn it into a log about 2-3 inches in diameter. (Imagine wringing a towel, that is the effect you want to achieve here, only not too tight.)
8. Sprinkle the log on all sides with bread crumbs. (See how I make my own bread crumbs here.) Optional: Cover with plastic and allow to rise for 10 minutes. This will lessen your final rising time.)
9. Using a dough cutter, cut the log at intervals of 1 to 1-1/2 inches. Roll again on bread crumbs to coat the cut sides. (This makes about 20 pieces.)
10. Lay on lightly greased (with shortening) baking pan slightly diagonally, with the cut side up, 1 inch apart or at least one fingerbreadth apart. Cover with Cling wrap (or damp flour sack) and let rise for about 30 minutes (or 10 if you did an earlier optional rising of log) in a draft-free place. Alternatively, you may want to put it inside the oven and turn the oven on bake for 1 minute then turn off. This will make the oven warm and will hasten rising (about 10 minutes only, plus it is draft-free, but if you want fluffier pan de sal you can extend to 30 minutes. Just be careful when you open the door to take it our prior to setting the temp for baking per se. You do not want to create a sudden rush of air or else you might end up with a flat bread.)
11. Bake at 350 deg F for 12-15 minutes or until golden brown (depends on the size, spacing and oven used). If you want it darker, bake at 375 for 10-12 minutes).
12. Let cool (kung makakatiis ka!) for about 1 minute.
13. Enjoy either plain or with your favorite filling! (Mine is Reno liver spread, but I do not have access to that here, so I content myself with butter, jam, or Kraft Old English cheese spread.)
Here is a video of the actual shaping and baking of pandesal. The dough was pre-made using the bread machine.
Taglish version (requested by Jacklyn)
1.Gamitin ang resipi na pang 1 pound kung hanggang 10 cups lang ang kaya ng bread maker. Ilagay ang sangkap ayon sa suhestyon ng gumawa ng bread maker (sa brand na gamit ko, ilagay muna ang mga likido – tubig, gatas, mantekilya, at itlog – sa pan at kelangan ay maligamgam, Pwedeng hayaan sa countertop para maging room temp, o kaya ay i-microwave ng mga 30 segundo, haluin at i-check sa thermometer kung nasa 80-100 deg F. I-microwave pa kung malamig pa.)
2.I-set sa Dough Cycle ang bread maker.
3.Maghintay. Habang naghihintay para matapos ang dough cycle, ihanda ang lamesa o countertop (medyo punasan ng konting mantekilya o shortening para medyo madulas, at budburan ng konting harina), baking sheet/pan (punasan ng shortening), at breadcrumbs. Pahiran din ng mantekilya/shortening ang kamay mo.
4.Alisin ang dough sa pan pag handa na. Magfa-flat ang dough, gaya ng nangyayari pag sinuntok mo. Ganon talaga. Dapat pa nga medyo pitpitin mo.
5.Ilagay sa ibabaw ng lamesa/countertop at ayusin nang pahaba (i-stretch mo para humaba).
6.Gumawa ng baston: irolyo habang pinipitpit ang pandesal para maghugis “log” na mga 2-3 inches ang haba pag cross-section.
7.Budburan ng bread crumbs. Pwedeng takpan ng plastic at hayaan lumaki ng mga 10 minuto bago hiwain.
8.Gamit ang dough cutter, maghiwa (kelangan, mabilis ang kilos ng kamay mo sa paghiwa para hindi parang nahihila yung dough. Parang itak ang bagsak ng dough cutter tapos biglang ilihis para humiwa). Hiwain kada 1-2 inches. Irolyo uli sa bread crumbs bawat pirasong nahiwa.
9.Ilagay sa baking pan. Kelangan yung nahiwang parte ang nakapatong sa pan.
10.Palakihin ng mga 30 minutes o hanggang magdoble (baka mas maikli kung medyo mainit dyan). Eto ang second rising. Dapat ay walang hangin at dapat ay “moist” ang paligid, para hindi matuyot ang pandesal habang lumalaki. Pag walang hangin, hindi sya basta babagsak. Pag nabiglang nahanginan, maaaring bumagsak ang tinapay, lalabas na flat. Pwede mong gamitin ang pugon para sa second rising. Ilagay mo yung pan sa loob, paandarin ang oven ng isang minuto at patayin para yung namuong init sa loob ay makatulong mapabilis ang pagpapalaki ng tinapay, na hindi naiistorbo ng hangin.
11.I-hurno (bake) sa 350 deg F (nasubukan ko na rin hanggang 450 deg F, basta nakaantabay ka). Mas malutong at ma-brown ang ibabaw kung mas mataas ang temperature. Kung gusto mo medyo albino ang dating, ok na yung 350. Hayaan ng mga 10 minuto, paikutin ang pan para uniform ang pagkaluto/pagkabrown, at lutuin pa ng mga 2-4 minuto o hanggang total ng 15 minuto basta maganda ang pagka-brown. Tantayahin mo sa unang pagbake kung gano kainit ang oven mo.
12.Pagkahango sa pugon, alisin agad sa pan at ilipat sa cooling wire rack. Pag wala nang init, pwede na ilagay sa plastic para hindi matuyot at manigaw (pag nagpapawis pa sa plastic, palamigin mo pa, para hindi madali mag-amag).
MANUAL METHOD:
1. In a pyrex measuring cup, microwave the liquid ingredients for about 30 sec to 1 min to make it lukewarm (80-100 deg F or room temp).
2. In a large bowl, place all dry ingredients and make a well at the center.
3. Place liquid ingredients in the well at the center. Using wooden spoon, mix liquid with dry starting from center until all dry ingredients from the sides are incorporated and you have a soft dough.
4. Transfer to a lightly floured surface and knead for about 8 mins.
5. Cover with plastic wrap and let rest for 10 mins.
6. Stretch as shown on slides and form into a tight log.
7. You may opt to sprinkle with breadcrumbs and (1) slice at this point or (2) let rest for another 10 mins before slicing.
8. Coat the sliced dough pieces and placing on greased baking pan.
9. Place in pre-warmed oven (to hasten rising time) and let rise some more for (1) 30 minutes if they were cut right away, or (2) 10-20 mins if they rose before cutting. The point is, get them to a good size before baking (remember that they will do a final rise when you place them in hot oven, so bake them when they reach a size just a little bit smaller than the size of pan de sal you want to eat).
10. Bake at 350 mins (or 365 if you want them darker) for 10-15 mins (keep watching after 10 mins by opening the oven door and looking at how dark they are).
IMPORTANT TIPS for beginners in yeast doughs:
A bread machine not only makes it less messy for your hands during the initial phase of dough preparation. You can also learn how the dough must feel if you will touch and poke it before it goes into the initial rising phase (that is 30 minutes after you start the dough cycle). Familiarize yourself with that dough and then also after the initial rising (end of dough cycle). Once you have done so, you can then have the courage to do the conventional way of kneading the dough by hand and judging if the initial rising time is enough.
Make sure you don't disturb the initial rising phase and that it is warm and moist and there is no draft (bread machines have that ideal setting).
When checking for brownness, OPEN the door and bring the bread under natural light instead of looking through the oven glass (the yellow light shows the bread being white when in fact it is already brown, you might toast it).
If you want to use the old-fashioned buttermilk recipe, but you don't have buttermilk on hand, you can substitute it with 1 tbsp cider vinegar or lemon juice plus enough fresh milk to make 1 cup, then use the right proportion in preparing the dough as per ingredients. (I saw this tip in the Cooking Pleasures Magazine of CookingClub.com, which sparked the idea of trying that recipe in making pandesal.)
For those without fresh milk (presuming I have followers in the Philippines, but please help our small businesses by patronizing the local bakeries), use 1:1 ratio of evaporated milk and water.
Place the buns right away on a cooling rack so they don't sweat at the bottom and make the bottom soggy.
In STORING pan de sal:
Let the buns cool on the wire rack completely but do not overdo that they dry up (this take about 10-30 mins here in my place depending on the weather or season). Then place in ziploc bags or airtight container. If you do this while they are still warm, they will sweat and will invite molds very soon. If you do it too late, they will be hard.
VARIATIONS:
Corned Beef Pan de Sal: If you have access to Argentina CB, get a small can and add a small, chopped onion. Without the breadcrumbs, cut the pan de sal into pieces about the size of pingpong ball, flatten and place a tbsp of CB mixture, seal the edges and roll in breadcrumbs. (I used to sell these when I was still studying in Med school, but without the breadcrumbs. They sold fast! Perfect breakfast!)
Hotdog Pan de Sal: Roll pieces to flatten (like in my spanish bread post) then put the hotdog in, wrap the dough around, then roll on breadcrumbs. (This is probably the equivalent of "hoagie" here.)
Yun lang...
This re-posting is so that I can have it labeled properly and make it easier to locate.
UPDATE: Some Americans (my co-workers, friends' friends, relatives) have tried these and absolutely loved the soft interior and the crusty exterior. Just try to offer them to your co-workers or relatives who are open to new things, and I guarantee you, they will see you with new eyes...
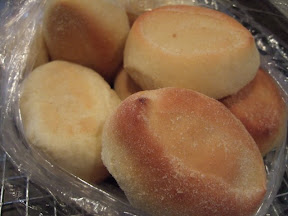 |
| From pandesal |
At dumating ang bayaw na balikbayan,
Araw-araw, nagpapabili ng pandesal,
Ito kasi ang nami-miss nya sa kanyang almusal.
Ngayon, si Manang, nasa parehong kalagayan,
Pero walang panaderyang nagbebenta ng pandesal
Nang ipamalita ang "Kusina" sa mga kaibigan,
"Ayan! I-feature mo ang paggawa ng pandesal!"
(Patay! Ang pandesal, di ko pa nasubukan...)
Kaya sa alaala, pilit na hinalughog
Mga panaderong sa masa ay humubog
Ipinikit ang mata upang balikan
Mahigit dalawang dekada nang nakaraan.
Tulad ni Sassy, humanap ng sweet bread recipe
Pang bread machine, mula Fleischmann's Bakery
Kasi ang sangkap, pang-family size lang
Para pag pumalpak, di nakakahinayang
(Mahal kasi grocery eh! At mas madali ubusin.)
Si Manong Ken, me resipi nga,
Pero sabi nya, me halong daya
Di kasi kanya yun, di sya panadero
Ang sangkap at proseso, iba sa alam ko.
(Parang mahirap ba...)
Nung bata kasi ako, sa panaderya ni Tatay
Sa paghulma at pagsalansan, laging nakaantabay
Sa kakahawak ng dough, nahasa ang mga kamay
Yung nga lang, resipi't sangkap, di ako nasanay.
Paggamit ng pugon, di rin natutunan
Para sa batang patpatin, medyo me kahirapan
Pero paglabas dun, alam ko ang gagawin
Palamigin, hiwain, balutin, KAININ!
Kaya eto ngayon, aking sinusubukan
Papel ng panadero, kaya bang gampanan?
Unang subok, sumobra, medyo natusta
Pangalawang subok, umubra, tamang-tama ang timpla!
Wish ko lang pandesal ko ay inyong matikman
Keso o mantekilya ang gawing palaman
Pero ang tangi ko lang kayang gawin
Ilagay sa website nang sa inyo ay maihain.
Lika, kusina ko ay iyong bisitahin
Paggawa ng pandesal, iyo ring subukin (excited ka na no?)
Sana kahit paano, natulungan kita,
Kahit araw-araw, me pandesal ka na!
*************
On to pan de sal making...
INGREDIENTS (using Basic Egg Bread recipe from Breadworld.com. Other suggested recipes are Old Fashioned Buttermilk Bread and Buttery Sweet Bread.):
| 1-POUND LOAF | INGREDIENTS | 1-1/2-POUND LOAF |
| 1/2 cup 1 1 tbsp 3/4 tsp 2 cups 1 tbsp 1-1/2 tsp | milk large egg(s) butter, cut up salt bread flour sugar bread machine yeast | 2/3 cup 2 2 tbsp 1 tsp 3 cups 2 tbsp 2 tsp |
DIRECTIONS: Update 7-20-09 - I added the manual method after the bread machine method due to readers asking for recipe if they do not have a bread machine.
BREAD MACHINE METHOD:
1. Use the 1-pound recipe if your machine pan holds 10 cups or less of water. Add ingredients to bread machine pan in the order suggested by manufacturer.
2. Set the bread machine to DOUGH CYCLE and let it do its job. (Saves you from getting your hands messy!
3-4. Wait for the dough cycle to complete the initial rising. While waiting, prepare the table (grease a bit), baking sheet (grease), and breadcrumbs. Grease your hands as well.
5. Punch the dough down (actually, as soon as you try to remove this from the pan, it will deflate.)
6. Lay the dough on the table and stretch as shown in the slide.
7. Using your two hands, roll the dough while squeezing some bubbles to make it more compact and turn it into a log about 2-3 inches in diameter. (Imagine wringing a towel, that is the effect you want to achieve here, only not too tight.)
8. Sprinkle the log on all sides with bread crumbs. (See how I make my own bread crumbs here.) Optional: Cover with plastic and allow to rise for 10 minutes. This will lessen your final rising time.)
9. Using a dough cutter, cut the log at intervals of 1 to 1-1/2 inches. Roll again on bread crumbs to coat the cut sides. (This makes about 20 pieces.)
10. Lay on lightly greased (with shortening) baking pan slightly diagonally, with the cut side up, 1 inch apart or at least one fingerbreadth apart. Cover with Cling wrap (or damp flour sack) and let rise for about 30 minutes (or 10 if you did an earlier optional rising of log) in a draft-free place. Alternatively, you may want to put it inside the oven and turn the oven on bake for 1 minute then turn off. This will make the oven warm and will hasten rising (about 10 minutes only, plus it is draft-free, but if you want fluffier pan de sal you can extend to 30 minutes. Just be careful when you open the door to take it our prior to setting the temp for baking per se. You do not want to create a sudden rush of air or else you might end up with a flat bread.)
11. Bake at 350 deg F for 12-15 minutes or until golden brown (depends on the size, spacing and oven used). If you want it darker, bake at 375 for 10-12 minutes).
12. Let cool (kung makakatiis ka!) for about 1 minute.
13. Enjoy either plain or with your favorite filling! (Mine is Reno liver spread, but I do not have access to that here, so I content myself with butter, jam, or Kraft Old English cheese spread.)
Here is a video of the actual shaping and baking of pandesal. The dough was pre-made using the bread machine.
Taglish version (requested by Jacklyn)
1.Gamitin ang resipi na pang 1 pound kung hanggang 10 cups lang ang kaya ng bread maker. Ilagay ang sangkap ayon sa suhestyon ng gumawa ng bread maker (sa brand na gamit ko, ilagay muna ang mga likido – tubig, gatas, mantekilya, at itlog – sa pan at kelangan ay maligamgam, Pwedeng hayaan sa countertop para maging room temp, o kaya ay i-microwave ng mga 30 segundo, haluin at i-check sa thermometer kung nasa 80-100 deg F. I-microwave pa kung malamig pa.)
2.I-set sa Dough Cycle ang bread maker.
3.Maghintay. Habang naghihintay para matapos ang dough cycle, ihanda ang lamesa o countertop (medyo punasan ng konting mantekilya o shortening para medyo madulas, at budburan ng konting harina), baking sheet/pan (punasan ng shortening), at breadcrumbs. Pahiran din ng mantekilya/shortening ang kamay mo.
4.Alisin ang dough sa pan pag handa na. Magfa-flat ang dough, gaya ng nangyayari pag sinuntok mo. Ganon talaga. Dapat pa nga medyo pitpitin mo.
5.Ilagay sa ibabaw ng lamesa/countertop at ayusin nang pahaba (i-stretch mo para humaba).
6.Gumawa ng baston: irolyo habang pinipitpit ang pandesal para maghugis “log” na mga 2-3 inches ang haba pag cross-section.
7.Budburan ng bread crumbs. Pwedeng takpan ng plastic at hayaan lumaki ng mga 10 minuto bago hiwain.
8.Gamit ang dough cutter, maghiwa (kelangan, mabilis ang kilos ng kamay mo sa paghiwa para hindi parang nahihila yung dough. Parang itak ang bagsak ng dough cutter tapos biglang ilihis para humiwa). Hiwain kada 1-2 inches. Irolyo uli sa bread crumbs bawat pirasong nahiwa.
9.Ilagay sa baking pan. Kelangan yung nahiwang parte ang nakapatong sa pan.
10.Palakihin ng mga 30 minutes o hanggang magdoble (baka mas maikli kung medyo mainit dyan). Eto ang second rising. Dapat ay walang hangin at dapat ay “moist” ang paligid, para hindi matuyot ang pandesal habang lumalaki. Pag walang hangin, hindi sya basta babagsak. Pag nabiglang nahanginan, maaaring bumagsak ang tinapay, lalabas na flat. Pwede mong gamitin ang pugon para sa second rising. Ilagay mo yung pan sa loob, paandarin ang oven ng isang minuto at patayin para yung namuong init sa loob ay makatulong mapabilis ang pagpapalaki ng tinapay, na hindi naiistorbo ng hangin.
11.I-hurno (bake) sa 350 deg F (nasubukan ko na rin hanggang 450 deg F, basta nakaantabay ka). Mas malutong at ma-brown ang ibabaw kung mas mataas ang temperature. Kung gusto mo medyo albino ang dating, ok na yung 350. Hayaan ng mga 10 minuto, paikutin ang pan para uniform ang pagkaluto/pagkabrown, at lutuin pa ng mga 2-4 minuto o hanggang total ng 15 minuto basta maganda ang pagka-brown. Tantayahin mo sa unang pagbake kung gano kainit ang oven mo.
12.Pagkahango sa pugon, alisin agad sa pan at ilipat sa cooling wire rack. Pag wala nang init, pwede na ilagay sa plastic para hindi matuyot at manigaw (pag nagpapawis pa sa plastic, palamigin mo pa, para hindi madali mag-amag).
MANUAL METHOD:
1. In a pyrex measuring cup, microwave the liquid ingredients for about 30 sec to 1 min to make it lukewarm (80-100 deg F or room temp).
2. In a large bowl, place all dry ingredients and make a well at the center.
3. Place liquid ingredients in the well at the center. Using wooden spoon, mix liquid with dry starting from center until all dry ingredients from the sides are incorporated and you have a soft dough.
4. Transfer to a lightly floured surface and knead for about 8 mins.
5. Cover with plastic wrap and let rest for 10 mins.
6. Stretch as shown on slides and form into a tight log.
7. You may opt to sprinkle with breadcrumbs and (1) slice at this point or (2) let rest for another 10 mins before slicing.
8. Coat the sliced dough pieces and placing on greased baking pan.
9. Place in pre-warmed oven (to hasten rising time) and let rise some more for (1) 30 minutes if they were cut right away, or (2) 10-20 mins if they rose before cutting. The point is, get them to a good size before baking (remember that they will do a final rise when you place them in hot oven, so bake them when they reach a size just a little bit smaller than the size of pan de sal you want to eat).
10. Bake at 350 mins (or 365 if you want them darker) for 10-15 mins (keep watching after 10 mins by opening the oven door and looking at how dark they are).
IMPORTANT TIPS for beginners in yeast doughs:
A bread machine not only makes it less messy for your hands during the initial phase of dough preparation. You can also learn how the dough must feel if you will touch and poke it before it goes into the initial rising phase (that is 30 minutes after you start the dough cycle). Familiarize yourself with that dough and then also after the initial rising (end of dough cycle). Once you have done so, you can then have the courage to do the conventional way of kneading the dough by hand and judging if the initial rising time is enough.
Make sure you don't disturb the initial rising phase and that it is warm and moist and there is no draft (bread machines have that ideal setting).
When checking for brownness, OPEN the door and bring the bread under natural light instead of looking through the oven glass (the yellow light shows the bread being white when in fact it is already brown, you might toast it).
If you want to use the old-fashioned buttermilk recipe, but you don't have buttermilk on hand, you can substitute it with 1 tbsp cider vinegar or lemon juice plus enough fresh milk to make 1 cup, then use the right proportion in preparing the dough as per ingredients. (I saw this tip in the Cooking Pleasures Magazine of CookingClub.com, which sparked the idea of trying that recipe in making pandesal.)
For those without fresh milk (presuming I have followers in the Philippines, but please help our small businesses by patronizing the local bakeries), use 1:1 ratio of evaporated milk and water.
Place the buns right away on a cooling rack so they don't sweat at the bottom and make the bottom soggy.
In STORING pan de sal:
Let the buns cool on the wire rack completely but do not overdo that they dry up (this take about 10-30 mins here in my place depending on the weather or season). Then place in ziploc bags or airtight container. If you do this while they are still warm, they will sweat and will invite molds very soon. If you do it too late, they will be hard.
VARIATIONS:
Corned Beef Pan de Sal: If you have access to Argentina CB, get a small can and add a small, chopped onion. Without the breadcrumbs, cut the pan de sal into pieces about the size of pingpong ball, flatten and place a tbsp of CB mixture, seal the edges and roll in breadcrumbs. (I used to sell these when I was still studying in Med school, but without the breadcrumbs. They sold fast! Perfect breakfast!)
Hotdog Pan de Sal: Roll pieces to flatten (like in my spanish bread post) then put the hotdog in, wrap the dough around, then roll on breadcrumbs. (This is probably the equivalent of "hoagie" here.)
Yun lang...
This re-posting is so that I can have it labeled properly and make it easier to locate.
UPDATE: Some Americans (my co-workers, friends' friends, relatives) have tried these and absolutely loved the soft interior and the crusty exterior. Just try to offer them to your co-workers or relatives who are open to new things, and I guarantee you, they will see you with new eyes...
Subscribe to:
Posts (Atom)

Custom Search