Showing posts with label Holidays. Show all posts

Sunday, November 28, 2010

Our Family's Thanksgiving Tradition


Our family tries to stick to traditions, and part of that is celebrating the four major holidays with my in-laws. There are 4 of us families in all -- my parents-in-law, my husband's brother's family, his sister's family, and our very own, that take turns hosting the four major holidays, and for this year's Thanksgiving, my mother-in-law was the "IT." In addition, we have her father with us as well, so that makes for four generations in these gatherings.

I was excited when Eric and Tiffany of theguerrilagourmet.com emailed me for an invitation to be a part of their holiday project - The Gorilla Gourmet -- to represent Maine.  It is an honor for me to do so.

Our family probably typically represents the Mainers in that we try our best to be together with family (and exclusively family) during the Holidays. My mother-in-law prepares her fruit cocktail with mostly canned fruits that they picked from their own trees and bushes.

Our usual menu stars THE TURKEY and it will never be Thanksgiving if we prepare an entreƩ other than the turkey. (Oh, the Filipina in me tried to do that before, and it was like a major violation to them true Mainers!). The turkey is roasted with stuffing that is usually prepared the night before then stuffed into the turkey's cavity just before roasting.

Mashed potatoes are also prepared using potatoes they harvested from their own garden. White bread is prepared using a breadmaker (and no, we don't mill our own flour; we get that from Hannaford stores). Other sides are pitted olives, cranberry salad, bread and butter pickles, boiled onions (a Tibbetts family tradition that I am still trying very hard to assimilate), and mashed turnips.


My mother-in-law also prepared three various pies -- pecan pie, pumpkin pie and raspberry pie, but I forgot to take photos of these desserts before they were gone. One thing that my mother-in-law prepared last year that she skipped this year was the pumpkin whoopie piea, something that was not really traditionally prepared in our family during Thanksgiving, but my younger son was somehow anticipating this year. Now if there is something in our menu that I would be almost sure was very Maine-ly, it would be whoopie pies. So I decided to make the whoopie pies the very next day (recipe coming soon), and I promised to my son that from now on, pumpkin whoopie pies will be part of the Thanksgiving tradition in our family.

From the slideshow above, you can see how closely-knit our families are.  I feel so blessed to have in-laws who treat my sons as if they are true blood relations, and that is something worth thanking for.  We have a lot other things to be thankful for, but that would be something exclusively for our family to ponder upon.


Saturday, January 02, 2010

Pinoy-Style Fruit Salad


Sorry for the blurry pic...

I made this to bring fruits to the New Year Party we had yesterday at my friend Cecilia's house. I also brought frozen almond brazo de mercedes that went untouched during the Christmas Dinner I hosted (because my MIL brought cheesecake so I did not bother to bring the BDM out).

Although some of the fruits were not typically added in the usual fruit salad I used to have back in the Philippines, I just gathered the canned fruits I had in my pantry and made the dressing as close as I could get to the taste of that dressing my Nanay used to make. Cream cheese is a good substitute for Nestle Cream that is not available here.

I have not offered this to my American family/relatives, because I doubt they will like it. But my kids, including stepd, like this salad.


Ingredients:
Canned fruits
4 oz (1/2 package) cream cheese
1 can (14 oz) sweetened condensed milk
a dollop of mayonnaise

Instructions:
Let cream cheese sit out at room temp to soften.
Drain the fruits.
Using hand mixer, blend cream cheese and condensed milk, add a little of mayonnaise and blend. Taste and see if you like the balance of sweetness (condensed milk), saltiness (cream cheese), and creaminess (cream cheese and mayo). Adjust as needed. (I usually don't need any more than the ingredients I listed above).

Blend gently using a silicone spatula the fruits and the dressing. Place in a covered container and chill.

Serve chilled after at least 3 hours.

Sabi ng friends ko as they introduced me to new Pinay friends, "Lagi namin inaabangan ang dala nyan kasi masarap!"

I came home with empty containers of the fruit salad and BDM. I brought home containers filled with leftovers of anything else in the party.

Tuesday, December 15, 2009

LP: Paskong Pinoy: Our Filipino Christmas Party 2009

I modified this post to participate in this week's LP theme: Paskong Pinoy. I have a related post in my tahanan blog here.

What are the major differences between the Filipino Christmas Party and a typical American Christmas Dinner? These are the differences in the two parties I hosted and will be hosting.

Pinoy - you will find a lot of main entrees (needless to say, some of which may be repulsive to some Americans
American - One main entree

Pinoy - buffet type table, with people in line waiting to dig in
American - Serve formally on the table

Pinoy - everyone can pitch in
American - I am expected to be able to make everything since I am hosting.

However, since I will have to include traditional desserts that I cannot make from bought groceries, my MIL and SIL offered to make them, especially that those are not my specialties. I will, however, make desserts that they truly find interesting and to die for (at least, in my MIL's opinion -- SANS RIVAL). And though they would be forgiving as to have bread from a bread maker due to time constraints and the stress of prep, I am inclined (still!) to make rolls (espcially that hubby requests it)...something that my in-laws are in awe of me for. To them I am the yeast roll/bread master.

Anyway, this post is about our recent Filipino Christmas Party. My close circle of friends always look forward to it now, especially with my penchant for preparing truly Filipino traditional favorites and my perseverance to find ingredients for it.
Hubby had to ask me which foods he had to avoid...not surprisingly, 3 out of 4 meaty dishes I prepped were not American-friendly. Good thing my friends brought some foods that our kids and hubbies would eat. Even among the desserts, many of our hubbies did not care for the consistency of rice- or cassava- or custard-based desserts, nor did they care for the coconuts. They liked the puto I made using white cake mix, though.

We would have had monito monita exchange gifts, but I myself forgot to get one, so Thess announced that instead of that, they would just give me the gifts since it was my birthday the past day. Nobody contradicted! It was done on a Sunday and some had to go to church, so we only had afternoon to be together and have some chitchat. They had to leave as early as 4pm (there was a snow storm beginning), no karaoke this time. But we had fun, especially with the buko salad!

I admit it was a stressful event, with lots of hard work from me and my kids who helped me prepare, but it was all worth it. Once a year indulgence in exotic ingredients...once a year reveling in each other's friendship...actually, twice a year now...if you count summer get-togethers for cookout. Filipino gathering just somehow brings me back home, and it is all worth the effort...

Friday, December 11, 2009

Do you need Buko? Here's a tip...


I so want to post more about food, but these times are busy. However, I am posting this, hoping to help anyone in the US (particularly in New England) who needs buko/young coconuts in time for Christmas.

Last week I went to Hannaford hoping to find some buko (young coconuts) to make into pichi-pichi (for the juice) and to mix with cassava cake and sapin-sapin. I did not find a single one. Desperate to get them, I approached a guy unloading some produce from crates, asking who I could talk to if I wanted 15 pieces of young coconut, which I knew they carried before. I was asked for my name and telephone number, and would be referred to their manager (in the produce section). I told them I would need the coconuts by the next week. I also added 5 yucca (although I had several frozen grated yucca packages in my freezer).

Next morning, I had a follow up phone call about who would be the acting manager to assist me (they left a message). I was told they would try to see what they could do about my order.

In the afternoon I was told the coconuts would be coming to their store the next day, then I would just have to ask a guy to get them from the cooler at the back. Whoa!!! So soon! I did not expect that! I was expecting them in about 5 days if they could actually get those.

So off I went to the store on the afternoon of the second day after I made my request. Now they are sitting in a cooler, out in the garage (protected somehow from freezing by the insulation of the cooler.)

Now I am thinking of making them tomorrow into buko salad (although I originally intended to make a fruit salad) instead of just using some in pichi-pichi or cassava cake. My Filipino Christmas party will be on Sunday. My menu so far includes cassava cake, sapin-sapin, dinuguan at puto, bopis, escabecheng tilapia, beef lengua with onions and mushroom, and humba. Giveaways will be hopia, siopao, ensaymada, pan de coco, and lengua de gato plus some jams and pickles. I told my friends it would be potluck.

I hope you have a Hannaford store near you so you can do the same if you plan to make anything with more than 5 buko for Christmas or New Year. I love how they have accommodated my request and so fast too! They just made me into a loyal customer!

Wednesday, November 25, 2009

Thanksgiving/Christmas Dinner

It is not my turn to host the Thanksgiving Dinner this year nor last year. So I am not hysterical at the moment...I will come Christmas time. Haha! But since we have basically the same menu for both Holidays, it is like having a preview before I actually have my turn to host.

Anyway, this post is about the traditional Thanksgiving/Christmas dinner our family has...We cannot deviate from the basics...we can only add if we want anything new, but there should always be the following:

Roast Turkey & Gravy with Stuffing
Bread (usually white bread)
Mashed Potatoes
Boiled and Mashed Turnips
Boiled and Mashed Onions
Cranberry Salad
Fruit Salad
Bread & Butter Pickles
Pitted Olives


No we are not pumpkin lovers, so there are no pumpkins here.

We usually get 20++ lb turkey for a gathering of 14 people. The stuffing is cooked with diced celery and onions sauteed in butter. Some stuffing is stuffed into the turkey cavity, and some kept warm in a slow cooker.

My in-laws love the boiled-mashed-buttered turnips and onions (I tried, but they don't appeal to me at all, and they laugh about it, being smug that they found out something I would not eat!).

The cranberry salad is something my SIL Stacey makes, a mixture of cranberry and marshmallows and whipped cream, but I do not know the recipe. I like it, but not so much that I want to learn the recipe.

I love the fruit salad, but my MIL and FIL make that using their own canned fruits (peaches and kiwi in particular came from their own trees, which they canned right after harvesting, and the only fruit here that they get from the store is the cherry topping).

Bread & Butter Pickles is a must for my FIL.

Pitted olives from the grocery store is part of the tradition.

White Bread is made using bread machine/breadmaker.

[Now my frustration is, the same menu is what we have for Christmas. I would want to deviate, but my husband and in-laws are such traditionalists, so I cannot. Ham is for Easter. I can add other desserts, but I cannot change the entree.]

What we are thankful for? That we have a happy and closely-knit family. No one is antagonistic to others. No one is envious or jealous. Everyone is supportive, warm, and loving. The youngest generation, for the most part, behave how they should behave. And of course we are thankful for generally good health for everyone, and all the blessings we receive.

Here's wishing a Happy Thanksgiving to everyone!

Thursday, July 09, 2009

Wave-Your-Flag Cake


One of the desserts I prepared for July 4th. Made with layers of (from bottom to top):

Mamon (Filipino chiffon cake)
White Chocolate Pudding and Cream Cheese (recipe courtesy of MaMely; she suggested white choc pudding instead of vanilla. I got it from a post that she has now deleted so I cannot provide the link. I did not print out the recipe then because I was just using the laptop while making it.)
Blueberries and Strawberries

However, my son made a Florida Citrus Cake that he displayed minutes earlier than I did the flag cake, so by the time this cake arrived on the table, the FCC already was almost gone and the eaters were already scooping out the soft vanilla ice cream. Only 3 slices were eaten from this cake. Sigh! Oh well, I just wanted to be in the spirit of the July 4th.

Saturday, June 27, 2009

Menu for July 4th

Gotta prepare for July 4th...I am the IT for this year. Yikes! Menu in mind: pork and chicken barbecue, hotdogs and burgers (for the Americans), chips, veggies with dip, tossed salad, potato salad, deviled eggs, cut up fruits, orange salad (or ambrosia), fruit salad (pinoy style), homemade vanilla ice cream, wave-your-flag crema de fruta...

Oh wait...I don't have Pinoy visitors...the only Pinoys are myself and my boys. I might end up with lots of leftovers. Oh well, we'll see

What's in your menu?

Friday, June 26, 2009

Pinoy-Style Fruit Salad


Very simple to make...truly masarap!

Ingredients:
canned fruit cocktail
1 jar kaong
1 jar nata de coco
Other cut up fresh fruits
1 cup mayonnaise
1 can condensed milk
1 8-oz softened cream cheese
Instructions:
Drain the fruit cocktail  and other ingredients. Mix together with mayo, condensed milk and cream cheese. Chill.  You may add other fresh fruits like apples, kiwi and some buko meat.

Wednesday, December 24, 2008

Roasted Turkey

This is for my Ate Cris in Canada. We were talking on Skype last night, and she
From Roasted Turkey
asked me how I cooked the turkey when I visited her last 2006. I promised I would give her the instructions. She got a free turkey from the grocery store that time we cooked it. First time she witnessed turkey being cooked, and first time to have a taste of a deliciously prepared turkey (the prior ones she tasted were like cardboard, she said).

First check if your turkey is brined or not. Turkey should be completely thawed. If you bought frozen turkey, it might take 2-5 days to completely thaw in the refrigerator depending on the weight (or use cooler with some ice, if you place the cooler out in your garage or porch). Do not thaw in room temp.

Once completely thawed, if your turkey is not brined, brine it in kosher salt:cold water mixture of 2 cups:1 gallon (1 cup only if table salt). Use your cooler (clean first!) to submerge the whole turkey. Add spices like garlic, peppercorns, bay leaves and onions if you desire. Brine at least overnight, preferably two nights before you plan to bake the turkey. Then rinse, wipe and put on a cooling wire rack on top of baking pan, place in the fridge to let air dry for at least 4 hours (drying helps make the skin crisp when you bake). You can start the airdrying night before you are going to bake.

When ready to bake, prepare your spices:
whole garlic, cloves separated, roasted in oven toaster for 7 mins, mashed, and mixed with 1 tbsp each of rosemary leaves and crushed lemongrass. This is your garlic paste.

Separate skin from meat using your fingers or the blunt handle of wooden spoon. Place some garlic paste under skin. Massage to distribute. Wipe skin and cavity lining. Rub some paste onto skin and lining.

Stuff the cavity with:
1 whole onion, 1 whole garlic, bunch of lemongrass, rind of lemon (use the juice in something else), innards (liver and gizzard).

Place on a rack on top of roasting pan with chunks of onions, carrots, celery, and water to cover the veggies.

Place oven rack on lowest position. Heat oven to 400 deg and bake turkey covered with foil for 30 mins. Uncover, spray skin with oil (or brush), and sprinkle with garlic salt and freshly milled/ground pepper. Put back in, turn heat to 350 deg. Bake for additional 3 hours (or more depending on the weight -- check out below from guideline I got from wiki). If skin is crispy brown already, cover with foil and bake again for another 30 minutes or until done.

Take turkey out and let rest on the platter, covered loosely with foil. Wait at least 10 minutes before carving. This will redistribute the juice so you will not end up with dry meat on the breast part.

Prepare gravy. (Use fat separator if you have one.) Place the pan on stove top and using a silicone spatula, loosen the crust formed (if any). Add water (or white wine), season with salt and pepper and soy sauce if needed, to come up with around 2-3 cups of gravy. Don't forget to get the liver and mash it in the sauce. Once you got the taste right, continue to boil while you mix 1/2 cup flour with 1 cup water. Using wire whisk, while sauce is briskly boiling, add in thin streams the flour/water mixture and continue stirring until you have achieved the right thickness. Strain the gravy.

Of course, you prefer to eat this with rice, not mashed potato. But if you want to have mashed potatoes, peel and boil with some salt about 10 medium potatoes for 4-5 people (Yukon or Russet or White) for about 30 minutes on high (don't let water dry out). Add about 1/4 cup of butter, cut up to make them melt easily. Using hand beater, mash the potatoes first before turning on to medium setting. Add about 1/4 cup of half and half cream (or just enough to achieve consistency you want). Serve with butter on top, and let people sprinkle pepper and/or salt.

Hope my instructions are clear! Enjoy your turkey!

NOTES:

How long to thaw frozen turkey:

Turkey Thawing Time in the Refrigerator (40 degrees F):
Approximately 24 hours per 5 pounds

Whole Turkey Weight Thawing Time
8 to 12 lbs 1 to 2 days
12 to 16 lbs 2 to 3 days
16 to 20 lbs 3 to 4 days
20 to 24 lbs 4 to 5 days
Turkey Thawing Time in Cold Water: Approximately 30 minutes per pound.
Change water every 1/2 hour.

Whole Turkey Weight Thawing Time
8 to 12 lbs 4 to 6 hours
12 to 16 lbs 6 to 8 hours
16 to 20 lbs 8 to 10 hours
20 to 24 lbs 10 to 12 hours

Source: GlobalGourmet
How long to bake turkey:

USDA Roasting Timetable for Fresh or Thawed Turkey at 325° F.

These times are approximate and should always be used in conjunction with a properly placed thermometer. The USDA does not recommend cooking turkey in an oven set lower than 325° F.

Unstuffed
8 to 12 pounds 2 3/4 to 3 hours
12 to 14 pounds 3 to 3 3/4 hours
14 to 18 pounds 3 3/4 to 4 1/4 hours
18 to 20 pounds 4 1/4 to 4 1/2 hours
20 to 24 pounds 4 1/2 to 5 hours

Stuffed
8 to 12 pounds 3 to 3 1/2 hours
12 to 14 pounds 3 1/2 to 4 hours
14 to 18 pounds 4 to 4 1/4 hours
18 to 20 pounds 4 1/4 to 4 3/4 hours
20 to 24 pounds 4 3/4 to 5 1/4 hours

Source: WikiAnswers

Monday, December 22, 2008

Cassava Bibingka Espesyal

I got this from stel.
From special cassava (yucca) cake
The first time I made this I used a small pan. Did not have enough space for rising while it baked, nor for the topping to be placed without spilling. It did taste good, and I shared the recipe with my friend's mom. She made it the next year, and I was so delighted with it, and I asked her for the recipe. "That's the recipe you gave me!"

So yesterday, I tried again the second time this year...with all the right
From special cassava (yucca) cake
ingredients, but still managed to end up with small pan (I should have taken note of the lasagna pan measurement; I grabbed an aluminum foil pan in the store which was 13x9; should have been 14 x10, but the next size I saw was that of a roasting pan, so I settled for the smaller one. I did not want to use my ceramic or glass pans as I was using them for something else. Bad decision. It was still good, though, and I mananged to use the remaining topping mix for the leftover, when the top of the cassava cake shrunk as it cooled. I spread the topping mix and broiled for 5 minutes on high.

(For this recipe and that of pichi-pichi, I bought the yucca last week and grated them, pre-measured by the cups then froze until I was ready to bake them.)

Ingredients
4 cups grated cassava/yucca (or 2 packs thawed grated cassava)
1 can (12-oz) of evaporated milk
1 cup cream of coconut (coco lopez or other Spanish brand) (use the remaining for topping)
1 can (14-oz) of condensed milk (subtract 6 tbsps. for topping)
1 can (14-oz) of coconut milk (subtract 6 tbsps. for topping)
5 eggs
1/2 cup of brown sugar
1-2 cups strips of young coconut meat (or 1 jar of drained macapuno strings or a pack of thawed frozen shredded young coconut)

Topping:
remaining coco lopez (7-oz)
6 tbsp condensed milk
6 tbsp coconut milk
2 egg yolks

Instructions:
Blend all ingredients well and pour into a 14x10 baking dish (preferably lined with cleaned and dried banana leaves brushed with butter). Bake at 350 deg F for 40 minutes or until just set.

Meanwhile, prepare topping by blending well all the ingredients.

Increase heat to 400 and pour topping. Bake an additional 15-20 minutes or until topping is brown and bubbly. Watch closely so it does not burn.

Cool completely before cutting into squares.

EDITED:
The following is a recipe that my sis and I used when I was there in Canada on a two-week visit:
Recipe ng cassava:
1/2 cup butter,melted (123 grams)
3 eggs
1 3/4 cups sugar
1 cup evap milk
3/4 cup condensed milk
3/4 c. coconut milk or evaporated milk
1 cup buko or 1/2 cup Macapuno preserved
5 cups frozen cassava, grated (1kilo) Topping:
3/4 cup coconut milk (use kakang-gata)or evaporated milk mix with 3/4 cup condensed milk Grated quick melt cheese

Procedure:
Mix all ingredients(base). POUR ON 9x13x2" lined baking pan, butered and lined with aluminum foil pan. Bake for 40 mins at 350 degrees F oven. Remove from the oven and pour topping. Bake again for 20 mins or until golden brown.
To attain a darker topping, broil for 3-4 mins or use a blow torch.

And the following is another recipe by my friend Fe -
4 c. grated cassava
1 can (12-oz) evaporated milk
1 can(14-os) coconut milk
1 can(14-oz)  condensed milk
2 cups young coconut

TOPPING:
1 can (12-oz) evaporated milk
1 can(14-oz) coconut milk
1 can (14-oz) condensed milk
2-4 TBSP flour
6 egg yolks
Bring to boil then pour to cassava cake
Broil for 5 minute or until brown

A More Special,Easy and Quick Pichi-Pichi Espesyal Using Microwave

I posted before a recipe for
From pichi-pichi
pichi-pichi espesyal using the traditional method of steaming. My long-time blogger friend JMom made a post using microwave (isn't that kewl?). So, with my hosting of Filipino Christmas party yesterday, I prepared pichi-pichi using the microwave. Basing on some comments at JMom's post, I tried adding pandan essence (actually, it was McCormick Buco Pandan Essence; thanks to Deb for sending me several bottles). What makes it more special? I used buko water instead of plain water.

From buko

I bought several young coconuts from hannaford to use for cassava cake. Out of the 4 I bought, 3 had the right chewy consistency of young coconut perfect for salads or buko pie or cassava cake. One was too young it had the mala-uhog consistency. The boys are in love with buko water and they asked if they could have some; of course I allowed them to. But as I was reading JMom's post and the idea of using buko water crossed by mind, I immediately stopped them and measured out 2 cups (my earlier steamed pichi recipe called for 2 cups water to 1 cup cassava and 1 cup sugar; JMom's recipe called for 1:1:1 ratio). So I used 2 cups buko water, 1 cup grated cassava, and 1 cup sugar. I knew the result would be very wobbly and quite soft, but that's how I really want it so it will still be soft even after chilling.
From pichi-pichi

Ingredients:
1 cup grated cassava
2 cups coconut water
1 cup sugar
several drops of buco pandan essence (McCormick)

Instructions:
Blend everything well in an 8x8 or 9x9 microwavable dish. Microwave for 1 minute on high, stir with a wire whisk, microwave and stir repeatedly every 30 seconds until it becomes like soft paste (remember, this will continue to thicken as it cools down). I probably did this repeatedly 4-5 times, adding more buco pandan
essence until I reached my desired color. I left it for a while to cool down before I took the hot dish out and let it cool completely. Meanwhile, I asked my older son to open the coconut (the mature one,as opposed to young coconut), then my younger son to grate it. (See my primitive coconut grater here.)

Using a
From pichi-pichi
cookie scoop, I then rolled in grated coconut to coat each piece. I did buy sesame seeds upon seeing some suggestions from JMom's post, but opted to just serve it the traditional way. Only 3 pieces were left at the end of the day. My kids were leery of the greenish color, but I explained to them that the same color reminds us Filipinos of special buko-pandan salad (I tasted this in PI prepared by one of the midwives where she used the buco water boiled with pandan leaves to make runny green-colored gelatin and mixed with strips of soft buco, blocks of unflavored
green gelatin and condensed milk. It was so good!)

Now you wonder what I did with the buko flesh/young meat? I cut them in pieces and froze, then used for special cassava cake once I was ready to make it. (I had to restrain myself and the kids from eating them all!)

Friday, November 28, 2008

Holiday Paper Baking Pans

I mentioned this in my supersoft ensaymadapost which I made last Sunday and was quite surprised to have received them by Tuesday early afternoon! Later, I got an email from them stating they shipped the items already. Kudos to KAF for very good business practice. It is an employee-owned business and very reputable. I purchased 4 sets of these at $6.95 each (each set has 4 pans) and a set of all-purpose bakery bags. I have my Christmas ribbon to tie that.


Now I have to make the invitations for the Christmas Party.
Posted by Picasa

Wednesday, November 26, 2008

Frozen Almond Brazo De Mercedes

HAPPY THANKSGIVING TO ALL!
From Frozen Almond Brazo De Mercedes


10:50 PM

Nephew: Oh wow! This is the best tasting dessert I have ever had in a long while!

SIL: That was good! As a matter of fact, it is a tad better then the Paris Brest! (Paris Brest is what I always hope my SIL would bring during these gatherings. I love it.)

Sons: Yummy! This is so good, ma!

Husband: Thanks, honey. That was awesome!
Me: So, is this something I should make again?
Husband: Definitely! You can make it everyday!

Me: Mom, would you like me to leave some of this brazo?
MIL: Oh yes, PLEASE! That was so good!

VERDICT: It was a HIT!!!

Gotta make one again for Filipino Christmas Party.

11:45 PM
Done assembly!

11:21 PM
Cooling the meringue now...

11:00 PM
Meringue baking and the rest of the brazo in the freezer right now...

For some reason I was craving for this. And in my head I was toying with the idea of adding almonds to it...then when I went grocery shopping last Monday I impulsively grabbed a box of almond paste aside from sliced almond nuts.

I got the recipe and how-to's for the brazo itself from stef's post on the traditional brazo de mercedes log roll type. But reading the comments, I learned that the latest craze was frozen brazo de mercedes. I thought that would be an easy solution to the usual dilemma of baked meringue/egg-y/custardy goodies (which we are always afraid to be contaminated with Salmonella when out in room temp for a long while), and will allow me as well to prepare it much ahead of time (like when I prepare leche flan -- always best when chilled for at least overnight). That way, I can still make egg pie tomorrow and bring only that as freshly baked and still warm. (My MIL is addicted to my leche flan, my SIL to egg pie. My bilas loves both. I hope this new custard type of dessert will also wow them.) If it turns out superb, I might prepare this for a Filipino Christmas Party I am contemplating on having.

While photos and flavors of such frozen BDM that I saw while researching more about it were of mango flavor, which is definitely not an option for me, I had this persistent idea in my head brewing, which consisted of adding almond paste and sliced almond nuts to the filling, then chopped caramelized sugar sprinkled on top of the meringue...Sounds sinfully good to me...I hope it does turn out good. I used the vanilla because it has been a tested favorite among my family members.

Please take note of wiping the stainless steel mixing bowl with vinegar and salt then rinsing, then wiping dry, prior to placing egg whites in it. And before I started the whole process, I made caramelized sugar first.

Ingredients and How To's:

Base:
8 oz crushed graham crackers
1/4 cup melted butter (or 1/2 cup if you want this layer more intact,less crumbly)
2 tbsp sugar
1/4 gallon vanilla ice cream (approximately; I just got thin layers using a pie server to lay on top of the graham base; you may opt to put the whole gallon for a thicker layer)

Mix thoroughly the first 3 ingredients then pack at the bottom of a 13 x 9 baking dish. Top with thin layer of ice cream. Cover with cling wrap then freeze.

Filling:
1 box (7-oz) almond paste, grated, sprinkled on top of the ice cream

Custard:
10 egg yolks (the egg whites should be placed in the mixing bowl and let stand in room temp for about 30 minutes before making the meringue)
1 (14-oz) condensed milk
several drops of lemon extract (to eliminate the fishy smell)
2 capfuls of almond extract

2-oz sliced almonds, sprinkled over the custard filling.

On medium low heat (#3 or 4 on my stove), blend well and continuously stir egg yolks and condensed milk until it sticks to the back of the wooden spoon. It may look still very liquidy at this stage but after removing from the heat, it will continue to cook so keep stirring, add the lemon extract, stir well, then the almond extract.

Spread this on top of the almond paste. Place back in the freezer (The short intervals of having this out of the freezer is to prevent the ice cream from melting too much while you work on it). Proceed with meringue procedure and while baking the meringue, sprinkle the sliced almonds on top of the custard. Place back in the freezer.

Meringue:

10 egg whites
1/2 tsp cream of tartar
3/4 cup sugar

Topping:
5 tbsp Caramelized sugar, cooled and chopped finely (The melted caramel should be poured onto a buttered baking sheet. Let harden, take off from pan, then chop in a chopper.)

As suggested by stef, since I have stainless steel mixing bowl, I wiped it first with vinegar and salt then rinsed and wiped dry with paper towel before I placed the egg whites in it.

Line the bottom and sides of a jelly roll pan (10 x 15) and spray with oil on all
sides (meringue, I realized, is so sticky!). Preheat oven to 350 deg F.

Add the cream of tartar to the egg whites and start beating, low speed first then gradually increasing to highest speed. When soft peaks start to form, pour the sugar gradually and beat until it forms stiff peaks, still glossy. (You have overbeaten if it loses sheen and appears granular. This does not take too long as soon as you start slowly pouring the sugar.) Spread this onto the wax paper and level with spatula. Bake for 20-25 minutes (it inflates so much!!! I felt I had to rotate because one side was way much higher than the other).

Place on a wire rack to cool completely (deflates). Sprinkle some chopped caramelized sugar on top of the meringue then place a sheet of wax paper. Cover with bigger baking sheet and flip over. Peel off the wax paper from the underside of meringue. (I goofed here; did not spray with oil the sides of the wax paper, so it was so hard to peel it off the meringue edges.)

Lift the meringue using the wax paper, folding at the middle a bit so it is easier to place on top of the base/filling. Tuck the edges under. Sprinkle the rest of the chopped caramelized sugar. Place back in the freezer.

To serve: upon getting from the freezer, while still hard, slice with butter knife. Rinse with hot water and wipe knife with every line of slice (or when some custard starts to stick to it). Optional: drizzle with maple syrup.

Will post photo of sliced brazo, then update on how it was accepted by my in-laws and family tomorrow after celebration of Thanksgiving...

Monday, November 24, 2008

Buttery Ensaymada

I should call this buttery eggyolk-y ensaymada.
I am getting so ensaymada'ed out already I could puke (excuse me!), but I just gotta be able to compare the two recipes which vary only in the fat content (shortening versus butter) and the eggyolks.

Honestly, I cannot really choose between the two recipes (Supersoft using shortening and just whole eggs versus Buttery using butter, of course, and 5 eggyolks in addition to 1 whole egg).

Supersoft has the familiar taste of the ensaymada I used to get from bigger bakeries in PI. By itself (without topping), it is okay, but since it is not sweet, the flavor is greatly enhanced once the topping is there, and a bite becomes heavenly. Lasts 2 days or even 3 without getting tough as long as it is kept in plastic at room temp.

Buttery is strikingly special flavored by itself mainly by its very nature...buttery and yolky. Once with the usual topping, it is as heavenly as supersoft, although it is not the taste I was familiar with when it comes to ensaymada bought from the likes of goldilocks. I have yet to observe how long it lasts. It is still soft after a day even when cold.

Now, since i have made lots of ensaymada dough, I thought I'd use some of it for something else special I can create for the Holidays. I came up with pan de coco-cinni (or Coconut-cinnamon rolls) because I accidentally left a pack of grated coconut on the warm floor when I was rearranging my meats in the freezer). I am not assigned to any of the winter holidays, so I will just bring to the gathering some desserts like this or leche flan or egg pie. I will next post the coconut-cinnamon roll and pan de coco-cinni, which my poor husband had to taste-test last night, and he bit with that familiar closing-of-the-eyes expression for something sooo good.
Ingredients:

3+1 +1 + 1 cups bread flour (total 6)
1/2 cup sugar
2 envelopes RapidRise Yeast
1 tablespoon salt
1 cup milk
1/2 cup water
1/2 cup butter + 1/2 cup softened butter (total 1)
1 cup mashed potato
1 egg
2 + 3 eggyolks (total 5 yolks)
Melted butter (about 1/4 cup) for brushing

Directions

Combine 1 cup flour, sugar, undissolved yeast and salt. Heat milk, water and butter until very warm (120Āŗ to130ĀŗF). Gradually add to dry ingredients. Beat 2 minutes at medium speed of electric mixer, scraping bowl occasionally. Stir in mashed potato, 1 egg and 2 egg yolks and 1 cup flour; beat 2 minutes at high speed, scraping bowl occasionally. Gradually stir in 3 cups flour to make a stiff batter. Detach dough hook from mixer. Cover dough with the hook loosely with plastic wrap; refrigerate 1 hour. Meanwhile, soften 1/2 cup butter by leaving it out at room temp.

Remove dough from fridge and attach dough hook to mixer. Stir in 3 egg yolks and 1/2 cup softened butter (cut into bits), gradually add 1 cup flour and blend well. Place in greased bowl and cover loosely with plastic and refrigerate for additional 2-24 hours prior to baking (put simply, shape and bake the next day).

Use a GENEROUS amount of flour on the countertop, your hands, and your rolling pin when you start working to shape this dough because it is so STICKY. Shape accordingly (coiled or rolled method -- please see previous post). Brush with (or dip in) melted butter. Let rise for about an hour in a draft-free, warm and preferably moist environment (oven works best - place pans of ensaymada inside, along with a bowl of hot water, turn oven on for one minute then turn off and let the trapped heat hasten the rising. Don't forget to remove from oven once you are ready to bake and you are heating up the oven to the right baking temp.) (This whole batch will probably give you 32-40 pieces depending on the size you want. I suggest you think of ways to use this as master dough for other special desserts/pastries, like pan de coco-cinni up on my next post, or use ube haleya as filling, or make monggo bread which I plan to experiment on sometime later).

Bake at 350 deg F for 12-15 minutes (rotate pans after the first 10 minutes to even out browning) until done and browned to your preference. Take out from oven and brush again with melted butter (helps keep them moist). Enjoy with preferred topping.
If not consuming right away, let cool on wire rack completely then place in ziploc bags without the toppings. For individual servings, zap in microwave for 15 secs, add softened butter, sugar, and cheese. For family servings, cover loosely with foil and bake at 350 deg for 10 minutes.


Posted by Picasa


UPDATE: 9-07-09
Ritchie made and blogged about these ensaymada buns, saying,
Thank God for Kusina ni Manang she has the recipe for ensaymada (brioche) without too much work. Not that I want to eat ensaymada a lot, but because of the challenge in making it and getting the desired result, it became a monkey on my back, until now. You are da bomb manang.

I left a comment there thinking it was the supersoft, and she emailed me back:
Hi Ritchie,
Thanks for trying my recipe and actually liking it. :)
I presumed it was the supersoft ensaymada that you made?...I edited my post on it to include a link to this post.

Actually, it is the buttery one. OMG, it is the best I have ever made in my life. I gave some to my friends today and they said this is the best they have eaten too...hahaActually, it is the buttery one. OMG, it is the best I have ever made in my life. I gave some to my friends today and they said this is the best they have eaten too...haha

Thanks, Ritchie!


Sunday, November 23, 2008

Supersoft Ensaymada

NOTE as of 2/23/09:
This has become a favorite of many of my readers, as well as mine. Easy to make, super moist and supersoft. Satisfaction guaranteed. :)

UPDATE: Sorry I was not able to come back yesterday to posting.
From supersoft ensaymada
I got busy cooking, (and experimenting yet again with my ensaymada recipe below. I am quite satisfied with the outcome I got with the recipe I am posting here, but I am currently waiting for the newest experiment to rise prior to baking. Once I get the results, I will post later today about comparison...)

This is dedicated to all homemakers like me, who have a life outside of the kitchen...I have tried to make my recipes easy to make and follow, with ingredients easy to find and not gourmet types which you will find in God-only-knows-what-specialty-store (and therefore they are very affordable) and which would not demand your whole day to make (unless you make several batches), yet will give you fulfillment and definitely will wow your friends, brown- or white-skinned. As one of my white co-workers told me after I made her taste a pinch of this roll minus the sugar and butter, "Hmmm, how come your rolls are always moist and pillow soft???".

But of course, if you have easy access to specialty items (like special cheeses) and you have the financial means, go ahead and do your own experiment in trying different ingredients.

Just kindly do me favor, my dearest readers/followers, if you know of people with whom you might like to share the recipes I have here, please point them to my website instead of giving them a copy of the recipe. I appreciate increased traffic to my website.

11-22-08
An absolute welcome give-away in any Filipino Christmas Party supersoft ensaymada that melts in your mouth(soft even without heating up in the microwave, even after two days. Yeah, we finished them after two days because I made a big batch trying to experiment with other ways to use the dough.)

The secrets:
(1) Potatoes
(2) Lots of butter
(3) No kneading!!! (You read that right!)

I have been telling some of those who have been emailing me that I have been experimenting with this ensaymada. I am posting this right before the Holidays, in time for preparing giveaways made with love. The recipe to be posted later...Gotta go grocery shopping first.

(I can hear you say..."Bummer! Whatta teaser!")
Ingredients:
5 cups bread flour (separate 1 + 1 + 3)
1/2 cup sugar
2 envelopes Fleischmann’s RapidRise Yeast (1 envelope is 0.25 oz = 2-1/4 tsp)
1 tablespoon salt
1 cup milk
1/2 cup water
2/3 cup shortening (also known as lard, purico in Philippines, strutto in Italy)
1 cup mashed potato
2 eggs
3 egg yolks
2-oz grated sharp cheddar cheese, added to the 3-cup flour above(I used Helluva Good brand, because it comes closest to the kind of cheese paired with ensaymada that I grew up with. It's up to you to experiment with other cheeses.)- [UPDATE 12-23-08: I tried 2-oz crumbled feta cheese and it was wonderful! I loved the cheesy effect on the dough. Save your cheddar cheese for topping instead.]
melted butter (approximately 1 stick)
softened butter (approximately 1 stick to 1-1/2)(for rolled method)
(Note: Before you turn your nose up with the shortening here, wait for my next post comparing the two).

Directions
Combine 1 cup flour, sugar, undissolved yeast and salt. Heat milk, water and shortening until very warm (120Āŗ to130ĀŗF). Gradually add to dry ingredients. Beat 2 minutes at medium speed of electric mixer, scraping bowl occasionally. Stir in mashed potato, eggs and 1 cup flour; beat 2 minutes at high speed, scraping bowl occasionally. Stir in remaining flour to make a stiff batter. Detach dough hook and cover dough plus hook loosely with plastic wrap; refrigerate 2 hours. Remove from fridge and add the 3 egg yolks, stir setting on the mixer. Remove hook from the dough this time and cover loosely again with plastic then refrigerate for another 1-22 hours.

The next stage will make use of a method depending on how hardworking you are or how time pressed you are.

Coiled: If you got lots of time, do the old-fashioned way of coiling like katol by pinching off pieces from the chilled dough about the size of a small pandesal. Get only a few at a time and chill the rest of the dough again because it becomes harder to handle when warmer; it becomes too sticky. Sprinkling flour on work surface helps lessen the stickiness. Shape the dough into a long rope about a foot long and coil as previously illustrated in older posts. Place on greased baking pan and brush with melted butter. See this post for step-by-step slideshow on how to shape into coils.

Rolled (para sa tinatamad): Get a chunk of dough about the same as one that you have for 2-lb recipes of bread (or about the size of a grapefruit or suha). Flatten to disk, fold over the four edges like that of an envelope, and roll to make a rectangle about 8 x 10 inches. Place a generous layer of softened butter except near the edges. Roll tightly from the long end. Cut in 1 to 1-1/2 inch intervals. Dip one end of cut side in melted butter then place on baking pan. Brush the rest of the surfaces with melted butter. [UPDATE 12-23-08: This whole batch can be divided into 3. When shaped into logs after you place your filling, wrap tightly in cling wrap and freeze. After freezing, let stand in room temp for about 15-20 minutes and cut with a knife to end up with 8-9 pieces minus the ends. Place in baking pan, preferably where they will crowd together to compress so they rise upward; ex., in 8x8 or 9x9 or round pans. Brush with butter. Let rise in warmed oven for about 45 mins to 1 hr, or until doubled in size. Bake as directed below. Cool down some or completely before applying topping of choice.]

Let rise in warm, draft-free place until doubled in size, about 1 hour. (My favorite thing to do is place them in the oven and "start" baking then turn off after one minute then let rise for 30 mins to 1 hr. Once puffy enough, remove from oven and start heating up the oven).

Bake at 350ĀŗF for 12-15 minutes or until done. Remove from pans; cool on wire rack for about 30 minutes or until completely cool if not consuming immediately, and store in ziploc bag.

To enjoy ensaymada the traditional Filipino way:
Brush softened butter to warm ensaymadas (not too hot that it melts the butter), dunk in a bowl of sugar (or sprinkle the sugar on top), and top with finely grated cheese (the finer grater gives you soft looking curls of the cheese like in the photo above).


TAGALOG VERSION:

Sangkap:
5 tasang "bread flour" (paghiwa-hiwalayin 1 + 1 + 3) = hula ko, eto yung primera sa Pilipinas
1/2 tasang asukal
2 pakete Fleischmann’s RapidRise Yeast (instant yeast din to)
1 kutsarang asin
1 tasang gatas
1/2 tasang tubig
2/3 tasang purico
1 tasang "mashed potato" (maaaring gumamit ng purong nilagang patatas, o yung tirang mashed potato)
2 itlog
3 pula ng itlog
2-oz ginadgad na sharp cheddar cheese o kaya ay gumamit ng "crumbled feta cheese" at ihalo ito dun sa nakahiwalay na tatlong tasa ng harina (pwedeng gamitin ang food processor para mabiyak nang husto ang feta cheese at mahalong maige sa harina)
tinunaw na "butter" (mga 1 stick, pampahid bago i-bake)
pinalambot butter (mga 1 stick to 1-1/2)(para sa nirolyong dough)

Paraan:
Paghaluin ang 1 tasang harina, asukal, yeast (lebadura) at asin (eto ang tuyong sangkap). Pagsamahin at initin ang gatas, tubig, at purico hanggang 120Āŗ to130ĀŗF. Unti-unting ihalo ang mga likidong sangkap sa tuyong sangkap. Paandarin ang electric mixer sa medium speed ng 2 minuto (paminsan minsan ay kaskasin sa gilid ang bowl para mahalong maigi). Idagdag ang mashed potato, itlog, at 1 tasang harina at i-beat uli ng 2 minuto sa high speed (pinakamabilis); kaskasin uli para mahalo maige.Unti-unting ibuhos ang natitirang harin (na me halong keso) habang umaandar ang mixer. Sa puntong ito, kung hindi kaya ng mixer maghalo ng makapal na dough, pwedeng gamitin ang wooden spoon o kamayin hanggang maging malambot na dough. Takpan ng plastic (cling wrap) at ilagay sa ref nang 2 oras.

Ihalo ang 3 pula ng itlog. takpan uli at ilagay sa ref. Maghintay ng 2 oras o kahit abutin ng 22 oras pa bago ihulma.

Sa paghulma, pwedeng hugis katol o nirolyo. Kung tinatamad ka, irolyo mo. Kung matyaga ka, gawing parang katol.

Wisikan ang countertop/lamesa ng maraming harina. Ilagay ang dough. Budburan ang ibabaw ng maraming harina. Gamit ang rolling pin, i-flat ang dough (Budburan lang na harina sa madikit na parte.). (Mas mabilis ito kesa paisa-isang piraso na pinahaba ng kamay).

(1) Katol: Gamit ang "dough cutter", maghiwa nang pahaba para makagawa ng "lubid" na kasingtaba ng hinlalaki na 1 ft ang haba.. Eto ang gawing parang katol. Ilagay sa baking sheet na pinahiran ng manipis ng purico. Yung dulo ng katol ay dapat nasa ilalim, para hindi hihiwalay habang umaalsa. Maglaan ng 2 inches na pagitan bawat piraso. (Pwedeng i-freeze sa puntong ito: ilagay sa freezer ng 3 oras, ilabas at ilagay sa makapal ng plastic bag/ziploc. Alisin ang hangin hanggang kaya. Pag handa na paalsahin, ilabas sa freezer, ilagay sa mold na me pahid ng purico, at paalsahin ng mga 4 na oras sa countertop/room temp, o ilagay sa pinainit (1 minuto) na oven para mas mabilis umalsa.)

(2) Nirolyo:
Itupi ang apat na gilid para makagawa ng parihaba (8x10 inches). Pahiran ng pinalambot na butter maliban sa pinakagilid para magselyo pag nirolyo. Irolyo nang mahigpit mula sa mahabang gilid. (Pwede i-freeze sa puntong ito: Balutin nang cling wrap nang mahigpit. Pag handa na paalsahin, ilabas sa freezer, palipasin ang 15 minuto bago hiwain.) Hiwain na mga 1 inch hanggang 1-1/2 inches ang kapal. Ilagay sa ensaymada mold na pinahiran ng purico/pinalambot na butter.

Pahiran ng tinunaw na butter. Hayaang umalsa sa lugar na mainit-init at kelangan, walang malakas na hangin (draft); takpan ng plastic na pinahiran ng purico. Pwedeng ilagay sa oven. Ganito: Painitin ang oven ng isang minuto, saka ilagay ang baking sheet (hindi na kelangan takpan ng plastic). Hayaang umalsa hanggan dumoble ang laki. Pahiran uli ng tinuna na butter. Ihorno (bake) sa 350 F ng 12-15 minuto or hanggang maging golden brown ang ibabaw. Pagka-alis sa oven, ilagay agad sa wire rack para lumamig nang mga 30 minuto. Kung hindi kakainin agad, ilagay sa ziploc.

Kung kakainin agad, pahiran ng pinalambot na butter ang ibabaw (ang iba ay gustong gawin to habang mainit pa ang ensaymada, kaya natutunaw ang butter. Ako, ang gusto ko ay makapal yung malabot na butter, hindi tunaw.) Maglagay ng asukal sa mangkok (bowl) at idukdok ang ensaymada na may butter. (Maaaring paghaluin ang malabot na butter at asukal, tapos eto ang ipahid sa ensaymada. Mas kakapit ang keso pag ganito.)

Kung gusto mo na me keso, maggadgad ng cheddar cheese sa ibabaw.


Variations for topping:

A. glaze/frosting
1 cup confectioners' or glazing sugar
2 tablespoons melted butter
1 tablespoon milk

better recipe from Spice Islands (good for 24 rolls)
# 6 1/2 cups powdered sugar
# 6 tablespoons butter, softened
# 6 tablespoons milk
# 1 teaspoon Spice Islands® Pure Vanilla Extract
# 1 teaspoon Almond Extract

B. cinnamon-flavored frosting
1/2 cup (1 stick) butter, room temperature
2 cups confectioners' sugar
1/2 teaspoon ground cinnamon
3/4 teaspoon salt
grated zest and juice of 1/2 orange
1 to 1 1/2 tablespoons hazelnut liqueur, such as Frangelico, or almond liqueur, such as Amaretto)

Why do I like this recipe aside from it giving me those tender, light-colored ensaymadas that very much reminds me of red ribbon or goldilocks (my previous recipes were only a bit more special than the ensaymada I grew up with, made by my Tatay or Manong)? Well, aside from those reasons mentioned above, this recipe also is pretty much like a slow cooker. Prepare then forget for a while until you are ready to cook. This recipe gives you a whole 24 hours to finally get going with the baking stage. Prepare today, put in the fridge, shape, rise and bake tomorrow. Or you can prepare today, shape hours later and refrigerate, bake the next day. Your choice. Just don't let 24 hours pass before you bake.

TIPS: For those who have a cellar with temps almost like that of a fridge, and you would like to bake several batches of this, I suggest you get a shelf (maybe 5-tier aluminum) and a damp sheet to wrap around the shelves once you have pans with the buns shaped already to keep them moist. You might want to experiment with just one or two pans and see how it turns out.

To those planning to give these away for Christmas (or maybe making a business out of it?), may I suggest baking them in Christmas baking boxes like those by KAF (star or tree).

UPDATE (12/11/08)
I tried to freeze some of the dough after rolling like a log, then tried to cut with a knife after about 20 minutes out of the freezer, as shown in the additional photos in the slideshow. I let it rise in room temp after brushing some more with melted butter, which maybe took one hour before I baked them. Taste-wise, they turned out perfect still, if not for the fact that placing them on baking sheet made them expand laterally so they looked flat. They probably would look better if placed in 8x8 or a tree-shaped pan, where they would be compressed and forced to rise upward.
Happy Holidays!

UPDATE as of 12-21-08:
From Holiday tree baking pan

I baked them in tree-shaped pan after freezing, and they rose after about 1-1/2 hour (would have been faster if I let them rise inside a warm oven, but I was baking something else that time). So this is how they looked like after baking. Beautiful, ain't it? Just add toppings of softened butter, sugar and grated cheese just before giving to your friends/relatives.

UPDATE: 1-24-09
Does this task seem daunting to you? Don't feel intimidated. Wena has tried making this and was very pleased with the results, too. And as you will see with the comments by Crystal, she found this very satisfactory as well. So shake off you fear and JUST DO IT!


UPDATE: 1-29-09
Anonymous EQ, a pastry chef, tried this recipe and states it is better than the ensaymada of goldilocks or red ribbon. Here's a photo of what pastry chef made. Pwedeng pang-business! Click on the photo to see a larger picture. Basing on his story in the comments section below, seems like he played with the dough (like it was Play-Doh, haha!), especially that he did not have his Kitchen Aid Mixer to prep the dough. I remember when I was just learning to bake from scratch (not play with dough, as that is something I have done since I was a kid), I was soooo scared to handle the dough that I myself produced, and it took time for me to get comfortable again to handle it like it was clay.

To EQ, Thanks a lot for your comment. It means a lot to me!

UPDATE as of 3-15-09: Joy L. also made these today and was very satisfied with the results. She is going to bring them the next day to her homeschooling group.

The next day she again emailed me about how these were received by his husband. "My husband said:"WoW! It's one of your best bread ever!! I can easily eat more but I have to watch my carb." My husband is diabetic but is addicted to bread and chocolates My 6 years old boy ate 2 for merienda while my little girl ate one whole piece too!! They want me to pack ensaymada for their lunch tomorrow."

Thanks Joy L for letting me know about your outcome!

UPDATE as of 4/3/09: Mai also baked these (first time for her to bake!), and was so nervous before placing the dough inside the oven to bake. The results brought joy both to her and to her husband. Her husband said, "masarap pa to kesa Goldilocks."

Thanks, Mai, for trusting me and giving this recipe a try!
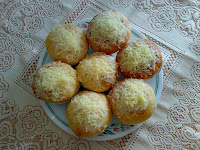
UPDATE as of 4/21/09: I was at work when I received this email of Marlene's ensaymada photos.Truly inspiring! Thanks for sharing this photo of your gorgeous ensaymadas, Marlene! Glad your family enjoyed them!


Sunday, November 02, 2008

Sugar Cookies for decorating Graveyard Halloween Cake

This post should have been earlier uploaded,.
From Sugar cookies for Halloween
but I had been working every night since Halloween, and I blog during the slow time of my shift, if any.

I was not able to take a photo of the cake that I made for Halloween. I got the idea of "graveyard" look by browsing kraftfood.com. I brought it to work with only the chocolate glaze on it, planning to top it with crushed Oreos then decorate once I got to work, but I forgot to bring my camera! Anyway, while I found it quite too sweet for my teeth, my coworkers said it was excellent!

The recipe I used for the sugar cookies was courtesy of Liz. My husband hogged the sugar cookies as soon as the first batches were out of the oven. He loved them especially with the sugars. I got different sprinkles and icing colors from Walmart. (Hubby had been hinting to me for years that he likes sugar cookies. I just got discouraged with the flat cookies I have been making using Nestle Toll House choco chip cookies recipe that I did not try sugar cookies too soon.) My sons had some fun trying to shape them cookies and decorating, but I myself had a hard time achieving the effect I wanted (as you can see in the photo). I probably will try to recreate that graveyard cake just so I can take a photo. I still have some sugar cookies in the freezer (we got tired of shaping them).

I will post about the cake recipe itself once I had the gumption to make it again and take a photo of it complete with "graveyard" decors.

Friday, October 31, 2008

Pumpkin Carving

It's Halloween!
From pumpkin carving


One thing we have embraced in the Western Culture is the tradition of pumpkin carving during this holiday. I have to go to work tonight so we did this last night. Too bad my stepd had to be with her mother so she was not able to join in the fun. (We also made sugar cookies and tried to decorate them.) Here's my artwork, and those of my kids can be seen in the slideshow below.

I purchased a cheap pumpkin carving kit from Hannaford a few weeks ago. The boys were quite excited when they saw it (first time to have that at home!) so last night was the opportunity they (we all) have been waiting for. I myself had some fun (I joined in the carving craze since my stepd was not here and my husband never really was interested in this activity. He just likes appreciating our finished products.) Now I am off to find a recipe for the seeds...

Saturday, November 24, 2007

Paris Brest


No misspelling here.

According to Wikipedia:

Paris-Brest-Paris (PBP) was originally a 1200km long bicycle race from Paris to Brest and back to Paris. It is the oldest bicycling event that is still regularly run.


But I am talking about this wonderful dessert that I always look forward to annually from my sister-in-law. Paris Brest is "classic French creation — a large ring of airy choux pastry filled with the richest praline pastry cream —" (from epicurious.com). I fell in love with it the first time I tasted it. I did not bother to try to make it myself, because I love looking forward to having it during holidays. And of course, I love wolfing it down without having to sweat a drop to make it.

But I asked my SIL for the recipe and instructions to share with those of you who might want to try serving this to your relatives (and I am sure you will impress them!) She warned me not to try making it, and I gladly said, "That's your specialty, so I am not even gonna try."

So here it is:

DOUGH
Ingredients:
1/2 cup butter
1 cup water
1 cup flour
pinch of salt
4 eggs

Instructions:
Preheat oven to 400 deg F. (IMPT)
Boil the butter and water then cook on low. Add the flour and salt, and cook for about a minute stirring constantly until it leaves the sides of the pan.
SET 5 MINUTES on the countertop. (This is critical).
Break an egg and drip into the mixture, beat by hand with a woden spoon. Repeat 3 times more (so that makes it a total of 4 eggs added).
Using a pastry bag (or whatever you can use as substitute. I usually use ziploc bag with a corner cut), pipe and form into a circle with 7-inch diameter on a greased baking sheet.
Bake at 400 deg F for 15 minutes then lower the heat to 350 and keep baking for 30-40 minutes more until top becomes dark brown.
Let cool.

PRALINE:
Ingredients:
1/2 cup white granulated sugar
1/2 cup sliced almonds
1 pint whipping cream

Instructions:
Whip cream then let sit in the fridge for 4-5 hours.
Cook sugar and almonds in a small saucepan over low heat and keep shaking (do not stir) until sugar is all melted.
Pour onto buttered tin foil. Let cool and solidify.
Break into pieces then use a FOOD PROCESSOR (not chopper) to break further into powdery form.
Fold the praline into the whipped cream.

ASSEMBLY:
Cut the top off the dough ring and scoop inside. Fill with praline in the middle. Return the top portion then sprinkle with sugar.

Serve as fresh as you could.


Monday, January 24, 2005

Mix-In-A-Jar by my Boys

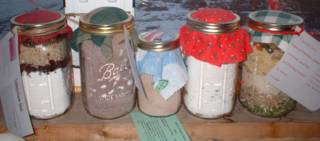
I registered my boys in the After-School Program, which runs in seasons (different line up of types of activities for each season). During the Holidays last year, I enrolled them in the "Mixes In A Jar Crafts". Here's a photo of their products. Since both of them are enrolled, we got to try one and preserve the other at least until the collection was completed.


These are, from left to right, all the mixes that they have prepared:


Cranberry Raisin Bread

Hot Cocoa

small Hot Cocoa (different recipe)

M&M Cookies

Friendship Soup


So far, we have tried the hot cocoa, the Friendship Soup and the M&M Cookies.


M&M Cookies


Since these were meant for the Holidays, the M&M chocolate candies were coated in red and green colors.

Ingredients:


For the quart jar:

1 1/4 cups sugar

1 1/4 cups M&M chocolate candies

2 cups flour

1/2 tsp baking soda

1/2 tsp baking powder


For the preparation, to be written on the gift tag, available here):

1/2 cup butter or margarine, softened

1 beaten egg

1 tsp vanilla


Instructions:


For the jar:


Mix together flour, soda, and baking powder. Layer sugar, M&M candies and flour mix in 1 quart canning jars. Be sure to pack firmly.


Add fabric, ribbon and gift tag to jar.


For the preparation:

Empty jar of cookie mix into mixing bowl, blend thoroughly.

Add 1/2 cup butter or margarin, softened, 1 beaten egg and 1 teaspoon vanilla. Mix until completely blended.

Roll into 1-inch balls and place 2 inches apart on ungreased cookie sheet. Nake at 375 degrees until edges are lightly browned, about 12 to 14 minutes.


Right after baking these cookies (as in piping hot and very soft), my husband was so eager to have one. Despite almost burning his fingers and tongue, he could not wait for the cookies to cool down first.


Friendship Soup


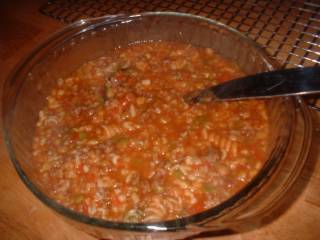
This is like a combination of stew and rice porridge, with the addition of beans. Hearty and healthy, this is a novelty for both me and my husband, and I can't believe it is an American recipe! I have been making dishes converting leftover mac & cheese into revised version of the Filipino sopas, which my husband has jokingly commented looked like a dish for swine (sarap batukan). This looked worse, and I admit, it does seem like "kanin-baboy." But I am open for new things, so I cooked it. It has a taste characteristically Italian, and it went very well with biscuits.


Ingredients:


For the jar:


1/2 cup dry split peas

1/3 cup beef bouillon granules

1/4 cup pearl barley

1/3 cup dry lentils

1/4 cup dried minced onion

2 tsp Italian Seasoning

1/2 cup uncooked long grain rice

1/2 cup tri-colored pasta

1/2 cup alphabet macaroni


Layer ingredients in jar and put lid and cover on.


Additional ingredients for preparation:


1 lb hamburg

1 can tomato sauce (4-0z)

1 can diced tomatoes (28-oz)

4 qt (8 cups) water


Instructions:


In a large saucepan, brown hamburg and drain.

Carefully remove macaroni from top of jar and set aside. Add water, tomatoes, tomato sauce and soup mix. Bring to boil. Reduce heat, cover and simmer for 45 minutes.

Add the macaroni. Cover and simmer for 15 to 20 minutes or until beans are tender.


Yields 4 to 5 quarts, so I prepared this for a weekend lunch when we had my nephew and niece with us.


Hot Cocoa Mix


We have been enjoying these jars of hot cocoa. It goes well with the cold season.


Ingredients:


2 cups powdered milk

1 cup sugar

1/2 cup cocoa

1/2 cup powdered non-dairy creamer

1/4 tsp salt

miniature marshmallows, optional


Instructions:


Combine all ingredients and layer with marshmallows in quart jar. Makes about 4 cups osf hot cocoa mix.


For preparation:


Add 2-3 tbsps to a mug of hot water.


*****


I am documenting these for future reference. Those that we deem really good we might try to prepare next holiday season. It is a creative, enjoyable and frugal way for the children to prepare their gifts for relatives. Other ideas can be found at this website and some more here. (I found it when I was looking for the Preparation instructions for the M&M cookies because both boys forgot to attach a gift tag. I am sure my MIL and SILs will appreciate these.

Custom Search