Showing posts with label canning. Show all posts

Wednesday, February 04, 2009

Sweet Chili Sauce

From sweet chili sauce
My husband loves sweet chili sauce for chicken nuggets (we sometimes have those frozen chicken nuggets from the grocery store). We were using Jufran sweet chili sauce then that he braved to try and very much liked better than duck sauce (which he used prior). But I don't always find Jufran sweet chili sauce in the Asian stores. When we ran out of it, I tried to make my own, which was acceptable to him.

Recently when I made and canned atsarang papaya, I ended up with extra brine that I did not feel like dumping. But since I had no plans to make additional atsara or other pickles at the time, I could not bring myself up to storing the brine in the fridge either. Voicing these concerns to my older son, he came up with a brilliant suggestion. "Ma, why don't we make sweet chili sauce out of it?" Now why I had not thought of that myself, I have no idea! But thanks to my son, I made our own canned sweet chili sauce. I need not say it was cheaper to do this, since I did not have to travel 2 hrs to get them, and I have all the ingredients right in my pantry/freezer, and I actually avoided wasting the brine from making atsara! I am sure, with my experience in pickling that adding the ingredients below will not affect the pH negatively, so that the outcome will most likely last in the shelf for as long as one year. I was able to come up with 5 (8-oz) and 3 (4-oz) jars of sweet chili sauce (I like using small jars so I can easily chuck the leftovers whenever we use them).

My son will probably be a good cook...

Ingredients:
leftover brine from atsarang papaya (less than 2 quarts)
handful of frozen green and red bell peppers, chopped
1 thumb-sized ginger, sliced or julienned
1 tsp dried chili flakes (I got from Spice of Life)
tapioca flour (as needed, mixed with cold brine or water for thickening)

Method:

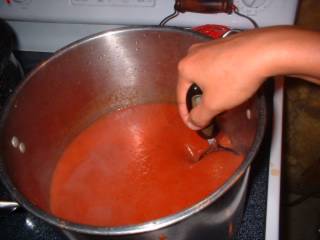
Boil the brine to rolling boil. Add the spices and cook 5 minutes. Slowly add in thin streams the tapioca dissolved in cold brine or water, constantly stirring the mixture, until you achieve the desired consistency. Keep on low heat when canning.
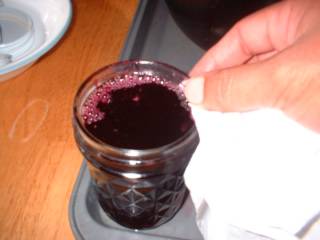
Place in sterilized jars and leave 1/4 inch headspace. Wipe rim. Cover with lids and bands fingertight. Invert for 5 minutes then set upright to completely cool. Those that will not pop in need to be refrigerated and used within two weeks.


Monday, January 19, 2009

Atsarang Papaya (Pickled Green Papaya)

From atsarang papaya
Just a peek into what's coming next....
Ok, peeps...during this week I am in a marathon for orientation in another hospital where I am gonna work per diem. So, even though I have cooked and tried and eaten quite a lot in the past days, my posts will be slow...slower than my actual cooking and eating. haha!

Like I said before, my favorite pickled cucumbers, "bread and butter pickles," was to me reminiscent of atsarang papaya when I first had a taste of it from my mother-in-law. Since then, I have been making them yearly since fall of 2005 (I learned as I watched MIL in 2004). I have been giving them away to Filipina friends every Christmas or whenever we would gather together and I still had some to give away (I have to ensure my own supply of minimum 6 quarts per year).

I tried making atsarang papaya last year using the same method but trying a certain recipe I got online, but trying to stick to the proportions of sugar and vinegar, and the kinds of veggies included, so as not to deviate significantly from proven recipes that are effective in keeping the canned atsara safe even without refrigeration. However, in that first attempt, combining the salt from the first stage, and the salt in the recipe I followed made my atsara too salty that I ended up throwing them away (sayang!).

This year, I resolved to stick to the brine recipe I have for bread and butter pickles minus the turmeric, because I included slices of ginger with the papaya, along with the usual bell peppers, onions and carrots. I don't like the taste of garlic in atsara (I like it in dill pickles, though.) nor ampalaya (but I eat ampalaya prepared in other ways). Since I have had success in the shelf-life (and maintaining the quality and crunchiness) of BBP that can keep up to a year at least, I am most certain that with this recipe, and observing proper methods of clean (almost aseptic) techniques in preparation, I will end up with atsarang papaya that I can say "Proudly Pinoy." Can't wait to let my in-laws have a try at it. My kids loved it (we tried some that we strained off the excess brine).
I will post as soon as I have the time...Stay tuned!
In choosing green papayas, for those who have not done any pamamalengke in the past, choose ones that are very firm to the touch, so that when you poke gently and firmly with a finger, there are no dents formed at all. Most of the ones I got, they tend to be hidden underneath the mushy, obviously not fresh, green papayas (typical business practice of exposing the older ones to get rid of them first).

When peeling papaya, I made sure I removed a thick layer of the skin and scraped the inside lining (where seeds attached) good. I believe these are bitter, but I could be wrong!

Now, this process can be so tedious when you are doing them all manually. I asked my husband for a food processor when he could not think of what to give me for Christmas. After I received it, I was so excited to finally make another trip to the Asian stores to get some raw ingredients for such projects as this.

Please take note that the brine has NO WATER; only vinegar and sugar, two very powerful preservatives. If you want to dilute with water or use less sugar, I cannot vouch for the safety or shelf-life, and so I do not recommend that. Please understand that maintaining pH and minimizing contamination are the key to effective canning/food preservation, especially for recipes that you will not process in a water bath. I cannot overemphasize the importance of reading first about the basics of canning. I have several links on the right sidebar for your perusal before you embark into the wonderful world of canning.

Equipment:

knife/grater/food processor
chopping board (better if you have a mandolin or a slicer either in food processor or as attachment)
nonreactive stockpot (stainless steel)
Jars and closures
magnetic picker
wide stainless steel funnel (to make it easier to transfer into jars; I don't have any. I used spaghetti lifter and ladle instead.)
cheesecloth (for pressing out excess water)
bubbler (I dont' have any; I used the handle of spatula)

Ingredients:
3 green papayas (each weighed about 3 pounds), grated
1 each of red and green bell peppers, cut in small squares
1 big onion, sliced round
1 big carrot, sliced round (you may want to grate it, but I like the flowery look)
about 2 tbsp of peeled and sliced ginger
1 cup canning salt

For brine:
12 cups cider vinegar (this gives you light yellowish tint of the product; more so if turmeric is used instead of ginger)
12 cups of sugar
1/4 cup of mustard seeds (optional; I love these in BBP so I thought I'd include them. If you don't like eating these round spices, them don't include).

Day 1: Preparation -
Prepare the veggies as described above. Place in a stainless steel stock pot. Sprinkle 1 cup of canning salt (I use Morton - the green box) on top. This process draws juice/liquid from the veggies as the salt turns into solution by process of simple diffusion so somehow, the veggies get less watery, resulting to more crunchy veggies despite being cooked and kept in brine). Cover with the (hopefully flat) lid, and let sit in the fridge. If you don't have space in the fridge, what I did was to put it in a bed of ice cubes inside a medium-sized cooler, then added more ice cubes on top of the lid and the sides. Let sit at least overnight. (If made during fall, you can leave this in the garage overnight instead of using ice and cooler).

Day 2: Canning -
As usual, before proceeding, prepare jars and closures according to instructions in Canning Basics.

Next morning, rinse with cold water and drain. (I did this twice and tasted some to make sure it is the right saltiness I like). Place in two layers of cheesecloth by batches, and wring out excess water as much as you can). Place in a big nonreactive stock pot (aluminum is NOT advisable; it reacts with vinegar. Use stainless steel.)

Prepare brine and boil for 5 minutes. I usually start boiling hot water in another shallower stock pot, then pouring hot tap water into the jars as well, to prime them for sterilizing in boiling water. This prevents jars from being shocked with extreme temp changes. [During the actual canning, I remove the hot water in the jars then transfer the jar into the boiling water for sterilization, rotating as needed, and take out just before filling with the hot pickles. Alternatively, you can use a sterilizer by steaming (much like how you do with feeding bottles). I don't let the jars get cold before filling, or the pickles to get cold/contaminated before covering.)]

Pour the brine into the veggies. Cook on medium heat for about 2-3 minutes then lower to maintain heat while you do canning. In one fluid motion for each of the jars, proceed as follows:

Stir, then ladle into the jars. Make sure you have enough brine. Leave 1/2-inch headspace. Take bubbles out by using the bubbler (this minimizes air trapping; read about the effects of air trapping here.)Wipe the rim with clean damp paper towel to make sure nothing is there to prevent proper seal. Lift a lid out of hot water (or I swipe quickly in boiling water) then cover and close tight. Wipe sides of jar to minimize stickiness. Place hot jars on towel laid on countertop (minimize jarring), one inch apart, in a draft-free place (sudden rush of cold air might cause hot jars to crack). Additionally, you may cover with towel to minimize exposure of the jars to cold air. Leave untouched for minimum 12 hours. Observe for popping in of lids. If lids did not pop in, that signifies that it was not sealed properly. Place in the fridge and consume within two weeks.
Pickles start tasting like pickles after the 3rd day.

UPDATE: 1/30/09
From sweet chili sauce
If you are going to try making this and end up with lots of lefotver pickle juice, DO NOT THROW IT AWAY. While I was looking at it, debating against dumping it in the sink or saving it in the fridge, my older son suggested, "Maybe we can make sweet chili sauce out of it." Like a light bulb, I knew what to do with it. Will post about it sometime in the future. Thanks, Patrick!


Friday, January 16, 2009

Concord Grape Jelly

This is a re-posting from my Old Kusina. I am posting with today's date mainly for A Scientist in the Kitchen, who expressed interest in learning more about making jams and jellies. Maybe those in the Philippines can also experiment using our very own fruits. I have seen my ex-MIL make guava jelly even without pectin, so probably we can also find out how to make jams and jellies out of those fruits without using pectin.

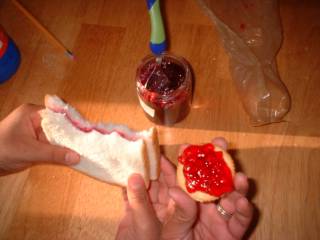
Children like it on sandwiches, I like it on Ritz or saltine crackers, hubby likes it (and raspberry and strawberry jams) with peanut butter for sandwiches. It is quite a bit sour for my taste, but my hubby and in-laws like the contrast of sweetness and tartness (maybe because they are used to these sour berries and grapes). One thing for certain, these home-made jams and jellies are far superior than the commercial ones.

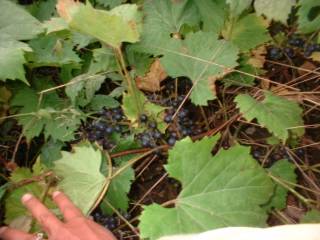
These are concord grapes, and they are very very tart! Not at all suitable for eating in its raw form. I had about 2 pounds or more of these bunches about a week before the first frost hit us. Then I waited for the second batch, which I made the morning right after the first frost (a friend's mother-in-law told me they taste better after frost).


1 big colander is equivalent to more than a pound of them, but I had to wash, remove the green ones (choose only the most purple ones) to make into grape jelly.

Ingredients:

5 cups prepared juice (about 3-1/2 lb. fully ripe Concord or you may use other loose-skinned grapes)
1-1/2 cups water
1 box Fruit Pectin (Sure-Jell or Ball Brand)
1/2 tsp. butter or margarine (optional)
7 cups sugar, measured into separate bowl

Preparing the juice:

STEM and crush grapes thoroughly, one layer at a time. Place in large saucepan; add water.


Bring to boil. Reduce heat to low; cover and simmer 10 minutes, stirring occasionally.

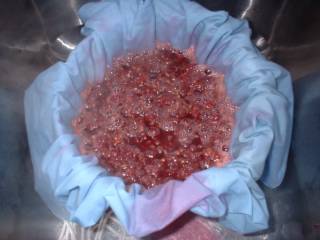
Place 3 layers of damp cheesecloth or jelly bag in large bowl. (I had none at the time. I improvised using a clean old pillowcase with a small cheesecloth sandwiched inside.) Pour prepared fruit into cheesecloth.


Tie cheesecloth closed; hang and let drip into bowl until dripping stops. Press gently (If you squeeze hard, you might end up with turbid jelly). Measure exactly 5 cups prepared juice into 6- or 8-quart saucepot.

(I did this juice preparation at night and let it drip overnight. Then I proceeded with the next step the next morning)

Making the jelly:

BRING boiling-water canner, half full with water, to simmer. Wash jars and screw bands in hot soapy water; rinse with warm water. Pour boiling water over flat lids in saucepan off the heat. Let stand in hot water until ready to use. Drain well before filling.


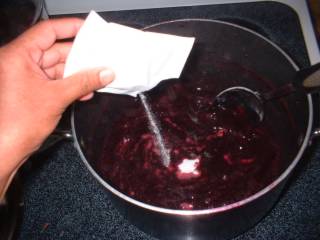
STIR pectin into juice in saucepot. Add butter to reduce foaming, if desired. Bring mixture to full rolling boil (a boil that doesn't stop bubbling when stirred) on high heat, stirring constantly.

Stir in sugar all at once and keep on stirring until dissolved.


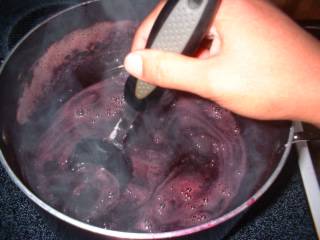
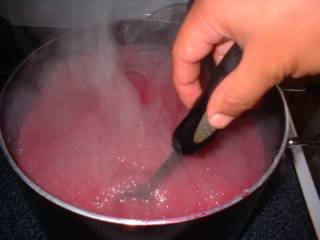
Return to full rolling boil and boil exactly 1 minute (set the timer!), stirring constantly. This is how a full rolling boil looks like, where any stirring won't keep the bubbles down (hence, if the pot is not big enough, it might overflow). After one minute, remove from heat.


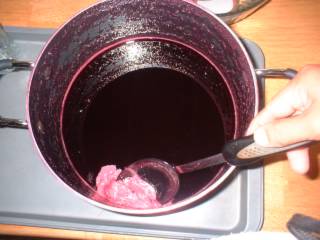
Skim off any foam with spoon.

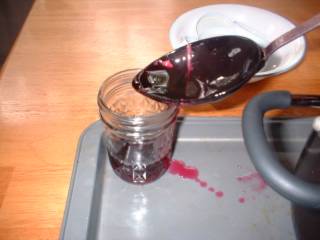
Ladle into the hot jars.


Wipe with damp paper towel the sealing surfaces.

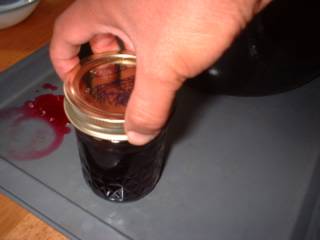
Pick the lid and screw band submerged in boiling water using the magnetic picker, then cover the jars and close, fingertip-tight.


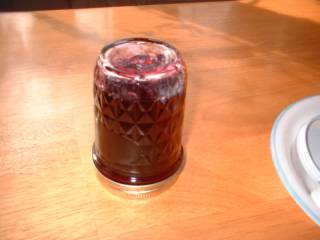
Turn upside down for 5 minutes then turn upright again (this is when you want to eliminate processing in boiling-water canner for 5 minutes).

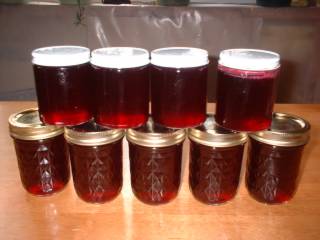
Set them on a place without disturbing for at least 12 hours. Then watch out for covers that did not pop in (downward concavity). If there's one, or if a jar is not full like in the upper small jar in this phot, place in the fridge and consume immediately, preferably within 2 weeks.


I also make strawberry jams , blueberry jams, and raspberry jams (which are made almost in the same manner; the only difference being in the proportions). Our family's fave is the raspberry jam, and when I did bring one to work, to go with some Club crackers, everyone loved it. The nurse travelers (a couple) who were based in Florida even expressed how superior it was over commercially prepared ones. Maybe those in the Philippines can try to make jams out of aratiles or other lowly berries we have, and adjust the amount of sugar according to how sour or sweet they are....just a suggestion for those who are thinking of going into the food business for something less paid attention to, so competition is less. This process is almost a no-brainer and will require very little capital.

(To my Filipina readers/friends in the Philippines who might be interested in making home-made preserves, a web research lead me to this site which gives the telephone number for the pectin producer in the Philippines and globally.) [That link is not valid anymore!] I know that pectin is available in the Philippines because when I was still in college (BS Biology), two of my classmates worked on a thesis involving pectin. At the time I only knew that it was a gelling agent and knew nothing about it. Apparently it can be extracted (as hesperidin?) from citrus peels, also from apples. I do wonder what fruits will not need pectin to jell, given the proper proportion of fruits to water to sugar? These are the only ingredients to making jams and jellies, aside from pectin. Guava naturally has pectin as well.

Saturday, January 10, 2009

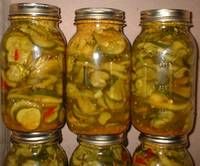
Canning Bread & Butter (aka Pimento) Pickles

If you like atsarang papaya, you will like this. I did.

This is a re-posting from my Old Kusina. While this seems off-season in that I usually do canning in the fall, I figure it won't hurt to show this here at this time, so those who will try can plan ahead for what they want to plant in their gardens. (I usually have gardening catalogs during Jan-Feb. My MIL orders as early as Feb or Mar to start her seedlings indoor in April). It is best to can veggies yo yourself grow in your garden, and start the process on the very day you harvest your produce. (Although an exception for me is canning tomatoes. Sometimes I harvest my tomatoes as soon as they have red/yellow/orange streaks and let them ripen inside the house to avoid being attacked by slugs, then I process them).

During the winter of 2003-2004 my dear MIL gave me a quart of this BBP. (She gave me a jar of dill pickles prior to this.) She said her husband likes it so much that he can finish the whole quart in two weeks, and that he can't eat any roasted meat without it on the side. I tried it right away, and that day I decided that I had a new favorite pickle. The closest Filipino pickle that tasted like BBP is the atsara, but my! This one is a lot better! (I have tasted several atsara preparations in the PI, some with carrot slices, some with bittermelon slices (ugh!), and some just the grated papaya with onions and the brine. The best atsara I have tasted was the one that went along with Baliwag lechon manok, if my memory serves me right.)

That summer of 2004 when it was harvest and canning time for the cucumbers from my vegetable garden, I was so eager to learn how to make BBP. I first learned canning the dill pickles first, which was harder and fussier when it comes to processing (have to maintain at a point just below boiling). This one is way too easy...just half-cook the cucumbers and can. No more processing needed! The pure vinegar-sugar combination (as in no water) does not encourage growth of Clostridium botulinum and other microbes while the jar is not yet opened.

Browsing some websites about BBP, I learned that many required other ingredients not in this recipe from my MIL's canning book. Some required processing in a boiling water canner. MIL says you can't buy these at the grocery stores, and if ever you find one, they are not as good as what we are making. She first had a taste of this from a friend who shared with her the recipe.

Others are just so mushy and not as pleasantly tasting as these.

So, for those who are planning on planting cucumbers next summer, you might want to make these pickles. Your spouses might prefer the dill pickles (as mine does), but you will surely love this if you love atsara. Now for American wives to Pinoys, if your hubby likes atsara (pronounced ah-cha-rrra), they will surely appreciate this. For Filipinos in PI, you might want to try making these as substitute for atsara. Best served with roasted chicken. Also goes well with burgers and hotdog sandwiches. I love giving these away as Christmas gifts to friends. My friend Ana can finish a jar the very day she gets one from me.

Equipment:

knife
chopping board (better if you have a mandolin or a slicer either in food processor or as attachment)
nonreactive stockpot (stainless steel)
Jars and closures
magnetic picker
wide stainless steel funnel

Ingredients:

25 pickling cucumbers
8 fist-sized yellow onions (or the equivalent amount)
2 red and green bell pepper (1 each, or 2 bell peppers plus 1 small jar of pimento)
1 cup canning salt

For the brine:

12 cups sugar, dissolved in 12 cups vinegar
1/2 cup mustard seed
6 tsp ground turmeric

Instructions:

I did this in two consecutive days.

Day I: Preparation


Do on the same day of harvesting for optimum result. Wash cucumbers well. Remove ends. Group the cucumbers into 3. Slice the first group to the desired thickness (I like mine about 3/16 of an inch). Divide the onions into 2, slice into rings. Divide the peppers into 2, dice and discard the seeds.

Layer as follows: cucumbers; onion+peppers; cucumbers; onions+peppers; cucumbers.

Sprinkle 1 cup of canning salt on top. Cover and let sit overnight. The salt draws the excess moisture from the cucumbers, so that it will retain its crispiness even when canned.

Day 2: Canning

As usual, before proceeding, prepare jars and closures according to instructions in Canning Basics.

Next morning, rinse with cold water and drain. Taste cucumber. Rinse again and taste again. Repeat until the cucumbers are not that salty to your taste (just a bit).

Prepare the pickling solution and boil for 5 minutes, stirring constantly.

Pour into the stockpot of cucumbers, and heat near boiling point, stirring constantly to assure uniform cooking.

Bring back to heat up to just below boiling point then lower heat and maintain, stirring constantly to assure uniform cooking. After about 5 minutes, slices should start to become translucent. Check for doneness by trying some slices from different spots in the pot. Cucumbers should be just half-cooked and still crispy. Lower heat to the minimum to maintain heat yet not overcook the remaining cucumbers as you transfer them to jars little by little.

*Using wide-mouthed funnels, transfer to hot jars right away, with a good proportion of pickles to brine solution, making sure all slices are covered. Leave 1/2-inch headspace. (Headspace allows for volume contraction while the jars are cooling down so that later on the lid pops in, indicating proper seal.)

Release bubbles with a plastic spatula or a bubbler, wipe rim with damp cloth or paper towel, and close immediately with clean lid and screw band. Put on a sterile towel.**

Repeat steps *-** in one smooth flow jar per per jar, stirring again before ladling. Don't fill all the jars then proceed with covering because this will not be processed in a boiling water bath. (the pure vinegar-sugar combination makes it less prone to developing botulism and is less susceptible to bacterial/mold proliferation. For every new jar filled, stir the pickles, with the heat kept to the minimum to avoid overcooking yet maintain the heat, before ladling into the hot jars. After all jars are filled, cover with another towel. Only then can you allow open windows/draft. Wait for at least 3 hours for popping sounds when sealing. After 12 hours, take note of unsealed jars and place in refrigerator, to be consumed within 2 weeks. For the properly sealed jars, let sit in the pantry (should be dark and cool) for at least three weeks to further develop the flavor. Unopened jars will remain good within 1 year from canning.

This is now my favorite pickles (hubby's fave is the dill pickles) because it comes closest to the taste of the atsara that I liked, even better. I use this with any dry (not soupy) dishes, or when hunger strikes and I am not in the mood to cook and there are no leftovers to raid in the fridge. Now I am planning to turn them into holiday gifts for the few friends that I have made in the past year.

Do you want more ideas about pickling cucumbers? Click here.

Wednesday, January 07, 2009

Boiling Water Canner and Bamboo Steamer

I have posted during my earlier blogging days about
From boiling water canner & bamboo steamer
canning, and this is where I use my boiling water canner primarily (It was a birthday gift from my mother-in-law after I have borrowed hers several times to can my produce during my first year of garden harvest). But through years now of using the canner and with my bamboo steamers also now available whenever I want to prepare steamed pinoy goodies such as puto, siopao, or siomai, I resort to this, especially if it requires oven-like environment as in the case of puto or siopao, which requires the high moist heat of steam. Leche flan can also be prepared in this way, if you cover the llanera with foil, place in the bamboo steamer atop the canning rack, steamed in MODERATE heat for 30 minutes for the typical llanera size, or longer for 8x8 round pans (if you try using high heat, it will result to big holes; less heat will take longer cooking time).

Although the bamboo steamers can be used on top of a
wok for siomai and dumplings, which do not require sudden rising of dough, the canner provides a better effect of sudden heat to assist in rising of dough for such recipes as puto or siopao ("ginulat" kumbaga). The canning rack allows for proper elevation so you don't boil the goodies, and the handles also provide an easy way to place and remove what you are cooking. Of course you can use these for the individual purposes they were intended to be used for. I am just showing here how I marry the use of some distinct tools to prepare some Filipino favorites. The bamboo steamer I use is a 10-in size. If larger, it won't fit in my canner. There are larger sizes of bamboo steamers available, though.

To properly care for bamboo steamers, spray with oil after each use and thoroughly dry when storing.

To properly care for your boiling water canner, just promptly remove the water after each use and wipe to avoid rusting.

Friday, December 01, 2006

Blueberries

Every year I get about 1 gallon of freshly picked blueberries from my MIL's garden.

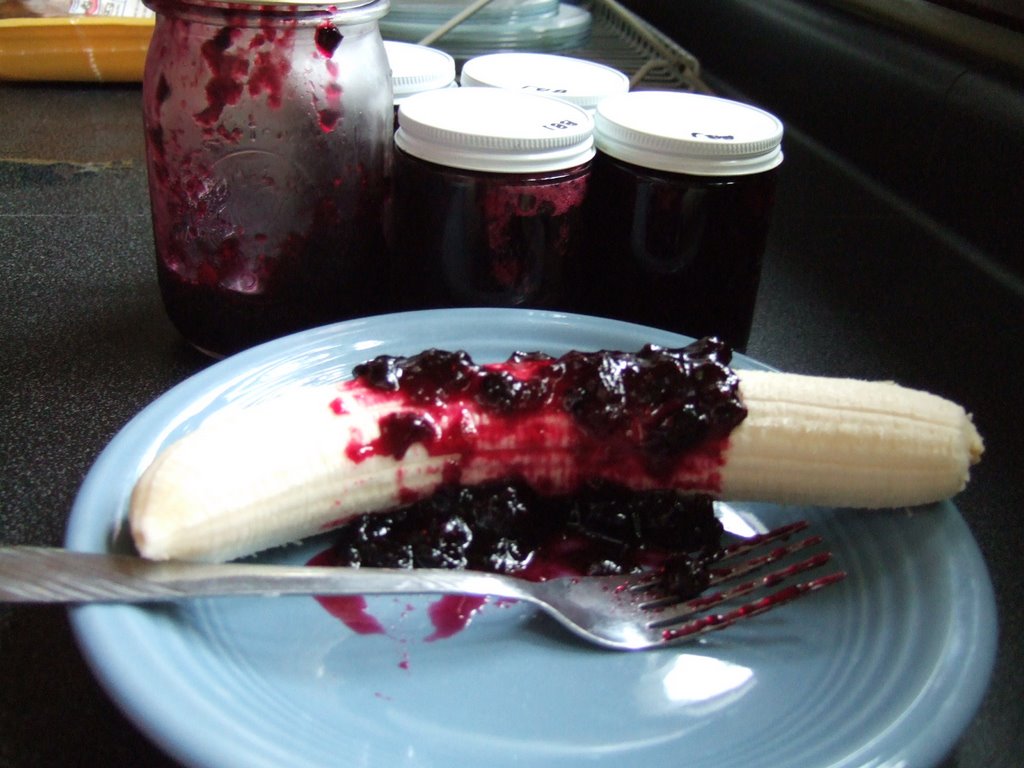
I make blueberry jam (recipe here), which I store in 3/4 cup jars, and which I love using on bananas, or saltine crackers, or toast...

I also use one such jar for the very tastyStonewall Kitchen's blueberry sourcream coffee cake, the recipe for which is as follows:

Ingredients
2 cups granulated sugar
2 cups all purpose flour
1 Tbsp vanilla extract
1 Tbsp baking powder
1/4 Tsp salt
2 sticks (1 cup) unsalted butter
2 eggs, beaten lightly
1 cup sour cream
1 - 13 oz. jar Stonewall Kitchen Wild Maine Blueberry Jam, stirred well

Directions
Pre-heat oven to 350 degrees.
Butter a 10” bundt pan and lightly dust the inside with flour.
In a mixer, or by hand, cream sugar and butter until light and fluffy.
Add eggs, blending well, and then add sour cream. Mix until combined.
Gradually fold in flour, vanilla, baking powder, and salt into creamed mixture until just blended.
Reserve 1/2 cup of batter and mix with 3/4 of the jar of blueberry jam.
Pour 3/4 remaining batter into the prepared pan, smoothing to the edges and creating a slight "trough" with a spatula.
Gently spoon the blueberry mix into the batter "trough", being careful not to touch the side of the pan.
Pour the remaining batter over the jam and smooth the top.
Set pan on middle rack in the oven and bake for about 60 minutes, or until the sides of the cake pull away from the pan and a cake tester (or toothpick) inserted in the center comes out clean.
Cool on a wire rack for at least 30 minutes. Turn onto a plate, sprinkle with confectioners sugar, drizzle with remaining jam and enjoy!

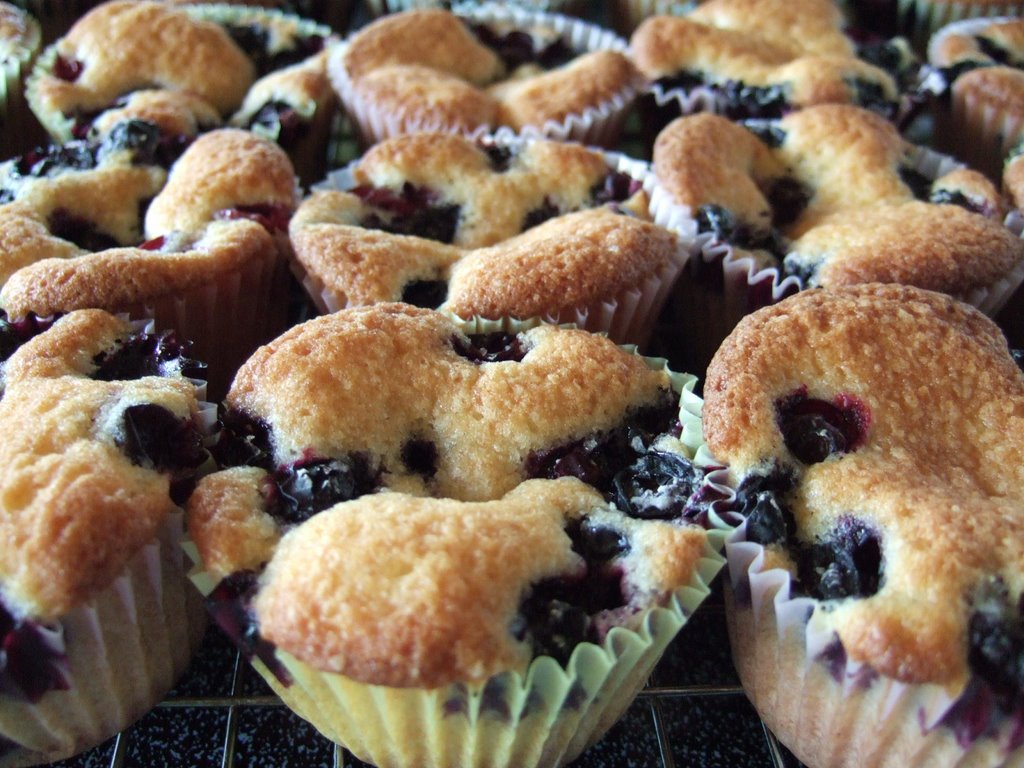
I also usually make these blueberry muffins, and though my favorite recipe for that so far does not produce the dome that I would like to have, it does come up with muffins which I like so much, and get better and better on the 2nd, 3rd, and 4th days.

Monday, October 25, 2004

Canning PASTA SAUCE

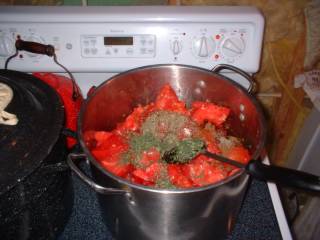
I canned a total of 4 bushels of those big heavy deep-red tomatoes (not counting the smaller tomatoes which are better canned whole or used raw in salsa). Quite expectedly I experimented with different recipes for pasta or spaghetti sauces. After several experimentations, I came to the conclusion that the easiest thing is to make them all into standard tomato sauce, then just add the other ingredients to convert them into pasta sauce according to my taste. You see, this recipe here does not give the taste that I really want, because most of the concern of the developer of these recipes is to come up with a mixture that will ensure the pH that will least encourage the growth of Clostridium botulinum. I mixed together 1 pint of standard tomato sauce with a pint of Italian Seasoned Tomato Sauce and came up with the most delicious yummy pasta sauce I have ever had. The procedure is actually quite standard, with variations only in the style of cooking (stewed tomatoes prepared differently from pasta sauces). So for purposes of demonstration, I am featuring this here. My personal preference at the end of my canning season is just to make standard tomato sauce then add ingredients as I cook the meal. The standard tomato sauce is easier to prepare, requires no other veggies so it maintains its acidity and therefore is not subject to dangers of botulism. For more information on preserving tomatoes, click here.

Ingredients

3/4 cup chopped onion
3/4 cup chopped celery
4 cloves garlic, minced
2 tablespoons olive oil
20 pounds tomatoes
3 bay leaves
2 tablespoons brown sugar
2 tablespoons oregano
2 tablespoons parsley
1/4 teaspoon crushed red pepper (I lessened the original amount asked for, for my children's sake)1/2 teaspoon black pepper
Bottled lemon juice

Instructions

Prepare Ball® or Kerr®jars and closures according to instructions found in Canning Basics. Since this is a combination of tomatoes plus other vegetables, it is considered low-acid food, and therefore, caution against development of botulism is warranted.

Core and quarter tomatoes.


Cook onion, celery and garlic in olive oil, in a large saucepot, until transparent.

Add some of the tomatoes, then transfer this


and the remaining ingredients to saucepot.

Simmer mixture about 2 hours, stirring occasionally.


Remove bay leaves. Put tomato mixture through a food mill or sieve to remove seeds and peel.

Return puree to saucepot and cook, uncovered, over medium-high heat until sauce thickens (usually down to half of the original volume of pureed mixture). Stir frequently to prevent sticking.


Add 1 tablespoon bottled lemon juice to each pint jar. Carefully ladle hot sauce into hot jars, leaving 1/4-inch headspace.

Wipe jar rim clean with a damp paper towel or cloth to ensure smooth sealing.


Place lid on jar with sealing compound next to glass.

Screw band down evenly and firmly just until a point of resistance is met-fingertip tight.


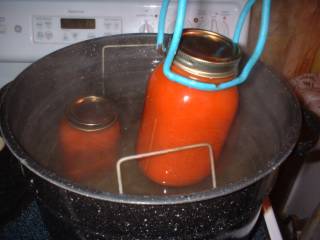
Place in the canning rack and lower into the boiling water. Add more water as needed, making sure that water level is about 2 inches above the lids.

Process at least 40 minutes in a boiling-water canner. Make sure that the water is boiling fully and refrain from opening the canner while processing.


Making sure that there is no draft inside the house, remove the jars one by one from the canner and place on a towel on the countertop, with at least 1 inch space between each jar. Cover with another towel and leave alone for at least 12 hours.

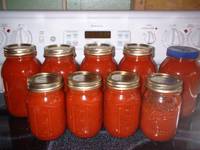
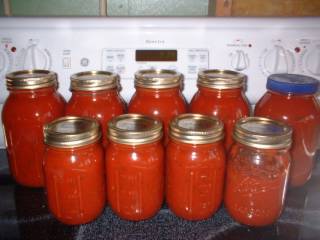
Check for failure to indent, a sign of non-sealing. This photo is a combination of canned pasta sauce and spaghetti sauce that I made. Notice the jars that are less than the required volume, and the jar with a different cover. I don't bother processing that jar with half the content. I use it up right away. A batch of tomatoes that I process that results only in 1 or 2 quart jars I also do not process anymore. Instead, I place it inside the fridge and consume within 2 weeks. Or I may transfer to a freezer bag and use within 1 year.

Here's how I stack them in the freezer. When I transfer into freezer bags, I squeeze out as much air as I can to create vacuum and lessen the chances of freezer burn. Then, once frozen, I lay them flat on a baking sheet for organized stacking. By then I can stand them upright like books or just pile them up higher.

I confronted my hubby about whether the quality of the pasta and tomato sauces rivaled those in the grocery store, because if not, I would rather not spend this much time processing these tomatoes. It can be quite tiring and power-consuming. I wanted to see if it was worth the effort. I might be biased, but I love my home-made sauces. Hubby said they were yummy indeed, but if I tire so much canning them, it might still be more cost-effective to buy from the store. (Quite hard to assess whether it was bola or truth. It might be that he did not want to hurt my feelings.) Then recently we watched on History Channel a documentary on how tomatoes are harvested and processed immediately. Oh well...most of my canning this year was out of curiosity on how it was done, on what would be the result (I have no doubt that home-made jams and jellies are better than store-bought, but I doubt that canning veggies are worth the trouble), and having the produce on hand from my garden. I might plan my garden otherwise next year, probably less tomatoes, more berries, same cucumbers, etc. I will probably plant several other veggies good enough for freezer storage for the whole year.Posted by Hello
Custom Search