Showing posts with label coconut. Show all posts

Friday, December 11, 2009

Do you need Buko? Here's a tip...


I so want to post more about food, but these times are busy. However, I am posting this, hoping to help anyone in the US (particularly in New England) who needs buko/young coconuts in time for Christmas.

Last week I went to Hannaford hoping to find some buko (young coconuts) to make into pichi-pichi (for the juice) and to mix with cassava cake and sapin-sapin. I did not find a single one. Desperate to get them, I approached a guy unloading some produce from crates, asking who I could talk to if I wanted 15 pieces of young coconut, which I knew they carried before. I was asked for my name and telephone number, and would be referred to their manager (in the produce section). I told them I would need the coconuts by the next week. I also added 5 yucca (although I had several frozen grated yucca packages in my freezer).

Next morning, I had a follow up phone call about who would be the acting manager to assist me (they left a message). I was told they would try to see what they could do about my order.

In the afternoon I was told the coconuts would be coming to their store the next day, then I would just have to ask a guy to get them from the cooler at the back. Whoa!!! So soon! I did not expect that! I was expecting them in about 5 days if they could actually get those.

So off I went to the store on the afternoon of the second day after I made my request. Now they are sitting in a cooler, out in the garage (protected somehow from freezing by the insulation of the cooler.)

Now I am thinking of making them tomorrow into buko salad (although I originally intended to make a fruit salad) instead of just using some in pichi-pichi or cassava cake. My Filipino Christmas party will be on Sunday. My menu so far includes cassava cake, sapin-sapin, dinuguan at puto, bopis, escabecheng tilapia, beef lengua with onions and mushroom, and humba. Giveaways will be hopia, siopao, ensaymada, pan de coco, and lengua de gato plus some jams and pickles. I told my friends it would be potluck.

I hope you have a Hannaford store near you so you can do the same if you plan to make anything with more than 5 buko for Christmas or New Year. I love how they have accommodated my request and so fast too! They just made me into a loyal customer!

Monday, October 12, 2009

Pandan Chiffon Cake


Before I start, may I please request for one of my readers to please send me some more of pandan paste (as in the slide show below) or the canned pandan extract (that I used in buco pandan salad)? I would gladly pay for them (just could not find them here). My previous supply was sent by a co-blogger, stel of babyrambutan.net, and my present pandan and buco-pandan extracts were sent to me by Deb from California. Thanks to them, but I do not feel like requesting from them again. Dyahe....

The pandan chiffon cake recipe I have below is courtesy of my online friend Helen in Australia. I made it for the first time last Friday to bring to my friend Fe's birthday celebration last Saturday.

Helen cuts the sugar and coconut milk in half per her preference. I used the exact amounts stated in the procedure and still found the cake a bit less sweet than I had anticipated, although the sweet frosting made up for it. Fe, however, is like Helen in that she always cuts her sugars in half whenever she makes cakes, rolls, or kakanin. It is a matter of preference, so feel free to experiment with yours.

The pandan butter-coco-cream frosting was something I made up basing on some online recipes I found.

(The chocolate writing on the frosting was melted semi-sweet morsels that I piped out to write onto a parchment paper then cooled. Too bad it broke when I was trying to stand it up on the cake, so we just laid it down.)

Just this afternoon, Fe called me to ask whether I had posted the recipe yet, because she only had a slice of our leftover (We had two cakes, a white cake from my friend Ana, and this one, so Fe ended up with leftover of both. She had half of pandan cake left that Saturday). Then her son had finished the rest of the leftover, so now she wants to bake one.

Thanks, Helen, for this delightful pandan chiffon cake recipe!

Ingredients:
-Batter-
2 cups cake flour
1 tbsp baking powder
1 cup sugar or to taste
1/3 cup oil
6 egg yolks
1 cup coconut milk
1 tsp pandan extract (I used paste)

-Meringue-
6 egg whites
1 tsp lemon (or vinegar)
1/2 cup sugar

-Pandan Butter-Coco-Cream Frosting-
1/2 cup (1 stick) butter
1/2 cup coconut milk
1 tsp buco pandan extract (McCormick)
2-4 cups confectioner's sugar (depends on how sweet you want it)

Instructions:
Sift dry ingredients together (up to 3 times, ideally). Mix well.
Make a well at the center then add oil, yolks, coconut milk and pandan paste. Mix well.
Beat egg whites with vinegar until soft peak forms. Add sugar slowly while beating, beat until stiff but still glossy (do not overbeat).
Add a little of the meringue to batter mixture and blend well, before slowly folding in the rest of the batter into the beaten whites.
Pour into an UNGREASED bundt pan or angel food cake pan (no grease apparently helps keep the volume fluffed up by helping the cake cling onto the walls).
Bake at 350 deg F for 45-50 minutes.
After baking, invert onto a wire rack WITHOUT REMOVING THE PAN. Let the cake COOL COMPLETELY before easing it out of the pan. You may use spatula to let the cake loose. (Again, these apparently help keep the chiffon cottony fluffy.)

Note: The emphasis I made in the procedures were tips I read about AFTER I made the cake. My chiffon cake was quite dense but still of satiny texture, and maybe I should have read more on those tips to maximize its volume and make it lighter.

For the icing, heat up the coconut milk on medium, stirring constantly until creamy. Let cool.
Cream the softened butter with 2 cups confectioner's sugar and pandan flavor, and add the coconut milk gradually. Taste if you like the sweetness already. If not, add some more sugar to taste. If it becomes to thick, you can thin to your desired spreading consistency by adding a little (about 1 tbsp increments) of regular milk or cream (if you have run out of heated coconut milk).

Let cake cool completely before spreading the pandan icing/frosting.

Tuesday, July 07, 2009

Buco Pandan Salad


Another longed-for Filipino dessert...

I got ideas from oggi (but I don't have pandan leaves nor gulaman bars). I was adamant I would NOT ever use Jell-O for this classic Filipino dessert. For one thing, I never liked Jell-O gelatin. The consistency is just not the same. Too jiggly and soft for me. And they gel longer too. Plus, they come from animal sources (the collagen), while agar-agar is from a seaweed.

Anna, Celia and I wolfed our serving down hungrily. My kids looked freaked out by its color, but loved its taste.

WARNING: Eat sparingly. Loaded with cream cheese and heavy cream (kaya nga yummy!).

Ingredients and Instructions:

For the gelatin:
juice from 3 buco (young coconuts)
1 can (14 oz) pandan leaves extract (Maesri brand; sent to me by Deb -- Thanks!)
water (enough to reach 4 cups when combined with buco juice and pandan extract)
1 (20 ml) buco pandan flavor (McCormick)
4-6 tsp of agar-agar (available at amazon.com; I bought mine, an expensive brand, from Spice of Life here but seeing amazon's, I should have just ordered from them.)
1/2 cup sugar

Note: The suggested ratio of agar-agar to liquid on the back of the label was 1 tbsp agar-agar to 1 cup of liquid. I read from burntlumpia's post that he found 1 tsp in 1 cup gives the right consistency, and that 1 tbsp results in too firm a gelatin.

Let agar-agar stand in the mixture of liquids liquids for 15 minutes then start boiling together until agar-agar is dissolved completely. Try cooling a small amount in the fridge for about 3 minutes and check if you like the consistency. If not, add a little more and reheat until the agar-agar dissolves. Add sugar when agar-agar is completely melted (not sure if it would get in the way of dissolving the agar-agar so I added it last). Place in 13x9 glass pan; cover and chill until solid. Cut into cubes. Mix in the rest of the ingredients.


Shredded young coconut meat (I had very little from the 3 buco because only one of them had meat that was not mala-uhog, so I opened 2 cans of canned young coconuts pre-cut in triangles. I discarded the "buco" juice from those cans as they tasted like very diluted. The coconut meat that came from these cans were not too pleasing when eaten plain, but mixed as buco salad, they are ok. The frozen shredded are too mature for buco salad use. The freshly shredded ones are still the best.)

1 can kaong (palm seeds in heavy syrup); drained (optional; I added because I had it in my pantry, and goes well with coconut)

Creamy Sauce
1 (14 oz) can condensed milk
equal amount of heavy cream (use the can of condensed milk to measure)
6 oz cream cheese spread

Beat the cream cheese first until smooth. Add the condensed milk slowly, then the heavy cream. Pour into the gelatin and shredded young coconuts and let chill.

Tapioca Pearls (optional)
Boil 4 cups of water then add 1/2 cup of tapioca pearls. Cook for about 2 minutes, stirring frequently. Turn heat off, cover and let stand 15 minutes or until translucent. Rinse with cold water 3 times. Place in a jar then add cold water to cover and refrigerate. Add these only when serving the buco pandan salad (not sure what the effect is if you mix right away).

Note: I love placing my buco pandan in the freezer for about 30 minutes to an hour to have some ice crystals before serving.

Sunday, March 01, 2009

Making Latik


Not the best photo....sowee...

Do you have kids? I feel thankful that I have son power when I need them, but sometimes, they are not the best human resources one could hope for...

One time I asked my boys to take turn grating coconut (nyog) for use in pichi-pichi. I was very dismayed when I saw the end result: full of fibers that it looked dirty instead of cottony white appearance. I froze it at the time, keeping in mind that I have to use it for something else that it would not have to appear in the final presentation.

Good thing I had spare coconuts at the time so I was still able to serve pichi-pichi the traditional way.

The other night, I recalled that coconut. I debated whether to use it for pan de coco or something else. The I thought of extracting gata...then while extracting, light bulb turned on inside my head and I thought I'd make latik (I had been considering using canned coconut milk for that purpose, but I was hesitant because what if canned coco milk does not produce latik at all???


Ingredients and How-To:

1 mature coconut, grated

Proceed as depicted in the slide show. I like placing the nyog on cheesecloth. Add about 1/4 to 1/2 cup hot water first. Squeeze repeatedly with your hands and fingers. Gather the edges of cheesecloth and wring out the juice. This is the first press (kakang-gata). Do this twice (the resulting juice is the second press; I mix them together for purposes of making latik), then start boiling. (Note: You can probably use the pressed coconut meat to mix with breadcrumbs or flour with curry powder to coat deep fried shrimps...just an idea...)

Use medium low heat to cook, uncovered. Do some chores. Once it starts to thicken, watch closely so as not to burn the resulting latik (you might have to lower the heat further). Once it starts to brown, scrape the bottom of pan frequently. When brown already, drain off the coconut oil. You can use this coconut oil to brush pans for bibingka and other kakanin. Or just pamper yourself with oil massage of the scalp or skin. Store latik in airtight container and keep in the fridge until use.

Can you guess what I will prepare next to use this latik for?


Saturday, January 03, 2009

My Humble Coconut Grater

I requested a coconut grater as pasalubong from Ana when she came back from a vacation to the Philippines. Since then, I have been getting mature coconuts (niyog) from hannaford when I need freshly grated coconut for pan de coco or palitaw or pichi-pichi. Before this, I had tried getting some pre-grated coconut that seemed dessicated it was like eating shredded paper! I never would want to do that again!

Ana gave me a possible attachment to kitchen aid or a motor to come up with a motorized grater, but I have never gotten around to asking a machinist(?) to see whether it can be re-shaped to fit my kitchen aid. In any case, since I grate only 1-2 coconuts at a time, which takes about 5-10 minutes of grating (using my son power), this humble manual grater, which I attached to a plank then place on a seat during use, serves the purpose for which it was intended. This way, I can easily hide it out of sight when not in use, by squeezing it into a slim cupboard.

A manual coconut grater can be bought here for $5, but I could only imagine how hard that one is for the wrist and hand. A seat version is also available for $16, but storage would be the problem here, not to mention shipping costs for the wooden part. If only they sell something like mine, only with screw to attach it to a plank like I did, with the option to get a plank as well, I bet they would sell better. Maybe I should ask for someone to make these for me, then maybe I can sell them at amazon.com...hmmmm....

Monday, December 22, 2008

Cassava Bibingka Espesyal

I got this from stel.
From special cassava (yucca) cake
The first time I made this I used a small pan. Did not have enough space for rising while it baked, nor for the topping to be placed without spilling. It did taste good, and I shared the recipe with my friend's mom. She made it the next year, and I was so delighted with it, and I asked her for the recipe. "That's the recipe you gave me!"

So yesterday, I tried again the second time this year...with all the right
From special cassava (yucca) cake
ingredients, but still managed to end up with small pan (I should have taken note of the lasagna pan measurement; I grabbed an aluminum foil pan in the store which was 13x9; should have been 14 x10, but the next size I saw was that of a roasting pan, so I settled for the smaller one. I did not want to use my ceramic or glass pans as I was using them for something else. Bad decision. It was still good, though, and I mananged to use the remaining topping mix for the leftover, when the top of the cassava cake shrunk as it cooled. I spread the topping mix and broiled for 5 minutes on high.

(For this recipe and that of pichi-pichi, I bought the yucca last week and grated them, pre-measured by the cups then froze until I was ready to bake them.)

Ingredients
4 cups grated cassava/yucca (or 2 packs thawed grated cassava)
1 can (12-oz) of evaporated milk
1 cup cream of coconut (coco lopez or other Spanish brand) (use the remaining for topping)
1 can (14-oz) of condensed milk (subtract 6 tbsps. for topping)
1 can (14-oz) of coconut milk (subtract 6 tbsps. for topping)
5 eggs
1/2 cup of brown sugar
1-2 cups strips of young coconut meat (or 1 jar of drained macapuno strings or a pack of thawed frozen shredded young coconut)

Topping:
remaining coco lopez (7-oz)
6 tbsp condensed milk
6 tbsp coconut milk
2 egg yolks

Instructions:
Blend all ingredients well and pour into a 14x10 baking dish (preferably lined with cleaned and dried banana leaves brushed with butter). Bake at 350 deg F for 40 minutes or until just set.

Meanwhile, prepare topping by blending well all the ingredients.

Increase heat to 400 and pour topping. Bake an additional 15-20 minutes or until topping is brown and bubbly. Watch closely so it does not burn.

Cool completely before cutting into squares.

EDITED:
The following is a recipe that my sis and I used when I was there in Canada on a two-week visit:
Recipe ng cassava:
1/2 cup butter,melted (123 grams)
3 eggs
1 3/4 cups sugar
1 cup evap milk
3/4 cup condensed milk
3/4 c. coconut milk or evaporated milk
1 cup buko or 1/2 cup Macapuno preserved
5 cups frozen cassava, grated (1kilo) Topping:
3/4 cup coconut milk (use kakang-gata)or evaporated milk mix with 3/4 cup condensed milk Grated quick melt cheese

Procedure:
Mix all ingredients(base). POUR ON 9x13x2" lined baking pan, butered and lined with aluminum foil pan. Bake for 40 mins at 350 degrees F oven. Remove from the oven and pour topping. Bake again for 20 mins or until golden brown.
To attain a darker topping, broil for 3-4 mins or use a blow torch.

And the following is another recipe by my friend Fe -
4 c. grated cassava
1 can (12-oz) evaporated milk
1 can(14-os) coconut milk
1 can(14-oz)  condensed milk
2 cups young coconut

TOPPING:
1 can (12-oz) evaporated milk
1 can(14-oz) coconut milk
1 can (14-oz) condensed milk
2-4 TBSP flour
6 egg yolks
Bring to boil then pour to cassava cake
Broil for 5 minute or until brown

A More Special,Easy and Quick Pichi-Pichi Espesyal Using Microwave

I posted before a recipe for
From pichi-pichi
pichi-pichi espesyal using the traditional method of steaming. My long-time blogger friend JMom made a post using microwave (isn't that kewl?). So, with my hosting of Filipino Christmas party yesterday, I prepared pichi-pichi using the microwave. Basing on some comments at JMom's post, I tried adding pandan essence (actually, it was McCormick Buco Pandan Essence; thanks to Deb for sending me several bottles). What makes it more special? I used buko water instead of plain water.

From buko

I bought several young coconuts from hannaford to use for cassava cake. Out of the 4 I bought, 3 had the right chewy consistency of young coconut perfect for salads or buko pie or cassava cake. One was too young it had the mala-uhog consistency. The boys are in love with buko water and they asked if they could have some; of course I allowed them to. But as I was reading JMom's post and the idea of using buko water crossed by mind, I immediately stopped them and measured out 2 cups (my earlier steamed pichi recipe called for 2 cups water to 1 cup cassava and 1 cup sugar; JMom's recipe called for 1:1:1 ratio). So I used 2 cups buko water, 1 cup grated cassava, and 1 cup sugar. I knew the result would be very wobbly and quite soft, but that's how I really want it so it will still be soft even after chilling.
From pichi-pichi

Ingredients:
1 cup grated cassava
2 cups coconut water
1 cup sugar
several drops of buco pandan essence (McCormick)

Instructions:
Blend everything well in an 8x8 or 9x9 microwavable dish. Microwave for 1 minute on high, stir with a wire whisk, microwave and stir repeatedly every 30 seconds until it becomes like soft paste (remember, this will continue to thicken as it cools down). I probably did this repeatedly 4-5 times, adding more buco pandan
essence until I reached my desired color. I left it for a while to cool down before I took the hot dish out and let it cool completely. Meanwhile, I asked my older son to open the coconut (the mature one,as opposed to young coconut), then my younger son to grate it. (See my primitive coconut grater here.)

Using a
From pichi-pichi
cookie scoop, I then rolled in grated coconut to coat each piece. I did buy sesame seeds upon seeing some suggestions from JMom's post, but opted to just serve it the traditional way. Only 3 pieces were left at the end of the day. My kids were leery of the greenish color, but I explained to them that the same color reminds us Filipinos of special buko-pandan salad (I tasted this in PI prepared by one of the midwives where she used the buco water boiled with pandan leaves to make runny green-colored gelatin and mixed with strips of soft buco, blocks of unflavored
green gelatin and condensed milk. It was so good!)

Now you wonder what I did with the buko flesh/young meat? I cut them in pieces and froze, then used for special cassava cake once I was ready to make it. (I had to restrain myself and the kids from eating them all!)

Tuesday, November 25, 2008

Coconut-Cinnamon Rolls & Pan de Coco-Cinni

This post is especially dedicated to Susan of Guam, who sent me an email yesterday about MY pan de coco recipe...She is one of those who give me inspiration.

Okay, here's the recipe for my Coconut-Cinnamon Rolls
From Coconut-cinnamon rolls
that made my husband close his eyes savoring his bite as he taste-tested this the night I baked them. I guarantee you this is gonna be a hit to any cinnamon and coconut lover.

Ingredients:

Prepared dough (I used half of my buttery ensaymada dough for two logs)

Mix and put in the fridge overnight -
8-oz grated coconut (that's about 1 cup packed?)
1 cup white sugar
1 cup packed brown sugar

Add to the above mixture the following prior to filling the dough:
2 tbsp ground cinnamon (you may add up to 4 tbsp depending on how cinn-y you want it)
5 tbsp flour

2 tbsp milk to brush on dough prior to filling

Directions (the slideshow is pretty much self-explanatory:

Prepare filling.
Roll dough to about 8x 13 in; make sure you sprinkle flour on the countertop and on your rolling pin. The dough gets stickier as it stays in room temp.
Brush milk onto the dough. Spread the filling thinly. Spare the edges that should make the seam.
Roll tightly into a log. You may have to use the dough cutter (dipped occasionally into a mound of flour) to lift up the dough as you roll.
Cut at 1-inch intervals using dough cutter (wipe the blade before every slice). Fix the roundness of the cut piece with your fingers before you place onto a greased pan.
Let rise for one hour inside the oven warmed by "baking" for 1 minute then turned off.
Take out of the oven; start heating up the oven for real baking at 350 deg F.
bake for 15-20 mins or until the middle dough is browned.
Loosen edges from the pan and invert onto a plate to remove.
Place on a cooling wire rack. If not eating right away, cool completely and wrap in plastic. May store at room temp for up to 3 days. (I guarantee you this is better than store-bought canned cinnamon rolls!).

Basically the same recipe for Pan de Coco-Cinni --

Ingredients:

Prepared dough (I used 1/4 of my buttery ensaymada dough)
Remaining filling (not sure how much was there; probably a cup)
Egg white for glaze

Instructions:
Cut dough into pieces (I cut them just so I could barely close my hand around each piece- yields pieces that are quite big one can fill you up quickly)
Flatten to disks.
Put about 1 tbsp filling at the center. Fold over the edges to seal.
Flatten the pieces. Place on greased baking sheet.
Bake at 350 deg F for 20 minutes or until browned to your liking (I should have baked this at 400 to bake at 12 minutes but since I baked this along with the coco-cinnamon roll, I used 350. End product seems too light (and uncooked) to my eyes, but actually they are done. My older son can eat two of these at a time.

I think I am gonna submit my coconut-cinnamon roll recipe to a baking contest...huwag nyo ako unahan/agawan...:)

Monday, July 07, 2008

Macapuno (Coconut sport strings) Ice Cream


I looked for a recipe for coconut ice cream just to get an idea of how I should tweak it to make it more coconut-ty. Got the original recipe from allrecipes.com and below is my revised recipe.

Before I made this, I asked my MIL and SIL to try the macapuno. They were surprised to find that coconut can be so tender!!! They are used to coconut being chewy, and they are not really a big fan of coconut. But I think I have converted them...Will let them taste this one as soon as I get the time to bring them some.

My husband, as usual, was so-so with the macapuno. He still prefers the Old-fashioned Vanilla Ice Cream, which I made earlier, for our celebration of July 4th.

A note to Debbie:
My sis in Pinas could not find a sorbetero willing to share the recipe for dirty ice cream. I hope you will give this one a try. My Pinay friends definitely rave over this.

Ingredients:

1 cup coconut premium milk (I use Thai brand)
1 cup milk
1/2 tsp salt
2 (14-oz) cans cream of coconut (I use Lopez brand; available in the alcohol section of Hannaford)
3 cups heavy cream
1 jar of macapuno (coconut sport strings; available at Asian/Filipino stores)
Buko pandan flavor (optional)


Macapuno

Buko Pandan Essence


Instructions:

1. Scald milk and coconut milk plus salt over low heat.
2. Remove from heat and add heavy cream and cream of coconut.
3. Chill for at least 4 hours.
4. Freeze using an ice cream maker. (Mine is Rival.)
5. When done, immediately stir in macapuno. (Optional: Add several drops of buko pandan. That's the greenish ice cream in the picture. Personally, I like the plain one.)
6. Freeze overnight. (You might have to stir every 30 minutes or so for the first 4 hours to make sure the macapuno is distributed evenly.)
7. Optional garnishings: additional macapuno, kaong, or nata de coco (available in Asian stores).

Thursday, July 03, 2008

My Bibingka Cake was featured on GMA-7's 100% Pinoy (Fusion Desserts)


I seldom blog nowadays (I feel guilty about it) because I have been very busy, especially in the most recent months with a skin allergy that I have been suffering from for two months now (better now and almost back to normal), plus the recent change in work (from rehab dept to ER).

But recently I was contacted by Ces because GMA-7 wanted to feature my fusion dessert bibingka cake on their 100% Pinoy segment on Fusion Desserts (they needed a foodblogger based in Manila to re-create my recipe as well, and Ces asked for my permission. Needless to say, it did not really take a lot of convincing on her part. I was thrilled, and ChefCK, who agreed to appear on the TV in re-creating my recipe, is a Culinary Institute of America graduate and is going to open a school in the Philippines. I am just honored!

Here's a youtube video of the said segment:


Thanks to Ces, ChefCK, and GMA-7!

Now that I have made this post, this reminds me that I have not actually posted about publications that have also featured my online kusina. Thanks to Catherine Bolandrina of planetphilippines for featuring me on the 09-14-07 issue of Planet Philippines; the article was entitled "Pinay Can Cook!"

Another publication that got interested was Hannaford's "fresh" Magazine, which they publish every two months and which shoppers could get for free with purchases of at least $25. I "got" their attention when I joined a contest for recipes using any of their "Inspirations" line-up (I did not win, but they got interested as to how I, a Filipina, was adapting in an American kitchen, especially in a rural area where the nearest Filipino/Asian store is a two-hour drive). The article appeared on the May-June 2007 issue under the segment "Food Lover's Favorite", and was entitled "When in Maine..." with a photo insert that mistakenly featured the face of a friend who was with me in the photo that I submitted (I did not bother to correct them). My recipes featured were the beef pares, spinach-haddock laing, and leche flan (links are from the hannaford website). I have not featured my laing on my blog, but I submitted the recipe per their request. They changed some ingredients in the recipes they asked for, with my permission, for them to re-create the recipes to what they thought tailored more to the American palates, and which would also reflect more their healthy approach to food (e.g., changing the premium coconut milk to a light one). Some of my co-workers back in the rehab department saw this article and said, "I did not know you were that popular!" I almost choked! Some of my newfound online friends also got in touch with me through email because of this article.

Now I wonder if I will have additional visitors to my site because of this??? Well, I gotta post more often! But I am foreseeing more posts on quick-fix types of meals, using more of ready mixes (they are my best friends nowadays).


Wednesday, November 29, 2006

Make Biodiesel out of Used Cooking Oil

I had been very lazy to blog about food lately, and I have not even started packing for my trip to Canada!

But last night, I somehow got into reading about biofuel and biodiesel.

We all have heard about global warming...many of us want to contribute to delaying if not preventing its catastrophic effects.

I read about how the Philippines has been making biodiesel and how it targets to be a major supplier to developed countries...As usual and as I expected, there is a huge manufacturing company involved, making use of coconut oil. Of course, this does minimal to help alleviate poverty, and while it provides job opportunities for coconut farmers, it does not address the potential of recycling used cooking oil and EMPOWERING the ordinary people. I read in a forum about some Filipinos already homebrewing it, but the latest was 2004. Was there a move by the government to suppress household production of biodiesel?

I PLAN TO SOMEDAY MAKE BIODIESEL out of used cooking oil collected from nearby restaurants (if I can get them for free). But, thinking of how ubiquitous carinderias, eateries, and small restaurants in the Philippines are, I could not help but post about it here. For a start, it will be a very good science project for high school students, not only because of the issue of recycling, but also looking into the issues of alternative fuels and less carbon emission into the environment to lessen global warming, use of resources naturally abundant in the Philippines, and empowering even the common household in my beloved country in that they, too, can lessen their need for fossil fuels and can even start generating income from this (if government allows).

Why I want the high school science project as a starting point -- the high school students usually have the right chemistry background and guidance; they can easily request to "haul away for free" the waste cooking oil used by restaurants (who would be glad to get rid of the "waste" without having to pay for disposal, and who would shy away from charging the students a fee); and they can easily generate funds through solicitation letters for other materials/equipment they would need to make the project.

The diagram for the process is shown here. The biodieselcommunity.org provides a very comprehensive resource for those who want to make it on a small scale (as small as a liter) or on a larger scale.

The small batch making is simple enough to be carried out using ordinary materials (and that's how I plan to start). Families who wish to make it on a larger scale (but still small compared to the big oil manufacturers) might find use of the diagram of the "Appleseed Processor found here (needs some engineering/plumbing know-how - I am expecting that a lot of scientifically-inclined Filipino HS students will find this interesting). Negotiating for Waste Vegetable Oil (WVO) is a very interesting read for gathering the most important raw material, but this will be needed only if families start making their own biodiesel out of WVO from nearby restaurants.

For the common household who want to experiment first to come up with one liter of biodiesel, here is a recipe, from the "World Famous Dr. Pepper Technique." (Dr. Pepper is the soda brand of the bottle they used in this process.)

World Famous DR Pepper Technique (Pat Pend)
The idea for the Dr Pepper Technique came about one day many years ago (it seems) when I was trying to figure out an inexpensive way of making my first few test batches of biodiesel.

I will assume that if you are reading this for the information then you are new to Biodiesel making, so just a few words of caution:

THESE ARE DANGEROUS/POISONOUS CHEMICALS.
COMMON SENSE MUST BE USED.
YOU ARE RESPONSIBLE FOR YOUR ACTIONS AND THE SAFETY OF YOURSELF AND EVERYONE/EVERYTHING AROUND YOU.


METHANOL IS A POISON WHICH CAN BE ABSORBED THROUGH YOUR SKIN, BY INHILATION, OR CONSUMPTION.
METHANOL CAN CAUSE BLINDNESS AND DEATH.
METHANOL IS AS FLAMMABLE AS GASOLINE/PETROL.
CARTRIDGE RESPIRATORS DO NOT WORK WITH METHANOL.

SODIUM HYDROXIDE (Caustic soda, NaOH, lye) can cause severe burns and death. wash off with water.

Long-sleve shirt, full shoes and trousers are recommended, no shorts or sandals.
Wear chemical proof gloves, apron, and eye protection.
Always have running water available to wash off any splashes.
DO NOT INHALE ANY VAPOURS!.


Now that I have managed to scare you, just realize that Methanol is the fuel used in most Model airplanes. In the USA methanol is available in small quantities as HEET brand fuel line antifreeze (Yellow bottle)
Lye is an every-day drain cleaner.
Both are freely available in most large shopping centres.


MATERIALS REQUIRED
1 litre oil- new or used
NaOH (lye/ caustic soda), at least 6g. Used as a drain cleaner and can often be found next to the Drano.
Methanol at least 250ml. HEET® Gas- Line Antifreeze in the yellow bottle is methanol and readly available in most auto supply stores in the USA.

EQUIPMENT REQUIRED
1- 2 litre (1.9 in US) Dr Pepper Bottle in sound condition with tight fitting top and dry inside.

1-measuring cup to measure out 250ml methanol
1-scales to measure 6- 7g NaOH
OR
1 teaspoon measure metric or imperial.

1- container to mix the methanol and NaOH in which makes methoxide.

1- Funnel

THE TECHNIQUE:

OIL PREPERATION

If using waste oil, take one litre and heat to at least 120 deg c to remove all water. If water is present the oil will spit and pop and carry on. If there is a lot of water this could get very violent, so be careful.
Once the water is gone (Oil becomes calm and there is no more spitting and popping) let the oil cool.

If you are using new oil from the bottle it should have no water in it, so in this case just heat to 55deg c when you are ready to mix.

MAKING THE METHOXIDE
WARNING: METHOXIDE IS A POISON!
DO NOT BREATH VAPORS.
WASH OFF ANY SPLASHES.
DO NOT MIX THE METHOXIDE IN A PLASTIC SOFT DRINK BOTTLE AS THE NaOH ATTACKS THE PLASTIC AND YOU WILL QUICKLY BE SHAKING A BOTTLE FULL OF HOLES WITH METHOXIDE GOING EVERYWHERE.

While the oil is cooling mix your methanol and NaOH(lye) to form the methoxide.
Use 250ml of methanol. This is more methanol than most people use but will help insure a successful first batch.
If you are using new oil this will require 5g (about half a Teaspoon) NaOH.
For used oil, you should do a titration to determine the correct amount of NaOH to use.
However, if you do not have the materials to do a titration, just use the imperical quantity of about 7g NaOH as this amount almost always achieves seperation. If you do not have a scales, this is about 1 level teaspoon measure (metric or imperial).

NaOH and Methanol do not readily mix, so if you are doing it by hand a bit of time and patience is required. Don't sniff the fumes. CARTRIDGE RESPIRATORS DO NOT WORK WITH METHANOL
For quickest mixing, start with the methanol at JUST body temp (not warm). As you mix, the temp will increase substantially. This is normal. Make sure ALL the NaOH (lye) is disolved. This may take 10 minutes or more.
Hand mixing can be accomplished using the back of a spoon to stir/crush the NaOH granules ina coffee cup or glass; OR placing methanol/NaOH in a glass bottle with a tight fitting top and shaking/ swirling until ALL NaOH is disolved.
After ALL the NaOH has disolved, top up to 250ml with fresh methanol, as there may be some evaporation during mixing.

MAKING THE BIODIESEL!
When the Oil's temp has dropped to 60 deg c or a bit less, using a funnel, pour the litre of oil into a DRY 2 litre Dr Pepper bottle (in a pinch any other brand of bottle will do).
Take the mixture of methanol/NaOH (commonly called methoxide on this forum) and pour on top of the oil using the same funnel.
Remove funnel.
Screw the top down TIGHT onto the bottle.
Shake vigerously for about ten seconds/ 40 good shakes.
NO appreciable pressure is generated during this mixing.

Now place the bottle on a table.
If you were using WVO you will probably observe the oil change colour from a "Light Chocolate milk to a rich, darker brown."
Then, as if by magic, within 10 minutes the by-product (commonly refered to as glycerine on this forum) starts to settle out and form an increasing layer on the bottom of the bottle.
Be sure to notice that you can see a very definate, slowly sinking line towards the top of the Biodiesel as the glycerine slowly settles.
Within an hour, most of the glycerine will be settled out.
This is referred to as seperation.
NOTE: Neutral has shown through GC tests that although one 10 second shake produces very useable Biodiesel it is in fact not ASTM conversion standard.
To produce ASTM conversion biodiesel requires titration and a further four- 5 second shakes over the space of an hour.


If you used New Oil, the colour change is not nearly as great and you may have problems seeing much of a colour change at all.

You should now have a bottle containing lighter coloured biodiesel on top of a layer of darker glycerine.
If you reacted New Oil the glycerine layer on the bottom will not be much darker than the oil you started with and the biodiesel will usually be very light in colour.
The biodiesel will be very cloudy, and it will take a day or two more for it to clear.

If it does not work out come onto the forum and see if anyone can figure out what went wrong.

And that is all there is to it. Only a little magic is involved.

Remember, after producing in excess of 53,459 litres of biodiesel in any calander year using this process, please make royality check out to Tilly From Paradise and send it to me through your favourite Numbered Swiss bank account.

CARTRIDGE RESPIRATORS DO NOT WORK WITH METHANOL

A few cautions: DON'T mix the methanol and NaOH (lye) in a plastic bottle as NaOH attacks some types of plastic. Once mixed it is quite acceptable to mix your biodiesel in a Dr Pepper plastic bottle.
Do NOT store unused methoxide in plastic bottles. Some plastic will degrade over time when in contact with methoxide.

DO NOT allow any WATER into any steps of this procedure.

Methanol boils at about 65 deg c. DO NOT mix until the oil is below 60 deg c.

Again, these are dangerous chemicals and care is necessary, especially if there are children in your home.

YOU ARE RESPONSIBLE FOR YOUR ACTIONS AND YOUR SAFETY AND THE SAFETY OF EVERYONE AROUND YOU.

I have Up-Sized the Dr Pepper technique by using a 20 litre plastic drum (longish and skinny) and make 14 litre batches. I simply lay the drum on a wooden "cradle" and place the center of the cradle on a pipe and rock back and forth for 3 or 4 minutes.
I then decant the mixture into a "finishing" container and so am ready to process another 14 litres straight away.


Now that you have a Litre of Finest biodiesel you will probably wish to wash it and this is quite easily accomplished using the World Famous Dr Pepper Wash Technique (Pat Pend).


So now that is added to my list of "Want-To-Do" in the future. I will start with producing a liter, then, if I manage to convince my husband to build me the Appleseed Processor, move on to a higher scale of production, at least for personal consumption, mainly heating our house during winter.

And yes, I am a wannabe homesteader, who wants to take part in the "Sustainable Living" and "Voluntary Simplicity" movement, who wishes to be "off the grid," and who does not share the interests of those whose dreams include "world travel" and whose top hobby is shopping (I am so against commercialism of Christmas and Halloween and other Holidays). I may sound so foreign to a lot of Filipinas now, but I know I am not alone (hi stef!) in this.

Friday, November 03, 2006

Pichi-Pichi Espesyal

UPDATE as of 12-22-08:
A more special pichi-pichi recipe can be found here.

I would have tried stel's recipe, but I did not list down things that I should have gotten from the Asian store when my friend Anna asked if I wanted to go with her. So I forgot to look for the lye water and pandan essence. Good thing, in the comments section, Lani gave her recipe using just the grated cassava, sugar and water. It was very good! Although, I would have still preferred it with some pandan essence. (tita stel, nagpaparamdam po...

Salamat, tita Lani, for the recipe!


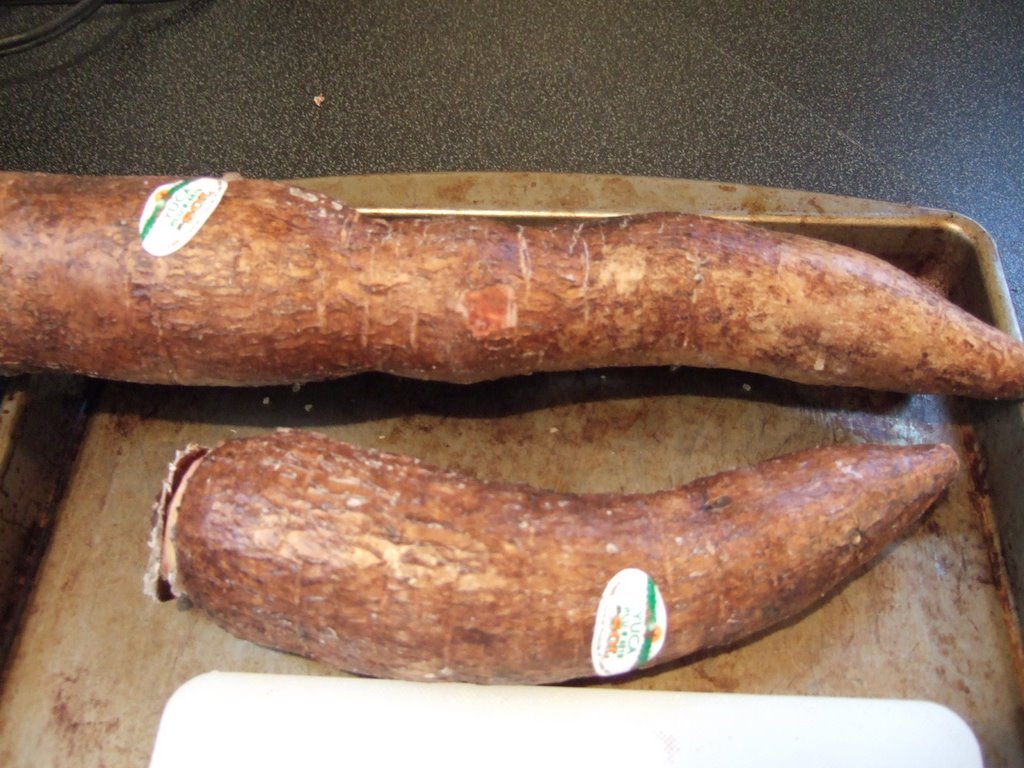
We Filipinos use cassava, but I cannot find any cassava here. Yucca is a good substitute. (I typed that on the search engine, and it showed plants different from what I have come to know as "kamoteng-kahoy." I then realized they are not one and the same.). It was my first time to buy yucca from the Asian store (have not seen it sold in the nearest grocery store), and I was quite surprised that it seemed to have been coated with wax...or is it a natural coating of dried up sap?

INGREDIENTS:

1 cup cassava [or yucca], grated
1 cup sugar
2 cups water
1 coconut, grated

PROCEDURE:
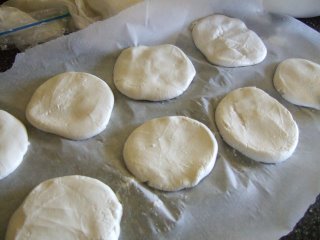
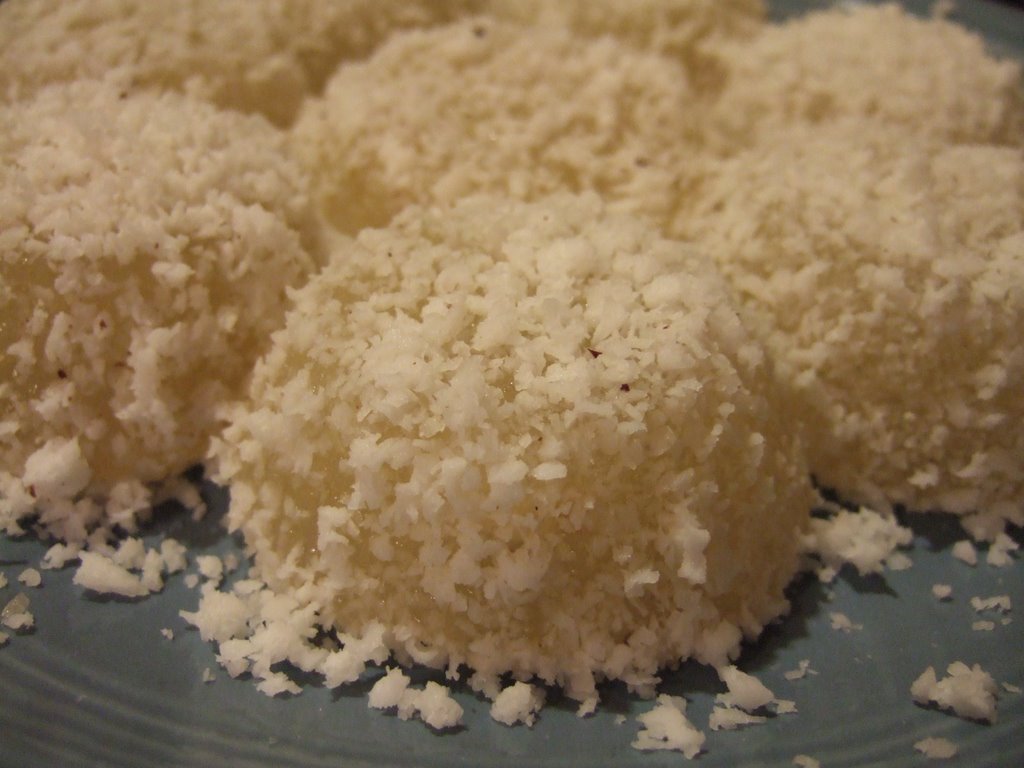
Squeeze out juice of cassava [or yucca]using flour sack. Place squeezed cassava in pan with sugar and water. Cook. Stir constantly 10 minutes or until mixture coats spoon. Transfer cooked mixture on silicone muffin cups placed on the steamer pan and steam 10 minutes. Remove from muffin cups, let cool, then coat in grated coconut.

(I love these silicone muffin cups for steaming purposes! Muffin pan just won't fit in the steamer, and these solved that problem. Now I can also experiment on making puto, and I might get big cups also for steamed leche flan.)

My sons and I loved them, and my Filipina friends did, too! Of course, they asked for the recipe and I generously (ahem!) shared it (salamat sa mga foodbloggers!) My Sdaughter loved coating them in the grated coconut, but would not taste them (pretty much like her father). That same day I just had to make a second batch. Refrigerates and microwaves (30 sec) pretty good, too! Perfect munchkin for after-school!

I am still waiting for the day when I will have my pandan essence.


Thursday, September 28, 2006

Pan de Coco

Yesterday my Filipina friends and I were scheduled (or so I thought) to have a lunchdate at the house of another Filipina, but we decided to meet here at my home before going there. I was the first person called by that hostess, and I was tasked to inform the others about it.

So we went...and our hostess Vengie (in blue shirt, sandwiched by me in yellow and Fe in red) was pleasantly surprised to see us because we were supposed to meet NEXT WEDNESDAY...Ooops! Sorry! (blush!) Though surprised, since she was not able to attend our picnic last August at Ana's (in blue tank top) tabing-ilog, she was pleased nonetheless, although apologetic that she did not cook anything. No problem, because I bought a pan (last batch) of savory chicken feet, some palitaw (which she missed that day I made them the first time), and some pan de coco (one for each of us). Fe brought Alaskan salmon (caught by her husband), and Daisy (the one who holds a baby) brought veggies, rice and fried fish, which we ate with tomato-soy sauce dip. Ana was exempted because of her two babies to take care of.

Anyway, I was not planning to make pan de coco. The night before, I was debating on which one to prepare: palitaw or pan de coco. I thought palitaw was easier to make, so I made those, about 15 pieces, but had excess coconut (about 7 heaping tablespoons), so I ended up planning to bake them the next morning (Wednesday). I used the Parker House Rolls recipe (same dough I use for siopao) was able to make only 9 pieces, and I left the rest of the dough plain. Fe came to my house first, so I offered it, with a warning to have only one ("Tig-iisa lang kayo!"). When she finished it, she was looking longingly at the rest. "Bitin ba?" (Do you want more?) "Bakit kasi konti lang ginawa mo?" (Why did you make only a few?) You know the story...Hehe...

Here's how:

INGREDIENTS:
Prepared dough (any sweet bread recipe; I used same dough as in siopao, but I have also tried Buttery Sweet Bread recipe using bread machine)
grated coconut (either bought frozen, or grate your own; see my palitaw post in old kusina)
white or light brown sugar (Note: I had about 2-1/2 cups of mixed coconut-sugar, proportion of 1 part coconut:2 parts sugar)

Buttery Sweet Bread recipe (dough cycle only; I used 1-1/2lb loaf to make 21 pcs)-

1/2 cup milk
1/3 cup water
1 large egg
1/4 cup butter or margarine, cut up
1 tsp salt
3-1/3 cup bread flour
1/4 cup sugar
2 tsp BM yeast

To prepare Buttery Sweet Bread dough:
Warm all liquid ingredients to room temp (80-100 deg F) and place in BM pan. Then place all dry ingredients. Run on dough cycle (about 1.5 hrs)

INSTRUCTIONS:
The night before you serve, mix grated coconut with granulated sugar (white or light brown), 1:2 ratio (i.e., I had 7 heaping tbsp of grated coconut which I mixed with 14 exact tbsp (not heaping) of sugar (you may want to taste first then adjust; really , it is up to you). Let this sit in a covered container in the fridge, so that it draws out moisture from the coconut and creates a wonderful caramel-y coconut-y taste. If you plan to bake right away, at least prepare this before your dough so it will sit for sometime before baking. Also, prepare the dough (you may want to use Parker House Rolls; see my beef asado siopao post) and leave it in the fridge overnight. You may also use the Buttery Sweet Bread recipe as above on the day you are going to bake.

Pinch off dough about size of pingpong balls and place on greased baking sheet to let rise for about 10 minutes, covered with greased plastic.

Proceed with filling the buns the same way you would the siopao. Place on parchment paper-lined baking pan. FLATTEN a bit. See slide show.

Allow the filled buns to rise for 30 minutes, in a warm place free of draft (on top of a flat stove covered with damp flour sack or greased cling wrap, or inside a warm oven).

Bake in 400 deg F for 12-15 minutes (it browns quickly). Brush with softened butter as soon as they come out. Let cool about 1-2 minutes before eating, or about 10 minutes those you will not consume right away, then transfer to wire rack to cool completely before storing in ziploc bags.


When I removed these from the oven, some of the coco-caramel oozed out of the buns and made a somewhat chewy caramel film on the paper, which I detached and savored. Yum!

Vengie, the hostess, asked me to bring pan de coco next week (the real schedule), as she has some Filipino friends who will be coming over from NY. Oh, and she requested to have some yeast rolls baking session with me in the near future (I feel flattered and honored!). She loves baking muffins and cakes, but does not know how to deal with yeast rolls. I love yeast rolls, because I grew up with such (typical ordinary) bakery goodies in PI. Back then, cakes and muffins were more expensive and bought only from SM or some specialty bakeshops, and what I had for ordinary snacks were mostly yeast rolls and breads, in the likes of pan de sal, pan de coco, monay, patigas, "tasty" (American pan bread), spanish bread, ensaymada, pan de regla (we at my father's bakery called them "pula"), etc., and I was lucky to have had any of these fresh and hot out of the oven before they even made it to the display area of our store. Now, I am getting more and more comfortable baking them, and loving the nostalgic trip as I knead and shape the dough. My husband happens to love yeast rolls as well, so although it is quite laborious and more time-consuming than muffins and cakes, I do enjoy making them.

UPDATE: 11-24-08
A very inspiring email was sent to me:
Hi Manang,
Hafa Adai from the island of Guam U.S.A!

Isa ako sa mga taga-hanga mo,mahilig din akong magluto pero di sing galing mo.
Marami na ko na-try na recipes online pero most of them ay palpak.I tried your pan de coco recipe at ako ay humanga pati asawa ko kasi perfect talaga.Mula ngayon site mo na lang pagtitiwalaan ko at gusto ko try lahat nga recpes mo.

Hanga ako sa blog mo ,sa slide show ,recipes at sipag mo.Superwoman ka yata ah!Pano mo nmn nagagawa lahat yan!!!Hanga ako talaga.You're the best.

People like you give me the motivation...Thanks a bunch for the kind words!

Saturday, June 24, 2006

Palitaw

This is my second entry for the LP 11.

Like I said in my most recent post, palitaw is one Filipino snack item that, as a child bored during summer, I learned to make through the recipe pages of Liwayway Magazine. I can't remember whose column it was, but I liked the recipes featured there. The original recipe called for galapong. I had no idea then what that was, but I asked my mother for money so I could try making this, and off I trekked to the wet market one sunny afternoon when most market vendors were taking their nap. Galapong turned out to be sticky rice soaked overnight (at least 8 hours), then ground as soon as there was a buyer. Once ground, it should be consumed immediately; otherwise it will spoil (panis). I have always loved to make this kakanin because of the ease of finding the ingredients and the simple process of making them. It was a bit of a challenge, though, now that I am here in the US. It took quite some time for me to finally come up with substitutes and the tools.
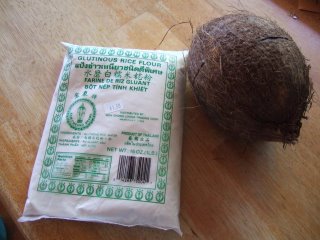
First, I tried to make my own galapong, but I did not know the proper proportion of water to rice, and my first attempt was not successful, I ended up throwing the rice. I was discouraged for a while, until I had an epiphany of using sticky rice flour and water instead! So now I had to start with these two basic ingredients: coconut and sticky sweet rice flour.

When it comes to the freshly grated coconut, I knew matured coconuts were available in Hannaford. I bought one several months ago and tried to grate that with fork. I got tired and swore 99% of the time. I did not want to do that again.
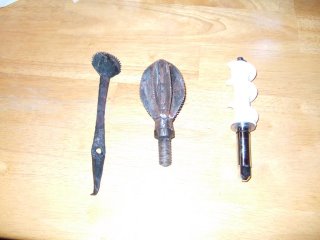
But when my friend Ana went on a vacation to the Philippines, I requested that she buy me a coconut grater. She did get me one for manual grating (left most in this photo), one as an attachment to a machine (middle one). I am hoping hubby could turn it like the Kitchen Aid attachment I have for grinding (right most). But until he could find the time to do that, I will content myself with the manual tool.
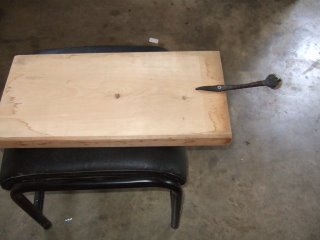
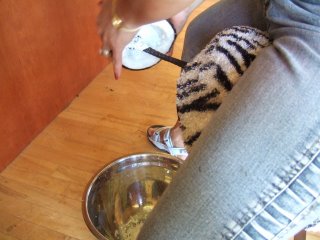
I attached it to a small piece of plank, which I could sit upon when placed on a bench or a chair or an ottoman.

This is my friend Fe doing the grating when we had a lunch as a welcome to Ana.
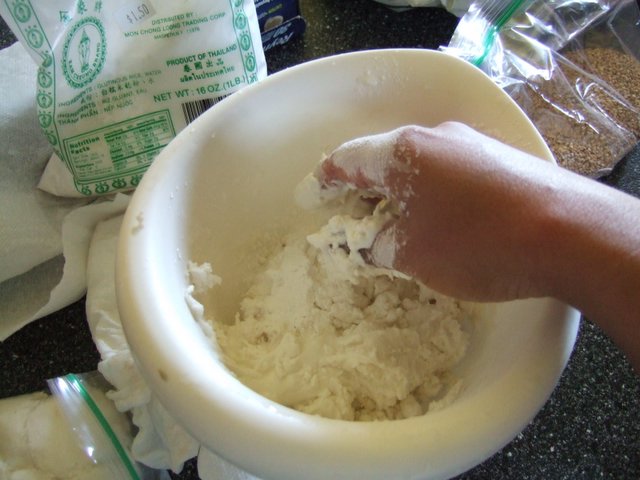
Now, going to the sticky rice patties, first, boil water in a big pot (wider than tall). While waiting for it to boil, prepare the patties by mixing cold water with some flour. I did it by approximating, I wanted to create a smooth dough, not mushy or super sticky, but not too dry. As soon as it is good to shape into balls, make the balls and flatten them into disks. Once the water is boiling briskly, drop these disks one by one, leaving enough space for each patty so they do not stick together.
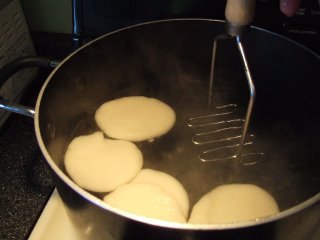
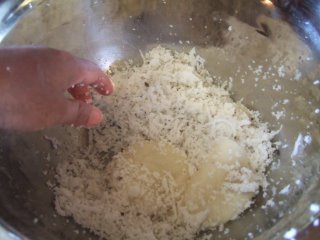
Once they come up to the surface/float (lumitaw sa ibabaw - hence, the name "palitaw"), scoop them out and let the excess water drip.

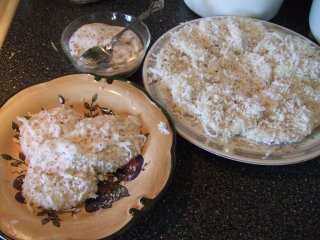
Roll each patty into the freshly grated coconut (I do not like using the dry coconut flakes), then lay on the plate, as illustrated in the first photo. Never add the sugar-sesame seed mixture as this will draw out the water and make it very wet, which will dissolve the sugar. Rather, serve the palitaw with the sugar-sesame in a separate bowl, to be added only once the palitaw pieces are on the eater's plate, to be consumed very soon.

How to prepare the sesame-sugar: toast/roast the sesame seeds (either white or brown are okay) on very low heat. If you are using the white, it will start popping, which heralds that it is almost ready. You must swirl or stir constantly so as not to burn. With the brown one, you just have to go by the smell. Let cool then add the sugar (1:1 proportion, or according to your preference).

I had enough leftover for each of the visitor to take home 3 pieces each (of course I had some too!) What to do with leftovers: Put in the fridge without the sugar-sesame. When you want to eat them, microwave for 30 seconds (if only one patty), then add the sugar-sesame.

My kids still have to develop the taste for this dessert/snack. I plan to serve this during Pinoys' Christmas get together or during my birthday to serve to my in-laws.

I would love to learn how to make pichi-pichi as well (another favorite of mine), and I hope someone can share the how-to's. Maybe it is already featured in past LPs. I gotta have the time to read them...

I also want to be able to find coconut juice (the real coconut juice, even if it is canned) with some young coconut bits so I can make buko-pandan ice candy or drink, and also buko-brown beans popsicle. Any such info?

UPDATE:
JMom posted an easy recipe on pichi-pichi (Yehey!!!), found here.

Thursday, June 24, 2004

Coconut Milk and Coconut Oil - is it healthy or unhealthy

A reader left a comment in one of my posts:

"It's just like making curry, where a fair amount of coconut oil is used. This is very unhealthy."
I am not sure whether the statement was in relation to his liver ailment or not, but I have my beliefs about the coconut oil that I strongly hold on to.

I came from a country where coconut is so common. It has been touted as the "Tree of Life" ever since I was in elementary school. And before any non-Filipino (or even (educated Filipinos) criticize coconut oil in front of me (who is a big fan of it), I would want him to scrutinize the physique of those who use it (mainly Asians) and those who prefer to use the polyunsaturated oils (like olive oil) in the belief that the latter is healthier.(Americans used to be slim, the increase in obesity happened only in the most recent years, and this is not only traceable to their diet, but also a significant change in their lifestyle. Obesity is now a big problem in the US. )

I vividly remember a teacher of mine in Organic Chemistry when I was in my pre-med days in UP Diliman, who, during a time that we were making hand-made soap using coconut oil, mentioned that the reason why olive oil was preferred in making those popular soaps manufactured by multinational companies was not because it was inferior; rather, resorting to coconut oil would economically benefit more the local (Filipino) industries, and kill the olive oil industry in that parent company.

So with all the marketing strategies done by all the big companies to promote their products to compete globally, no wonder there is an abundance of researches (mostly funded by the companies themselves) that "scientifically prove" that saturated fats (like coconut and soybean oil) are bad for the health and increase the risk for the development of cardiovascular diseases.

So when it comes to fat, I would like to reiterate my stand: eat the minimal recommended amount of 5% (some recommend up to 30%) of your daily TCR.

What happens when we eat the (whatever kind of )fat is that it has to be emulsified by bile salts (product of liver, stored in gall bladder, released in response to the presence of fat/oil in the gut), in order to be acted upon by digestive enzymes and finally run in the bloodstream to be distributed in the liver and other tissues for storage or for energy production. Click here for more information on fat metabolism (choose Fatty Acid Oxidation and Cholesterol and Bile Metabolism).

I read and read a lot of publications online about the coconut oil because my intuition and the lack of solid and direct evidence linking it (saturated fats in general) to atherogenesis left me uncomfortable with all that propaganda against it. I just feel that the coconut industry (of Asians) is at a disadvantage in the global competition with the Western companies primarily because of vigorous marketing by the latter.

I was finally appeased upon reading several articles, both by Filipinos and non-Filipinos:

COCONUT OIL IN HEALTH AND DISEASE: ITS AND MONOLAURIN'S POTENTIAL AS CURE FOR HIV/AIDS By Dr. Conrado S. Dayrit says

"...no evidence has ever been presented to prove that coconut oil causes coronary heart disease in humans. All the evidences presented have been in various species of animals who were given coconut oil alone without the necessary dose of essential fats or PUFA that should be given, just like the essential vitamins and minerals. On the contrary, the human epidemiologic evidence proves that coconut oil is safe. Coconut eating peoples like the Polynesians (Table V) and Filipinos (Fig. I) have low cholesterol, on the average, and very low incidence of heart disease.

Health and Nutritional Benefits from Coconut Oil: An Important Functional Food for the 21st Century by Mary Enig, Ph. D. says

It is important to realize that at that time (1960s) the edible oil industry in the United States seized the opportunity to promote its polyunsaturates. The industry did this by developing a health issue focusing on Key's anti-saturated fat bias. With the help of the edible oil industry lobbying in the United States, federal government dietary goals and guidelines were adopted incorporating this mistaken idea that consumption of saturated fat was causing heart disease. This anti-saturated fat issue became the agenda of government and private agencies in the US and to an extent in other parts of the world. This is the agenda that has had such a devastating effect on the coconut industry for the past decade. Throughout the 1960s, the 1970s, the 1980s, and the 1990s, the anti-saturated fat rhetoric increased in intensity.
and

There is another aspect to the coronary heart disease picture. This is related to the initiation of the atheromas that are reported to be blocking arteries. Recent research is suggestive that there is a causative role for the herpes virus and cytomegalovirus in the initial formation of atherosclerotic plaques and the recloging of arteries after angioplasty. (New York Times 1991) What is so interesting is that the herpes virus and cytomegalovirus are both inhibited by the antimicrobial lipid monolaurin; but monolaurin is not formed in the body unless there is a source of lauric acid in the diet. Thus, ironically enough, one could consider the recommendations to avoid coconut and other lauric oils as contributing to the increased incidence of coronary heart disease.
Coconut Oil: You Want a Food Loaded with Real Health Benefits? You Want Coconut Oil by Ray Peat, Ph.D., posted in Dr. Mercola's website also gives me enough reason to stick to my practice of using coconut milk and oil as often as possible.
This page on “The Tree of Life”: The Wonderful Health Benefits of Virgin Coconut Oil lists several articles that prove such claims on the wonders of the coconut oil, which comes from coconut milk, which is an extract of the coconut meat.

And I am posting this today because I am preparing my recipe page for Chicken Curry, and I have tried using the ingredients for that using beef as well. My husband loves these dishes.

And to further defend my affinity to coconut, despite my love for coconut oil and milk, and despite having delivered two kids already, I am definitely within the normal BMI category, far from being obese, my lipid levels are within normal. And I am sure a lot of Asians are, too.

Oh,...in addition, coconut oil is also good for massaging; coconut milk is very good in hair treatment (applied on hair for 30 minutes under a shower cap about once a month).

I have not changed my belief that coconut tree is the tree of life.
Custom Search