Showing posts with label summer. Show all posts

Wednesday, May 05, 2010

7-Up Citrus Pork Chop

Today I used our grill for the first time this year. Because I had been meaning to try this 7-Up Citrus Marinade on pork chops. I got the marinade from Hannaford sometime last winter (the 7-up caught my attention, since Pinoy style barbecues and even fried chicken are usually marinated or cooked with 7-up. Unfortunately, the fried chicken pre-cooked with 7-up was not well-accepted by hubby. He said it was too sweet.)

I had 8 pieces of pork chops. I marinated 6 pieces in this 7-Up Citrus Marinade for 1.5 hours (Meanwhile, I was transplanting seedlings that I bought from a greenhouse into hanging baskets). I left two pieces unmarinated just in case hubby would not like the marinated ones, just like he did not like the 7-up cooked fried chicken. These I just flavored with salt and pepper, basted with bacon drippings.

I fired up the grill (it's now officially summer in my book!), and cooked the chops, basting with bacon drippings from time to time until I was satisfied with the doneness (I just gauge by the looks...no thermometer, no timing).

Served them while hot...oriented hubby which ones were plain and the marinated. To my surprise, he tried both, and tried the marinated ones first, and loved it! Maybe because the flavor was more of citrus, and that the flavor did not overpower the chops (since they were marinated less than two hours). Then he had a plain one and liked it too...Maybe it was the bacon drippings used for basting...

What a satisfying meal on this hot summery spring day!


Monday, August 31, 2009

Snow Cone Syrups


I got this set of hawaiian shaved ice's snow cone syrups upon the kids' request...and guess what, the big boy (hubby) also likes it, cherry being his favorite flavor! Stepd's fave is the blue raspberry...I just ordered two sets of 3-flavor packs to replenish cherry and blue raspberry flavors.

Why hawaiian shaved ice brand? It got the best reviews on amazon.com...the other brands apparently are not packed with real flavors. We were not disappointed.

This set includes:
Banana
Watermelon
Root Beer
Lemon-Lime
Pina Colada
Grape
Cherry
Tiger's Blood (whatever that is!)
Blue Raspberry
Strawberry

UPDATE 9-5-09: During one pool party celebrating my older son's birthday, my kids had fun showing it off to friends and they all had a blast making their snow cones. Today, when celebrating his birthday with relatives, my SIL and her kids had fun making snow cones and asked me where I got the machine and the syrups. This is one of the best fun food stuff to make during summer!

Thursday, August 13, 2009

KNB: Icy Treats Snowcone and Slushie Maker

Host unlimited photos at slide.com for FREE!

As I said in my halo-halo post, my older son suggested we order a snowcone maker. So I searched amazon.com for snowcone maker, slushie maker, and ice shaver, and found some that reminded me of those I saw in some stalls in the Philippines.

The Paragon brand was very expensive, and yet I knew that it produces crushed ice too
chunky for me to consider for halo-halo, just a bit finer than the crushed ice my fridge makes. So on to the next...

I seriously considered the New Hawaiian Ice Shaver, because not only was it familiar (I saw it in action in one of the vendors in the Philippines), I also knew that the ice shavings produced by it was perfect for halo-halo. But when I placed it in my cart, the shipping cost was prohibitive! It was so heavy that the
S&H would have been a whooping $45! So I scratched it off...

Next I considered something made in Japan (because they make excellent blades), but the plastic body (of the pink one) seemed so flimsy that it reminded me of my sister's ice shaver when she was still in the Philippines, which when cranked threatened to fall apart. The gray one looked like metal, but the make was not specified and I did not dare try.

So I just checked out those that had high reviews, and settled for Hamilton Icy Treats after reading the negative reviews versus the positive reviews.

My very own experience with it? It definitely faster than my mandolin slicer-made shaved ice, and the only negative thing I can say about it is I have to pause and rearrange the ice so they don't stick together and get stuck that way. Otherwise, the gadget is sturdy for the purpose, the shaved ice has two settings - slushie (coarser) and snowcone (finer). Sometimes I just switch from one to the other just to dislodge the stuck ice and keep it going. The on and off switch is the cover itself (which I think is an excellent precaution to avoid cuts in children). And it is compact enough that it does not occupy too much countertop space (unlike if I bought the New Hawaiian brand).

But if I lived in Hawaii, I would have settled for that...

Tuesday, August 04, 2009

Mango Shake/Slushie


I don't really have a recipe. This is more like a slushie using a blender to crush the ice.

I used 2 mangoes (the red variety available in hannaford), about 2 cups of crushed ice (using pyrex glass measuring cup), enough water to make crushing easy (maybe about 1/2 to 1 cup), and about 1/4 cup of sugar (or to taste; just add some more if you feel like it).

I would have wanted to use the green mangoes if they were available but they are never available here...I had a taste of green mango shake back in the Philippines and was pleasantly surprised at the taste of it...tart vs sugary sweetness...it was sooo good!

Tuesday, July 21, 2009

Summer Nostalgic Tripping - Ube Ice Cream Sandwich


After a marathon at work last week, I baked pan de sal on the last night, because I was craving to have ube ice cream as filling in it! Yummy nostalgic food trip! (When I was a child, our family and the bakers would sometimes get this kind of tripping for freshly baked monay during summers.) Loved the contrast of hot and cold, crispy crust and melting ice cream....

I just wished someone else prepared it for me.... :( However, nakakaalis naman ng pagod after ko makain yung 2 pieces on this plate. Tsalap!

Thursday, July 16, 2009

Char-Broil Grill


My favorite cooking gadget for this season....


After we ourselves installed our pool, we have been enjoying bumming under the sun when weather permits.


When hubby bought this, I was busy cleaning up the house. He went to home depot and sent me a picture message. I immediately went online and looked at the bad reviews of that product, called him about it, then he looked for the next cheap grill, still bad reviews. This one is the third cheapest, with mixed reviews so we went for it.


I have no real complaints so far...

Sunday, July 12, 2009

Chicken and Zucchini Stir-Fry


When I do cut up a whole chicken for purposes of cooking adobo or BBQ, etc., I end up with the chicken back, which is mostly bones and very little meat. Sometimes I boil the whole thing for stock (and later on get the meat for arroz caldo or mami), but sometimes I patiently try to cut the meat off the bones for use in stir-fries.

Since this is a season to get fresh zucchini (and summer squash) from the grocery stores, it is a good time to stir-fry them together.

Ingredients:
1/4 to 1/2 cup of bite-sized chicken meat, marinated with soy sauce (enough to coat) for 30 minutes
1 small zucchini
1 small summer squash
2 tbsp oil
2 stalks celery
1 small onion
red and yellow bell peppers (I used a handful, diced)
1 cup cold chicken broth, mixed with 1 tbsp cornstarch (have extra mix of 1/4 cup broth with 1 tbsp cornstarch just in case you still need to thicken)
salt and pepper to taste

Instructions:
Slice all veggies as shown on photo.
Heat wok or skillet on medium, add oil and let heat up. Stir fry onion and celery until translucent, add the chicken and cook until chicken is browned. Add zucchini and summer squash, and the bell peppers and stir-fry about 1 minute. Stir in chicken broth/cornstarch mixture and cook until thick (or you may have to add some more broth/cornstarch mixture). Season with salt and pepper to taste.

Friday, July 10, 2009

Patrick's Ice Cream Creation


My son is also quite the adventurous eater. This is how he usually likes his ice cream:

Waffle bowl
vanilla ice cream
whipped cream
chocolate sauce
maraschino cherry

Tuesday, July 07, 2009

Buco Pandan Salad


Another longed-for Filipino dessert...

I got ideas from oggi (but I don't have pandan leaves nor gulaman bars). I was adamant I would NOT ever use Jell-O for this classic Filipino dessert. For one thing, I never liked Jell-O gelatin. The consistency is just not the same. Too jiggly and soft for me. And they gel longer too. Plus, they come from animal sources (the collagen), while agar-agar is from a seaweed.

Anna, Celia and I wolfed our serving down hungrily. My kids looked freaked out by its color, but loved its taste.

WARNING: Eat sparingly. Loaded with cream cheese and heavy cream (kaya nga yummy!).

Ingredients and Instructions:

For the gelatin:
juice from 3 buco (young coconuts)
1 can (14 oz) pandan leaves extract (Maesri brand; sent to me by Deb -- Thanks!)
water (enough to reach 4 cups when combined with buco juice and pandan extract)
1 (20 ml) buco pandan flavor (McCormick)
4-6 tsp of agar-agar (available at amazon.com; I bought mine, an expensive brand, from Spice of Life here but seeing amazon's, I should have just ordered from them.)
1/2 cup sugar

Note: The suggested ratio of agar-agar to liquid on the back of the label was 1 tbsp agar-agar to 1 cup of liquid. I read from burntlumpia's post that he found 1 tsp in 1 cup gives the right consistency, and that 1 tbsp results in too firm a gelatin.

Let agar-agar stand in the mixture of liquids liquids for 15 minutes then start boiling together until agar-agar is dissolved completely. Try cooling a small amount in the fridge for about 3 minutes and check if you like the consistency. If not, add a little more and reheat until the agar-agar dissolves. Add sugar when agar-agar is completely melted (not sure if it would get in the way of dissolving the agar-agar so I added it last). Place in 13x9 glass pan; cover and chill until solid. Cut into cubes. Mix in the rest of the ingredients.


Shredded young coconut meat (I had very little from the 3 buco because only one of them had meat that was not mala-uhog, so I opened 2 cans of canned young coconuts pre-cut in triangles. I discarded the "buco" juice from those cans as they tasted like very diluted. The coconut meat that came from these cans were not too pleasing when eaten plain, but mixed as buco salad, they are ok. The frozen shredded are too mature for buco salad use. The freshly shredded ones are still the best.)

1 can kaong (palm seeds in heavy syrup); drained (optional; I added because I had it in my pantry, and goes well with coconut)

Creamy Sauce
1 (14 oz) can condensed milk
equal amount of heavy cream (use the can of condensed milk to measure)
6 oz cream cheese spread

Beat the cream cheese first until smooth. Add the condensed milk slowly, then the heavy cream. Pour into the gelatin and shredded young coconuts and let chill.

Tapioca Pearls (optional)
Boil 4 cups of water then add 1/2 cup of tapioca pearls. Cook for about 2 minutes, stirring frequently. Turn heat off, cover and let stand 15 minutes or until translucent. Rinse with cold water 3 times. Place in a jar then add cold water to cover and refrigerate. Add these only when serving the buco pandan salad (not sure what the effect is if you mix right away).

Note: I love placing my buco pandan in the freezer for about 30 minutes to an hour to have some ice crystals before serving.

Monday, July 06, 2009

Manang's Ube (Taro) Ice Cream

This post is dedicated to Yvette and to every Filipino who craves for ube ice cream but has no access to ready made one.

I called it Manang's Ube Ice Cream because I did not rely on others' recipe for this. I just had the idea brewing in my head for some time now, and I dare say it was one very good idea, and it was successful at satisfying my craving for an ube ice cream.

[UPDATE: 7-8-09
I was not aware that July is officially the National Ice Cream Month, until I read about the Social-Ice Cream contest on Tangled Noodle's food blog. The contest is co-hosted by ScottySnacks and SavorTheThyme. My initial thought on the matter was that, non-Filipinos would probably welcome this with mild reception, with the final product looking so plain, and the flavor unknown to most and probably will not be appreciated by anyone who is not Pinoy, who did not grow up in the Philippines. So far, that is the kind of reception it gets from my family, so I get discouraged bringing any ube-flavored Filipino food to a non-Filipino gathering. However, with TN's prodding, I figured it would not hurt to expose to the world the unique Filipino flavors, so here goes my ube ice cream post as my entry to the said contest.

For non-Filipinos, to give you a background on ube, it is the real yam, purple yam at that. Not the sweet potato that are labeled yams in the grocery stores. Filipinos and other Asians use ube on a lot of desserts, especially ice cream and cakes, probably as often as we use coconuts or sweet sticky rice.]


After our family celebrated the 4th of July here at our house, the next day was a much better day to get together and grill foods and swim in the pool, and with a lot of leftovers (uncooked hotdogs and burgers and BBQ) I called/texted out an impromptu invitation to some of my friends for a pool party. Two of my friends came. Some of the items I served were buco pandan salad and ube ice cream (I served the buco pandan salad on the 4th and nobody among my in-laws were interested in it and I made the ube ice cream the next day using leftover homemade old-fashioned vanilla ice cream (which my in-laws and hubby love soft served as in freshly churned).

Out of the 6-qt (1-1/2 gallons) recipe I made, we had about 3.5 qt (about 2 cups less than 1 gallon) leftover. Instead of putting in the freezer to harden further, I left it in the fridge to just keep it chilled, with plans to turn it into ube ice cream. I would have made a two-hour trip to the Asian stores to get some frozen grated ube, but I remembered I had two packets of powdered ube. So even though I did not really like the ube haleya made out of powdered ube, I thought maybe it would do ok when mixed into ice cream. So I made the haleya and cooked until thick but runny enough to make it easy to mix with the ice cream even when fully cold. I even placed it in the freezer for about 1 hr or so and it was still easy to scoop out and mix with the ice cream. Then I churned to make the soft ice cream, then added the rest of the ube haleya by hand. I deep froze for about 2 hrs enough to give us some hard ice cream (at the center it was still soft).

My Filipina friends' verdict? Parang Magnolia daw("It's like Magnolia's.") [To non-Filipinos, Magnolia is a famous brand of ice cream in the Philippines.]

Me: "Pwede na i-post sa foodblog ko yung recipe?" (So,I can post my recipe in my foodblog?")
Celia: "Oo! Pwedeng pwede!" ("Yes, of course!")

Celia often visits my site too for some recipes. If she does not have success in making, say, leche flan, she is lucky enough to get a chance for an actual demonstration from me (For example, I taught her how to make caramel in the microwave).

The next day my ube ice cream was very very hard I had to zap in the microwave for 1-1/2 minutes (in increments of 30 second) to easily scoop out. But it was not icy gritty at all. Not as smooth as Magnolia in my opinion, but maybe because I added too much haleya (you know how frozen haleya can get too tough). But who complains anyway of having too much real flavor into something such as this? Our usual complaint about flavored foods (ice cream, ensaymada, etc.) is not having enough of the real flavor (bitin ba), and too often loaded with the artificial flavoring. Well, this one is packed with real goodness of ube. The pandan flavor adds volumes to its goodness.

Ingredients:
1 gallon or less Old Fashioned Vanilla Ice Cream (Click to get to its recipe page; make 6 qt if you want to experiment with different flavors or just leave out some as plain)- refer to the link on how to make it. You NEED to have an ice cream maker, rock salt, and crushed ice. I have been using the Rival Ice Cream Maker for 3 years already.

Ube Haleya
1 packet powdered ube (4.06 oz)
2 cups heavy cream
2 cups milk
1 tsp pandan flavor (clear colored)
enough purple food coloring to achieve the tint as desired (both for haleya and the final ube ice cream mix)

Instructions:


Prepare the old-fashioned vanilla ice cream. Chill in the fridge good before freezing. This is your base for any flavor you want. Place the aluminum ice cream maker bucket in the freezer.

Prepare ube haleya and chill until cool enough to not melt the fat content of the heavy cream in the vanilla ice cream.

(The fat content of heavy cream, especially ultrapasteurized, plus the egg custard in the base help in emulsifying the mixture. The flour when cooked, plus the cooked ube, both help in hindering any ice lattice formation by the water content. These factors help so that the resulting ice cream will not give you ice crystals. Well, that's how I have come to understand the science behind ice cream making.)

Mix half of the ube haleya with the ice cream base. Place in the cold aluminum bucket, cover and position in the plastic outer bucket.Run the ice cream maker. Make sure the aluminum bucket is covered well before you start placing ice and rock salt around. Keep adding ice and rock salt until the motor stops running. This is the soft ice cream stage. Finish hardening the ice cream by transferring into an ice cream container and deep freezing it. Cover the top with cling wrap to avoid freezer burn if you have air space in the container.

Saturday, June 27, 2009

Chicken Inasal


I recently tried the chicken inasal recipe from overseaspinoycooking.com. I never really knew how it tasted like. I know there was one Chicken Inasal outlet somewhere in Makati that I tried eating it, but was not too impressed (still preferred the lechon manok from Andok's or Baliwag, and one in Manila which seemed owned by a Japanese (superb herb and brine flavors! I would only get the chance to buy from them when I had to go home to Bulacan from a station near Jose Reyes hospital.)

But I remember one of my friends who is now located in this state and found me through this foodblog had chicken inasal and she recommended this recipe. I probably should have used more marinade, or marinated longer. I also goofed because when I had to boil the marinade before grilling, I mistakenly added soy sauce when there should not be (too much inclination for me to do things this way when making barbecue of anything). It was good, but only kinda skin-deep, so next time I am gonna make more marinade and will probably leave them in the fridge for more than overnight.

I did use annatto oil per MaMely's recipe. I had to try twice because I burnt the first. When she said simmer, she meant simmer! As in, start and keep the heat on low; not boil then lower to simmer. Haha! Now I got a whole cup of it in an 8-oz canning jar without seeds (take note, MaMely!)

Thanks to both foodbloggers!

UPDATE:
Because I was not too satisfied with the outcome of the recipe I initially tried, I googled it again. Found one at Market Manila but no recipe; just ingredients. Well, I do not like guessing when it is my first time to cook something. For something I have cooked many times before, I can cook without measuring (the measurements here in my recipes are often approximate, and given here for the sake of the newbie cooks who might want to try my recipes).

Reading the comments under MM's post, I came across this one particular comment which got me intrigued, so next time I am gonna try it:

Here’s 1 foolproof delish inasal recipe I have been following eversince I got this from the free recipe booklet of Lea and Perrins worcestershire sauce:

1 whole chicken,(approx.1kg), quartered
6 stalks lemongrass, white part pounded
1/2 tsp chopped ginger
1/3 cup annatto oil
1 cup soda(sprite)
2 tbsps tamarind paste or juice
1/3 cup tamarind leaves, washed
3 tbsps chopped garlic
3 tbsps lea and perrins worcestershire sauce
1 1/2 tbsps patis
1 tsp pepper
Place all ingredients in a bowl and marinate for at least 25 mins. Transfer in a pan and bring to a boil to cook chicken for about 15 mins.Remove chicken and simmer stock for another 15 mins.Strain and reserve stock for grilling.
Cook chicken over hot charcoal and brush frequently with the reserved stock.Cook just until chicken has burn marks.Serve with sinamak or spiced vinegar.
To make sinamak, put red chilies, garlic, peppercorns, ginger and onions in a bottle.Fill with vinegar and let the flavors infuse for at least 8 hours.Serve with grilled chicken.

I never go wrong with this recipe and am always ensured with a thoroughly cooked, moist and flavorful chicken!Sometimes I omit the tamarind leaves when not available and just increase a tbsp of the tamarind paste/juice or even use sinigang powder and it’s still the same flavor! Try it! Thanks to that free booklet of recipes!


Another recipe shared this time by Emeriza D.

Manang..heres my recipe of chicken inasal originally from my cousin sa bacolod.. hope you like it. I preffered po na grilled sya.. but okay din ang baked po.

*Whole chicken (cut into serving portions)
i rub nyo po ng salt..and leave it for 30-40 min.
then pour vinegar, lots of garlic (2 head) and lots of ginger..(pinoy suka po) enough to cover the chicken lng po (soak it for 1-2 hours lng po para di maluto sa suka)

Mag gisa po kayo ng luya and bawang at dinikdik na lemon grass po damihan ng mantika ( yun po yung i spread nyo sa chicken while cooking it) atsuete powder for coloring and salt to taste

pagtapos pong ibabad yung chicken, tusuktusukin para ma sure na papasok lasa ng ginisa mixture

ihaw lng po...

then sa sawsawan po... Kalamansi, toyo at suka, little amount of sugar to balance the taste.

yung pinaggisahan po ng pan... pwede pong dun mag gawa fried rice.

Friday, June 26, 2009

Baked Ham & Cheese Open Sandwich


After 6 years of marriage, only now did I learn of hubby asking for this type of open sandwich that he used to make for himself when he was still living alone.

He said just set the oven on low broil (or high; just keep looking), lay the bread slices on the pan, place sliced cheeses then top with bacon. He said the cheese would be toasted or burnt and that was inevitable. (Actually I like toasted cheese on pan de sal reheated in oven toaster.) I experimented by adding egg on mine near the end of broiling the second batch (which was not too successful as it slid down right away; I had to scoop the cooked egg from the pan).

Truly a food trip for a hot summer day!

Thursday, June 25, 2009

Strawberry Milk Shake


"I don't even like strawberry shake, but this is delicious!" -- Husband

My kids love it!

Probably the good store-bought strawberries made a lot of difference. Seldom are we able to get really good strawberries from the store. Usually they are puckery and hard, pinkish red instead of really red. This time I got a "Limited Edition" from a "William & Anderson" farm in California (not Mexico!). We liked them eaten as is, and we love the shake made with them.

Ingredients:
16 oz strawberries
1 to 1-1/2 crushed ice
1/2 cup sugar
enough milk to reach 4 cups in the blender
4 scoops of vanilla ice cream

Instructions:


Place strawberries in the blender first, followed by sugar, then crushed ice. Pour milk to level of 4 cups, top with 4 scoops vanilla ice cream. Blend using liquefy or blend mode. Use pulse setting, pressed for about 10 seconds, if the mixing seems not to include the top part. Once it starts making a funnel, revert to liquefy or blend mode to make the mixture smoother.

Ahhhh! Sarrrrap!

In a few weeks' time, we will have the chance to get "real" strawberries...as real as picking them straight from the strawberry farms around here...not sure how sweet they will be as they have not seen sunshine in weeks! But then again, if made sweet by ice cream and sugar, or if made into jams, being tart will be a plus anyway.

Wednesday, June 10, 2009

Pan-Fried Salmon Steaks


My kids and I love the taste of salmon...even plain with just the barest of seasonings - salt and pepper. And since wild Alaskan salmon is rich in omega-3 fatty acids (a healthy fat), this also cooks on the pan with very little oil to start with, as it also releases its own oil as it cooks, and comes out with crispy crust, almost like it was deep-fried, especially at the belly part. You can pretty much say "na-prito sa sariling mantika" (fried in its own oil). When summer is here, these are the most craved for dishes for me, and would be more so when I start producing my own tomatoes freshly picked from my garden. (That reminds me, this is also a good time to make salted eggs.)

Photo depicts how we Filipinos typically enjoy our fried fish -- with slices of tomatoes, green onions (or chives, as how I used here), and onions (I used Vidalia just for the taste of it), with a drizzle of patis (fish sauce) and some lemon juice, enjoyed with plain (or fried) rice. Pinoy na Pinoy! A lot of our typical Filipino meals are not at all gourmet, but if you look at food mags of today (like bon appetit), they are looking more and more like the Filipino style of enjoying food. Maybe because of the growing concern about going back to the basics of food (a rebellion against industrialization of food)...oh well...I am babbling here, an after effect of reading the book "The Omnivore's Dilemma" by Michael Pollan. Well, let's get on with how I prepare my salmon steaks -- nothing fancy gourmet-y. Just plain home cooking, Pinoy style.

Ingredients:
1 tbsp oil
salmon steaks
salt and pepper to taste

For tomato dip/salsa (whatever you call it!)
3 medium tomatoes, diced
onion greens, snipped
thin slices of vidalia onions to taste
1-2 tbsp fish sauce (or anchovy paste)
a drizzle of lemon juice (best to use calamansi if available)
(optional) fresh baby spinach

Instructions:
Sprinkle salmon steaks with salt and pepper to taste. Heat up your pan on medium low (#4) for 5 minutes. (Meanwhile, you can start preparing the tomato dip/salsa.) Add oil and distribute evenly; wait 1-2 minutes. Place the salmon steaks on the pan and let cook one side for 2 minutes. Flip over, cover loosely, lower the heat to #2 and let cook for another 4 minutes or until salmon is done (test with fork; if fish easily flakes off, it is done).

Enjoy with prepped tomato dip/salsa and plain or fried rice.

Saturday, May 30, 2009

Hamburger


I was looking at the searches made by readers of this foodblog, and one of them is hamburger. I did not realize until then that I have not posted a recipe here for hamburgers, and I have been serving hamburgers to my family (and my kids' friends when they come over) every summer, whether they are grilled indoors or outdoors. Indoors, sometimes I use George Foreman grill (cooks for 4-5 minutes each) for very informal one-at-a-time serving (sometimes I ask them to cook and assemble their own). Or I might make use of the big cast-iron grill/griddle to use on stovetop (cooks for 8-10 minutes total). Outdoors, I use a cheapo charcoal grill (much like when we made barbecues back in the Philippines).

These hamburgers I made on a rainy gloomy day, because the previous hot and sunny day I was working, and was too lazy tired to cook when I came home. Hence, the use of indoor grill. I guess it is too early to conclude that summer is here.

Tips: The use of plastic (these are open type sandwich bags) facilitates ease of removing the patties, plus you don't have to wash the press after use. The milk and breadcrumbs help retain moisture and hold the patty together. Also, if you don't have grill/griddle yet and plan to get one, the Lodge cast-iron one has very good reviews on amazon. I personally have Nordic ware, which has never been nonstick despite its claim, plus it warps even on medium heat. After about 5 years, I am ready to ditch it and do myself a favor by getting Lodge.

UPDATE as of 6-11-09:
I made hamburgers (and I also prepped hotdogs) for Patrick's graduation party held at home (other parents dropped off cakes, sodas and chips, cut up fruits and veggies, dips and salsas). Two of the parents stayed for a while for chaperoning (kids dipped in the cold swimming pool for a while then played outdoors before finally coming in the house to play video games/wii music). One of the two mothers said, "These are the best tasting hamburgers I have ever had!" seconded by the other. I was beaming...hehe! I just went by my taste buds in trying this recipe, and it has been received well in my family, including my husband. When I told my sister about it, she asked if I had done something special with it. None really...but as an afterthought, maybe it was the grass-fed beef that made the difference.

Ingredients: (amounts of seasonings approximate)
2 lb ground beef
1/2 tsp ground black pepper
1 tsp salt
1/4 cup breadcrumbs
2 tsbp milk
1/8 cup ketchup
1/8 cup A1 steak sauce
2 tsp mustard
(optional) 1 tsp (or few drops) worcesterchire sauce (L&P classic thick)
hamburger buns

Add-ons:
pickle relish
ketchup
sliced cheese
thinly sliced vidalia onions
sliced tomatoes
bread n butter pickles (homemade)
lettuce

Instructions:


Mix everything together. Form into patties. Let stand for at least 10 minutes for flavors to be absorbed.

At the same time, heat up stovetop grill on med low (#4 to #5) for about 5-10 minutes.

Meanwhile, slice the vidalia onions and tomatoes. Have the pre-washed lettuce ready (I buy a whole head, that way, it remains fresh longer in the fridge, compared to already shredded lettuce that comes in a bag). Bring these and everything else to the table.

Once grill is ready, spray with olive oil. Place patties and cook uncovered for 4 minutes. Turn over and cover. Turn heat to low (#2-3) and cook an additional 4-6 minutes. Check if juices run clear (this sometimes pool on top of patties if there are dips). If juices run clear, they are done.

Remove patties and transfer to plate (optional to top them with sliced cheese so that cheese melts with the heat). Keep warm. Warm up the buns on the grill for about 1-2 minutes. Enjoy your hamburger with your fave add-ons (everything for me and my boys; hubby likes only with cheese and ketchup). Hubby said, "It was delicious!" There were 4 of us eating at the time (my stepd was not with us). My younger boy had a second helping.

Tuesday, July 08, 2008

Strawberry Shortcake

Pardon the lack of art in my photo...

My MIL always makes strawberry shortcake around this time of the year (or even during winter; she just thaws her frozen strawberries). This is the first time I ever attempted making my own. The shortcake is more crumbly and sweeter than hers (hers is like that of scones), but I kinda prefer this one. My older son also likes it better. My younger son, who used to pass up on strawberry shortcakes during family gatherings, felt obliged to eat what I handed to him. I was surprised he actually ate everything and said it was good! My hubby usually just eats the strawberries and whipped cream, leaving behind about 75% of the shortcake, but this time, he ate about 80% of my shortcake. I think I will stick to this recipe for my own tradition-building. (I hope my children will someday remember to look into this website for their favorite recipes.)

I had two quarts of hulled and sliced strawberries freshly picked from my MIL's garden. I sprinkled about 2 cups of sugar and let stand while I prepare the rest. Even though I had two cans of prepared whipped cream, I had to use a homemade one to complement the freshness of the strawberries...nothing beats that! And while some would prefer to use angel food cake for this, I love the old-fashioned biscuit-type shortcake (ain't that what a shortcake is supposed to be???)

Ingredients for the shortcake:

  • 2 cups flour
  • 1 tablespoon baking powder
  • 1/4 teaspoon salt
  • 3 tablespoons sugar
  • 1/3 cup shortening
  • 1 cup milk

Instructions:
Heat oven to 450°. Grease an 8-inch round layer-cake pan. In a mixing bowl, combine flour, baking powder, salt, and sugar. Cut in shortening with pastry blender or 2 forks until crumbly. Stir in milk until just blended. Pat dough into prepared pan; bake 15 minutes or until golden brown.

Ingredients for homemade whipped cream:
  • 2 cups heavy cream
  • 1/4 cup sugar (approximate only)
Instructions:

Before you even start on the strawberries and shortcake, chill your mixing bowl and whisk/beater in the freezer. The cold temp helps prevent making butter out of your whipped cream (especially helpful in the summer time).
Start whisking on low going to high, and when starting to form peaks, add the sugar gradually. Stop when firm peaks form.


To assemble:

Divide the shortcake into 8. Slice horizontally. Put some strawberries in between the two halves of the shortcake. Add whipped cream on top of the upper slice. Top with more strawberries and syrup.

Thursday, September 07, 2006

Potato Dill Salad

When I was still in PI, I used to have potato salad with shreds of chicken breast added to the potatoes, spiced with chopped onions, and the taste adjusted with salt and pepper.

Now I have embraced what my husband's family of origin traditionally prepares. Potato dill salad is usually served on July 4th, and is now commonly found in our menu during summer days when it is too hot to have a hot meal, especially after harvesting our own potatoes that we planted.

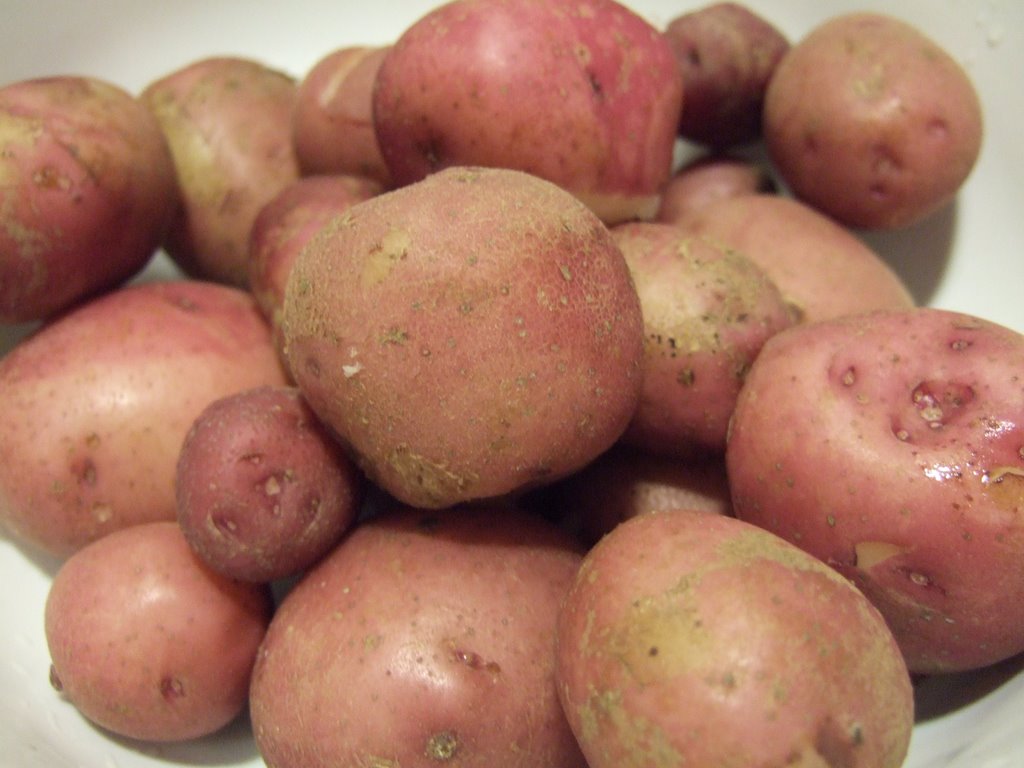
The red potatoes are usually the first (we also plant Russett(?) potatoes which we harvest later in the fall). They are smaller but more compact and yummy! For me, they are the best to use for potato salads as they do not easily crumble, and they retain their shape better when stirred. They are also very good for mashed potatoes, but they don't create fluffy mashed potatoes -- just sticky and creamy, like that served in KFC here (as commented by my older son's friend once).

This potato salad is not the same as the potato salad I used to have back in PI, where we add shreds of boiled chicken breasts, chopped onions, mayonnaise, salt and pepper to the chunks of boiled potatoes.

Here in Maine I had to prepare it the way my husband's family would eat it; otherwise, I will end up eating the salad by myself. Anyhow, I have developed a taste for the dill, which gives the distinct flavor of this recipe. When I first made it, I cut the potatoes in bigger chunks, but hubby requested to make them smaller next time, to enhance absorption of the flavors.

Here's the recipe as passed on by my MIL:

Ingredients:

10 red potatoes, boiled with some salt, peeled and sliced (approximately 2x1 inch cubes)
1/2 cup mayonnaise
1 tbsp grated onion
1 tsp dill
salt and pepper to taste
sliced hard-boiled eggs as topping

I added a sprinkle of lemon.

Instructions:
Boil the potatoes in water enough to submerge them, add some salt and boil for about 30 minutes or until done (check with fork). Once done, drain and peel as soon as cool enough to handle. (I have tried putting them in the fridge prior to peeling, and it was not a good idea! They were harder to peel that way!).
Add all other ingredients. Taste. Adjust ingredients according to your taste preference.
Chill for at least 3 hours. Top with sliced eggs.

Hubby wants it chilled overnight for his work lunch, and wants it even more when 3 days have passed. It will suffice for lunch, but for a heavy supper, I serve it usually with salad greens and grilled chicken (my Wish-Bone Robusto-marinated recipe).


Posted by Picasa

Friday, August 18, 2006

BLT Sandwich

Every supper time I am in a quandary, not truly knowing what to prepare that my fussy hubby will eat. If I ask him ahead of time, his usual answer is, "I don't know, honey. I am too full now that I can't think about supper for tomorrow." Won't do me any good to ask him when he is actually hungry for supper (as in 10 minutes before).

So, sometimes I ask him what he wants me to get from the grocery store. Summer is a hard time, because during this season when produce abound and I feel like eating stir-fries or salads, I always worry about what to offer to him (and daughter). My boys will always eat what I serve.

Can you believe I just learned about him liking BLT ("the perfect summer food") this year, our third year together????!!!!

But he does not like tomatoes, so for him, it's BL sandwich.

For me, I like it with onions and cucumbers as well, so it's BOLTC sandwich.

How to prepare:

Cook bacon the usual way and drain on paper towels.

On separate bowls/platters, serve lettuce (there are several bags available in Hannaford ready for consumption right from the bag), sliced fresh and ripe tomatoes, sliced fresh cucumbers, sliced onions (I get these three items from my garden during this time of the year). Also place on the table the mayonnaise, ketchup, and mustard.

Put regular bread or buns on the table. To each his own. Let everyone prepare his own sandwich.

I know this is not the healthiest meal, but it is complete nonetheless. We only use 2-3 strips of bacon per sandwich. One is enough for me, two will do for each of the boys (including the big one). Posted by Picasa
Custom Search