I bought a cookie press last December, triggered by a my husband's comment in relation to lengua de gato. Somehow, the image of my Nanay's plastic cookie press flashed in my mind, and I knew I had to get myself this toy.
At the time I got mine, it was the $41, chosen because of some good reviews on amazon. Then as of typing this, I saw the $14.39. I was intrigued by the cheap price. The gadget itself seemed the same. So I decided to order this just to see if it was made of the same material, and if constructed the same. Will update this post once I got a hold of the cheaper one.
I never saw my mother use hers. So I looked at some videos on how to use the cookie press. Got some ideas from Wilton's.
I used the ONLY recipe (coming up next) that came with the gadget, and while it said to grease the baking sheet, I found out that if I don't, the dough stays on the sheet after coming out of the press. If I did grease the baking sheet, the dough just would not stay on it. The Wilton video I saw suggested ungreased sheet anyway. I also had to shorten the baking time, and I placed the rack at the middle of the oven to not burn the cookies. After I developed the rhythm of pressing and baking, my husband is now a happy cookie muncher.
The baking pan I used is a nonstick insulated aluminum pan as pictured below in the link from amazon.
How to use the cookie press:
Unscrew the closing ring and raise the piston. Fill the entire cylinder with part of the dough prepared. Insert the desired die-plate into the closing ring.
The raised part of the die-plate must be facing downwards. Screw the closing ring onto the cylinder. Grrease a cookie sheet evenly. Choose the size of the biscuits you wish to obtain by rotating the regulator (1=small biscuits; 2=large biscuits).
Turn the knob so that the jack on the lever meets the notches on the rod. Pump the lever a few times until the dough comes out of the holes of the die-plate evenly. Remove this first dough so that the die-plate stays clean.Place the machine on the cold cookie sheet and push the lever downwards.
Raise the lever and move the machine to make another biscuit.
Bake the oven for approximately 12-15 minutes (or until the edges start to brown). You might have to rotate the pan to brown the cookies evenly.
Take the sheet out of the oven and let cool for about a minute before transferring the cookies onto the cooling rack.
Here's a video of me pressing the cookie out onto sheets. Sorry I am not a good video editor. No words here. But you will get the gist anyway...Pardon the mess, please. I was also making empanada at the time; hence, I had flour and bowls around.
Showing posts with label how-to. Show all posts
Showing posts with label how-to. Show all posts
Thursday, January 14, 2010


Thursday, January 07, 2010
How to Cook the Perfect Steak: Sous Vide Cooking

As I read and learned more about the technique, and the very few affordable choices of home cooks, I set out to get the equipment I needed to add to my existing kitchen gadgets to take the plunge and see for myself. I chose the least expensive one: a PID thermostat coupled with my 6-qt slow cooker.
I was determined to learn this method because my husband is a steak eater (as much as I am a fried fish eater).
I have often wondered how restaurants always would come up with tender and juicy steaks even when very well done (as how my hubby always likes his steaks). At home we have our homegrown, grass-fed beef. While it sounds ideal and romantic, grass-fed beef are not exactly as great as those in the restaurants. Flavor is superb and the meat is really lean, and whatever bit of fat left is the good stuff, having had grass instead of grain providing the building material for the fatty acids. But consistency sucks -- tough and stringy -- what with all the freedom our beef had in their life span, and the lack of hormones. Not wanting to waste a lot of steaks this year as I did last year (I gave away a lot of unused steaks because I was getting discouraged), my readings on sous vide cooking gave me hope. Now I can see this household running out of steaks before the next year's supply comes. It seems like this was the way to cook steaks "very well done" without drying it up.
For this post, I used T-bone steaks, which already partly has tenderloin. Although I used 140 deg F (which gave the appearance of medium rare), I was explaining to hubby and kids about the technique (hubby was particularly intrigued with my PID temp controller and the seemingly elaborate and unusual setup), discussing about killing of pathogens at such temp for several hours of cooking, so that psychologically he was primed to see reddish middle of this fully cooked steak. I did brown the steaks in butter for a period long enough to make it as brown as possible without drying. However, I noticed that the longer the cut meat was exposed to air (and oxygen), the redder it got at the middle (a result of oxidation). Good thing I assured everyone already that that was fully cooked. With their concerns answered, they were reassured and pacified, and we all ate the steaks and savored the goodness...they were indeed excellent!
The next batch of steaks I cooked at 170 deg F. This time they were really brown...and tender and juicy.
So if you are interested, there is a sous vide cooker meant for home cooks at a whopping price of $449. Or, if you already have a good sized slow cooker, and are willing to invest on a PID temperature controller available in ebay for $156, here's how I prepared my first sous vide cooked steaks.


1. Thaw the steaks.
2. Season with salt and pepper (or spices...avoid fresh garlic as this can be over powering. If you want garlic flavor, use powder.)
3. Vacuum pack the steaks (I used food saver. Their plastic bags are food grade and are ok for low temp simmering.)
4. Place a spacer on each steaks (I used the lids for canning).
5. Stack the steaks inside the slow cooker and fill with water (spacer ensures the warm water bathes each steak all around).
6. Submerge the temperature sensor.
7. Cover the slow cooker, plug it to the PID temp controller, turn it on low setting, plug the PID into power supply, and set the PID thermostat to desired temp (see Table 2.3).
7. Allow at least two hours for the water in the slow cooker to reach the desired temperature according to Table 2.2 here. Then add the cooking time per recommendation in Table 2.3 if cooking thawed meat, or Table 2.4 if cooking frozen. Take note that this is the minimum time to ensure safety.I cooked mine for a total of 6 hours from turning on the unit.
8. Remove from pouches and wipe with paper towels.
9. Briefly pan-fry in butter (longer if you want it more brown).
10. Serve immediately.
More readings avaialable here in a downloadable pdf format.
HOW TO USE THE PID THERMOSTAT:
Make sure you are using a slow cooker or rice cooker that has manual controls instead of electronic.
Plug the cooker into the PID unit. Plug the PID into the power supply.
Turn on the slow cooker on low setting, place the sensor in the water in the slow cooker. Plug the PID into power supply.
Set the temperature and time (including the two hours to get the water up to the desired temp).
PID thermostat will beep when time is up.
So if you are interested in sous vide cooking, the equipment you need (if you are not getting the above mentioned sous vide cooker) are:
- a large capacity rice cooker or slow cooker with manual controls
- PID temperature controller
- vacuum sealer (I have Food Saver) and bags
Sunday, November 01, 2009
How to Hard-Boil a Single Egg in Microwave

I posted before how I make hard-boiled egg in the microwave, for purposes of adding to noodles, which I cooked together with the egg (see here).
Some of the most common reason readers land on that post was they were looking for a way to hard-boil egg in the microwave. Here is a method for those who want only ONE egg for salads, sandwiches or as snack, not for noodles. If you would like to cook more than one egg, this post is not for you. Personally, if I am going to boil several eggs, then I would just use the stovetop, or as MaMely did, use the rice cooker.
This time, my post is about preparing hard-boiled egg in the microwave using only water, a bowl, and paper towel. NO, YOU DON'T NEED A SPECIAL GADGET FOR THIS. Please take note that my microwave is a 1.6 kW one, so if you are going to try this, you will have to modify the time and experiment until you get it right.
I also have to let you know (so you won't have to repeat this) that prior to coming up with the method below, I experimented placing an egg with cracked end inside a cup with water only, and it exploded within 30 secs (I tried 3 times, using different power levels, then I gave up). Knowing that the egg does not explode when it was with noodles, I then thought, maybe the egg should have some other "competition" for the microwave energy, so it is not too concentrated in the egg and cause sudden increase in temp then explode. Hence, I thought I would try the paper towel, soaked in water so it would not burn. The first time I did this for 2 minutes, the egg had some leaked soft egg white so I nuked 30 seconds more, and the result was perfect. The second time I tried it for 3 minutes, the egg exploded before it reached 3 minutes. The third time was for 2.5 minutes, and that is the method I describe below, which gave me perfectly hard-boiled egg. Lessen the time if you want soft-boiled.
Here's how:
1. Make a ring out of paper towel and place in a small bowl. Add water to soak the paper.
2. Using a corner of a table of your stovetop, gently crack the wider end of an egg to make a small depression. This will serve as an outlet for escaping steam and excess pressure as the egg is cooking and getting hotter.
3. Place the egg cracked end up in the middle of the bowl, supported by the paper
towel.
4. Microwave on high for 2.5 minutes (or stop as soon as you notice the depressed crack rise up so it becomes level with the rest of the shell again). You will also notice that cracks will also develop originating from this depression as the egg expands a bit while cooking.
5. Let it sit for 2 minutes. The egg will continue to cook with its heat and that of the water around.
6. Use tongs to get the egg and run it under cold tap water to stop the cooking process and to make it easier to handle and easier to peel (the cold shrinks the egg and it separates a bit from the shell).
7. Peel, slice and enjoy!


Thursday, May 28, 2009
Homemade Mayonnaise

The past week I had too many unused egg yolks because I was in a recent frenzy to make sans rival. I made one for MIL's birthday, and again for my friend Anna's birthday. Recently I made one to bring to work for a farewell party for a co-worker. At the end of all these, I was left with 15 egg yolks. Made some cinnamon rolls, some spanish bread...and I looked for other ways to use them.
I was gonna make potato dill salad (not related to yolk use), when I chanced upon a blog post about homemade mayonnaise. Hmmmm....maybe I should make some mayonnaise too...it would be nice to know how to. Hubby has never had homemade mayo. So I made one using two recipes. I tried one by chichajo of 80breakfasts. I think using the blade of my food processor did not give me the same consistency she got with her emulsifying disc. Mine came out very thick. I also used two egg yolks instead of one whole egg, so that probably also accounted for the thick consistency. The other recipe I used was from Kitchen Aid "Great Baking and More" recipe book, and the consistency was much better, and got approval from hubby. I do not really detect much difference in the taste. However, for the KA recipe, I used 1 cup extra virgin olive oil and 1 cup vegetable oil. I am posting here KA's recipe. Please refer to chichajo's blog post for hers. I asked my hubby to try both, and he preferred the KA recipe better.
I really could not appreciate the homemade mayonnaise plain. I mean, I don't even enjoy regular store-bought mayonnaise as is. So as soon as done, I went ahead with the potato dill salad. When I made the salad, I tried tasting the whole ensemble, and I had to agree...homemade is much better.
Potato dill salad coming up in my next post (this is different from the one I posted years ago).
Ingredients:
3 egg yolks
2 cups oil (vege oil plus extra virgin)
1 lemon, juiced
1 tsp salt
1/4 tsp dry mustard
1 tbsp cider vinegar
Instructions:


Place egg yolks in a mixer bowl. Attach bowl and wire whip to mixer. Turn to Speed 10 and whip about 3 minutes, or until yolks are stiff and pale yellow.
Reduce to speed 8 and slowly add 1 cup oil, a teaspoon at a time, in a thin stream. If mixture becomes too thick, thin with a little lemon juice. Carefully add remaining oil in a slow, steady stream until completely absorbed.
Reduce to Speed 6, add lemon juice, salt, dry mustard, and vinegar, and whip just until blended. Store mayonnaise in refrigerator.
Saturday, May 09, 2009
Baking Videos of How-To's
Since there have been readers who ask me to teach how to do this and that, and to make vids especially in relation to baking, I decided to compile good vids here of the most common how-to's asked. I am bad at making vids, and since baking can be a long process (from proofing to kneading to final rising), it would take tremendous amount of time to just edit and make a short non-boring vid of one recipe (let's say pan de sal). I think the only one missing is the proper way of cutting pan de sal. I would like to have the time to make a video of that, then I will add to this collection (the one I saw on youtube just was not the way I know how pan de sal is cut so I did not embed that here). If you would like to suggest additional how-to videos please do so and leave me a comment. Thanks!
Kneading
Shaping dough rolls
Slashing the dough (see 4:15)
Braiding
Folding egg whites into batter
Creaming Butter (or Shortening) and Sugar
Rolling a Cake/Jelly Roll
Kneading
Shaping dough rolls
Slashing the dough (see 4:15)
Braiding
Folding egg whites into batter
Creaming Butter (or Shortening) and Sugar
Rolling a Cake/Jelly Roll
Monday, March 23, 2009
Sweet Potato Bake

Sweet Potato Bake is my 3rd entry for the NC Sweet Potatoes contest. I would like to thank sweetbytes for this contest and giving us a boost to explore the possibilities of sweet potatoes.
I did not realize that such a contest can really unleash creativity in me! Well, I cannot really claim full credit to my creations, as I get ideas from all over the internet (where else?)
But the inspiration for this dessert came from a camote (white sweet potato) dessert that my brother, who was then a chief baker in Ji-Pan in the Philippines, would bring home from time to time. I was the number 1 fan of that delightful dessert. I remember asking him how they made it. His answer was a simple: "Just boil the sweet potatoes, mash and add condensed milk, then bake."
Basing on those, I then tried to recreate my version using the orange-colored sweet potatoes here, mixed with condensed milk, and I added rum flavor, vanilla, and chopped pecans. But instead of boiling the sweet potatoes, I microwaved them (an idea I got from CWD, which I preferred over boiling to minimize water.) I noticed this particular type of sweet potatoes are less sweet than what I had in the Philippines, and absorb more water when boiled. Microwaving was a preferable way of "boiling" them before mashing.
I and my sons liked it, but quite honestly, a serving was more than what I could tolerate...it was too heavy! Maybe I should have used smaller sweet potatoes, or just scooped small portions into small baking cups. I ended up with leftovers, which I turned into another recipe entry.
Ingredients:
4 sweet potatoes (9-11 oz each)
1 (14-oz) condensed milk
4 egg yolks (my leftover from making sans rival)
few drops rum flavor (McCormick)
1 tsp vanilla
2-oz chopped pecans
egg wash (1 egg beaten with 1 tbsp milk)
Instructions:
1. Cook the sweet potatoes in the microwave. I did them in batches of two. I placed water in a bowl first, then placed paper towels to soak. Then I cut cling wrap about 1 foot long, placed one wet paper towel there, then wrapped one sweet potato with the wet paper towel, followed by tight wrapping with the cling wrap, finalized with another layer of cling wrap. After I had made two sweet potatoes this way, I started microwaving them while I wrapped the remaining two the same way. My microwave has automatic settings for potatoes, so I clicked on that, and I turned on my timer so I could keep track of how long it took to cook them -- around 8 minutes. By the time it beeped to herald the end of cooking time, I checked with toothpick for doneness (they were done!) then cooked the second batch.


2. Careful not to burn your hands, unwrap the cooked sweet potatoes, cut in half, and taking care not to damage the skins, scoop out the pulp with a spoon.
3. When all sweet potatoes are gathered, add the rest of ingredients and mash or puree together. Fold in the chopped pecans.
4. Transfer to a big microwaveable bowl. Microwave for about 2 minutes, then stir and continue cooking in the microwave, stirring every minute until cooked (no longer smooth looking).
5. Scoop back the cooked sweet potatoes into the skins. Smooth out top, and paint with egg wash.
4. Broil for 3-5 minutes or until top had browned some.
5. Serve with (or without) maple syrup or caramel.
Saturday, March 07, 2009
Hard Boiled Egg in 4 Minutes Using Microwave

This method of cooking egg using microwave is useful if you want to "boil" ONLY ONE egg because you are preparing it only for yourself. Photo above does not depict egg yolk as good as it was, because I used the blunt spoon to cut the egg in half, instead of using a knife. But seeing the color, you will know that it was "hard boiled" to perfection.
I have been boiling eggs by batches of 6-10 in the past, for using in ramen/noodle soup or arroz caldo, but oftentimes, my kids would forget about them. So there will be several of them eggs in the fridge, even after a week. I am not comfortable with that, especially if the egg has cracked during boiling. After a while I just toss them away; what a waste! Though I have seen and eaten hard boiled eggs sitting on the counter of some carinderia in the Philippines and I had no idea how long they had been sitting there from the time they were cooked, I am not comfortable having any cooked foods sitting on the countertop at room temp for more than 4 hours, or in the fridge for more than two weeks. That's why, boiling several eggs (to maximize use of water, time, and electricity) does not really appeal to me.
So I experimented again with the microwave. When I was a kid, I always had some protein in my ramen (mami) noodles, and some veggies when we had them in the fridge. I used to boil the egg in the water as I cooked the noodles. My kids are too lazy to do the same, so they cook their noodles in the microwave. But in an attempt to influence them to add at least a hard boiled egg in their noodle soup, I had to improvise to make hard boiled eggs without deviating from their method of cooking noodles. And I found that method...saves me time and electricity, and avoids tossing away leftovers.
Ingredients:
1 egg
HOT water/soup/arroz caldo to cover at least 3/4 of the egg upright (maybe a cup of hot water will do)
Instructions:


If using water, turn your faucet to HOT until you get it really hot. I was using hot homemade chicken stock at the time, to turn into chicken mami, so the other ingredients here supported the egg upright. Having the egg upright while uncooked helps it from leaking out the white into the water/soup. If using cold water, you might have to prolong the microwave time. Feel free to experiment and get to know your microwave better.
Tap gently the wider end of the egg and peel off some shell to create a small hole. This hole will allow for some expansion of air or eggwhite while the egg gets hot during microwaving (as you can see by the knob that formed in the photo). If you do not create a hole, there will be no outlet for expansion and the egg will EXPLODE inside the microwave (I know...I have done that!). Place this egg upright in the bowl or cup, with soup/water reaching up to 3/4 of the egg.
Cover and microwave for 4 minutes (this is for a 1.6 kW microwave). You might want to adjust accordingly depending on your microwave. I also had tried doing this with cool soup and it gave me malasadong itlog, which I also like.
I demonstrated this to my kids...they thought it was cool!
Are you ready to try it?
UPDATE: I tried doing this with only some water and using a cup to hold the egg upright. It exploded. I did it twice. Both exploded. So I think, to achieve a really hard-boiled egg consistency, you must include other foods so the microwave does not concentrate the energy only on the egg. Maybe a lower power will also work (which I have tried at 30% and it still exploded. I dared not experiment again after that).
Tuesday, March 03, 2009
Making Gravy
While making this post, I am roasting chicken, with my potato peasant bread rising. We are gonna make a mini-birthday celebration of my husband's birthday (will celebrate with in-laws on weekend). Boxed brownie for dessert in place of cake (pagod na ko eh!)
Over the years with probably at least 12 times preparing roast chicken or (with occasional turkey if I am tasked to host a major holiday event) every year, my method of making gravy has evolved.
I have tried using roux method where you melt butter then add flour (this will replace the flour-water mixture) then the drippings/juice follow, the taste adjusted with salt and pepper (and/or soy sauce and worcestershire sauce) to come up with the final gravy. My problem with this is that, the amount of juice I make varies, and sometimes the roux I made is not enough to thicken the whole amount, so I end up boiling (and stirring) some more to reduce the sauce to achieve the desired consistency. Well, not really finding any special effect (like others claim it results to smoother and tastier gravy), I ditched that method.
What I describe below is how I prefer nowadays to make my gravy.
Ingredients:
drippings from roasted chicken or turkey
1/4 cup flour
1/2 cup water (or adjust to make a thick batter yet easy enough to pour)
1/4 cup sherry or cooking wine
salt and pepper to taste
Instructions:
A prelude:
Of course it starts with preparing a good base to start with. Your drippings should contain at least 4 cups of juice to have enough gravy to last the whole chicken (or to use for leftover, if making sandwiches or empanada, etc.). You also should have a good mix of spices (I prefer basic onion, garlic, peppercorns, celery, bay leaves, lemongrass) in the water you put in, with a good spice paste (like the garlic rosemary paste I put under the skin), or just plain (kosher) salt and freshly milled pepper (this combination is my husband's preference) sprinkle on the skin. I also like brining my chicken or turkey with 4 cups of water + 1/4 cup kosher salt while thawing in the fridge the day prior to roasting (this preferably should be rinsed of the next day, and the chicken left open in the fridge to dry out the skin some before roasting, which results to crispier skin). And if you have Americans in your household, the usual potato/carrots combination is a must as well.


So after 2.5 hours of roasting, I transfer the chicken onto a shallower aluminum pan (like my jelly roll pan) to continue for 30 minutes more, with foil over it to avoid overbrowning the skin. I then proceed to making the gravy.
Using a good fat separator like my Amco, I remove fat/oil as well as
big chunks of spices and veggies from the drippings.
I then boil using a small saucepan. I adjust the taste at this point before thickening with flour/water combination.
When I am satisfied with the consistency (I make it a bit thicker because of the next step), I stop and wait awhile. Meanwhile, I transfer potatoes and carrots in a bowl. I prepare the pan for putting back the chicken there.
When chicken is done, I transfer it back to the original pan. Now the jelly roll pan also has some drippings, and partly browned at some points. I now place this pan on stovetop, pour the sherry or cooking wine there, turn on the stove to med heat, scrape the bottom of the pan that it gets dissolved with the sherry/wine, resulting to brown sauce with intense flavor. I now pour this into the saucepan containing the gravy and mix well. Now my gravy has golden brown color with intense flavor and depth to it, so unlike the light brown sauce resulting from mixes.
Love it!
Over the years with probably at least 12 times preparing roast chicken or (with occasional turkey if I am tasked to host a major holiday event) every year, my method of making gravy has evolved.
I have tried using roux method where you melt butter then add flour (this will replace the flour-water mixture) then the drippings/juice follow, the taste adjusted with salt and pepper (and/or soy sauce and worcestershire sauce) to come up with the final gravy. My problem with this is that, the amount of juice I make varies, and sometimes the roux I made is not enough to thicken the whole amount, so I end up boiling (and stirring) some more to reduce the sauce to achieve the desired consistency. Well, not really finding any special effect (like others claim it results to smoother and tastier gravy), I ditched that method.
What I describe below is how I prefer nowadays to make my gravy.
Ingredients:
drippings from roasted chicken or turkey
1/4 cup flour
1/2 cup water (or adjust to make a thick batter yet easy enough to pour)
1/4 cup sherry or cooking wine
salt and pepper to taste
Instructions:
A prelude:
Of course it starts with preparing a good base to start with. Your drippings should contain at least 4 cups of juice to have enough gravy to last the whole chicken (or to use for leftover, if making sandwiches or empanada, etc.). You also should have a good mix of spices (I prefer basic onion, garlic, peppercorns, celery, bay leaves, lemongrass) in the water you put in, with a good spice paste (like the garlic rosemary paste I put under the skin), or just plain (kosher) salt and freshly milled pepper (this combination is my husband's preference) sprinkle on the skin. I also like brining my chicken or turkey with 4 cups of water + 1/4 cup kosher salt while thawing in the fridge the day prior to roasting (this preferably should be rinsed of the next day, and the chicken left open in the fridge to dry out the skin some before roasting, which results to crispier skin). And if you have Americans in your household, the usual potato/carrots combination is a must as well.
So after 2.5 hours of roasting, I transfer the chicken onto a shallower aluminum pan (like my jelly roll pan) to continue for 30 minutes more, with foil over it to avoid overbrowning the skin. I then proceed to making the gravy.
Using a good fat separator like my Amco, I remove fat/oil as well as
big chunks of spices and veggies from the drippings.
I then boil using a small saucepan. I adjust the taste at this point before thickening with flour/water combination.
When I am satisfied with the consistency (I make it a bit thicker because of the next step), I stop and wait awhile. Meanwhile, I transfer potatoes and carrots in a bowl. I prepare the pan for putting back the chicken there.
When chicken is done, I transfer it back to the original pan. Now the jelly roll pan also has some drippings, and partly browned at some points. I now place this pan on stovetop, pour the sherry or cooking wine there, turn on the stove to med heat, scrape the bottom of the pan that it gets dissolved with the sherry/wine, resulting to brown sauce with intense flavor. I now pour this into the saucepan containing the gravy and mix well. Now my gravy has golden brown color with intense flavor and depth to it, so unlike the light brown sauce resulting from mixes.
Love it!
Sunday, March 01, 2009
Making Latik

Not the best photo....sowee...
Do you have kids? I feel thankful that I have son power when I need them, but sometimes, they are not the best human resources one could hope for...
One time I asked my boys to take turn grating coconut (nyog) for use in pichi-pichi. I was very dismayed when I saw the end result: full of fibers that it looked dirty instead of cottony white appearance. I froze it at the time, keeping in mind that I have to use it for something else that it would not have to appear in the final presentation.
Good thing I had spare coconuts at the time so I was still able to serve pichi-pichi the traditional way.
The other night, I recalled that coconut. I debated whether to use it for pan de coco or something else. The I thought of extracting gata...then while extracting, light bulb turned on inside my head and I thought I'd make latik (I had been considering using canned coconut milk for that purpose, but I was hesitant because what if canned coco milk does not produce latik at all???
Ingredients and How-To:
1 mature coconut, grated
Proceed as depicted in the slide show. I like placing the nyog on cheesecloth. Add about 1/4 to 1/2 cup hot water first. Squeeze repeatedly with your hands and fingers. Gather the edges of cheesecloth and wring out the juice. This is the first press (kakang-gata). Do this twice (the resulting juice is the second press; I mix them together for purposes of making latik), then start boiling. (Note: You can probably use the pressed coconut meat to mix with breadcrumbs or flour with curry powder to coat deep fried shrimps...just an idea...)
Use medium low heat to cook, uncovered. Do some chores. Once it starts to thicken, watch closely so as not to burn the resulting latik (you might have to lower the heat further). Once it starts to brown, scrape the bottom of pan frequently. When brown already, drain off the coconut oil. You can use this coconut oil to brush pans for bibingka and other kakanin. Or just pamper yourself with oil massage of the scalp or skin. Store latik in airtight container and keep in the fridge until use.
Can you guess what I will prepare next to use this latik for?


Monday, January 19, 2009
How I Prepare Chicken Stock
Despite all the "waste not, want not" attitude of my MIL and SIL, apparently I am worse then them. During a familiy gathering, they mentioned how they wonder why some people gather the turkey or chicken carcasses after a holiday dinner to boil and make chicken stock.
First, for me, though chicken broth is readily available in the grocery stores, I want my signature taste in my chicken stock/broth. I don't want to have the same generic taste you get from those canned ones.
Second, I prepare chicken stock not only to make use of such bones that would otherwise end up in the trash, but because I like the flavor of "roasted" poultry it imparts to the resulting stock. Sometimes I do prepare stock using chicken necks or backs, though, which gives me the plain boiled chicken taste (the meat of which I remove from the bones after 45 minutes to 1 hr of boiling, then I continue to simmer for another 2 hrs, or I use the slowcooker to simmer overnight.
Third, chicken stock brings out the best taste in dishes such as pancit, chop suey, mami noodles, lugaw (if there's no meat; I usually like the meat taken off the necks here), chicken dumplings in stewed tomatoes, and some stir-fried veggies.
I prepare chicken stock with minimal basic spices: 2 bay leaves, 10 peppercorns, 3 cloves of garlic, and salt (approximate amounts to end up with about 2 quarts of stock). I usually pour water to cover the bones, then double that amount to make room for reduction while simmering. I don't put a lot of salt since that can be easily fixed once you do the cooking and final adjustment.
As depicted in the slide show above, I use empty cups of cottage cheese which measure about 16 ounces (2 cups) to freeze the strained broth. After freezing, I transfer to plastic bags and use as needed.
src="http://pagead2.googlesyndication.com/pagead/show_ads.js">
First, for me, though chicken broth is readily available in the grocery stores, I want my signature taste in my chicken stock/broth. I don't want to have the same generic taste you get from those canned ones.
Second, I prepare chicken stock not only to make use of such bones that would otherwise end up in the trash, but because I like the flavor of "roasted" poultry it imparts to the resulting stock. Sometimes I do prepare stock using chicken necks or backs, though, which gives me the plain boiled chicken taste (the meat of which I remove from the bones after 45 minutes to 1 hr of boiling, then I continue to simmer for another 2 hrs, or I use the slowcooker to simmer overnight.
Third, chicken stock brings out the best taste in dishes such as pancit, chop suey, mami noodles, lugaw (if there's no meat; I usually like the meat taken off the necks here), chicken dumplings in stewed tomatoes, and some stir-fried veggies.
I prepare chicken stock with minimal basic spices: 2 bay leaves, 10 peppercorns, 3 cloves of garlic, and salt (approximate amounts to end up with about 2 quarts of stock). I usually pour water to cover the bones, then double that amount to make room for reduction while simmering. I don't put a lot of salt since that can be easily fixed once you do the cooking and final adjustment.
As depicted in the slide show above, I use empty cups of cottage cheese which measure about 16 ounces (2 cups) to freeze the strained broth. After freezing, I transfer to plastic bags and use as needed.
src="http://pagead2.googlesyndication.com/pagead/show_ads.js">
Saturday, January 10, 2009
Canning Bread & Butter (aka Pimento) Pickles
If you like atsarang papaya, you will like this. I did. 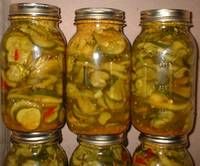
This is a re-posting from my Old Kusina. While this seems off-season in that I usually do canning in the fall, I figure it won't hurt to show this here at this time, so those who will try can plan ahead for what they want to plant in their gardens. (I usually have gardening catalogs during Jan-Feb. My MIL orders as early as Feb or Mar to start her seedlings indoor in April). It is best to can veggies yo yourself grow in your garden, and start the process on the very day you harvest your produce. (Although an exception for me is canning tomatoes. Sometimes I harvest my tomatoes as soon as they have red/yellow/orange streaks and let them ripen inside the house to avoid being attacked by slugs, then I process them).
During the winter of 2003-2004 my dear MIL gave me a quart of this BBP. (She gave me a jar of dill pickles prior to this.) She said her husband likes it so much that he can finish the whole quart in two weeks, and that he can't eat any roasted meat without it on the side. I tried it right away, and that day I decided that I had a new favorite pickle. The closest Filipino pickle that tasted like BBP is the atsara, but my! This one is a lot better! (I have tasted several atsara preparations in the PI, some with carrot slices, some with bittermelon slices (ugh!), and some just the grated papaya with onions and the brine. The best atsara I have tasted was the one that went along with Baliwag lechon manok, if my memory serves me right.)
That summer of 2004 when it was harvest and canning time for the cucumbers from my vegetable garden, I was so eager to learn how to make BBP. I first learned canning the dill pickles first, which was harder and fussier when it comes to processing (have to maintain at a point just below boiling). This one is way too easy...just half-cook the cucumbers and can. No more processing needed! The pure vinegar-sugar combination (as in no water) does not encourage growth of Clostridium botulinum and other microbes while the jar is not yet opened.
Browsing some websites about BBP, I learned that many required other ingredients not in this recipe from my MIL's canning book. Some required processing in a boiling water canner. MIL says you can't buy these at the grocery stores, and if ever you find one, they are not as good as what we are making. She first had a taste of this from a friend who shared with her the recipe.
Others are just so mushy and not as pleasantly tasting as these.
So, for those who are planning on planting cucumbers next summer, you might want to make these pickles. Your spouses might prefer the dill pickles (as mine does), but you will surely love this if you love atsara. Now for American wives to Pinoys, if your hubby likes atsara (pronounced ah-cha-rrra), they will surely appreciate this. For Filipinos in PI, you might want to try making these as substitute for atsara. Best served with roasted chicken. Also goes well with burgers and hotdog sandwiches. I love giving these away as Christmas gifts to friends. My friend Ana can finish a jar the very day she gets one from me.
Equipment:
knife
chopping board (better if you have a mandolin or a slicer either in food processor or as attachment)
nonreactive stockpot (stainless steel)
Jars and closures
magnetic picker
wide stainless steel funnel
Ingredients:
25 pickling cucumbers
8 fist-sized yellow onions (or the equivalent amount)
2 red and green bell pepper (1 each, or 2 bell peppers plus 1 small jar of pimento)
1 cup canning salt
For the brine:
12 cups sugar, dissolved in 12 cups vinegar
1/2 cup mustard seed
6 tsp ground turmeric
Instructions:
I did this in two consecutive days.
Day I: Preparation
Do on the same day of harvesting for optimum result. Wash cucumbers well. Remove ends. Group the cucumbers into 3. Slice the first group to the desired thickness (I like mine about 3/16 of an inch). Divide the onions into 2, slice into rings. Divide the peppers into 2, dice and discard the seeds.
Layer as follows: cucumbers; onion+peppers; cucumbers; onions+peppers; cucumbers.
Sprinkle 1 cup of canning salt on top. Cover and let sit overnight. The salt draws the excess moisture from the cucumbers, so that it will retain its crispiness even when canned.
Day 2: Canning
As usual, before proceeding, prepare jars and closures according to instructions in Canning Basics.
Next morning, rinse with cold water and drain. Taste cucumber. Rinse again and taste again. Repeat until the cucumbers are not that salty to your taste (just a bit).
Prepare the pickling solution and boil for 5 minutes, stirring constantly.
Pour into the stockpot of cucumbers, and heat near boiling point, stirring constantly to assure uniform cooking.
Bring back to heat up to just below boiling point then lower heat and maintain, stirring constantly to assure uniform cooking. After about 5 minutes, slices should start to become translucent. Check for doneness by trying some slices from different spots in the pot. Cucumbers should be just half-cooked and still crispy. Lower heat to the minimum to maintain heat yet not overcook the remaining cucumbers as you transfer them to jars little by little.
*Using wide-mouthed funnels, transfer to hot jars right away, with a good proportion of pickles to brine solution, making sure all slices are covered. Leave 1/2-inch headspace. (Headspace allows for volume contraction while the jars are cooling down so that later on the lid pops in, indicating proper seal.)
Release bubbles with a plastic spatula or a bubbler, wipe rim with damp cloth or paper towel, and close immediately with clean lid and screw band. Put on a sterile towel.**
Repeat steps *-** in one smooth flow jar per per jar, stirring again before ladling. Don't fill all the jars then proceed with covering because this will not be processed in a boiling water bath. (the pure vinegar-sugar combination makes it less prone to developing botulism and is less susceptible to bacterial/mold proliferation. For every new jar filled, stir the pickles, with the heat kept to the minimum to avoid overcooking yet maintain the heat, before ladling into the hot jars. After all jars are filled, cover with another towel. Only then can you allow open windows/draft. Wait for at least 3 hours for popping sounds when sealing. After 12 hours, take note of unsealed jars and place in refrigerator, to be consumed within 2 weeks. For the properly sealed jars, let sit in the pantry (should be dark and cool) for at least three weeks to further develop the flavor. Unopened jars will remain good within 1 year from canning.
This is now my favorite pickles (hubby's fave is the dill pickles) because it comes closest to the taste of the atsara that I liked, even better. I use this with any dry (not soupy) dishes, or when hunger strikes and I am not in the mood to cook and there are no leftovers to raid in the fridge. Now I am planning to turn them into holiday gifts for the few friends that I have made in the past year.
Do you want more ideas about pickling cucumbers? Click here.
This is a re-posting from my Old Kusina. While this seems off-season in that I usually do canning in the fall, I figure it won't hurt to show this here at this time, so those who will try can plan ahead for what they want to plant in their gardens. (I usually have gardening catalogs during Jan-Feb. My MIL orders as early as Feb or Mar to start her seedlings indoor in April). It is best to can veggies yo yourself grow in your garden, and start the process on the very day you harvest your produce. (Although an exception for me is canning tomatoes. Sometimes I harvest my tomatoes as soon as they have red/yellow/orange streaks and let them ripen inside the house to avoid being attacked by slugs, then I process them).
During the winter of 2003-2004 my dear MIL gave me a quart of this BBP. (She gave me a jar of dill pickles prior to this.) She said her husband likes it so much that he can finish the whole quart in two weeks, and that he can't eat any roasted meat without it on the side. I tried it right away, and that day I decided that I had a new favorite pickle. The closest Filipino pickle that tasted like BBP is the atsara, but my! This one is a lot better! (I have tasted several atsara preparations in the PI, some with carrot slices, some with bittermelon slices (ugh!), and some just the grated papaya with onions and the brine. The best atsara I have tasted was the one that went along with Baliwag lechon manok, if my memory serves me right.)
That summer of 2004 when it was harvest and canning time for the cucumbers from my vegetable garden, I was so eager to learn how to make BBP. I first learned canning the dill pickles first, which was harder and fussier when it comes to processing (have to maintain at a point just below boiling). This one is way too easy...just half-cook the cucumbers and can. No more processing needed! The pure vinegar-sugar combination (as in no water) does not encourage growth of Clostridium botulinum and other microbes while the jar is not yet opened.
Browsing some websites about BBP, I learned that many required other ingredients not in this recipe from my MIL's canning book. Some required processing in a boiling water canner. MIL says you can't buy these at the grocery stores, and if ever you find one, they are not as good as what we are making. She first had a taste of this from a friend who shared with her the recipe.
Others are just so mushy and not as pleasantly tasting as these.
So, for those who are planning on planting cucumbers next summer, you might want to make these pickles. Your spouses might prefer the dill pickles (as mine does), but you will surely love this if you love atsara. Now for American wives to Pinoys, if your hubby likes atsara (pronounced ah-cha-rrra), they will surely appreciate this. For Filipinos in PI, you might want to try making these as substitute for atsara. Best served with roasted chicken. Also goes well with burgers and hotdog sandwiches. I love giving these away as Christmas gifts to friends. My friend Ana can finish a jar the very day she gets one from me.
Equipment:
knife
chopping board (better if you have a mandolin or a slicer either in food processor or as attachment)
nonreactive stockpot (stainless steel)
Jars and closures
magnetic picker
wide stainless steel funnel
Ingredients:
25 pickling cucumbers
8 fist-sized yellow onions (or the equivalent amount)
2 red and green bell pepper (1 each, or 2 bell peppers plus 1 small jar of pimento)
1 cup canning salt
For the brine:
12 cups sugar, dissolved in 12 cups vinegar
1/2 cup mustard seed
6 tsp ground turmeric
Instructions:
I did this in two consecutive days.
Day I: Preparation


Do on the same day of harvesting for optimum result. Wash cucumbers well. Remove ends. Group the cucumbers into 3. Slice the first group to the desired thickness (I like mine about 3/16 of an inch). Divide the onions into 2, slice into rings. Divide the peppers into 2, dice and discard the seeds.
Layer as follows: cucumbers; onion+peppers; cucumbers; onions+peppers; cucumbers.
Sprinkle 1 cup of canning salt on top. Cover and let sit overnight. The salt draws the excess moisture from the cucumbers, so that it will retain its crispiness even when canned.
Day 2: Canning
As usual, before proceeding, prepare jars and closures according to instructions in Canning Basics.
Next morning, rinse with cold water and drain. Taste cucumber. Rinse again and taste again. Repeat until the cucumbers are not that salty to your taste (just a bit).
Prepare the pickling solution and boil for 5 minutes, stirring constantly.
Pour into the stockpot of cucumbers, and heat near boiling point, stirring constantly to assure uniform cooking.
Bring back to heat up to just below boiling point then lower heat and maintain, stirring constantly to assure uniform cooking. After about 5 minutes, slices should start to become translucent. Check for doneness by trying some slices from different spots in the pot. Cucumbers should be just half-cooked and still crispy. Lower heat to the minimum to maintain heat yet not overcook the remaining cucumbers as you transfer them to jars little by little.
*Using wide-mouthed funnels, transfer to hot jars right away, with a good proportion of pickles to brine solution, making sure all slices are covered. Leave 1/2-inch headspace. (Headspace allows for volume contraction while the jars are cooling down so that later on the lid pops in, indicating proper seal.)
Release bubbles with a plastic spatula or a bubbler, wipe rim with damp cloth or paper towel, and close immediately with clean lid and screw band. Put on a sterile towel.**
Repeat steps *-** in one smooth flow jar per per jar, stirring again before ladling. Don't fill all the jars then proceed with covering because this will not be processed in a boiling water bath. (the pure vinegar-sugar combination makes it less prone to developing botulism and is less susceptible to bacterial/mold proliferation. For every new jar filled, stir the pickles, with the heat kept to the minimum to avoid overcooking yet maintain the heat, before ladling into the hot jars. After all jars are filled, cover with another towel. Only then can you allow open windows/draft. Wait for at least 3 hours for popping sounds when sealing. After 12 hours, take note of unsealed jars and place in refrigerator, to be consumed within 2 weeks. For the properly sealed jars, let sit in the pantry (should be dark and cool) for at least three weeks to further develop the flavor. Unopened jars will remain good within 1 year from canning.
This is now my favorite pickles (hubby's fave is the dill pickles) because it comes closest to the taste of the atsara that I liked, even better. I use this with any dry (not soupy) dishes, or when hunger strikes and I am not in the mood to cook and there are no leftovers to raid in the fridge. Now I am planning to turn them into holiday gifts for the few friends that I have made in the past year.
Do you want more ideas about pickling cucumbers? Click here.
Thursday, January 01, 2009
How I Make Fresh Lumpia Wrappers
Thanks to the Villa Ware crepe maker,  making these wrappers are a breeze. I never have learned the proper way to make fresh lumpia wrappers using a skillet or a non-stick pan. I tried several times in the past, but I always ended up frustrated. Now I can make them without problems. It did take some practice before I was able to make good ones. And usually, once I start making them, the first ones are not good. It is expected, though, as the manual states the same thing. Maybe it has to do with the gadget warming up.
Please see recipe for batter on "Fresh Lumpia" post. Below is a short video on how I actually made them. I suck at video making, but I made this primarily to show how I swirled the pan right after lifting it up from the batter. If you don't do this swirling, you end up with a very uneven crepe.
Important notes:
1. Make the batter 1 night ahead so the gluten develops first. It lessens the hole and makes the crepe more pliable.
2. Let batter stand in room temp for 30 minutes prior to starting.
3. The first ones will get wasted as you get used to doing this and discovering the technique hands on. Don't get frustrated. (It is for this reason that you should not cut the recipe in half).
4. Butter the pan the whisk the batter before dipping the pan.
5. Put enough liquid but not too much into the dipping plate.
6. Make sure you let the crepe cool down completely before stacking. Use wire racks to cool. You do not have to use filter or wax paper in between. They easily come off each other.
7. Wrap in plastic the stacked crepes before storing in the fridge if not using immediately. Use within 2 days, I suggest.
Enjoy!
making these wrappers are a breeze. I never have learned the proper way to make fresh lumpia wrappers using a skillet or a non-stick pan. I tried several times in the past, but I always ended up frustrated. Now I can make them without problems. It did take some practice before I was able to make good ones. And usually, once I start making them, the first ones are not good. It is expected, though, as the manual states the same thing. Maybe it has to do with the gadget warming up.Please see recipe for batter on "Fresh Lumpia" post. Below is a short video on how I actually made them. I suck at video making, but I made this primarily to show how I swirled the pan right after lifting it up from the batter. If you don't do this swirling, you end up with a very uneven crepe.
Important notes:
1. Make the batter 1 night ahead so the gluten develops first. It lessens the hole and makes the crepe more pliable.
2. Let batter stand in room temp for 30 minutes prior to starting.
3. The first ones will get wasted as you get used to doing this and discovering the technique hands on. Don't get frustrated. (It is for this reason that you should not cut the recipe in half).
4. Butter the pan the whisk the batter before dipping the pan.
5. Put enough liquid but not too much into the dipping plate.
6. Make sure you let the crepe cool down completely before stacking. Use wire racks to cool. You do not have to use filter or wax paper in between. They easily come off each other.
7. Wrap in plastic the stacked crepes before storing in the fridge if not using immediately. Use within 2 days, I suggest.
Enjoy!
Friday, September 08, 2006
Savory Chicken Feet
Before I give the recipe for the chicken feet, here's a slide of instructions on how to prepare them.

When I was still in the Philippines during review days for the medical boards, my friends and I would often buy savory chicken feet from a Chinese restaurant. I used to just know chicken feet a la adidas (the grilled ones) which was a common merienda for me when I was still in elementary school. When I had a taste of this super tender savory chicken feet dish, I was hooked.
Here's my version for Savory Chicken Feet (It does not taste like the ones we ate back in PI, but tastes good nonetheless.)
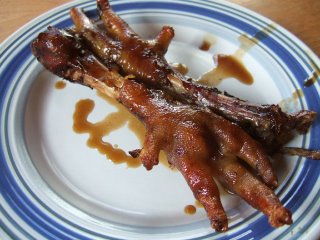
Ingredients:
12 chicken feet
3 tbsp dark soy sauce
2 tabsp rice wine
1 tbsp red wine vinegar
3 slices ginger
3 cloves, finely minced
3 sliced green onions
3 tbsp dark brown sugar
1 star anise
1/4 tsp pepper
1 tbsp sesame oil
2 cups water
1 tbsp cornstarch dissolved in 1/4 cup water
Instructions:
Place all chicken feet in the slow cooker. Combine the rest of the ingredients and pour over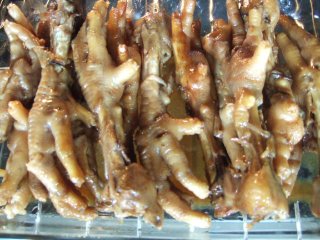 chicken feet. Cover and set in slow cook for 5-6 hours (I did this overnight from midnight). Then uncover and stir so those on top will be at the bottom and cover again to cook for two hours more.
Transfer the chicken feet onto a baking pan. Transfer the sauce into a fat separator first to pour out the sauce without the fat/oil into a small saucepan. Boil then slowly add while stirring the cornstarch-water mixture to thicken to desired consistency. Brush the chicken feet with the sauce and broil for about 5 minutes to glaze, then turn the pieces over, coat with sauce again and broil for another 5 minutes. Serve with hot plain rice (or pampulutan. Tagay na!)
Ingredients:
12 chicken feet
3 tbsp dark soy sauce
2 tabsp rice wine
1 tbsp red wine vinegar
3 slices ginger
3 cloves, finely minced
3 sliced green onions
3 tbsp dark brown sugar
1 star anise
1/4 tsp pepper
1 tbsp sesame oil
2 cups water
1 tbsp cornstarch dissolved in 1/4 cup water
Instructions:
Place all chicken feet in the slow cooker. Combine the rest of the ingredients and pour over
 chicken feet. Cover and set in slow cook for 5-6 hours (I did this overnight from midnight). Then uncover and stir so those on top will be at the bottom and cover again to cook for two hours more.
Transfer the chicken feet onto a baking pan. Transfer the sauce into a fat separator first to pour out the sauce without the fat/oil into a small saucepan. Boil then slowly add while stirring the cornstarch-water mixture to thicken to desired consistency. Brush the chicken feet with the sauce and broil for about 5 minutes to glaze, then turn the pieces over, coat with sauce again and broil for another 5 minutes. Serve with hot plain rice (or pampulutan. Tagay na!)
Thursday, March 24, 2005
TOGE (Mung Bean Sprouts)
Para ke Loree H. Love you!
I had plenty of mung beans; thanks to my online friends who sent me several packages. Because of this abundance, I once again had that tendency to experiment with them. I thought I'd make my own sprouts.


Prepare the baking dish by putting 2-3 layers of paper towel submerged in tepid water that is 1 inch high. Sprinkle 1/4 cup of mung beans to distribute as evenly as you can. Cover loosely with plastic (I use the plastic pouch that came with the traveling bags.) then place on a warm floor (if you don't have a warm floor, use heating pad. Heating pads are used by gardeners when they are starting their seedlings indoors in preparation for spring/summer planting to maximize the warm weather.)
Everyday add 1 cup of water by pouring slowly and carefully as to not displace the sprouts from where they have established their roots in the paper towel (which serves as a substrate much like the soil. Without paper towel, and without anything for the roots to hold on to, the seeds just drown in the water and rot. I know because I tried to eliminate this factor after successful sprouting on the third try, and so failed without it.)


I even used it in leftover tortilla from a taco kit dinner...
I also add it to shredded leftover beef pares.(I reheat the leftover, then sprinkle the sprouts and just get them to the point of blanching.)

I had plenty of mung beans; thanks to my online friends who sent me several packages. Because of this abundance, I once again had that tendency to experiment with them. I thought I'd make my own sprouts.
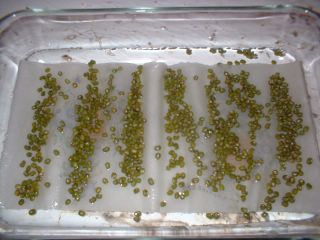
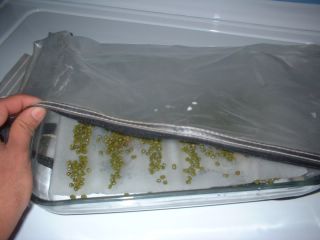
Prepare the baking dish by putting 2-3 layers of paper towel submerged in tepid water that is 1 inch high. Sprinkle 1/4 cup of mung beans to distribute as evenly as you can. Cover loosely with plastic (I use the plastic pouch that came with the traveling bags.) then place on a warm floor (if you don't have a warm floor, use heating pad. Heating pads are used by gardeners when they are starting their seedlings indoors in preparation for spring/summer planting to maximize the warm weather.)
Everyday add 1 cup of water by pouring slowly and carefully as to not displace the sprouts from where they have established their roots in the paper towel (which serves as a substrate much like the soil. Without paper towel, and without anything for the roots to hold on to, the seeds just drown in the water and rot. I know because I tried to eliminate this factor after successful sprouting on the third try, and so failed without it.)
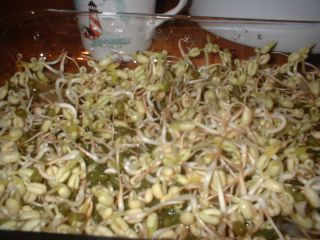
With my experimentations, I came to the conclusion on what were obvious needed factors when sprouting:
1. Paper towel serves as a growing medium like soil.
2. Water to germinate the seeds and feed the seedlings.
3. Plastic to keep the moisture in and the cold air out, not to keep the dust off. (Remember, this is not the Philippines. My area is cold and the air is so dry that humidity levels drop down to 30% in winter time. Without the plastic, the radicle that started to grow after one day just stopped growing. I realized it was because the cold and dry air tended to cool the water enough to inhibit germination and also would dry up the area surrounding the sprouts, making them brown.)
4. Warm floor or heating pad (the optimal temperature would be around 70-80 deg F, which would sound ridiculous for someone living in the PI, where temperature changes are not noted so much because they are pretty much stable, so in PI, one can place this anywhere in the house).
See...I am really learning about gardening.
Harvest these sprouts on the third day. Rinse well and refrigerate. Consume on the same day of harvesting. I am guessing that light promotes greening of these sprouts and formation of leaves, but I am not sure. I have done these at least 5 times successfully, and ate these. They tasted good and not at all bitter. I even tried to taste the raw brownish root tips, and they had the pleasant taste of raw greens.
What to do with toge?
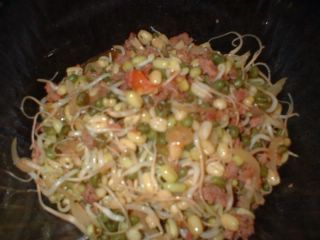

I even used it in leftover tortilla from a taco kit dinner...
I also add it to shredded leftover beef pares.(I reheat the leftover, then sprinkle the sprouts and just get them to the point of blanching.)

So for those of you who like bean sprouts, just give it three days. As long as you store mung beans, you will not have to go to the grocery store to buy mung bean sprouts.
Nutritional value of mung bean sprouts, taken from nutritiondata.com:
The Good
This food is low in Saturated Fat and Sodium, and very low in Cholesterol. It is also a good source of Protein, Thiamin, Niacin, Vitamin B6, Pantothenic Acid, Iron, Magnesium, Phosphorus and Potassium, and a very good source of Dietary Fiber, Vitamin C, Vitamin K, Riboflavin, Folate, Copper and Manganese.
The Bad
A large portion of the calories in this food come from sugars.
Detailed nutritional information can be seen here.

Monday, January 31, 2005
How I Make Breadcrumbs
This is a re-posting from my old kusina.
For Racquel and everyone else who might benefit from this bit of info...
One of the ways I use stale bread is to make bread crumbs (others: bread pudding, french toast, bread pizza). Bread crumbs can be used on our favorite roll pan de sal, or in such recipes as meatballs and embutido (recipes for pork embutido here and here and for beef embutido here).
For Racquel and everyone else who might benefit from this bit of info...
One of the ways I use stale bread is to make bread crumbs (others: bread pudding, french toast, bread pizza). Bread crumbs can be used on our favorite roll pan de sal, or in such recipes as meatballs and embutido (recipes for pork embutido here and here and for beef embutido here).
The way I prepare it depends on the season, and winter is my favorite time to make breadcrumbs because I don't need the oven, and therefore, it's cheaper energy-wise. Here's how:
Before the bread develops molds (which usually happens if the bread is kept in a place where heat causes "sweating" of the bread, and moisture is trapped inside the plastic packaging. Shred  the bread into small pieces and place on a baking sheet with enough space that allows good exposure. Since winter is a time when there are no flies, just place the baking sheet on the countertop overnight. The humidity level during winter drops so much (below 30% in my area) that by morning the bread slices are very crunchy. I use the chopper to pulverize them (some use ziploc and rolling pin). When bread is dehydrated this way, there is no danger of toasting them, as against using the oven during more humid days (either at 200 deg of right after turning off the oven after baking a dish or rolls and letting the residual heat dehydrate the bread pieces for around 5 minutes).
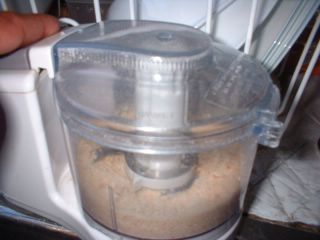

After pulverizing the breadcrumbs, I store it in the container of the first and only breadcrumbs I ever purchased.
Subscribe to:
Posts (Atom)

Custom Search