Showing posts with label pie crust. Show all posts

Wednesday, January 12, 2005

Buko (Coconut) Pie

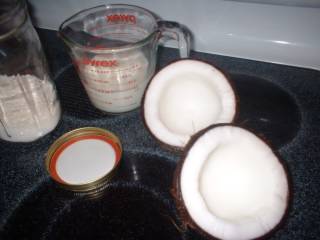
very think and hard flesh of mature coconutBefore Christmas, I bought a coconut that I saw at Hannaford, the kind that we would label as niyog in PI. My plan was to make a buko pie with it, according to the recipe that stel gave to me. I waited til the 23rd to see what kind of coconut it was. I was dismayed at what I saw...I had half-expected it, but I was hoping it was not so - a very mature coconut. I got the coconut water, then tried to scoop thin flesh, but I found it too hard for the spoon. I got a fork, and I came up with nyog that we usually use on puto, kutsinta, etc...you get the idea.

I stored the nyog in a jar in a fridge, thinking of what to do next.


Then I opened the macapuno jar that Joanne gave me, but found it too mature to be labeled as macapuno...hmmmm...but not too mature to be used in buko pie.


So, I got stel's recipe and proceeded with my experiment.


The ingredients as per stel's recipe were:


2 cups buko meat (which I did not have; I had the whole jar of macapuno with its syrup)

3/4 cup sugar

1/2 cup coconut water

1/2 1/2 cup evaporated milk (I used fresh milk)

1/2 cup starch


I forgot to look at her instructions (I scribbled it alongside other notes from the net), which called for cooking the mixture and stirring continuously then pouring it into a pastry-lined pan, to top with the 2nd crust then baked at 400 deg F til brown. What I actually did was to pour directly the uncooked mixture into the pastry-lined pan, top with the second crust, brush with eggwash, bake at 400 deg for 15 minutes then a further45 minutes at 325 deg F.


After it has cooled down to a comfortable-to-the-palate warmth, buko pie cooling down on a wire rackI started gobbling it up. Shared it with hubby, who could not decide whether he liked it or not, but he kept tasting it again and again that he ate half of the slice, saying, "It's different; the texture is interesting. I still can't decide whether I like it or not...maybe I'll have a slice when I come back. (He was about to go to the local store to get his supply of Pepsi, a habit I find hard to break for his own sake.) I was thrilled that he seemed to have liked it, but the novelty of the texture and taste (they are used to tart-sweet gooey fruit pies, whereas we Filipinos like em sweet and with a definite form).


My older son was hooked to it, he asked for another. My younger did not even try. When hubby came back, I was ready to offer him a slice while it was still warm, but he declined because he had to use the bathroom...Oooops...guess those who are not used to coconut will always have to deal with that problem initially. I and older son enjoyed it for the next 2 days, reheating the pie for several minutes in the oven toaster.Posted by Hello

Wednesday, November 24, 2004

Minced (Deer) Meat Pie

Nakatikim ka na ba ng usa? Si Pareng Joe of NJ, nakatikim na. We are going to exchange packages (he has just sent me a package of goodies from a Filipino store, and I will send him BBP pickles and empanadang minced deer meat.) But this post is not about tapa.


In this state hunting is one of the activities many people engage in, but they have to get a specific (as in turkey, doe, buck) license for that, aside from the license for carrying guns. My friend also told me that they do lottery for hunting.


My husband is fond of collecting guns, but hunting has never been appealing to him. His brother and his wife, though, like the outdoors, that the couple usually fish and hunt during the seasons.


Recently, my BIL shot a buck at the neck. They cleaned and slaughtered it and I had my supply of deer heart (which I cooked using Sassy's barbecued gizzard recipe. 'Twas good!) and liver.


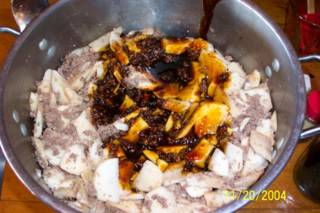
My MIL cooked the neck for five hours, then patiently separated the meat from the bones and ground it, ending up with 7 quarts of deer meat, which she cooked to make "minced meat". I was invited to witness how to do it, the message being carried to my by my dear hubby (and I noted a hint of excitement while he was asking me whether I wanted to see how his mom does that). I told hubby I knew what mincing was, but was minced meat something that referred to a process of some sort? Yes it was, he said. Of course I was eager to see what minced meat was. I am just too eager to discover more about foods that my hubby enjoys.


Ingredients:


The proportions will all depend on how much ground meat you have.


ground previously cooked deer meat

apples (we used Cortland)

raisins

molasses (They said that in the grocery stores is no good. They get theirs at Agway here, which sells molasses dispensed from a bucket. One has to bring his own jar. $2/qt.)

salt

ground cinnamon

ground cloves

ground allspice

cider (Hubby said apple juice is cider minus the pectin content.)


Instructions:


Measure the meat.

Peel and slice the apples. It should be double the amount of minced meat.

For every quart of meat, measure 1/2 of 15-oz box of raisins. Ground 3/4 of this and leave the rest whole.

Combining them altogether, add the spices as follows: For every 8 qts of the meat-apple-raisin mixture, add 1 cup molasses, and 1 tsp each of salt, cinnamon, cloves, and allspice.


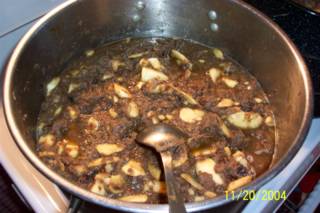
Cook everything together in a stockpot over low heat, intermittently stirring for even cooking and to avoid scorching.


Add cider from time to time to keep the mixture moist.Continue simmering (and stirring) for about 2 hours (personally I think it can be done in one hour, as soon as the fruits are cooked and the flavors have mingled.)


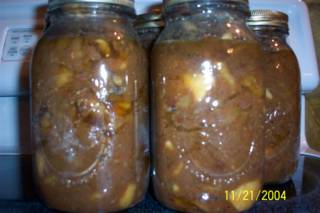
MIL processed the quarts in a boiling-water canner for 40 minutes (My MIL let me go home, thanks to her! ) then told me to just have my hubby pick up some of them, because I told her I wanted to try to make the minced meat pie as soon as it was done.


So I did. According to her, she puts pieces of butter on top of the minced meat before putting the top pie crust.


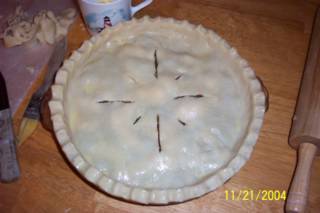
Learning more about making fancier edges, I pressed the overhangs (I left about an inch from the edge) of the two pie crusts together, tucked them under, then using my fingers, created waves like so. Then I made slits on the top using a knife, wiggling the knife while still through the slits to make them wider, so that they would not appose again (In my first attempts at slits I was too hesitant with them, then they almost closed off!)


As usual, I brushed the top with my egg-sugar combination for that golden crust. However, maybe my sides were too elevated (especially against the not so high pile of the minced meat) that they got too browned (I have none of those aluminum pie edge covers, and I was too lazy to improvise with the use of ordinary aluminum foil. I was thinking that nobody in the family really cares about the edges. They only like the filling and the thin crust. I am the only one who really cares for the crust, more for that than the filling.) So here you can see almost-burnt edges. (I remember a time when I tried to make the edges lower than that of the pie plate because I had not enough filling; during the initial stages of baking, when the fat melted, the dough slid off the sides! I stopped it immediately and saved the filling then made another pie crust. It was for a pie version of leche flan. I was experimenting to make an egg pie of some sort.)


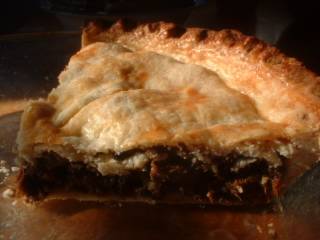
This was what was left when I remembered to take a photo of the sliced pie. The warm pie was runny. This one is cold already, so don't be fooled. We like the pie served warm with vanilla ice cream.


I prepared this pie the next day for supper, after having told my hubby about my plan. Then when I called him to the table with the pie and the ice cream there, he asked me. "What's for supper?"

I was puzzled. I said "That," pointing to the pie.

"Oh, you're not serving anything else? Because we eat Minced Meat Pie as dessert."

I said (I felt I was blushing), "I didn't know that...to us Filipinos, that could already count as a complete meal by itself, or a very heavy snack."

He shrugged, and savored it anyway, saying later that my pie crust is the best (despite the burnt edge! Haha!), and that the pie was indeed filling and delicious! (of course the credit for the filling goes to his mom).

My personal opinion on Minced Meat Pie: While it was good to discover new recipes traditionally prepared by my in-laws' family, and discovering a meat-fruit combination that my hubby actually likes (surprise! surprise!), I still prefer the chicken empanada. Maybe it's just because that's what I grew up with (and what he grew up with).

We're gonna have this on Thanksgiving, to be held at my SIL's house. But my MIL will be the one to prepare the pie. Walang nakatoka sa akin. Pero lagot ako sa Christmas. Dito naman kami sa bahay namin. Ngi! Posted by Hello


Friday, November 05, 2004

Apple Pie

Using the pie crust recipe and method that I posted about earlier, I now ventured into making my second apple pie, this time, using Cortland apples (not McIntosh, which were too sour for me). According to food journalist and cookbook author Mark Bittman, the best apples for baking are Cortland or Ida Redor Paula Red (Microsoft Encarta Reference Library 2003).


I used this recipe that my friend bingbing gave to me but eliminating the lemon juice, as I was apprehensive that the result might be too sour again.


Then upon friends at WK's suggestion of adding cardamom, and seeing a recipe at AllRecipes.com, I added 1/8 of allspice.


Then there was also the French apple pie that used a Streusel topping instead of a pie crust (I forgot where I got it. I just used the google search). I did that but still used a pie crust to top the Streusel topping.


It turned out to be the "Perfect Apple Pie" for my hubby, me, and my kids. (But I admit I still favor the Buko Pie in Laguna. Probably only because apple pie is not one that I grew up with.)


So here's the recipe (See Pie Crust post first and prepare crust-lined pie plate before preparing the filling):


Ingredients:


7-8 cups thinly sliced peeled baking apples

2 tablespoons lemon juice

1 cup sugar

1/4 cup all-purpose flour

1 tsp ground cinnamon

1/8 tsp ground nutmeg

1/8 tsp ground cardamom

1/8 tsp allspice

1/4 teaspoon salt


Streusel topping (you may want to forget about the pie crust topping and have this instead)

1/3 c brown sugar

1/2 tsp ground cinnamon

1/4 cup cold butter


Eggwash (1 egg + 1 tbsp sugar, beaten)


Instructions:


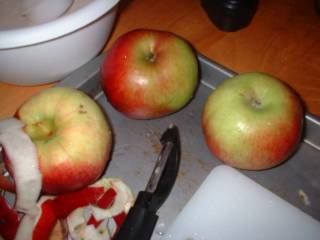
Peel, core and slice the apples thinly. Combine sugar, flour, cinnamon, nutmeg, allspice and cardamom; add to apples and toss.


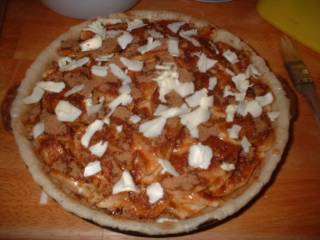
Pour into crust; Prepare Streusel topping by mixing brown sugar and cinnamon, then sprinkling on top of the apples.


Dot with butter (I used the peeler. You may use grater for this purpose).


Put on top the second pie crust; cut slits on top. Brush eggwash over pastry.


Bake at 425 degrees for 15 minutes then reduce heat to 350 degrees bake 40-45 mins. or until crust is golden and filling is bubbly.


(TIP: Place enough sheets of wax paper to cover bottom of the oven to catch overflowing juices. This will spare you the trouble of cleaning afterwards.)


Cool on a wire rack.


Eat when comfortably warm.


(I actually liked it better when it was cooled down and has sat in the fridge overnight. Not only is the pie firmer to cut without gooey juices flowing to the sides, the apple slices have also imbibed the flavors of the spices more.


My first apple pie made with McIntosh was too sour. A friend in WK, sognaluna (an American wife to a Filipino) suggested I eat the pie with vanilla ice cream. I tried, and even ate it with additional maple syrup, but the sourness was still too much for me. And when I noticed it was only me eating the rest of the pie (after the initial tasting by the other family members), I threw the last two big slices (1/4 of the whole pie). That night my hubby asked where the apple pie was, because he noticed that I had in the fridge the Jello no-bake cheesecake that he loves, I told him I threw the apple pie because nobody wanted it anyway.


"I like it...It's just that I have not been feeling too well in the past days. It would keep for a month..." I just shrugged, thinking..."yeah, right..."


Well, this time with Cortland, we easily consumed the pie, even without ice cream or maple syrup. Though I am foreseeing bags of Golden Delicious and Red Delicious apples, they are so good that we can eat them as is. No need to bake. Cortland is actually good enough to eat raw. Pretty much tastes like the apples that were sold at 3 for P20 in the Philippine Markets (if you bought them fresh), but not as good as Fuji apples.

Posted by Hello

Tuesday, October 19, 2004

Making Pie Crust - My first attempt

Last year I wanted to try making an apple pie. But I did not know how to make the crust. I searched the website which I trusted to give the best tips on how to make one: King Arthur Flour. And I found their Favorite Pie Crust Recipe, which explained their method first before they gave their ingredients list. At first I found it too complex. So, I shook off my dream to bake a pie that year and tried another apple recipe, which I liked but my hubby found so-so (anything new to him is not that welcome. I was surprised he liked my adobo, kaldereta, and chicken curry at all!).


Now, with the recent trial in making empanada which met success at least with the group we had during a friend's birthday celebration, I gathered enough courage to give the recipe a second look and to finally try. The empanada pie crust was very similar anyway. But the method given by KAF resulted to a more pliable, yet tender and flaky crust that my hubby dubbed as "perfect" and "better than store-bought" ("Don't show that to Mom. She'd have a fit!" What a compliment.) My apple pie tasted good to my husband, but not to me nor to my kids, as we are not that used to super-tart/sweet combination in pies. So, in this post, I would share only my pie crust making, as I am still in search of pie filling recipes that will reach a compromise between my taste and my husband's (the kids like it sweeter, just as I do). Maybe the long-time Pinay expats can give me some.


Why do I want to make my own pie crust when we can buy it from the store? One thing is that I believe that making from scratch is more economical, given that I have plenty of time to experiment. Second, I like the challenge. Third, if I can come up with something better than store-bought (like my whoopie pie), then why not? Fourth, it might be a source of additional occasional income in the future if I find a market for my goods. (A note to drstel: My friend who celebrated her birthday was asking for a session in empanada, because her co-worker's family had been bugging her to teach them the recipe!) And fifth, if I can teach my kids the how-to's of such favorites, then it will be a tradition to be passed on (a good way to share quality time with the family).


Okay on to Pie Crust Making:


(I compared recipes of two-crusted pies with that of KAF, and I chose one that used both vegetable shortening and butter (like in KAF), but I incorporated 1 tbsp vinegar (as in KAF, but not in the recipe I used) and eliminated KAF's use of their special flour (I used regular all-purpose flour, which I had in my pantry) as well as the buttermilk powder (I did not have it; it was optional anyway.) I got the recipe from All-Recipe's website. It also had sugar (not in KAF, but I liked it so after having tried the empanada crust of drstel). Then I added a touch of eggwash (1 egg slightly beaten + 1 tbsp sugar + (optional) 1 tbsp cream or milk) like I did with the empanada.


Ingredients:

2 1/2 cups white flour

2 tbsp sugar

1/4 tsp salt

1/2 cup cold butter

5 tbsp cold vegetable shortening

1 tbsp cold cider vinegar

7 tbsp (or so) ice water


Instructions:


Whisk together all of the dry ingredients, reserving a few tablespoons of the flour. Cut in the vegetable shortening, working the mixture until it’s mealy and crumbly. (I did not include photos here of the initial steps. That would be redundant. Just look at the chicken empanada recipe.)


Place the reserved flour on your work surface, and coat the butter with the flour. Use a rolling pin or the heel of your hand to flatten the butter till it’s about 1/2-inch thick. Break this flour-coated butter into 1-inch pieces, and mix it into the dough, just till it’s evenly distributed; some of the pieces of flour-coated butter should break into smaller pieces.


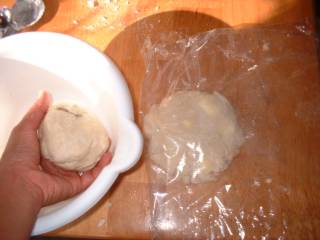
Sprinkle the vinegar first then the ice water (may use more than 7 tbsp) over the dough while tossing with a fork. Just as soon as the dough becomes cohesive (i.e., you can squeeze it into a ball easily), stop mixing; there should still be visible pieces of fat in the dough. Make two balls and flatten the dough balls into disks and wrap them in plastic wrap or waxed paper.
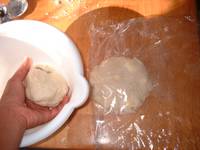
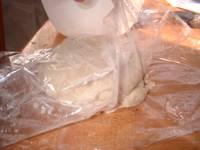

Refrigerate for 30 minutes or longer; this resting period allows the flour to absorb the water, making the dough easier to roll out.


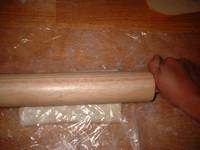
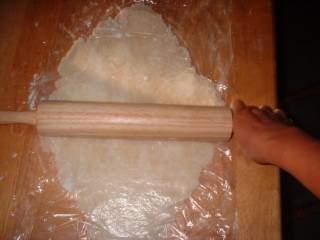
Flour your work surface and roll the dough into a 12 x 9-inch (approximately) rectangle. If it isn’t holding together well, sprinkle it lightly with a couple of teaspoons of water. (I intermittently sprinkled lightly with flour while rolling, so it will spread out easier despite the clinginess to the plastic.)
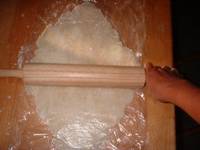
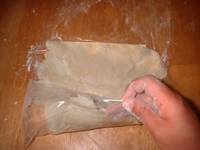

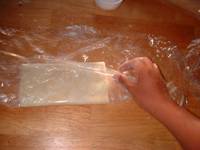
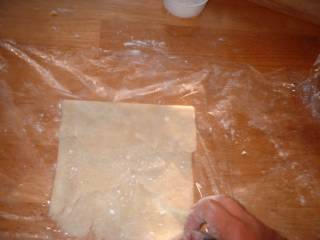
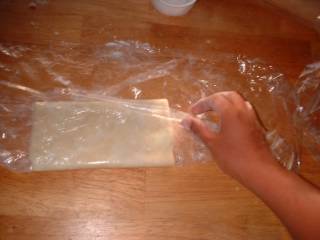
Fold the dough into thirds (like a letter),


then fold it into thirds the opposite way, to form a rough square.
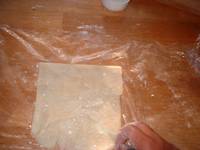


Do the same with the other disk.


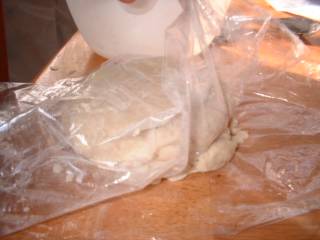
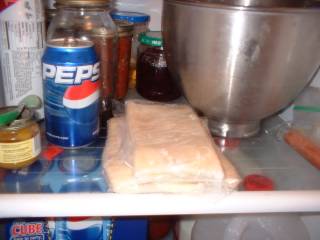
Wrap them well and refrigerate again.
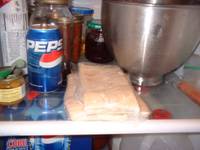


When you’re "ready to roll," remove the dough from the fridge. Dough made with a combination of butter and shortening should rest for about 5 minutes at room temperature before rolling.


Roll the dough between sheets of plastic wrap or waxed paper to the size needed (about 13 inches for a 9-inch pie). Chill in its plastic wrap or waxed paper until ready to fill.
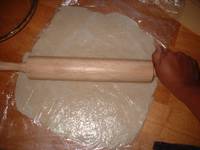


Pre-heat the oven to 425 deg F. Prepare your filling. (I chose not to post the apple pie recipe that I tried here since I did not like it. It was too sour for me, but my hubby liked the tartness that was in contrast to the sweetness of the sugar, though he admitted it was a bit too sour, and suggested that it was probably the McIntosh variety that made it so, then added that probably next time I should use the Cortland variety or use more sugar. I intend to do both next time.)


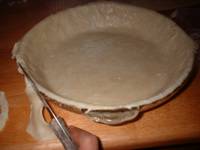
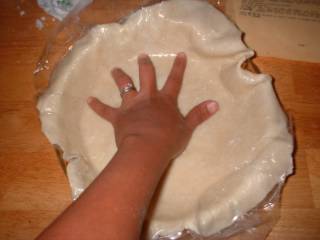
Place one dough onto the pie plate; peel off the plastic wrap (or wax paper).
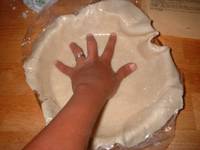


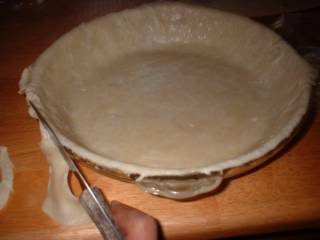
Cut the edge with a knife or the handle of a spoon.


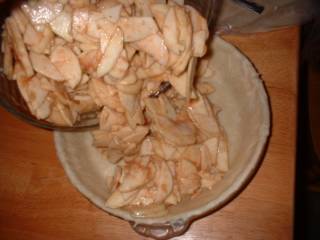
Pour the filling into the middle; shake to distribute around.
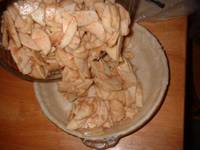


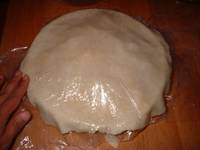
Cover with the other disk; peel off the plastic (See how easy it is to maneuver with plastic?)


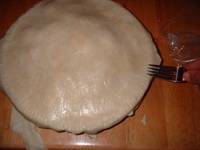
Decorate the edges by pressing with fork (or use your thumb; whatever suits you). Pressing also seals the two disk doughs together. Trim away the excess dough.
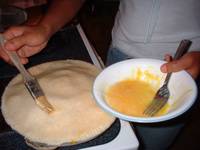

Brush the top with eggwash (I make mine the same way I do with my empanada: 1 egg slightly beaten with 1 tbsp sugar; may add a tbsp of milk or cream)


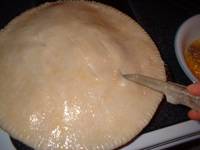
Cut several slits (you may want to decoratively slit, as in orient the slits as to create an asterisk effect. Don't copy what I did here). These will be vents for steam to escape through.
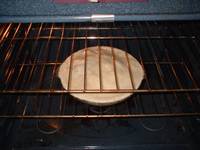

Bake in the middle shelf of the oven as instructed in the recipe you are following (mine said 40-50 minutes or until crust is brown and juice begins to bubble through slits in crust).


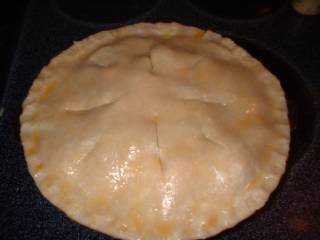
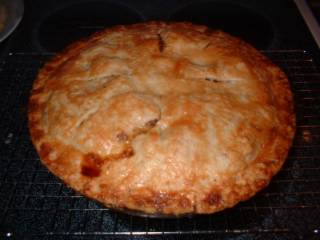
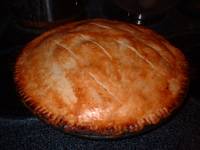
This is how it appears after baking. Bulge in the middle will disappear upon cooling down. Set on the cooling wire rack for several minutes until comfortably warm to eat.

I am not saying this is the perfect way to do it. I just followed the instructions by the authority in baking at King Arthur's website and it turned out "perfect" for my hubby, and I was satisfied with it so I am sharing this here. If you have better ways, maybe you can share yours, too.


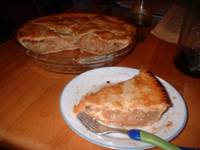
The cut pie reminded me of longed-for BUKO (coconut) PIE. Now I wanted to ask my fellow pinay expats if there's any chance I can make coconut pie a la Laguna style even if I am here, probably with the use of dried coconut meat (if there's any) or fresh buko (where can I find one?) and if you have a recipe to share (because I really don't know how to make buko pie)? Also if you have tried and tested recipes for fillings which uses other fruits, can you share or provide links to them? I would appreciate it if I would be spared the trouble of trying, like I did with this one. Posted by Hello


UPDATE as of January 15, 2005.


This update is a result of correspondence with isabelo.


What I do now with my pie crust recipe is I use pork lard (I have a post on that, too) while I have it, in place of the vegetable shortening. Malapit na maubos ngayon, haha!


Then while you are rolling, once in a while you peel off the plastic and sprinkle some more flour on top of the dough, then place the plastic and roll again. This way, while you flatten the bits of butter/shortening/lard, you also have a thin layer of flour above them, so that when you finally bake them, they are formed as flaky sheets. I realized that this pie crust recipe can also be used for empanadas. So when I make a pie and have extra crust that I cut off from the overhang, I form it into balls for empanada making. I place in airtight bag until I am ready to make the empanadas, either making another batch of pie crust recipe, or using leftover doughs from making pies. Don't let them openly exposed in the fridge or they will dry up and will be brittle -- hard to roll.


When I make empanadas, I have a sheet of baking pan inside the fridge, ready to receive the empanadas as I make them, this way the butter does not melt, so that when I am ready to bake them and brush the eggwash on top, it will be "dry" (the butter won't get incorporated/dissolved in the eggwash).


I have also been freezing some of the extra empanadas, kept airtight in ziploc bags. When I want to bake only 3-4 pcs (one for me and my boys for merienda purposes), I use the oven toaster (I asked that from hubby last Christmas; I saw one big enough for just $12 at Sear's), set at 400 deg F for 15 minutes or until I see the crust's butter bubbling and crust gets golden brown. Then I lower the heat to 325 and bake to further heat the innermost filling for about 5 minutes more. Instant and saves energy!
Thursday, October 07, 2004

Chicken Empanada

Last Tuesday I attended a Filipina friend's surprise birthday party. It was planned and hosted by her business partner, Janis, an American. Other visitors included relatives of that American, as well as some common friends of theirs. I thought it would be a good opportunity to bring the empanadas, as at our house, it is quite hard to consume even a dozen when it's only me and my sons who would eat red meat with veggies as fillings for rolls and pies. And since empanada is very Filipino (I presume), this is one good way to introduce these to the non-Filipino guests there. If they would be as fussy as my husband, at least I would have several Filipina friends who would enjoy that rare baked treat.

(With the few Filipinas that I have met, very seldom do they experiment with baking, as working with dough is not a popular thing in Filipino households for the mere fact that only a few can afford a stove with an oven. So that in the Philippines, baking is most often done by bakers using big ovens and handling massive doughs which often requires machines, and they have mastered working with yeast and quick breads and cakes. The busy mother would find it more practical to just buy the perfectly baked goods from a nearby bakery or mall on her way home from the office. That meant less hassles and less expenditure for the mother, more profit for the big bakeshops.)

After the Americans have tried the chicken empanada, they wanted the recipe! I gave them my blog address instead, to make teaching easier. Hence, my haste in posting this one. Then Janis had an idea to push through with her catering business plan, seeing that our combined efforts would be able to feed a group of 20-30 people. She and the other Americans can prepare the American dishes, our Burmese friend can prepare Oriental dishes like Lo Mein and Fried Rice and be the bartender, my friend Ana can prepare the cakes (she has mastered that art!), and I will bake the rolls and pies! We were all quite enthusiastic about it, because it will provide income opportunities for stay-at-home moms like us. Realistically speaking, it was a wishful thinking; we live so far apart that this would be impossible to do.


The original recipe shared to me by drstel used the following as filling:

2 cloves garlic, chopped fine
1 medium o yellow onion, diced
2 1/2 lbs coarsely chopped chicken, preferably dark meat
1/2 cup cream of asparagus soup
2 diced medium potatoes
1 diced carrot

I had to make adjustments to that because I could not just go out to buy the cream of asparagus. The short notice for the party left me with very little time to include that in my list. So I thought, since the leftover meat from roasted chicken already was packed with flavors, it might not hurt to miss on the cream of asparagus, and the gravy made from the pan juices were also yummy enough and would provide a good cohesive force. The result was very good.

Ingredients:

Dough:
2 cups flour
1/2 cup shortening (stel forgot to include that when I copied; I just looked at other recipes)
1/2 cup sugar
1/4 tsp baking powder
1 tsp salt

ice water (enough to make a cohesive ball)

Filling:
I used leftover chicken meat from roasted chicken (or sautee 1/2 lb chicken meat with 2 cloves garlic and 1 onion, diced), plus
2 medium potatoes, diced
1 carrot, diced
pan juices (1 cup) (substitute:broth)
2 tbsp chicken fat plus 2 tbsp flour(In the absence of broth, may use cream of asparagus and don't use fat and flour any more)

Instructions:
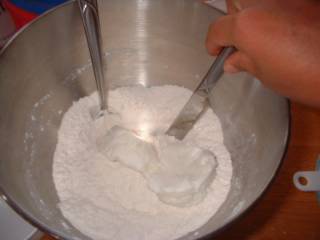
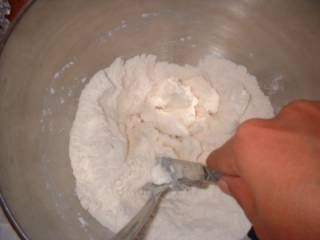
I mixed all dry ingredients together. Using a knife and a spoon, I cut the shortening into the flour mixture (by "cutting," flour coats the sides of the pieces of the fat, until the pieces are smaller, all coated by flour). - Update as of 3/12/09: I now just use my hands to do this. I also use my homemade pork lard.


Some use a pastry blender or two knives. Anything you can think of to do the job will be good enough.

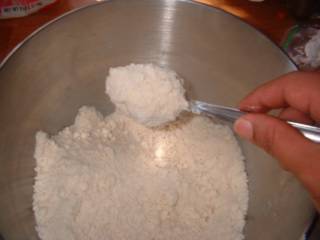
Stop when the texture is crumbly and mealy, like cornmeal.


Teaspoon by teaspoon, add ice water (water in a pitcher with lots of ice swimming) while fluffing with a fork. After about 3- 5 teaspoons, check if the dough will form a ball. Add some more if it cannot stay cohesive yet. Use the smallest amount possible. Chill in the fridge.

(Note: This recipe will make about a dozen empanadas. The filling that I made could be used for 2 dozens empanada, but I used a different dough, a roll recipe, for that other dozen, which I prepared the next day. You may want to double this dough recipe or lessen the filling to suit your needs. I don't suggest freezing the excess filling, because frozen cooked potatoes taste awful.)

Remember my baked/roasted chicken? I chopped the leftover red meat, skin, gizzard, and heart, which amounted to about 2 cups packed. Then I got half of the pan juices (the other half I used for gravy to make sandwiches the next day), reheated it, then added cubed (half-inch cubes) of 2 medium potatoes and a carrot to cook until tender.


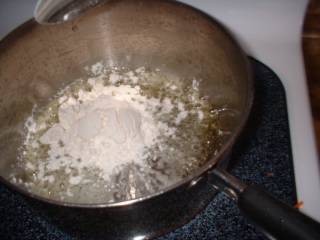
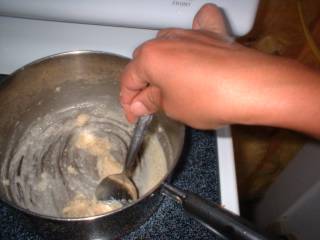
In a smaller saucepan, I heated 2 tbsp of chicken fat (the fat that formed on top of the pan juices which I transferred to another jar), then blended it with 2 tbsp flour to make a paste. (I got this idea from the Creamed Beans from bingbing, where she used butter and flour then milk and spices to make a creamy base for beans. I thought, when fluid like broth is added, then something like "cream of [broth flavor]" is made, especially upon addition of milk or cream).


I added the chopped meat to the simmering veggies to heat through. I then adjust the taste by adding sugar, salt and pepper as needed. This is one good way to use leftover meat (from roast chicken, ham, roast beef, etc. Chopped raisins may be added, too.)

If you don't have any leftover meat, just sautee chopped 2 cloves of garlic and
1 medium onions, add chicken pieces to brown then simmer for 10 minutes then chop. Put back into the pan and sautee with diced potatoes and carrots and chopped raisins then add the cream of asparagus (or whatever cream you want to use. Asparagus goes very well with chicken.) and simmer for another 10 minutes.

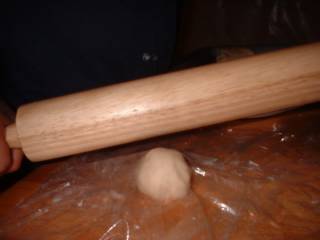
When chicken filling has cooled, you can then start working on the empanada itself. Form a piece of the chilled dough into a ball the size of pingpong. Sandwich this in between sheets of plastic (here I greased the plastic with shortening, but later I found out that sprinkling with flour is better). Maneuvering is made easier by using plastic.


Starting from the middle, work toward the sides on all directions to make a disk about 5-6 inches diameter. UPDATE: 3/12/09 - A more energy- and time-saver method would be to roll out flat a big piece then cut out using a bowl or an empanada dough press.

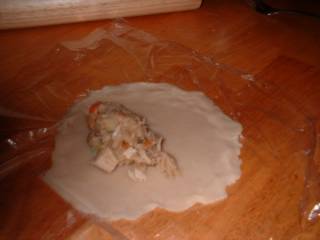
Peel off the plastic,


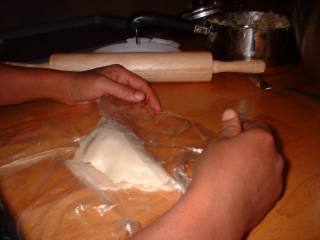
place about a tablespoonful of filling on half of the disk,

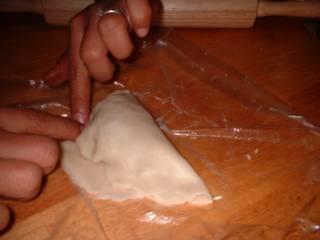
Fold over the other half of the disk by flipping the plastic and peel it off,


By small sections, fold the lower crust over the top (fluting?). You may press with fork tines to decorate and seal further). UPDATE as of 3/12/09: When using the dough press, if your dough is too floury to seal, brush the edges with eggwash then seal.

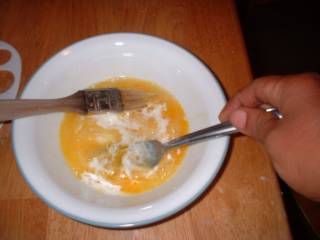
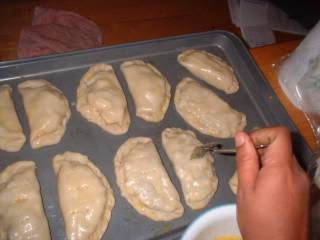
Place on greased baking sheet. Cover with the greased/floured plastic until ready to bake. When baking, pre-heat oven to 400 deg F then prepare 1 egg slightly beaten and mixed with 1 tbsp sugar plus some cream (around 1 tsp). Mix together. (or you may use 1 egg plus 1 tbsp water = eggwash. I just used the egg-sugar combination because that was what was called for in a recipe for holiday dinner rolls that I used for my excess filling).


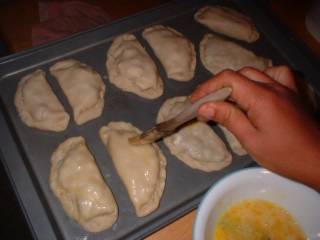
Use this to coat the empanada before baking.

Pierce with a fork to create vents through which stem may escape during baking. (if you use different fillings, you may use the orientation of the fork marks to differentiate - e.g. horizontal for pure breast meat without veggies, vertical for the rest). Without vents, the crust may puff and create dead space inside, creating the impression that the filling was not enough ("Nagtitipid siguro!")


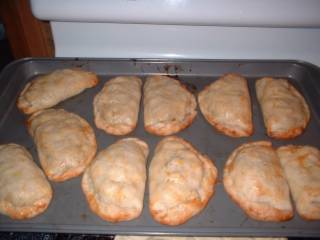
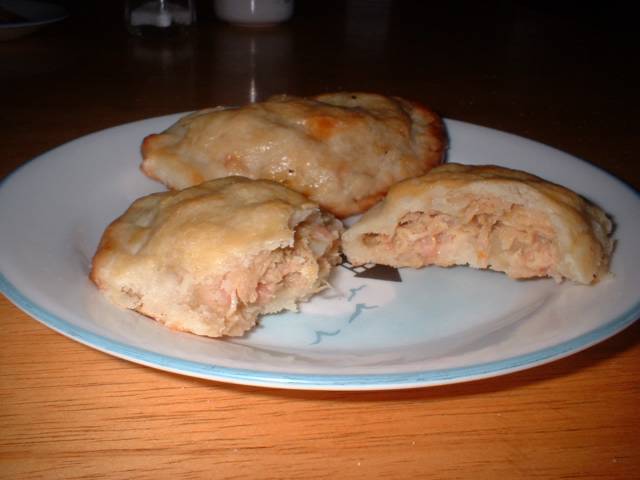
Bake for 20 minutes (or until golden brown; the filling is cooked already anyway), then cool on a wire rack for at least 2 minutes before serving (filling will be piping hot!)
Posted by Hello


UPDATE: 08-09-09
Para kay jayneh na nag-request ng Tagalog translation:
"Sangkap:

Dough:
2 tasang harina
1/2 tasang purico (puting mantekilya; vegetable lard. )
1/2 tasang asukal
1/4 kutsaritang baking powder
1 kutsaritang asin
ice water (tama lang para makabuo ng bola ng dough)

Palaman:
Gumamit ako ng natirang baked chicken na mga 2 tasa ang dami (o kaya ay maggisa 1/2 lb manok sa 2 ipin ng bawang at 1 sibuyas, tinadtad)
2 medium patatas, diced
1 carrot, diced
tinadtad na raisins (1/4 tasa)
pan juices (1 cup; eto yung sabaw sa baked chicken) (pwede gumamit ng chicken broth)
2 kutsarang mantika ng manok galing sa sabaw ng baked chicken or gayatin ang balat ng pino at igisa hanggang magmantika;
2 kutsarang harina
(Kung walang broth, gumamit ng Campbell's cream of asparagus at hwag na gumamit ng taba ng manok na hinaluan ng harina)

Paraan sa paggawa ng dough:
Paghaluin ang harina, asukal, baking powder, asin (eto ang dry ingredients. Gamit ang mga kamay, ihalong maigi ang purico sa dry ingredients. Pag namumuo na ito, unti-unti idagdag ang ice water habang hinahalo ng tinidor. Pag nakapaghalo na ng mga 3-5 kutsaritang ice water, subukan kung makakabuo na ng bola. Dagdagan ng ice water kung hindi pa. Kung nakakabuo na, tama na yung ice water. Balutin ng plastic at ilagay sa refrigerator.

NOTE: Ang recipe ko sa dough ay tama para sa 12 pirasong empanada. Yung recipe ng palaman ay makakagawa ng 24. Pwede mo doblehin yung dough.

Paraan sa paggawa ng palaman:

Pakuluin ang patatas at carrots sa chicken broth hanggang lumambot (wala pang 10 minuto ito; hwag i-overcook dahil pangit naman kagatin pag masyadong malambot at baka madurog lang). Ihalo ang tinadtad na manok hanggang kumulo. Isantabi muna ito.

Sa maliit na saucepan o kaldero, pagmantikain ang balat ng manok (or kunin ang mantika galing sa pinagsabawan ng manok); sa katamtamang init, ihalo ang 2 kutsarang harina at haluin hanggang maging parang paste (roux ang tawag dito). Idagdag ang pinakuluang patatas, carrots, manok at haluing maigi hanggang maging malapot. Ayusin ang lasa sa pagdagdag ng asin, paminta, at asukal. Hayaang lumamig.

(Kung walang tirang manok, maggisa ng 2 ipin ng bawang at 1 medium sibuyas, idagdag ang manok at hayaang mag-brown, takpan at hinaan ang apoy, lutin ng 10 minuto. Tadtarin ang manok, ibalik sa pan at igisa pati ang tinadtad na carrots at patatas. Idagdag ang cream of asparagus o kung anong cream ang gusto mong ihalo, gaya ng cream of chicken. Magdagdag ng konting tubig kung masyadong tuyo ito. Pakuluin ng 10 minuto o hanggang lumambot ang patatas at carrots. Palamigin. )

Pag malamig na ang palaman, ilabas ang dough at i-flat gamit ang rolling pin, umpisahan sa gitna palabas. Mas madali kung merong wax paper or plastic sa ilalim at ibabaw ng dough. Wisikan ng harina kung masyadong madikit.
Gumamit ng bowl o empanada dough press para makahugis ng bilog. Lagyan ng 1 kutsarang palaman sa gitna. Magbati ng isang itlog at ibrush ang itlog sa gilig para magselyo ang dough pagkalagay ng palaman. pwede gamitan ng tinidor para disenyo sa gilid.

Painitin ang oven sa 400 deg F.

Pahiran ng purico ang baking sheet ("plantsa") at ilagay ang mga empanada. Pahiran ng binating itlog (egg wash - pwedeng haluan ng 1 kutsarang gatas at 1 kutsarang asukal) ang ibabaw. Tusuk-tusukin ng tinidor ang ibabaw para sumingaw ang steam at hindi lolobo. I-bake ng 20 minutes o hanggang mag-golden brown ang ibabaw.
"
Custom Search