I was watching "V" at home one night (for the second time) and I again saw this part where V was cooking egg-in-a-hole. The first time I saw that, I did not know how it was called. Then sometime later I read in a blog (I cannot remember now which one) about this style of cooking egg and toast. It is called several names, but I stuck to this name, easiest to remember and does not make it seem to mystical. Egg-in-a-hole apparently has its origins in the UK (and the movie "V" is set in England).
I tried it and loved it! Perfect for breakfast!
What you need are:
biscuit cutter, skillet, cover
slices of bread
eggs
butter
salt and pepper
(optional) ground basil (or whatever spices you want)
How to:
Heat the skillet on medium. Melt some butter.
Make a hole in the bread slice using a biscuit cutter.
Place bread slice on the skillet. Add some more butter into the hole.
Crack an egg and carefully place into the hole. Sprinkle spices.
Cover to hasten cooking (time will depend on how done you want it).
Flip and briefly cook the other side. You might also want to brown the round bread piece sliced off the center.
Enjoy with a cup of freshly brewed coffee.
"Kusina" = kitchen; "Manang" (aka Ate in Tagalog)= Ilokano term for older sister.
A Filipina's adaptation in an American Kitchen
Showing posts with label eggs. Show all posts
Monday, January 11, 2010
Sunday, November 01, 2009
How to Hard-Boil a Single Egg in Microwave
I posted before how I make hard-boiled egg in the microwave, for purposes of adding to noodles, which I cooked together with the egg (see here).
Some of the most common reason readers land on that post was they were looking for a way to hard-boil egg in the microwave. Here is a method for those who want only ONE egg for salads, sandwiches or as snack, not for noodles. If you would like to cook more than one egg, this post is not for you. Personally, if I am going to boil several eggs, then I would just use the stovetop, or as MaMely did, use the rice cooker.
This time, my post is about preparing hard-boiled egg in the microwave using only water, a bowl, and paper towel. NO, YOU DON'T NEED A SPECIAL GADGET FOR THIS. Please take note that my microwave is a 1.6 kW one, so if you are going to try this, you will have to modify the time and experiment until you get it right.
I also have to let you know (so you won't have to repeat this) that prior to coming up with the method below, I experimented placing an egg with cracked end inside a cup with water only, and it exploded within 30 secs (I tried 3 times, using different power levels, then I gave up). Knowing that the egg does not explode when it was with noodles, I then thought, maybe the egg should have some other "competition" for the microwave energy, so it is not too concentrated in the egg and cause sudden increase in temp then explode. Hence, I thought I would try the paper towel, soaked in water so it would not burn. The first time I did this for 2 minutes, the egg had some leaked soft egg white so I nuked 30 seconds more, and the result was perfect. The second time I tried it for 3 minutes, the egg exploded before it reached 3 minutes. The third time was for 2.5 minutes, and that is the method I describe below, which gave me perfectly hard-boiled egg. Lessen the time if you want soft-boiled.
Here's how:
1. Make a ring out of paper towel and place in a small bowl. Add water to soak the paper.
2. Using a corner of a table of your stovetop, gently crack the wider end of an egg to make a small depression. This will serve as an outlet for escaping steam and excess pressure as the egg is cooking and getting hotter.
3. Place the egg cracked end up in the middle of the bowl, supported by the paper
towel.
4. Microwave on high for 2.5 minutes (or stop as soon as you notice the depressed crack rise up so it becomes level with the rest of the shell again). You will also notice that cracks will also develop originating from this depression as the egg expands a bit while cooking.
5. Let it sit for 2 minutes. The egg will continue to cook with its heat and that of the water around.
6. Use tongs to get the egg and run it under cold tap water to stop the cooking process and to make it easier to handle and easier to peel (the cold shrinks the egg and it separates a bit from the shell).
7. Peel, slice and enjoy!
Saturday, March 07, 2009
Hard Boiled Egg in 4 Minutes Using Microwave
This method of cooking egg using microwave is useful if you want to "boil" ONLY ONE egg because you are preparing it only for yourself. Photo above does not depict egg yolk as good as it was, because I used the blunt spoon to cut the egg in half, instead of using a knife. But seeing the color, you will know that it was "hard boiled" to perfection.
I have been boiling eggs by batches of 6-10 in the past, for using in ramen/noodle soup or arroz caldo, but oftentimes, my kids would forget about them. So there will be several of them eggs in the fridge, even after a week. I am not comfortable with that, especially if the egg has cracked during boiling. After a while I just toss them away; what a waste! Though I have seen and eaten hard boiled eggs sitting on the counter of some carinderia in the Philippines and I had no idea how long they had been sitting there from the time they were cooked, I am not comfortable having any cooked foods sitting on the countertop at room temp for more than 4 hours, or in the fridge for more than two weeks. That's why, boiling several eggs (to maximize use of water, time, and electricity) does not really appeal to me.
So I experimented again with the microwave. When I was a kid, I always had some protein in my ramen (mami) noodles, and some veggies when we had them in the fridge. I used to boil the egg in the water as I cooked the noodles. My kids are too lazy to do the same, so they cook their noodles in the microwave. But in an attempt to influence them to add at least a hard boiled egg in their noodle soup, I had to improvise to make hard boiled eggs without deviating from their method of cooking noodles. And I found that method...saves me time and electricity, and avoids tossing away leftovers.
Ingredients:
1 egg
HOT water/soup/arroz caldo to cover at least 3/4 of the egg upright (maybe a cup of hot water will do)
Instructions:
If using water, turn your faucet to HOT until you get it really hot. I was using hot homemade chicken stock at the time, to turn into chicken mami, so the other ingredients here supported the egg upright. Having the egg upright while uncooked helps it from leaking out the white into the water/soup. If using cold water, you might have to prolong the microwave time. Feel free to experiment and get to know your microwave better.
Tap gently the wider end of the egg and peel off some shell to create a small hole. This hole will allow for some expansion of air or eggwhite while the egg gets hot during microwaving (as you can see by the knob that formed in the photo). If you do not create a hole, there will be no outlet for expansion and the egg will EXPLODE inside the microwave (I know...I have done that!). Place this egg upright in the bowl or cup, with soup/water reaching up to 3/4 of the egg.
Cover and microwave for 4 minutes (this is for a 1.6 kW microwave). You might want to adjust accordingly depending on your microwave. I also had tried doing this with cool soup and it gave me malasadong itlog, which I also like.
I demonstrated this to my kids...they thought it was cool!
Are you ready to try it?
UPDATE: I tried doing this with only some water and using a cup to hold the egg upright. It exploded. I did it twice. Both exploded. So I think, to achieve a really hard-boiled egg consistency, you must include other foods so the microwave does not concentrate the energy only on the egg. Maybe a lower power will also work (which I have tried at 30% and it still exploded. I dared not experiment again after that).
Monday, February 16, 2009
Spinach Quiche
In the Philippines, anything with meat and veggies that we cook with eggs that look like pancake, we called omelet. When I came here to the US and started browsing the net and magazines for recipes, I realized that this comes closest to "quiche" although that would have been baked and would have a crust. Well, this does not use crust nor an oven. I still fried it in oil, but covered to cook on medium low heat until the top is set. Another way for me to use leftovers - baby spinach, ground beef, and shredded cheese.
Ingredients:
Oil for frying (I used probably about 1/2 cup)
5 eggs
1 cup uncooked baby spinach
1 medium onion
1/4 cup cooked ground beef
1/4 to 1/2 cup shredded cheese
some garlic powder
salt and pepper
dash of ground basil
Instructions:
Heat the saucepan under medium heat (#6). Meanwhile, chop baby spinach in a chopper. Do the same with onion. Beat the eggs. Mix the chopped veggies in; season with salt, pepper, garlic powder and ground basil.
Pour oil into the pan. When hot enough (after about 5 minutes or so), pour the mixture. Cover, lower heat to #3 and cook until jus starting to set (about 7 minutes). Sprinkle ground beef on top and cook further until completely set. Remove from pan and transfer to a plate. Sprinkle cheese on top and cover for several minutes more until cheese is melted some.
My kids liked it. We ate that with fried dinaing na bangus, atsarang papaya, and rice.
Sunday, December 07, 2008
EggNog French Toast
Hubby likes EggNog especially around this time of the year...makes him feel the spirit of the Holidays more...
I, however, never did develop any liking to it, and neither have my kids...
Problem is, my husband can only drink about a cup or so, then he will not finish a whole jug (even if one as small as this). I thought of other ways to use it. I thought it would probably be good used for making french toast, since french toast is basically made from stale bread dipped in a mixture of egg, milk, nutmeg and cinnamon. I looked at the ingredients of eggnog once, and it was not too different.
Making french toast this way made me tolerate eggnog...even my kids like them.
| From eggnog french toast |
Problem is, my husband can only drink about a cup or so, then he will not finish a whole jug (even if one as small as this). I thought of other ways to use it. I thought it would probably be good used for making french toast, since french toast is basically made from stale bread dipped in a mixture of egg, milk, nutmeg and cinnamon. I looked at the ingredients of eggnog once, and it was not too different.
Making french toast this way made me tolerate eggnog...even my kids like them.
Wednesday, November 26, 2008
Frozen Almond Brazo De Mercedes
HAPPY THANKSGIVING TO ALL!
10:50 PM
Nephew: Oh wow! This is the best tasting dessert I have ever had in a long while!
SIL: That was good! As a matter of fact, it is a tad better then the Paris Brest! (Paris Brest is what I always hope my SIL would bring during these gatherings. I love it.)
Sons: Yummy! This is so good, ma!
Husband: Thanks, honey. That was awesome!
Me: So, is this something I should make again?
Husband: Definitely! You can make it everyday!
Me: Mom, would you like me to leave some of this brazo?
MIL: Oh yes, PLEASE! That was so good!
VERDICT: It was a HIT!!!
Gotta make one again for Filipino Christmas Party.
11:45 PM
Done assembly!
11:21 PM
Cooling the meringue now...
11:00 PM
Meringue baking and the rest of the brazo in the freezer right now...
For some reason I was craving for this. And in my head I was toying with the idea of adding almonds to it...then when I went grocery shopping last Monday I impulsively grabbed a box of almond paste aside from sliced almond nuts.
I got the recipe and how-to's for the brazo itself from stef's post on the traditional brazo de mercedes log roll type. But reading the comments, I learned that the latest craze was frozen brazo de mercedes. I thought that would be an easy solution to the usual dilemma of baked meringue/egg-y/custardy goodies (which we are always afraid to be contaminated with Salmonella when out in room temp for a long while), and will allow me as well to prepare it much ahead of time (like when I prepare leche flan -- always best when chilled for at least overnight). That way, I can still make egg pie tomorrow and bring only that as freshly baked and still warm. (My MIL is addicted to my leche flan, my SIL to egg pie. My bilas loves both. I hope this new custard type of dessert will also wow them.) If it turns out superb, I might prepare this for a Filipino Christmas Party I am contemplating on having.
While photos and flavors of such frozen BDM that I saw while researching more about it were of mango flavor, which is definitely not an option for me, I had this persistent idea in my head brewing, which consisted of adding almond paste and sliced almond nuts to the filling, then chopped caramelized sugar sprinkled on top of the meringue...Sounds sinfully good to me...I hope it does turn out good. I used the vanilla because it has been a tested favorite among my family members.
Please take note of wiping the stainless steel mixing bowl with vinegar and salt then rinsing, then wiping dry, prior to placing egg whites in it. And before I started the whole process, I made caramelized sugar first.
Ingredients and How To's:
Base:
8 oz crushed graham crackers
1/4 cup melted butter (or 1/2 cup if you want this layer more intact,less crumbly)
2 tbsp sugar
1/4 gallon vanilla ice cream (approximately; I just got thin layers using a pie server to lay on top of the graham base; you may opt to put the whole gallon for a thicker layer)
Mix thoroughly the first 3 ingredients then pack at the bottom of a 13 x 9 baking dish. Top with thin layer of ice cream. Cover with cling wrap then freeze.
Filling:
1 box (7-oz) almond paste, grated, sprinkled on top of the ice cream
Custard:
10 egg yolks (the egg whites should be placed in the mixing bowl and let stand in room temp for about 30 minutes before making the meringue)
1 (14-oz) condensed milk
several drops of lemon extract (to eliminate the fishy smell)
2 capfuls of almond extract
2-oz sliced almonds, sprinkled over the custard filling.
On medium low heat (#3 or 4 on my stove), blend well and continuously stir egg yolks and condensed milk until it sticks to the back of the wooden spoon. It may look still very liquidy at this stage but after removing from the heat, it will continue to cook so keep stirring, add the lemon extract, stir well, then the almond extract.
Spread this on top of the almond paste. Place back in the freezer (The short intervals of having this out of the freezer is to prevent the ice cream from melting too much while you work on it). Proceed with meringue procedure and while baking the meringue, sprinkle the sliced almonds on top of the custard. Place back in the freezer.
Meringue:
10 egg whites
1/2 tsp cream of tartar
3/4 cup sugar
Topping:
5 tbsp Caramelized sugar, cooled and chopped finely (The melted caramel should be poured onto a buttered baking sheet. Let harden, take off from pan, then chop in a chopper.)
As suggested by stef, since I have stainless steel mixing bowl, I wiped it first with vinegar and salt then rinsed and wiped dry with paper towel before I placed the egg whites in it.
Line the bottom and sides of a jelly roll pan (10 x 15) and spray with oil on all
sides (meringue, I realized, is so sticky!). Preheat oven to 350 deg F.
Add the cream of tartar to the egg whites and start beating, low speed first then gradually increasing to highest speed. When soft peaks start to form, pour the sugar gradually and beat until it forms stiff peaks, still glossy. (You have overbeaten if it loses sheen and appears granular. This does not take too long as soon as you start slowly pouring the sugar.) Spread this onto the wax paper and level with spatula. Bake for 20-25 minutes (it inflates so much!!! I felt I had to rotate because one side was way much higher than the other).
Place on a wire rack to cool completely (deflates). Sprinkle some chopped caramelized sugar on top of the meringue then place a sheet of wax paper. Cover with bigger baking sheet and flip over. Peel off the wax paper from the underside of meringue. (I goofed here; did not spray with oil the sides of the wax paper, so it was so hard to peel it off the meringue edges.)
Lift the meringue using the wax paper, folding at the middle a bit so it is easier to place on top of the base/filling. Tuck the edges under. Sprinkle the rest of the chopped caramelized sugar. Place back in the freezer.
To serve: upon getting from the freezer, while still hard, slice with butter knife. Rinse with hot water and wipe knife with every line of slice (or when some custard starts to stick to it). Optional: drizzle with maple syrup.
Will post photo of sliced brazo, then update on how it was accepted by my in-laws and family tomorrow after celebration of Thanksgiving...
| From Frozen Almond Brazo De Mercedes |
10:50 PM
Nephew: Oh wow! This is the best tasting dessert I have ever had in a long while!
SIL: That was good! As a matter of fact, it is a tad better then the Paris Brest! (Paris Brest is what I always hope my SIL would bring during these gatherings. I love it.)
Sons: Yummy! This is so good, ma!
Husband: Thanks, honey. That was awesome!
Me: So, is this something I should make again?
Husband: Definitely! You can make it everyday!
Me: Mom, would you like me to leave some of this brazo?
MIL: Oh yes, PLEASE! That was so good!
VERDICT: It was a HIT!!!
Gotta make one again for Filipino Christmas Party.
11:45 PM
Done assembly!
11:21 PM
Cooling the meringue now...
11:00 PM
Meringue baking and the rest of the brazo in the freezer right now...
For some reason I was craving for this. And in my head I was toying with the idea of adding almonds to it...then when I went grocery shopping last Monday I impulsively grabbed a box of almond paste aside from sliced almond nuts.
I got the recipe and how-to's for the brazo itself from stef's post on the traditional brazo de mercedes log roll type. But reading the comments, I learned that the latest craze was frozen brazo de mercedes. I thought that would be an easy solution to the usual dilemma of baked meringue/egg-y/custardy goodies (which we are always afraid to be contaminated with Salmonella when out in room temp for a long while), and will allow me as well to prepare it much ahead of time (like when I prepare leche flan -- always best when chilled for at least overnight). That way, I can still make egg pie tomorrow and bring only that as freshly baked and still warm. (My MIL is addicted to my leche flan, my SIL to egg pie. My bilas loves both. I hope this new custard type of dessert will also wow them.) If it turns out superb, I might prepare this for a Filipino Christmas Party I am contemplating on having.
While photos and flavors of such frozen BDM that I saw while researching more about it were of mango flavor, which is definitely not an option for me, I had this persistent idea in my head brewing, which consisted of adding almond paste and sliced almond nuts to the filling, then chopped caramelized sugar sprinkled on top of the meringue...Sounds sinfully good to me...I hope it does turn out good. I used the vanilla because it has been a tested favorite among my family members.
Please take note of wiping the stainless steel mixing bowl with vinegar and salt then rinsing, then wiping dry, prior to placing egg whites in it. And before I started the whole process, I made caramelized sugar first.
Ingredients and How To's:
Base:
8 oz crushed graham crackers
1/4 cup melted butter (or 1/2 cup if you want this layer more intact,less crumbly)
2 tbsp sugar
1/4 gallon vanilla ice cream (approximately; I just got thin layers using a pie server to lay on top of the graham base; you may opt to put the whole gallon for a thicker layer)
Mix thoroughly the first 3 ingredients then pack at the bottom of a 13 x 9 baking dish. Top with thin layer of ice cream. Cover with cling wrap then freeze.
Filling:
1 box (7-oz) almond paste, grated, sprinkled on top of the ice cream
Custard:
10 egg yolks (the egg whites should be placed in the mixing bowl and let stand in room temp for about 30 minutes before making the meringue)
1 (14-oz) condensed milk
several drops of lemon extract (to eliminate the fishy smell)
2 capfuls of almond extract
2-oz sliced almonds, sprinkled over the custard filling.
On medium low heat (#3 or 4 on my stove), blend well and continuously stir egg yolks and condensed milk until it sticks to the back of the wooden spoon. It may look still very liquidy at this stage but after removing from the heat, it will continue to cook so keep stirring, add the lemon extract, stir well, then the almond extract.
Spread this on top of the almond paste. Place back in the freezer (The short intervals of having this out of the freezer is to prevent the ice cream from melting too much while you work on it). Proceed with meringue procedure and while baking the meringue, sprinkle the sliced almonds on top of the custard. Place back in the freezer.
Meringue:
10 egg whites
1/2 tsp cream of tartar
3/4 cup sugar
Topping:
5 tbsp Caramelized sugar, cooled and chopped finely (The melted caramel should be poured onto a buttered baking sheet. Let harden, take off from pan, then chop in a chopper.)
As suggested by stef, since I have stainless steel mixing bowl, I wiped it first with vinegar and salt then rinsed and wiped dry with paper towel before I placed the egg whites in it.
Line the bottom and sides of a jelly roll pan (10 x 15) and spray with oil on all
sides (meringue, I realized, is so sticky!). Preheat oven to 350 deg F.
Add the cream of tartar to the egg whites and start beating, low speed first then gradually increasing to highest speed. When soft peaks start to form, pour the sugar gradually and beat until it forms stiff peaks, still glossy. (You have overbeaten if it loses sheen and appears granular. This does not take too long as soon as you start slowly pouring the sugar.) Spread this onto the wax paper and level with spatula. Bake for 20-25 minutes (it inflates so much!!! I felt I had to rotate because one side was way much higher than the other).
Place on a wire rack to cool completely (deflates). Sprinkle some chopped caramelized sugar on top of the meringue then place a sheet of wax paper. Cover with bigger baking sheet and flip over. Peel off the wax paper from the underside of meringue. (I goofed here; did not spray with oil the sides of the wax paper, so it was so hard to peel it off the meringue edges.)
Lift the meringue using the wax paper, folding at the middle a bit so it is easier to place on top of the base/filling. Tuck the edges under. Sprinkle the rest of the chopped caramelized sugar. Place back in the freezer.
To serve: upon getting from the freezer, while still hard, slice with butter knife. Rinse with hot water and wipe knife with every line of slice (or when some custard starts to stick to it). Optional: drizzle with maple syrup.
Will post photo of sliced brazo, then update on how it was accepted by my in-laws and family tomorrow after celebration of Thanksgiving...
Friday, October 31, 2008
Mozarella Sticks
There is a family-friendly restaurant about 45 minutes away from our house that we visit often. Our favorite appetizers is the mozarella sticks.
At home one attempt that I have made to come up with something close is to make them using lumpia wrappers instead of batter, then dip in homemade marinara sauce (I'd like to think that I made marinara sauce although I was not looking at a recipe when I cooked it. Basically sauteed lots of tomatoes with other ingredients we usually use. We like the outcome and that's all that matters!). For purposes of simplifying things, I suggest you use the recipe below for marinara sauce.
Then one day, my older son and I thought of trying to really copy those served in that restaurant. I looked up the ingredients and one weekend we tried. We were very satisfied with the outcome, and my son had fun making them. Recipe courtesy of foodnetwork.
Mozzarella SticksPrep Time: 30 min Inactive Prep Time: 2 hr 0 min Cook Time: 10 min Level:
Intermediate Serves:
6 to 8 servings (makes about 56 pieces) 1 1/2 cups Italian-style dried breadcrumbs
1 1/3 cups freshly grated Parmesan
1 teaspoon salt
2 (16-ounce) blocks pasteurized mozzarella cut into 4 by 1/2-inch sticks
4 large eggs, beaten to blend
1 1/2 cups vegetable oil
4 cups Marinara Sauce, recipe follows
Stir the bread crumbs, 1 cup of Parmesan and 1 teaspoon of salt in a medium bowl to blend. Dip the cheese in the eggs to coat completely and allow the excess egg to drip back into the bowl. Coat the cheese in the bread crumb mixture, patting to adhere and coat completely. Place the cheese sticks on a baking sheet. Repeat dipping the cheese sticks in the egg and bread crumb mixture to coat a second time. Cover and freeze until frozen, about 2 hours and up to 2 days.
Heat the oil in a large frying pan over medium heat. Working in batches, fry the cheese until golden brown, about 1 minute per side. Transfer the fried cheese to plates. Sprinkle with the remaining cheese and serve with the Marinara Sauce.
Marinara Sauce:
1/2 cup extra-virgin olive oil
2 small onions, finely chopped
2 garlic cloves, finely chopped
2 stalks celery, finely chopped
2 carrots, peeled and finely chopped
1/2 teaspoon sea salt, plus more to taste
1/2 teaspoon freshly ground black pepper, plus more to taste
2 (32 ounce) cans crushed tomatoes
2 dried bay leaves
In a large casserole pot, heat the oil over a medium-high flame. Add the onions and garlic and saute until the onions are translucent, about 10 minutes. Add the celery, carrots, and 1/2 teaspoon of each salt and pepper. Saute until all the vegetables are soft, about 10 minutes. Add the tomatoes and bay leaves, and simmer uncovered over low heat until the sauce thickens, about 1 hour. Remove and discard the bay leaf. Season the sauce with more salt and pepper, to taste. (The sauce can be made 1 day ahead. Cool, then cover and refrigerate. Rewarm over medium heat before using.)
Yield: 2 quarts
Prep Time: 10 minutes
Cook Time: 1 hour 10 minutes
| From Mozarella Sticks |
At home one attempt that I have made to come up with something close is to make them using lumpia wrappers instead of batter, then dip in homemade marinara sauce (I'd like to think that I made marinara sauce although I was not looking at a recipe when I cooked it. Basically sauteed lots of tomatoes with other ingredients we usually use. We like the outcome and that's all that matters!). For purposes of simplifying things, I suggest you use the recipe below for marinara sauce.
Then one day, my older son and I thought of trying to really copy those served in that restaurant. I looked up the ingredients and one weekend we tried. We were very satisfied with the outcome, and my son had fun making them. Recipe courtesy of foodnetwork.
Mozzarella SticksPrep Time: 30 min Inactive Prep Time: 2 hr 0 min Cook Time: 10 min Level:
Intermediate Serves:
6 to 8 servings (makes about 56 pieces) 1 1/2 cups Italian-style dried breadcrumbs
1 1/3 cups freshly grated Parmesan
1 teaspoon salt
2 (16-ounce) blocks pasteurized mozzarella cut into 4 by 1/2-inch sticks
4 large eggs, beaten to blend
1 1/2 cups vegetable oil
4 cups Marinara Sauce, recipe follows
Stir the bread crumbs, 1 cup of Parmesan and 1 teaspoon of salt in a medium bowl to blend. Dip the cheese in the eggs to coat completely and allow the excess egg to drip back into the bowl. Coat the cheese in the bread crumb mixture, patting to adhere and coat completely. Place the cheese sticks on a baking sheet. Repeat dipping the cheese sticks in the egg and bread crumb mixture to coat a second time. Cover and freeze until frozen, about 2 hours and up to 2 days.
Heat the oil in a large frying pan over medium heat. Working in batches, fry the cheese until golden brown, about 1 minute per side. Transfer the fried cheese to plates. Sprinkle with the remaining cheese and serve with the Marinara Sauce.
Marinara Sauce:
1/2 cup extra-virgin olive oil
2 small onions, finely chopped
2 garlic cloves, finely chopped
2 stalks celery, finely chopped
2 carrots, peeled and finely chopped
1/2 teaspoon sea salt, plus more to taste
1/2 teaspoon freshly ground black pepper, plus more to taste
2 (32 ounce) cans crushed tomatoes
2 dried bay leaves
In a large casserole pot, heat the oil over a medium-high flame. Add the onions and garlic and saute until the onions are translucent, about 10 minutes. Add the celery, carrots, and 1/2 teaspoon of each salt and pepper. Saute until all the vegetables are soft, about 10 minutes. Add the tomatoes and bay leaves, and simmer uncovered over low heat until the sauce thickens, about 1 hour. Remove and discard the bay leaf. Season the sauce with more salt and pepper, to taste. (The sauce can be made 1 day ahead. Cool, then cover and refrigerate. Rewarm over medium heat before using.)
Yield: 2 quarts
Prep Time: 10 minutes
Cook Time: 1 hour 10 minutes
Wednesday, June 21, 2006
EGGS: A Comparison Between Homegrown and Grocery Source
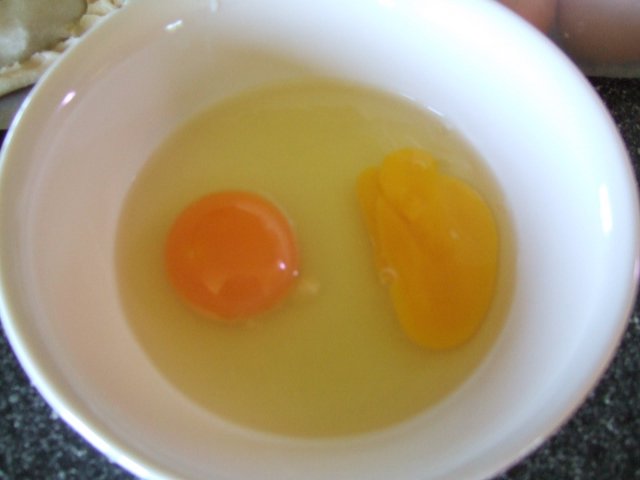
One time when I had lunch at my friend's house (with other Filipinas) I brought an egg with me (My eggs all come from my in-laws who raise chickens). Then I asked for an egg from my friend who was hosting the lunch, an egg which she buys from the grocery store. Both had brown shells. I wanted to compare and see for myself the truth in the photo in a magazine article my sister-in-law showed to me recently.
I was quite a bit careless when I cracked my friend's egg open; hence, the broken yolk. Regardless, it was still quite obvious how different the two are when placed side by side in this bowl.
I remember when I first came here, I was quite surprised at the almost-orange yolk, it made me wonder that maybe the brown shell had to do with it. Now I know better. And yes, that article reminded me about that first time I had an egg here. But during that time, I was comparing it to eggs that I was used to eating in the Philippines. This made me realize that those commercial eggs in PI are no better than the commercial factory farm-produced eggs here.
The physical appearance is only one clue as to the superior quality of eggs from chickens raised with tender loving care. A comprehensive comparison illustrated by a bar graph can be found in Mother Earth News's Chicken and Egg page. Nutrition-wise, they say:
Many vegetarians are forced to be so, even refusing to eat eggs because of cruelty to animals. While some cannot get themselves to slaughter (sacrifice) animals for their own consumption, others just plainly do not want to consume products raised under the most horrible conditions one can imagine (so they do not want to support such factory farms), as depicted in the video below, nor would they like to ingest such hormone-laden, probably previously sick products and have some dire health consequences.
Other related videos are the Meatrix I and II.
Have you noticed how the grocery stores are now teeming with "organic" produce? I am afraid it may be another "meatrix" where the produce is labeled as organic, but turns out to be another fantasy created by the profit hungry companies who want to take advantage of the "fad." If you feel at a loss now as to where to get foods you can trust (which can be quite a problem for the city dwellers), read here.
I feel privileged to have a taste of REAL GOOD FOOD, though not as completely as I would like it to be. Some people consider foods prepared in fancy restaurants as good food. To me, homegrown, safe, hormone-free, and healthy (as opposed to sick) nutritious foods are the real good foods.
I am contemplating on saving some money to have a contract with my SIL or MIL so they can raise chickens and pigs (in addition to beef) for my family's consumption (I do not have their expertise). There is also a local farm where the milk is organic and pasteurized (not homogenized). It may be quite costly, but the health benefits will be all worth it. Most of all, I will have the peace of mind on what I am feeding my family.
I was quite a bit careless when I cracked my friend's egg open; hence, the broken yolk. Regardless, it was still quite obvious how different the two are when placed side by side in this bowl.
I remember when I first came here, I was quite surprised at the almost-orange yolk, it made me wonder that maybe the brown shell had to do with it. Now I know better. And yes, that article reminded me about that first time I had an egg here. But during that time, I was comparing it to eggs that I was used to eating in the Philippines. This made me realize that those commercial eggs in PI are no better than the commercial factory farm-produced eggs here.
The physical appearance is only one clue as to the superior quality of eggs from chickens raised with tender loving care. A comprehensive comparison illustrated by a bar graph can be found in Mother Earth News's Chicken and Egg page. Nutrition-wise, they say:
In 1988, Artemis Simopoulos, co-author of The Omega Diet, found that eggs from
pastured hens in Greece contained 13 times more omega-3s than eggs from U.S.
supermarkets. In 1974, a British study found that eggs from pastured hens had 50
percent more folic acid and 70 percent more vitamin B12 than eggs from
factory-farmed hens. In 1997, a study in Animal Feed Science and Technology
found eggs from free-range chickens had higher levels of both omega-3s and
vitamin E than those from hens maintained in cages and fed commercial diets.
Most recently, in 2003, Pennsylvania State University researchers reported that
birds kept on pasture produced three times more omega-3s in their eggs than
birds raised in cages on a commercial diet. They also found twice as much
vitamin E and 40 percent more vitamin A in the yolks of the pastured birds.
Many vegetarians are forced to be so, even refusing to eat eggs because of cruelty to animals. While some cannot get themselves to slaughter (sacrifice) animals for their own consumption, others just plainly do not want to consume products raised under the most horrible conditions one can imagine (so they do not want to support such factory farms), as depicted in the video below, nor would they like to ingest such hormone-laden, probably previously sick products and have some dire health consequences.
Other related videos are the Meatrix I and II.
Have you noticed how the grocery stores are now teeming with "organic" produce? I am afraid it may be another "meatrix" where the produce is labeled as organic, but turns out to be another fantasy created by the profit hungry companies who want to take advantage of the "fad." If you feel at a loss now as to where to get foods you can trust (which can be quite a problem for the city dwellers), read here.
I feel privileged to have a taste of REAL GOOD FOOD, though not as completely as I would like it to be. Some people consider foods prepared in fancy restaurants as good food. To me, homegrown, safe, hormone-free, and healthy (as opposed to sick) nutritious foods are the real good foods.
I am contemplating on saving some money to have a contract with my SIL or MIL so they can raise chickens and pigs (in addition to beef) for my family's consumption (I do not have their expertise). There is also a local farm where the milk is organic and pasteurized (not homogenized). It may be quite costly, but the health benefits will be all worth it. Most of all, I will have the peace of mind on what I am feeding my family.
Thursday, March 17, 2005
Deviled Eggs
Pasensya na sa tagal ng post ko. Excited pa ako sa trabaho eh.
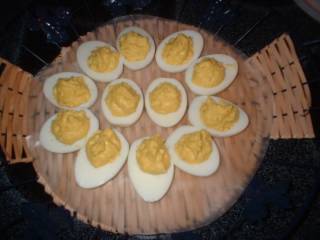
Deviled eggs are a common item in wedding receptions, and basically any gathering here. I liked it, so I researched for the recipe. It was not hard to find it. Just type "deviled eggs" into the Google search engine, click on the first link in the list, and you will get the recipe below (which I am posting here for your convenience; other tips on eggs can be found in that site). My kids loved them, though I discovered that my husband did not really care for boiled eggs (Malay ko ba! Eh di nag-hotdog sandwich sya!) My boys and I ate them with rolls. It is almost like our Egg Sandwich, only richer with eggs.
Items Needed: (for 12 Deviled Eggs)
6 hard boiled Eggs (large)
3 tablespoons mayonnaise or salad dressing
1 tablespoon sugar
1 teaspoon mustard (honey mustard is great!)
1 teaspoon vinegar
salt & pepper to taste
paprika (optional)
To boil eggs, place eggs in enough cold water to cover completely, bring to a rolling boil over high heat.
Reduce heat to a lower MEDIUM BOIL and cook an additional 12 minutes.
Remove shells from eggs, and halve lengthwise with a knife.
Carefully remove the yolks, and place in a medium bowl.
Mash yolks with a fork, and add remaining ingredients.
Very carefully spoon mixture back into the egg white halves. Garnish with a light sprinkling of paprika (optional).
Deviled eggs are a common item in wedding receptions, and basically any gathering here. I liked it, so I researched for the recipe. It was not hard to find it. Just type "deviled eggs" into the Google search engine, click on the first link in the list, and you will get the recipe below (which I am posting here for your convenience; other tips on eggs can be found in that site). My kids loved them, though I discovered that my husband did not really care for boiled eggs (Malay ko ba! Eh di nag-hotdog sandwich sya!) My boys and I ate them with rolls. It is almost like our Egg Sandwich, only richer with eggs.
Serve for any occasion, whether it be a wedding feast, a picnic in the park, or for lunch or dinner!
Items Needed: (for 12 Deviled Eggs)
To boil eggs, place eggs in enough cold water to cover completely, bring to a rolling boil over high heat.
Reduce heat to a lower MEDIUM BOIL and cook an additional 12 minutes.
Promptly chill eggs so yolks stay bright yellow.
Remove shells from eggs, and halve lengthwise with a knife.
Carefully remove the yolks, and place in a medium bowl.
Mash yolks with a fork, and add remaining ingredients.
Very carefully spoon mixture back into the egg white halves. Garnish with a light sprinkling of paprika (optional).
Wednesday, January 12, 2005
Tortang Talong with Pepperoni
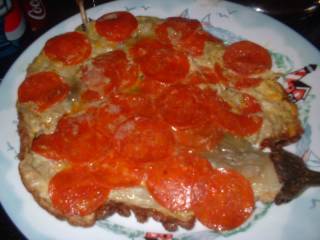
I did not use up all the pepperoni for the callos, and I was contemplating on making a home-made
pizza, but then I saw the Italian eggplant which I meant to use for kare-kare, so what I did was to cook it a la tortang talong with pepperoni.
Ingredients:
1 Italian aggplant, broiled then peeled
3 eggs, slightly beaten
salt and pepper to taste
few slices of pepperoni (enough to cover the torta)
Instructions:
Heat the skillet on mod-high heat (#7). Using a fork and holding on to the stem, mash gently with a fork to flatten the eggplant. Pour the beaten egg and sprinkle with salt and pepper to taste. Lower the heat to #3 and slide the eggplante-egg onto the skillet. Quickly distribute the pepperoni slices on top, cover and let cook for another5-7 minutes.
Children loved it, and so did I. I served it during lunch with plain rice when hubby was not here. I knew my hubby would not even try because when it comes to vegetables (except potatoes, tomatoes and carrots), he usually prefers them just boiled, or creamed, or as salads served with Wish-Bone Robusto Italian dressing. Nothing else.
pizza, but then I saw the Italian eggplant which I meant to use for kare-kare, so what I did was to cook it a la tortang talong with pepperoni.Ingredients:
1 Italian aggplant, broiled then peeled
3 eggs, slightly beaten
salt and pepper to taste
few slices of pepperoni (enough to cover the torta)
Instructions:
Heat the skillet on mod-high heat (#7). Using a fork and holding on to the stem, mash gently with a fork to flatten the eggplant. Pour the beaten egg and sprinkle with salt and pepper to taste. Lower the heat to #3 and slide the eggplante-egg onto the skillet. Quickly distribute the pepperoni slices on top, cover and let cook for another5-7 minutes.
Children loved it, and so did I. I served it during lunch with plain rice when hubby was not here. I knew my hubby would not even try because when it comes to vegetables (except potatoes, tomatoes and carrots), he usually prefers them just boiled, or creamed, or as salads served with Wish-Bone Robusto Italian dressing. Nothing else.

Monday, November 08, 2004
Itlog na Maalat (Salted Egg in Brine)
Do you miss salted eggs? Those eggs in the Philippines that are colored deep red, and which we often eat with diced fresh tomatoes? I do. We don't have it here. Well, I do see some "pickled eggs" displayed in jars on the grocery shelves, but I guess those are prepared as described on this home food preservation page. The technique is obviously different.
Thanks to Bernice for giving me a link to the DOST's TeknoTulong website, I found the method to make salted eggs (which are commonly sold in the Philippine grocery stores and wet markets, even in small stores, distinguised by its red color).[Note as of 1-17-09: Seems like DOST does not want to share their information anymore. Don't they realize if they posted their how-to's online with google adsense, they might have more revenue than waiting for people to purchase their ebooks?]
As instructed in the Tagalog version, the eggs should be submerged for weeks in a
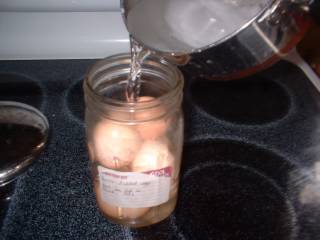
supersaturated salt solution. What I did was I tried to fit in as much eggs as I could in a wide-mouthed quart jar. Then I filled it with water and poured it off to a small saucepan to approximate the amount that I will need to boil (of course I added a bit more water for allowance).I boiled the water and continuously added canning salt (I used Morton) by 1-2 tbsp increments to fully dissolve it up to a point when it could no longer dissolve (which is called the supersaturated salt solution). I let it cool down. Since heat increases solubility, it was expected that some salt re-crystallized as the solution cooled.
Then I poured the solution into the jar with the eggs (I used chicken eggs as I do not have access to duck eggs), making sure that the eggs are fully submerged. (If eggs tend to float as the saltiness increases buoyancy, you should add some weight to it). I covered with a cheesecloth like so and used the screw band to secure it in place (you may use rubber band for the purpose).
Notice that I placed the label containing the date of start. I noted on the calendar the 12th day when I should try boiling 1 egg. Which I did, but did not find it quite salty enough. So I waited some more, until the 25th day, when my friend Ana was here and we shared pinangat that she cooked.
I boiled the eggs in the brine itself for 10 minutes then submerged them in cold water, and cubed them, then mixed with diced fresh red ripe tomatoes. So, as a side dish, my contribution was the salted eggs with tomatoes as pictured above. Ana said she felt like she was back in the Philippines, and those eggs really tasted like the ones we used to buy in the nearby sari-sari stores. My boys were so delighted it was almost like a treat to them (and as you would expect from a child, they favored the salted eggs with tomatoes over the pinangat, especially that Ana used a small finger-sized type of fish.)
The four eggs that we shared (there were four of us) were not enough, despite the pinangat. Bitin! My sons asked me to prepare some more. Isn't that something? I could now make my own salted eggs, and I am assured of the cleanliness and freshness!xI am now on my second batch of salted eggs. Problem is, I will have to buy fresh tomatoes from the grocery stores next time.
UPDATE as of 1-17-09:
From Minnie's comment below: An alternative recipe:
Hi Manang, I'm Minnie V. Acosta of Malabon City, Philippines. Im a Food Technologist & a Fd. Demonstrator in our City I want to share a simple procedure of Salted Egg Making.
Ings :
Duck egg 12 pcs
Coarse Salt 1 1/4 cups
Water 4 cups
Red granna crystals (for coloring eggs) 1 tsp.
Procedure:
1. Boil 1 1/4 cups coarse salt in 4 cups of water. Cool & strain the
dirts.
2. Put 12 pcs eggs in a glass jar then pour the salt solution. Reserve atleast 1/2 - 1 cup of the salt solution and place in a plastic bag (para hindi lumutang)then cover.
3. Soak in Salt solution for 12-15 days.
4. Wash the eggs thoroughly then boil for atleast 20 minutes without cover. Remove from water then cool.
5. Making color solution : Dissolve 1 tsp. red granna crystals in 4 cups of water. Soak the eggs for atleast 60 seconds.
That's we how we make our salted eggs (Brine solution)here in the
Philippines. Hope this will help our kababayans. Thanks also to you manang I enjoyed reading comments and your advices
BELOW is the DOST Teknotulong's recipe for salted eggs, both in clay and in brine. I copied these when their website was back online (it tends to be changed often and sometimes not available).
SALTING EGGS IN BRINE:
Materials: Eggs (chicken or duck), Salt
Utensils: Wide-mouthed glass jar, Measuring cups, Cheesecloth
Procedure:
1. Boil 12 cups of water and 3 cups of salt. Cool.
2. Carefully place 12 chicken or duck eggs in wide-mouthed glass jar.
3. Pour the salt solution in the jar. Weigh down eggs with plate or cup to keep them from floating or use a sealed plastic bag filled with the salt solution.
4. Cover mouth of jar with perforated paper or cheesecloth. Keep in a cool, dry place.
5. Try one egg after 12 days by cooking below boiling point for 15 minutes. Soak again if eggs is not salty enough. Test for saltiness by cooking one egg after a few days until desired level of saltiness is attained. Duck eggs may need to be soaked longer.
6. Cook salt eggs below boiling point for 15 minutes.
Source: Technical Information and Documentation Division ITDI (DOST)
back to top
SALTING EGGS IN CLAY
Materials:
Eggs (chicken or duck), Clay, Salt
Utensils: Measuring cups, Palayok
Procedure:
1. Mix 12 cups of clay and 4 cups of salt, adding water gradually until well blended.
2. Apply generous portion of this mixture at the base of a clay pot or "palayok."
3. Coat each egg with the mixture.
4. Arrange in layers and allow 2.5-5.0 cm. in between to prevent breakage.
5. Cover with extra mixture and store.
6. Try one egg after 15 days by cooking below boiling point for 15 minutes. If not salty enough, extend storing period.
7. When ready, cook eggs below boiling point for 15 minutes.
8. Color eggs, if desired.
Subscribe to:
Posts (Atom)
Custom Search