Saturday, November 10, 2007

Egg (Custard) Pie

I first came across the recipe of CeliaK (God bless her!) that looks like the traditional egg pie back in PI -- custard with dark brown topping. So, getting the ideas from her recipe, I tried mine with some variations to save time (using graham crust instead of making my own pie crust; I rarely have the time nowadays because of work) and use up some of the ingredients in my pantry given by relatives (i.e., honey). If you are interested in making your own graham cracker pie crust, I have copied and pasted a recipe down below.

My first attempt created that dark brown but too spongy topping, and I wanted the top thinner, and I wanted the custard sweeter (guilty of having a sweet tooth!). But in wanting to see how my in-laws would receive it (my husband is hopeless), I did not make the top dark, but golden brown. Now, my SIL is a very opinionated person who cares not a bit if you will like what she is gonna say or not, but when she got her first bite of this egg pie, her comment was: "Oh my God, this is to die for!!!" and helped herself to a second serving.

My MIL raises chicken layers so we could get the freshest eggs, and right now she gets 18 eggs a day! What to do? Give us some, and sell the rest. In return, I try to make this egg pie or leche flan, which she and FIL both love (makes me wonder why my hubby does not).

Here is my final recipe (my kids like the leche flan better, though):

Ingredients (good for one pie)

Keebler's Graham Crust (with 2 extra servings - see slide show below)
2&1/3 cup milk
1 beaten egg for brushing the crust (the excess goes into the mixture)
3 eggs Plus 1 yolk
1 egg white
1/2 cup sugar
1/2 cup honey
1&1/2 tbsp cornstarch

Instructions:
1. Preheat oven to 375 deg F.
2. Place the crust onto a baking pan/cookie sheet and brush with beaten egg. and bake for 5 minutes. (This procedure is actually found under the label.)
3. Meanwhile, combine the rest of the ingredients (except the 1 egg white) in a blender using pulse setting.
4. Pour the excess beaten egg (from step 2) into the mixture that you are gonna prepare.
5. In a separate bowl, beat the egg white until it forms soft peaks.
6. Using a wire whisk, cut the egg white into the mixture by gentle mixing until just a thin layer of egg white floats.
7. Increase the oven temp setting to 400 deg F and immediately take out the crust and pour the custard mixture into it and fill to capacity.
8. Bake immediately for 15 minutes then lower the temp to 290 deg F and bake for 30-60 minutes more (depending on how many pies you are making; you kind have to keep watching). When the middle part is a bit wiggly like soft jelly, take the pie out (don't when it seems liquidy still). [If you do not bake right away after pouring the custard onto the crust, the custard starts disintegrating the crust and you will see the custard impregnated with graham cracker. I have done that!]
(EDITED- removed the confusing extra lines - thanks to Teresa for her query!
EDITED again12/06/07 because I noticed my step-by-step instructions were not too clear, thanks to Dona's query. I think was busy SingSnapping while making this post...lol!)


This is a great Christmas give-away idea for your Filipino friends!

Graham Cracker Pie Crust recipe from Southernfood.
This crust is simple to make, and may be used for a 9-inch pie or cheesecake.
Difficulty: Easy
Time Required: 10 minutes
Here's How:

1. In a small saucepan or the microwave, melt 6 tablespoons of butter.
2. Place about 24 graham crackers in a plastic bag. Roll with a rolling pin until finely crushed. This may be done in small batches.
3. Measure 1 1/2 cups of graham cracker crumbs into a medium bowl.
4. Add 1/4 cup of sugar to the graham crackers.
5. Add the melted butter.
6. Stir or blend together with your hands.
7. Press into the pie plate or other pan.
8. To pre-bake the pie crust, bake for 8 to 10 minutes in a preheated 350 degree F. oven.

Monday, October 08, 2007

Bunuelos (fried dough or doughnuts)

This is one of our favorite snacks. I got it from a Chinese cookbook, and while the photos in the cookbook reminded me of buchi-buchi (?), the taste is very much like fried dough. Here in Maine, fried dough is a very popular item sold by food vendors in carnivals/fairs. But I made mine pretty much like doughnuts, and shared some with my in-laws. They called it fried doughnuts. It easily became a favorite snack/dessert item in our house, and you can serve it to American visitors as well, guaranteed to be a big hit, especially when they dread/expect you to come up with "exotic" Filipino dishes.

INGREDIENTS:

2 cups all-purpose flour
1 tsp baking powder
1/2 tsp salt
1 tbsp sugar
1 large egg, beaten
1/2 cup milk
2 tbsp unsalted butter, melted
oil for frying
cinnamon-sugar for dusting (you can combine 1/4 cup sugar + 2 tbsp ground cinnamon)

Sift the flour, baking powder and salt into a bowl, whisk the egg and the milk well together. Gradually stir in the dry mixture, then beat in the melted buter to make a soft dough.

Heat wok. Pour oil about 1 inch deep and let heat at #6 setting for about 1 minute. (You may use a deep-fryer).

Turn the dough onto a lightly floured board and knead until it is smooth and elastic. Shape to make a log then pinch off golf-ball sizes, flatten with your hands into disks. Poke a hole through the center of each disk using floured handle of wooden spoon (make the hole wider by swirling the dough around the handle).

Fry in batches, taking care not to overcrowd the pan, until they are puffy and golden brown on both sides. Lift out with slotted spoon and drain on paper towels.

I like pouring melted butter, and sprinkling confectioner's sugar or cinnamon-sugar, then I pour maple syrup. Honeyko likes only cinnamon-sugar on them.

Instead of the syrup recipe included in the cookbook, I just use maple syrup and sprinkle cinnamon-sugar onto these treats.

Tuesday, September 11, 2007

Spanish Bread

I managed to take photos the last time I made spanish bread, so here goes the step-by-step how-to's. For some reason, my computers (both PC with Windows XP and laptop with Linux) do not currently work well with slide.com. I have not had the gumption to make a new account with Flickr to attempt making slide shows, so I resorted to posting a series of photos here instead.

This is another kid-favorite rolls, they like these more than they do ensaymada, although I made both using the same dough (see my posts on Ensaymada).

RECIPE: Please see the BM ensaymada recipe here for the ingredients list and to prepare the dough on the bread machine. The following is the step-by-step guide on how to actually make the rolls.

For the butter-sugar mixture: 1 stick of softened butter (1/2 lb) + 1 cup white sugar.

Instructions:

Prepare the dough. Divide into portions the size of a golf ball. Mix sugar (your choice: brown or white. I prefer white.) and softened butter/margarine (I can't specify the proportions because I approximated. I just kept adding sugar and mixing until I got a consistency that was gritty yet spreadable.)

Flatten each piece with a rolling pin as shown. Go ahead, don't be afraid...Start from the middle outward up and down, especially adding pressure at the ends so they stick to the table. That way, they don't roll back or spring up.


Spread a good layer of sugar-butter mixture. Avoid the ends so you can seal properly.


Roll tightly. Make sure end seals.


Coat with breadcrumbs.


Place on baking pans with seam side down. Cover with plastic. Let rise for 15-30 minutes (depending on what yeast you used and the humidity/temperature of environment). Bake at 350 deg F for 12-15 minutes or until golden brown. (If you have too much for one-time serving and want to reheat these in the future, bake only for about 10 minutes initially, so when you reheat they won't look burnt. I reheat 2-3 pieces for merienda in an oven toaster at 350 deg F for about 3 minutes or so.). Transfer to cooling wire rack right away.

STORING: When you cannot eat all freshly baked spanish bread, after cooling in the wire rack for about 30 minutes, they should be warm (not hot) or almost room temp. That is the perfect timing to place them in ziploc bags and close. Observe after several minutes if they sweat. If they do, open the bag and let the excess moisture evaporate some more, wipe the sweat inside the bag with paper towel. Whey they do not sweat anymore, close bag tightly. When done at the right timing, your spanish bread will remain soft for 3 days without having to reheat them. But then, I myself prefer heating them up in oven toaster for about 3 minutes. And these do not last more than 3 days (or even a day!) for my family.

Monday, July 30, 2007

The Face Behind the Blog

This (rather too late post) is in response to babyrambutan's tag (see her post here). She was originally tagged by thess.

Me as a singer-wannabe, used to be a videoke addict (with some withdrawal symptoms up to now; well-controlled). See how I was holding the mic. I had it for essentially the whole night that time...singing and dancing, hindi naman ako lashing...hik!


Used to work as a general medical practitioner back in PI. Nagpapaka-nars ngayon, and quite happy about my choice (less headaches, more time with family). Favorite thing to do back then was to deliver babies (via NSDs). Had some inaanak because of patients-turned-friends. I would have wanted to be an OB-Gyn (though some friends told me I could have been a good internist, and some patients suggested I become a psychologist -- bleh!!). Things turned out differently mainly because I had no connections in DOH when residency matching was implemented. Mahirap talaga maging mahirap.


Nature-lover (Philippines-type of nature, though. I still have some aversion with the cold winter and would rather stay home. I also have not had enough courage to engage in winter activities). Notice my short hair here? I used to wear my hair short, until I discovered that I look much better and younger with long hair when straightened and cellophane treated at Freshair (naks, me plugging pa!). Noon yun. Now I don't have enough dough for that type of luxury here in the US. I just use the electric hair straightener coupled with virgin coconut oil treatment once in a while. Still the envy of many Ams here because of my hair.


Did I mention I was a videoke addict??? I am now out of it...pretty much...I do have the Magic Sing...but someday I would like to get the USB-type one. Di nga...not an addict anymore...I swear. Peks man!


Since I rarely blog nowadays, I am afraid I cannot think of other bloggers who could qualify, nor do I really have the time to notify them that I am tagging them, so please bear with me.

Saturday, July 21, 2007

(Best?) Ensaymada Recipe #2 (Bread Machine)

UPDATE (11/16/08): Just for fun I googled ensaymada recipe and found a yahoo answers webpage that voted this particular recipe as best answer to the question pertaining to ensaymada. Two yahoo users posted a copy-paste of my recipe and how-to's below, although they did not provide reference to my kusina (which, I think, is a disservice for those whose question they answered, and was quite unfair to me not being credited, but it's okay. As long as it gives me the satisfaction that there are those who have tried this recipe and actually recommend it to others, even without letting me know, I still feel honored...
After getting tired of kneading using the first recipe I posted about earlier, I experimented twisting some other similar recipes for bread machine, and came up with this recipe. I now prefer this (less messy) method. It still gives me that familiar taste of ensaymada I used to eat from our cheap bakery when I was a kid (This ensaymada is NOT goldilocks or red ribbon-type, but it is the type I used to eat a lot when I was a kid. If you want the soft, fluffy, light-colored ensaymada that will remind you of Goldilocks or Red Ribbon, try the supersoft ensaymada). Everyday when it was being baked, I would eagerly wait for the first batch to come out, and would wait patiently until I could brush it with margarine without melting, then dip into a bowl of sugar. Yum-yum!

As a bonus, I am using part of the dough to make mini-Spanish bread, which my kids (including stepd) are crazy about, they're gone in minutes!

Ensaymada Recipe #2: Bread Machine Method using bread machine yeast

URGENT NOTE as of 07/21/07: I am making this recipe while editing this post. I should have included this note before any of you tries making this recipe. If your BM is like mine with tall bucket instead of horizontally long (loaf-shaped), this recipe might HAVE TO BE CUT IN HALF. (The ingredients here are for a total of 3-lb loaf, and my BM can only accommodate up to 2-lb loaf without problems for dough cycle.) If you do use the same proportions here,make sure you stay with your BM, initially put only 4 cups of bread flour, help mix the dough using silicone spatula, then add the rest of the flour when you already have the soft dough (takes about 15 minutes). Keep watching, as you might have to add more flour by the tbsp (I had to add 4-5 tbsp at this time) depending on the size of egg you used. You have to poke with your finger a bit to see if the dough will NOT stick to your finger to know you have enough. Do not add too much that the dough appears flaky, because then it becomes tougher and dry.

So if you want not to worry about guarding the BM while it does its job, cut the recipe in half (1-1/2 lb loaf), or use the alternate recipe below.

If your BM is horizontally long with 2 paddles, I do not think it will be a problem to prepare the 3-lb recipe.

Ingredients (3-lb dough):
1 cup milk
3/4 cup water
1 egg
4 egg yolks
1/2 cup (1 stick) butter
2 tsp salt
6-3/4 cups bread flour (plus some more; see note above)
3/4 cup sugar
2 tsp BM yeast

(2-lb dough) - [This yielded 9 ensaymadas and 12 pcs spanish bread]
2/3 c milk
1/2 c water
1 egg
2 egg yolks
6 tbsp butter
1-1/2 tsp salt
4-1/2 c bread flour
1/2 c sugar
1-1/2 tsp BM yeast

Topping: softened butter, granulated sugar (or sugar-cinnamon, which hubby prefers), and optional grated cheese.
Directions:
Add ingredients to bread machine pan in the order suggested by manufacturer. Set in dough cycle.
Once done, punch dough, lay on the table and roll with a rolling pin to make it flat. (NOTE: To keep the surface of dough from drying up, cover with plastic while you work on the ropes.)
Using dough cutter, make long ropes (about a foot long) about 3/4 of an inch wide, and coil.
Apply melted butter on coils and let rise for 10-15 minutes (or up to 30 if you want them really fluffy) in a draft-free moist enough area (I like putting them in oven with a bowl of hot water).
You may apply egg glaze prior to baking (if you want it darker brown upon baking).
Bake at 350 for 12-15 minutes (depending on your oven).
You may apply melted butter as soon as they get out of the oven. Helps keep them soft by preventing too much moisture loss. Then apply softened butter and roll in sugar when ready to consume. (Please see slideshow for step-by-step how-to's).
Bonus: I use the smaller sides of the flattened disk of dough to make mini-spanish bread. Just mix together softened butter and sugar (approximate - butter should have enough sugar to make it super gritty but still spreadable), and apply a not-so-thin layer leaving about 1/4 inch at the edges for sealing(if too generous, it becomes gooey caramelly when baking and overflows out of the buns and make the bread quite tough when they get colder. So when you do make them like so, eat right away while they are still soft and fresh from the oven.) Roll tightly as shown. Then coat with bread crumbs. Put on baking pans seam side down. Bake at 350 deg F for about 8-10 minutes.
Sorry no pics for the finished spanish bread. They were gone too quickly before I had a chance to take photos.


Sunday, July 08, 2007

Whoopie Pies

These, in my opinion, are more like soft cookies, or small cakes, instead of pies.

The photos shown below were taken way back in 2004 (payat pa ako nun). One picture shows my niece when I was receiving the lesson from my MIL and we were in my SIL's house then. The rest of the photos were during my first try to bake them.

Whoopie Pies are a favorite of my in-laws, and my husband gave me a Kitchen Aid standing mixer on our first Christmas together that I may learn how to make them for him. "You can never buy them the same from any store around," he says. And I guess the reason is that we use fresh egg whites for the creamy filling. The commercial ones taste like plain lard mixed with confectioner's sugar and vanilla (yuck!).

Caution: If you do not trust the freshness of the eggs, I do not recommend that you try this recipe. If you can get fresh eggs from a neighboring farm, then by all means, make these! (that is, if you are not allergic to eggs nor is your tummy squeamish)

Ingredients:
Filling -
2 1/4 cup shortening
6 cups confectioner's sugar
6 egg whites
3 tsp vanilla

Dough -
1 cup shortening
2 cups sugar
6 egg yolks
1 whole egg
2 cups milk + 2 tbsp vinegar
8 heaping tbsp cocoa
2 tsp baking soda
2 tsp baking powder
1/2 tsp salt
4 cups flour
2 tsp vanilla

Instructions:
Filling -
1. Cream (beat together) the shortening and sugar well under moderate speed.
2. Add egg whites one at a time under slow setting, gradually increasing in speed until high.
3. When fluffy and forms soft peaks, turn speed to moderate then add vanilla and increase speed again until the right spreading consistency is achieved. Place in a ziploc bag then put inside the fridge until ready to use.

Dough -
1. Pre-heat oven to 350 deg F.
2. Cream the shortening and sugar first. Beat well.
3. Mix all dry ingredients in a separate bowl.
4. Add eggs/egg yolks one at a time to the creamed sugar and shortening and beat on low going to medium until lemony creamy.
5. Alternately add the dry ingredients and the milk-vinegar mixture under low setting into the cream. Scrape bowl with spatula from time to time.
6. Add vanilla.
7. Place in ziploc bag. Cut one corner of the bag and squeeze out about 1 tbsp of dough onto baking pan lined with aluminum foil (makes it easier to change pans if you make bigger batches), 2 inches apart.
8. Bake for 10 minutes.
9. Cool on wire rack for 10 minutes.
10. Put the filling and sandwich between two cookies.
11. Refrigerate those which you will not consume right away. (Remember, there are raw egg whites there).

Ensaymada Recipe #1 (Manual)

Quite late, but here it is as promised.

As with the bread machine method, the ensaymada resulting from this recipe is like the ones I used to eat a lot when I was a kid, the kind of ensaymada you can get from the nearby bakery in the Philippines, not from goldilocks or red ribbon. This is only made more special by virtue of its very ingredients: more eggyolks and butter.

I have tried both manual and bread machine methods. I still prefer using the bread machine, but the manual was my first attempt, so here goes the recipe.

Recipe #1: Manual method using Rapid Rise Instant Yeast

6 to 6-1/2 cups all-purpose flour – (measure separately and put in 3 separate bowls 2 cups first then 1/2 cup then 4 cups to make a total of 6-1/2; reserve the last ½ cup for dusting while kneading)
3/4 cup sugar
2 envelopes FLEISCHMANN'S RapidRise Yeast - If you do not have this, just look for anything equivalent to instant yeast (this is mixed with the flour before the hot liquid. 1 envelope = 2-1/4 tsp )
1-1/2 teaspoons salt

1 cup milk (You may want to experiment using buttermilk instead of milk)
1/2 cup water
1/2 cup butter or margarine
1 large egg
3 egg yolks (reserve 1 egg white for Egg Glaze – optional; if you are wondering what to do with egg whites, you can use it for meringue or just use for tortang talong and the likes)

about 1/2 cup melted butter for brushing prior to rising

Topping:
Softened (not melted) butter or margarine
Granulated sugar
grated white cheese or any other cheese you fancy (optional)

Directions (See earlier post for slide presentation)
In a large bowl, combine 2 cups flour, sugar, undissolved yeast, and salt. Heat milk, water, and butter until very warm (120o to 130o F). Gradually add to flour mixture. Beat 2 minutes at medium speed of electric mixer, scraping bowl occasionally. Add egg, egg yolks, and 1/2 cup flour. Beat 2 minutes at high speed. Stir in enough remaining flour to make a soft dough (leave about ½ cup for dusting while kneading). Knead on lightly floured surface until smooth and elastic, about 8 to 10 minutes. Cover; let rest 10 minutes. (If preparing one night ahead, you can refrigerate at this point, a method I prefer because it is then easier to manipulate the dough. Grease a big bowl with shortening, put the dough in it and turn it over so that the dough is covered with grease all over. Cover with plastic wrap then refrigerate. The plastic wrap will prevent the dough from drying up on the exposed surface.)

Divide dough into 24 equal pieces (I do it by halves - cut in half first then cut each half into another half so that I have 4 big pieces. Then I cut each into half again, then cut into 3 to make 6 pieces for each of the 4 big pieces). Using both your hands, roll each piece to make ropes about 1 foot long or more, with the diameter about the same as your middle finger. Make a loose coil with each rope (parang katol; you can even give more allowance for rising), tuck the end under and lay flat on the greased baking sheet (or use parchment paper). Brush each piece right away with a generous amount of softened margarine or melted butter (so that the coil’s grooves are more pronounced. If you don’t, the dough sticks at the grooves and it appears as pyramid instead of a nice mound). Let rise until doubled. (I usually place them inside the oven, along with a bowl filled with hot water, then I heat the oven for 1 minute then turn it off and let the warm air speed up the rising process. Usually they are ready after 15-20 minutes, but you may extend some more if you want puffier buns. I then open the oven door carefully and gradually so as to avoid creating draft then take out the sheets carefully to avoid jarring them -- these might flatten the dough if you are not careful; what we term as "bumagsak.") Put the baking sheets on the countertop where there is no draft.
You might have to prolong the rising time to more than 40 minutes depending on the level of humidity and the temperature where you are (I was told by some that theirs did not rise too much so the buns turned out quite too solid). Keep eyeballing if the buns have doubled in size. You can now start heating the oven.
Brush with Egg Glaze (optional). Bake at 375o F for 12-15 minutes or until done and top is golden dark brown if with glaze or golden light brown if without. (I usually start checking periodically after 10 minutes for the individual rolls. Remove from baking sheets (this avoids sweating at the bottom part so it won’t turn soggy there); cool on wire racks until lukewarm just so that the softened butter or margarine will not melt when brushed. Dip in a bowl of granulated sugar to coat (or you can just sprinkle on top). If storing some pieces, it is better not to put butter/margarine and sugar yet. Cool them completely (about 10 minutes or so; keep touching them) then immediately store in an airtight Ziploc bag to avoid sweating (which will make them soggy and also will encourage faster mold growth). If you live in an area where humidity is too low, avoid exposing to air beyond the time for complete cooling, or the buns will dry out and will be hard. When reheating, place in the microwave for 10-15 seconds (depending on the microwave) to make it lukewarm before applying butter/margarine and sugar. As advised by breadworld.com, leftover breads are better left in room temp instead of inside the fridge. Refrigerating makes them stale faster.

Egg Glaze: Combine 1 egg white and 1 tablespoon water; beat lightly until well blended. This will create a very dark golden brown top. (I like the contrast. For those who usually think a dark crust means overdone, it will be such a surprise to bite into the softness of the ensaymada, and that wonderful first bite will reveal a yellowish-whitish interior).

You may want to bake them braided or in rounded pans if you want to wrap them as gift (as I did for Christmas) to friends.

Tuwang-tuwa sila!

UPDATE as of 4/2/09: Vincent posted his own take of ensaymada on thefreshloaf, with changes involving omission of milk and adding an extra yolk. Hmmmm....yum!


Leche Flan (using Whole Eggs)

Whole Egg Leche Flan is very creamy!
I had a post about leche flan in my old kusina, but the how-to's were in a geocities page which is now not viewable. Since there have been those who requested, I am now re-posting it, with my fave recipe and my usual methods.

My MIL usually sneaks into the kitchen to get a slice of this when we get together even before dinner is served on some special occasions. "It kinda grows on you," she said. (Her initial acceptance was mild, now she's kinda addicted to it, so whenever I get lots of fresh eggs from them, I make one for them.)

Some think that egg whites prevent the leche flan from turning very creamy. This is still creamy, and the outcome has a lot to do with the technique in preparation. I do it slow and low (long, 1-hr baking in a water bath on low temp of 295 deg F). Some think using the strainer is the best way to make it smooth. I (the radical me) have made use of the pulse setting of a blender (short bursts only) to make a homogenous mixture with minimal waste (Have you tried using the strainer for this purpose? Then you know how hard it is to push the eggwhite through the mesh, and how hard it is to clean it up later). I like this reecipe not only because it tastes so good in my opinion (I got the recipe from Milkmaid label sometime when I was still in high school), but also it does not make me crazy trying to figure out what to do with the egg whites (like the recipe using egg yolks only). And more importantly, egg white is mainly protein, and egg yolk is mostly cholesterol. So, I really do not want to waste protein and make the egg flan cholesterol-laden, when I can have very rich-tasting leche flan this way (any of my friends who have tasted this can attest to that. In fact, whenever we get together and they see a leche flan on the table, they blurt out "Yehey! Pinagdasal ko yan na gumawa ka ng leche flan. Buti gumawa ka!" I have tasted the yolk-only flan, and to me, it is just too rich, like the cheesecake that my SIL makes and I am not crazy about (nor is my husband, so I am not too motivated to make one). Hence, I have been making this for >20 yrs (steamed when I was in PI on moderate heat for 30 minutes covered with foil, now baked in water bath for 1 hr or so at 295 F).

UPDATE as of March 2008: I brought this as my contribution to a fund-raising activity we had at work, and according to my co-workers, many were asking who made this rich cheesecake-like dessert, and they were raving about it. It was such a big hit!

Ingredients:
1/2 cup white sugar
4 whole eggs
1 can condensed milk (14-oz)
1 can evaporated milk (15-oz)
1 tsp vanilla (alternative: few drops of McCormick lemon extract essence)
(optional: 1 8-oz cream cheese + 1 additional egg for cheesecake-like flan)


Instructions:

NOTE: I prefer to use the oven, using water bath method.

1. Caramelize the sugar in an 8-inch round aluminum pan over low heat (#3 on my stove setting). You may swirl the pan around (use tongs to hold) or stir with a spoon once it starts to melt. It can easily scorch and will be bitter if that happens, so keep an eye on that (takes about 20-30 mins before it start melting, and I prefer a bit of bitterness like that of coffee).
UPDATE (11-21-08): You may want to try caramelizing sugar in the microwave. Place 1 cup of sugar in microwave-safe cup (Pyrex is ok) and add enough water (about 2-3 tbsp) to wet all of the sugar.  Microwave for about 4-5 minutes, keep watching starting on the 4th minutes and wait until it turns into amber-colored liquid per your preference (if you want it lighter, stop earlier). Grab with gloves on (this is very hot!) and then pour into the pan that you are going to cook your flan in, whether small custard cups or 8-in round baking pan. (Make sure your pan sits on a towel or trivet to protect your tabletop/countertop. Quickly tilt to coat before it hardens. (Tip: You may want to let your pan sit on hot water so the caramel would not harden right away once it touches the pan.) See video below.

2. While still hot and fluid, swirl to distribute the caramel to the sides and bottom of the pan.
3. Place the pan on a wire rack to cool and let the caramel solidify.
4. Meanwhile, prepare the steamer (alternatively, you may use the oven, heated to 295 degrees).
5. Mix the rest of the ingredients while heating the steamer (or oven) using the pulse setting in a blender (push the pulse button for about 3 seconds 3 times or until the mixture appears homogenous). Avoid prolonging the blending such that it creates lots of bubbles.
6. When steamer (or oven) is ready, pour the mixture into the prepared pan.
7. Cover with foil before placing in steamer (If using oven, place the pan uncovered into a larger pan with water such that water reaches about 1 inch up the sides of of the leche flan pan- aka water bath). Steam for 30 minutes on medium heat (or bake for about 1 hr at 295 deg F).
8. Check for doneness (I prefer wiggling it rather than using toothpick. If it wiggles at the center pretty much like jello, that is done for me. If it is too fluid, I steam/bake some more.).
9. Let cool before serving (I prefer it chilled for 3 days with foil cover before eating. My in-laws and husband prefer it fresh from the oven).
10. Run a knife around the edges of the flan. Invert onto a deep platter (or pan) to serve.

P.S. This and other recipes were featured in Hannaford fresh magazine (article on page 10) for the May-June 2007 issue, but they revised some of my recipes (probably because they deemed the revisions would cater better to their general readers).

UPDATE as of 4/2/09: Here's a comment from Anna of France (she made the comment under Custard Cake):
i tried your leche flan recipe,and its perfect recipe,leche flan using egg whites,napa wow talaga ako sa texture nya..so creamy, and you are right na super rich talga pag eggyolks lang..thank you atlast my recipe na ako sa leche flan na hindi ma waste ang whites.;
thank u so much for being so kind sharing recipes like this.

Wednesday, April 25, 2007

Ensaymada Recipe

UPDATE: 12-24-08 --
Please choose from the following recipes I have: supersoft and buttery, which are both cake-like or pastry-like, and many say are like Goldilock's or ensaymada, aside from the earlier bread machine and manual methods which are more like the traditional ensaymada you will typically find in a neighborhood bakery in the Philippines, which have more chewy and robust texture. You will also see tips and methods.

Merry Christmas!
~~~~~~~~~~~
To those who have emailed me for the ensaymada recipe, please bear with me. I have decided to post it online, hopefully over the weekend, since my sister does not seem to have the time to sell ensaymadas as a sideline anyway, and there have been quite a lot who have been emailing me...

As many of you know, I have embarked on a new career, and currently am orienting at a hospital. Quite busy nowadays to post...more so to answer emails or mail the recipe every time someone asks me for it. So I figure the best thing to do is to post it online, and if my sis makes an issue out of it, pasensya na lang sya.

I have been experimenting with different types of yeasts, so I will post different versions depending on what type of yeast I used.

So please be patient...I promise to take the time to post that this weekend.

Friday, December 08, 2006

Special Ensaymada

Note as of 1-12-09: Please see my labels on the sidebar and look for "ensaymada" for other recipes I have (supersoft and buttery, aside from the earlier bread machine and manual methods). You will also see tips and methods. My favorite, and most popular among my readers, is the super moist, super easy to make, supersoft ensaymada.

~~~~~

Before I left the USA, I baked this bread for supper, which I tweaked with to substitute honey for some of the sugar. Husband said it was so good, so soft and sweet it was almost like a pastry. It reminded me so much of ensaymada.


Now, I am here in Canada as I post this, with my sister and Nanay, and I brought the recipe with me, following the recipe save for changing the proportion of eggyolk and eggs, brushed some with egg glaze and some without, and of course, I shaped them into regular sized ensaymada.

My sister tasted it and said, "Ang sarap! Siksik sya, hindi puro ere." (It's delicious, and not full of air.) At first I thought she was trying to tell me it was solid [hard] because it was "siksik" but what she really wanted to say was that it was not the kind that some rolls are - full of airy holes that one would get gas pains due to so much air eaten than the actual bread, which is usually a result of over-rising.

She brought to work two pieces, as she was giving the other piece to her Filipina co-worker. When she got back, she told me, "Sarap na sarap yung kasama ko. Gusto mag-order. Ituro mo nga sa akin kung paano paggawa." (My co-worker liked it so much that she wants to order some. Teach me how to make it.) At last I achieved what I have meaning to -- evoke interest in my sister to learn baking. She was, anyway, exposed to the same bakery and bakers I grew up with.

Hence, that is the reason why I am not (yet) posting the recipe here. My sister might want to sell ensaymada as a sideline, so she does not want me to post my final recipe here. I can only say that I did not use honey, but all the ingredients can be easily bought from the grocery store. And I can only offer, for now, the slideshow and the how-to's below. For those who will be interested, email me (see contact link) and provide me with your physical mailing address.


Procedure:
1. Prepare the dough (this recipe can be refrigerated, which I prefer because the dough is easier to handle/shape when cold).
2. Divide the dough into 24 pieces (you may want to make 12 pieces first and re-place the rest of the dough in the fridge. This dough can be used within 24 hours.).
3. Using both palms and starting from the middle going outward, roll out each piece to make a 1-ft long "rope."
4. Make each piece into a loose coil so that when you place it on the baking sheet, it lies flat, not like a mound. Some space in between can be allowed, since the dough will still have to rise. The mound at the center will form as the dough rises.
5. After placing on the baking sheet, brush with softened or melted butter/margarine. Let rise in a warm, draft-free place for about 10 minutes or until doubled (depending on the warmth of the place). I place mine inside the oven and turn the oven on for one minute just to make it warm inside. If you are going to place them on the countertop, make sure you cover to avoid drying up.
6. Bake at 350 F for about 12-15 minutes or until golden brown. You may brush with egg glaze if you want the top a darker brown for better contrast with the inside.
7. Once cooled enough, brush with softened butter or margarine then dredge in sugar and enjoy. Optional: Sprinkle top with grated cheese. I can tell you, though, that this is so good you don't need anything else aside from the basics of ensaymada to enjoy it. In other words, you don't need cheese or salted egg to make it taste good. It was my sister who labeled my ensaymada "special." That's how pleasurable this is to the palate.

Note: The rolling pin method can also be used. Instead of making "ropes", you can flatten the whole dough using rolling pin to make about 10x15 rectangle and brush with butter, leaving about half an inch on one long end. Start log-rolling from the other long end, then pinch to seal at that end without butter. Cut the log into 24 pieces, lay on the baking sheet at 2-inch intervals and let rise. Proceed as above.

TIPS:
When storing, let the buns cool completely then place inside a ziploc bag immediately. It is better to NOT brush them with butter and NOT to sprinkle sugar yet. If you have done so then you have to reheat, the sugar and butter will be quite melted when you microwave, which is not quite appealing to the eyes, but still appealing to the palate.
When ready to consume again, just reheat each piece for about 10-15 seconds in the microwave then brush with butter and roll on sugar.


UPDATE: 12-24-08 --

Please see my labels on the sidebar and look for "ensaymada" for other recipes I have (supersoft and buttery). You will also see tips and methods.

Merry Christmas!

Friday, December 01, 2006

Blueberries

Every year I get about 1 gallon of freshly picked blueberries from my MIL's garden.
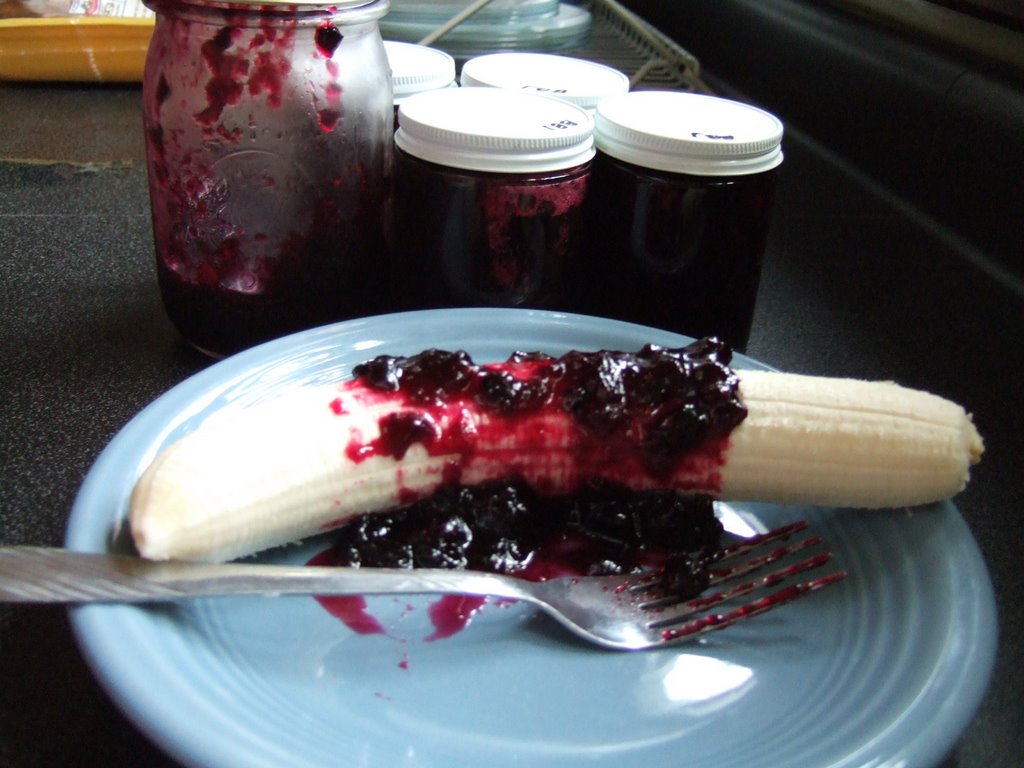
I make blueberry jam (recipe here), which I store in 3/4 cup jars, and which I love using on bananas, or saltine crackers, or toast...

I also use one such jar for the very tastyStonewall Kitchen's blueberry sourcream coffee cake, the recipe for which is as follows:

Ingredients
2 cups granulated sugar
2 cups all purpose flour
1 Tbsp vanilla extract
1 Tbsp baking powder
1/4 Tsp salt
2 sticks (1 cup) unsalted butter
2 eggs, beaten lightly
1 cup sour cream
1 - 13 oz. jar Stonewall Kitchen Wild Maine Blueberry Jam, stirred well

Directions
Pre-heat oven to 350 degrees.
Butter a 10” bundt pan and lightly dust the inside with flour.
In a mixer, or by hand, cream sugar and butter until light and fluffy.
Add eggs, blending well, and then add sour cream. Mix until combined.
Gradually fold in flour, vanilla, baking powder, and salt into creamed mixture until just blended.
Reserve 1/2 cup of batter and mix with 3/4 of the jar of blueberry jam.
Pour 3/4 remaining batter into the prepared pan, smoothing to the edges and creating a slight "trough" with a spatula.
Gently spoon the blueberry mix into the batter "trough", being careful not to touch the side of the pan.
Pour the remaining batter over the jam and smooth the top.
Set pan on middle rack in the oven and bake for about 60 minutes, or until the sides of the cake pull away from the pan and a cake tester (or toothpick) inserted in the center comes out clean.
Cool on a wire rack for at least 30 minutes. Turn onto a plate, sprinkle with confectioners sugar, drizzle with remaining jam and enjoy!

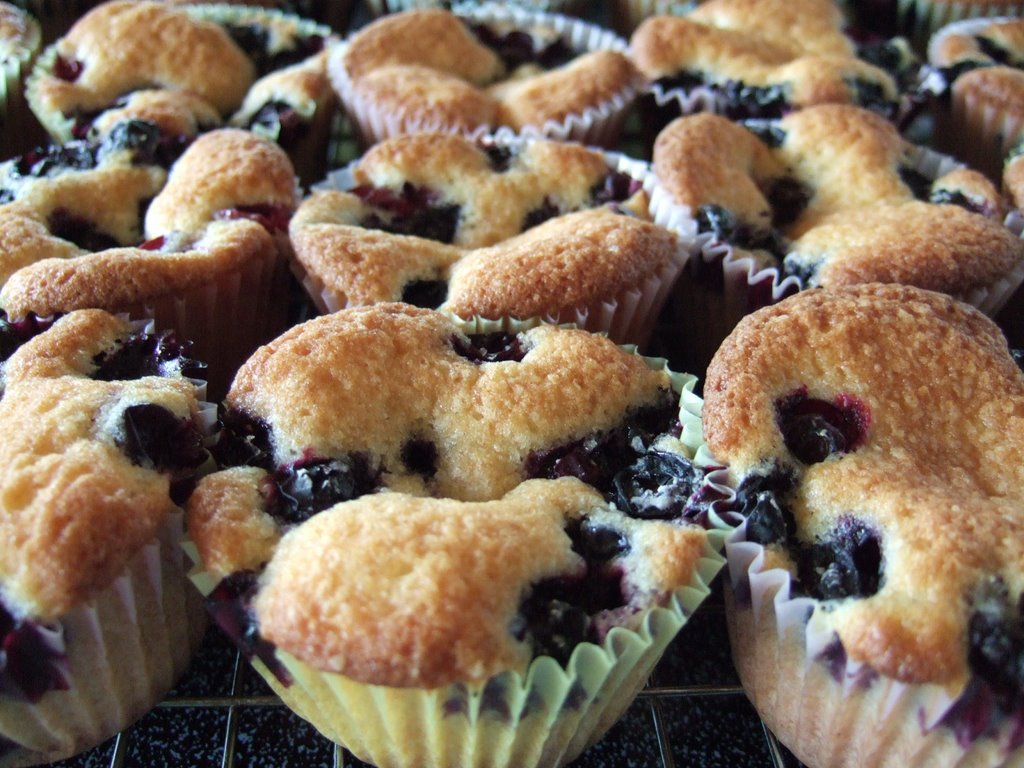
I also usually make these blueberry muffins, and though my favorite recipe for that so far does not produce the dome that I would like to have, it does come up with muffins which I like so much, and get better and better on the 2nd, 3rd, and 4th days.

Wednesday, November 29, 2006

Make Biodiesel out of Used Cooking Oil

I had been very lazy to blog about food lately, and I have not even started packing for my trip to Canada!

But last night, I somehow got into reading about biofuel and biodiesel.

We all have heard about global warming...many of us want to contribute to delaying if not preventing its catastrophic effects.

I read about how the Philippines has been making biodiesel and how it targets to be a major supplier to developed countries...As usual and as I expected, there is a huge manufacturing company involved, making use of coconut oil. Of course, this does minimal to help alleviate poverty, and while it provides job opportunities for coconut farmers, it does not address the potential of recycling used cooking oil and EMPOWERING the ordinary people. I read in a forum about some Filipinos already homebrewing it, but the latest was 2004. Was there a move by the government to suppress household production of biodiesel?

I PLAN TO SOMEDAY MAKE BIODIESEL out of used cooking oil collected from nearby restaurants (if I can get them for free). But, thinking of how ubiquitous carinderias, eateries, and small restaurants in the Philippines are, I could not help but post about it here. For a start, it will be a very good science project for high school students, not only because of the issue of recycling, but also looking into the issues of alternative fuels and less carbon emission into the environment to lessen global warming, use of resources naturally abundant in the Philippines, and empowering even the common household in my beloved country in that they, too, can lessen their need for fossil fuels and can even start generating income from this (if government allows).

Why I want the high school science project as a starting point -- the high school students usually have the right chemistry background and guidance; they can easily request to "haul away for free" the waste cooking oil used by restaurants (who would be glad to get rid of the "waste" without having to pay for disposal, and who would shy away from charging the students a fee); and they can easily generate funds through solicitation letters for other materials/equipment they would need to make the project.

The diagram for the process is shown here. The biodieselcommunity.org provides a very comprehensive resource for those who want to make it on a small scale (as small as a liter) or on a larger scale.

The small batch making is simple enough to be carried out using ordinary materials (and that's how I plan to start). Families who wish to make it on a larger scale (but still small compared to the big oil manufacturers) might find use of the diagram of the "Appleseed Processor found here (needs some engineering/plumbing know-how - I am expecting that a lot of scientifically-inclined Filipino HS students will find this interesting). Negotiating for Waste Vegetable Oil (WVO) is a very interesting read for gathering the most important raw material, but this will be needed only if families start making their own biodiesel out of WVO from nearby restaurants.

For the common household who want to experiment first to come up with one liter of biodiesel, here is a recipe, from the "World Famous Dr. Pepper Technique." (Dr. Pepper is the soda brand of the bottle they used in this process.)

World Famous DR Pepper Technique (Pat Pend)
The idea for the Dr Pepper Technique came about one day many years ago (it seems) when I was trying to figure out an inexpensive way of making my first few test batches of biodiesel.

I will assume that if you are reading this for the information then you are new to Biodiesel making, so just a few words of caution:

THESE ARE DANGEROUS/POISONOUS CHEMICALS.
COMMON SENSE MUST BE USED.
YOU ARE RESPONSIBLE FOR YOUR ACTIONS AND THE SAFETY OF YOURSELF AND EVERYONE/EVERYTHING AROUND YOU.


METHANOL IS A POISON WHICH CAN BE ABSORBED THROUGH YOUR SKIN, BY INHILATION, OR CONSUMPTION.
METHANOL CAN CAUSE BLINDNESS AND DEATH.
METHANOL IS AS FLAMMABLE AS GASOLINE/PETROL.
CARTRIDGE RESPIRATORS DO NOT WORK WITH METHANOL.

SODIUM HYDROXIDE (Caustic soda, NaOH, lye) can cause severe burns and death. wash off with water.

Long-sleve shirt, full shoes and trousers are recommended, no shorts or sandals.
Wear chemical proof gloves, apron, and eye protection.
Always have running water available to wash off any splashes.
DO NOT INHALE ANY VAPOURS!.


Now that I have managed to scare you, just realize that Methanol is the fuel used in most Model airplanes. In the USA methanol is available in small quantities as HEET brand fuel line antifreeze (Yellow bottle)
Lye is an every-day drain cleaner.
Both are freely available in most large shopping centres.


MATERIALS REQUIRED
1 litre oil- new or used
NaOH (lye/ caustic soda), at least 6g. Used as a drain cleaner and can often be found next to the Drano.
Methanol at least 250ml. HEET® Gas- Line Antifreeze in the yellow bottle is methanol and readly available in most auto supply stores in the USA.

EQUIPMENT REQUIRED
1- 2 litre (1.9 in US) Dr Pepper Bottle in sound condition with tight fitting top and dry inside.

1-measuring cup to measure out 250ml methanol
1-scales to measure 6- 7g NaOH
OR
1 teaspoon measure metric or imperial.

1- container to mix the methanol and NaOH in which makes methoxide.

1- Funnel

THE TECHNIQUE:

OIL PREPERATION

If using waste oil, take one litre and heat to at least 120 deg c to remove all water. If water is present the oil will spit and pop and carry on. If there is a lot of water this could get very violent, so be careful.
Once the water is gone (Oil becomes calm and there is no more spitting and popping) let the oil cool.

If you are using new oil from the bottle it should have no water in it, so in this case just heat to 55deg c when you are ready to mix.

MAKING THE METHOXIDE
WARNING: METHOXIDE IS A POISON!
DO NOT BREATH VAPORS.
WASH OFF ANY SPLASHES.
DO NOT MIX THE METHOXIDE IN A PLASTIC SOFT DRINK BOTTLE AS THE NaOH ATTACKS THE PLASTIC AND YOU WILL QUICKLY BE SHAKING A BOTTLE FULL OF HOLES WITH METHOXIDE GOING EVERYWHERE.

While the oil is cooling mix your methanol and NaOH(lye) to form the methoxide.
Use 250ml of methanol. This is more methanol than most people use but will help insure a successful first batch.
If you are using new oil this will require 5g (about half a Teaspoon) NaOH.
For used oil, you should do a titration to determine the correct amount of NaOH to use.
However, if you do not have the materials to do a titration, just use the imperical quantity of about 7g NaOH as this amount almost always achieves seperation. If you do not have a scales, this is about 1 level teaspoon measure (metric or imperial).

NaOH and Methanol do not readily mix, so if you are doing it by hand a bit of time and patience is required. Don't sniff the fumes. CARTRIDGE RESPIRATORS DO NOT WORK WITH METHANOL
For quickest mixing, start with the methanol at JUST body temp (not warm). As you mix, the temp will increase substantially. This is normal. Make sure ALL the NaOH (lye) is disolved. This may take 10 minutes or more.
Hand mixing can be accomplished using the back of a spoon to stir/crush the NaOH granules ina coffee cup or glass; OR placing methanol/NaOH in a glass bottle with a tight fitting top and shaking/ swirling until ALL NaOH is disolved.
After ALL the NaOH has disolved, top up to 250ml with fresh methanol, as there may be some evaporation during mixing.

MAKING THE BIODIESEL!
When the Oil's temp has dropped to 60 deg c or a bit less, using a funnel, pour the litre of oil into a DRY 2 litre Dr Pepper bottle (in a pinch any other brand of bottle will do).
Take the mixture of methanol/NaOH (commonly called methoxide on this forum) and pour on top of the oil using the same funnel.
Remove funnel.
Screw the top down TIGHT onto the bottle.
Shake vigerously for about ten seconds/ 40 good shakes.
NO appreciable pressure is generated during this mixing.

Now place the bottle on a table.
If you were using WVO you will probably observe the oil change colour from a "Light Chocolate milk to a rich, darker brown."
Then, as if by magic, within 10 minutes the by-product (commonly refered to as glycerine on this forum) starts to settle out and form an increasing layer on the bottom of the bottle.
Be sure to notice that you can see a very definate, slowly sinking line towards the top of the Biodiesel as the glycerine slowly settles.
Within an hour, most of the glycerine will be settled out.
This is referred to as seperation.
NOTE: Neutral has shown through GC tests that although one 10 second shake produces very useable Biodiesel it is in fact not ASTM conversion standard.
To produce ASTM conversion biodiesel requires titration and a further four- 5 second shakes over the space of an hour.


If you used New Oil, the colour change is not nearly as great and you may have problems seeing much of a colour change at all.

You should now have a bottle containing lighter coloured biodiesel on top of a layer of darker glycerine.
If you reacted New Oil the glycerine layer on the bottom will not be much darker than the oil you started with and the biodiesel will usually be very light in colour.
The biodiesel will be very cloudy, and it will take a day or two more for it to clear.

If it does not work out come onto the forum and see if anyone can figure out what went wrong.

And that is all there is to it. Only a little magic is involved.

Remember, after producing in excess of 53,459 litres of biodiesel in any calander year using this process, please make royality check out to Tilly From Paradise and send it to me through your favourite Numbered Swiss bank account.

CARTRIDGE RESPIRATORS DO NOT WORK WITH METHANOL

A few cautions: DON'T mix the methanol and NaOH (lye) in a plastic bottle as NaOH attacks some types of plastic. Once mixed it is quite acceptable to mix your biodiesel in a Dr Pepper plastic bottle.
Do NOT store unused methoxide in plastic bottles. Some plastic will degrade over time when in contact with methoxide.

DO NOT allow any WATER into any steps of this procedure.

Methanol boils at about 65 deg c. DO NOT mix until the oil is below 60 deg c.

Again, these are dangerous chemicals and care is necessary, especially if there are children in your home.

YOU ARE RESPONSIBLE FOR YOUR ACTIONS AND YOUR SAFETY AND THE SAFETY OF EVERYONE AROUND YOU.

I have Up-Sized the Dr Pepper technique by using a 20 litre plastic drum (longish and skinny) and make 14 litre batches. I simply lay the drum on a wooden "cradle" and place the center of the cradle on a pipe and rock back and forth for 3 or 4 minutes.
I then decant the mixture into a "finishing" container and so am ready to process another 14 litres straight away.


Now that you have a Litre of Finest biodiesel you will probably wish to wash it and this is quite easily accomplished using the World Famous Dr Pepper Wash Technique (Pat Pend).


So now that is added to my list of "Want-To-Do" in the future. I will start with producing a liter, then, if I manage to convince my husband to build me the Appleseed Processor, move on to a higher scale of production, at least for personal consumption, mainly heating our house during winter.

And yes, I am a wannabe homesteader, who wants to take part in the "Sustainable Living" and "Voluntary Simplicity" movement, who wishes to be "off the grid," and who does not share the interests of those whose dreams include "world travel" and whose top hobby is shopping (I am so against commercialism of Christmas and Halloween and other Holidays). I may sound so foreign to a lot of Filipinas now, but I know I am not alone (hi stef!) in this.

Thursday, November 16, 2006

Citrus and Ginger Chicken

My computer had a virus (a free hard drive cleaner pop-up) and I had to re-install my OS (it would not let me do a system restore). That was the reason why I could not post photo-blogposts in the past week. It is okay now...

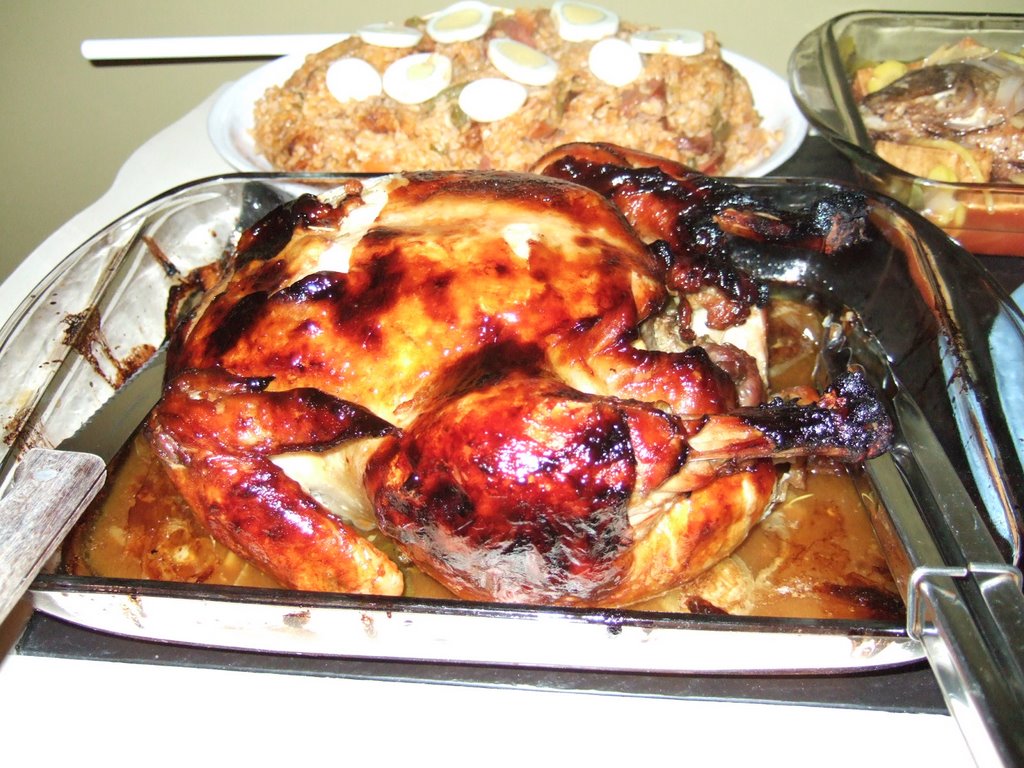
My husband invited some Jamaican farm workers over at our house for dinner. At first he requested me to make beef pares, but then learned that Jamaicans do not usually eat beef apparently because it was expensive in their country (like in PI), but we were not sure whether there was a religious factor to consider. To be on the safe side, I looked for Jamaican recipes using chicken. Originally titled as Orange and Ginger Chicken using cut portions of a whole chicken, I modified it to cook the whole chicken, using lemon and tangerine orange(what I had in my fridge) as substitute for orange. Everyone was pleased with the results.


Here is the original recipe (I would have provided the link to the site but I could no longer find it, although I had a printed Word copy of it. You will notice there is no ginger nor "seasonings" in the list of ingredients.):

Orange and Ginger Chicken

The Plantation Inn, now Royal Plantation, once served this as a specialty of the house. This elegant resort has hosted many celebrity travelers and was the setting for Prelude to a Kiss, starring Meg Ryan.

1 whole chicken, cut into eight pieces
2 cloves garlic
3/4 cup fresh orange juice
2 tsp honey
1 tsp soy sauce
3 tsp sugar
1 green pepper, diced

Preheat oven to 375 deg F. Cut whole chicken into 8 pieces and season with mix of seasoning (I am not sure what they referred to here), garlic and onions. Combine remaining ingredients in a bowl and mix well. Pour sauce over chicken in a shallow baking dish and bake for one hour, basting chicken as often as needed. Serve with rice.

What I used and did:

Citrus and Ginger Chicken


1 whole chicken
garlic rosemary paste - 1 whole garlic, roasted, peeled and mashed, plus 1 tsp of dried rosemary - this I placed underneath the skin (just like I do with roast chicken)
1 onion, sliced
marinade - made up of 1/2 cup tangerine orange juice (1 whole orange), 1/4 cup lemon juice (1 whole), 2 tsp honey, 1 tsp soy sauce, 3 tsp sugar, 1 diced green pepper, and thumb-sized ginger, pelled, crushed and sliced thin. (Note: Reserve the rinds of orange and lemon to stuff into the cavity)
cornstarch-water mixture (1 tbsp:1/2 cup) for thickening the sauce


Be warned that the way I did this required a whole weekend day (well, I really did not care because I was busy preparing other dishes).


Prepare the marinade and garlic-rosemary paste.
Apply the paste under the skin of the most meaty parts.
Lay the slices of onions at the bottom of foil-lined slow cooker.
Pour 1/2 of the marinade into the chicken cavity and 1/4 into the slow cooker.
Place the chicken breast side down and then pour the remaining marinade.
Cover and let cook on low setting for 3 hours (This allows the chicken to absorb the marinade while already starting to cook the chicken. The three hours will be enough such that you will be able to lift the chicken out onto a rack for browning in the oven without it falling apart. I thought my foil was sturdy enough to assist in that, but I should have used a heavy-duty foil.)
Transfer the chicken onto a baking dish breast side up and start to bake at 350 deg F. Gather the sauce and boil. Thicken with cornstarch water mixture. Reserve 1/4 cup for basting and the rest for use as gravy.
Baste the chicken and let bake for 30 minutes. Baste again and continue baking for 30 minutes. If it gets too burnt looking, cover with foil (but soy sauce will naturally produce that look. It will be up to you to judge whether that charred look is what you want. To me, this reminds me of grilled chicken in barbecue stands in PI.)

Here was my menu:

Arroz ala Valenciana (from the unofficial cook)
Escabecheng Tilapia (Fried Tilapia with sweet and sour chili sauce courtesy of JMom -loved it!)
Fish Lumpia with Jufran chili sauce
Fresh Lumpia with paalat sauce
Leche Flan (sorry, not in the pic)
Light Wheat Bread (using bread machine)
(I boiled one potato for hubby)

The Jamaicans brought beer (we in the family do not drink alcohol). We finished almost everything, but I forewarned the Jamaicans to remove the paper off the fresh lumpia. They ended up not eating even the crepes (waah! sayang pagod ko!). I should have eaten the fresh lumpia first to demonstrate to them how to enjoy it. Oh well...at least they went back to the table at least 3 times (I placed the dishes on a separate table a la buffet style to make space on the dining table).

Hubby was quite surprised at the small feast I prepared (his family of origin usually does not prepare appetizers and side dishes except for Thanksgiving or Christmas), and he was so proud of me. The Jamaicans were all praises as well (I could not understand them because of their strong accent, though. Hubby had to relay the message to me).

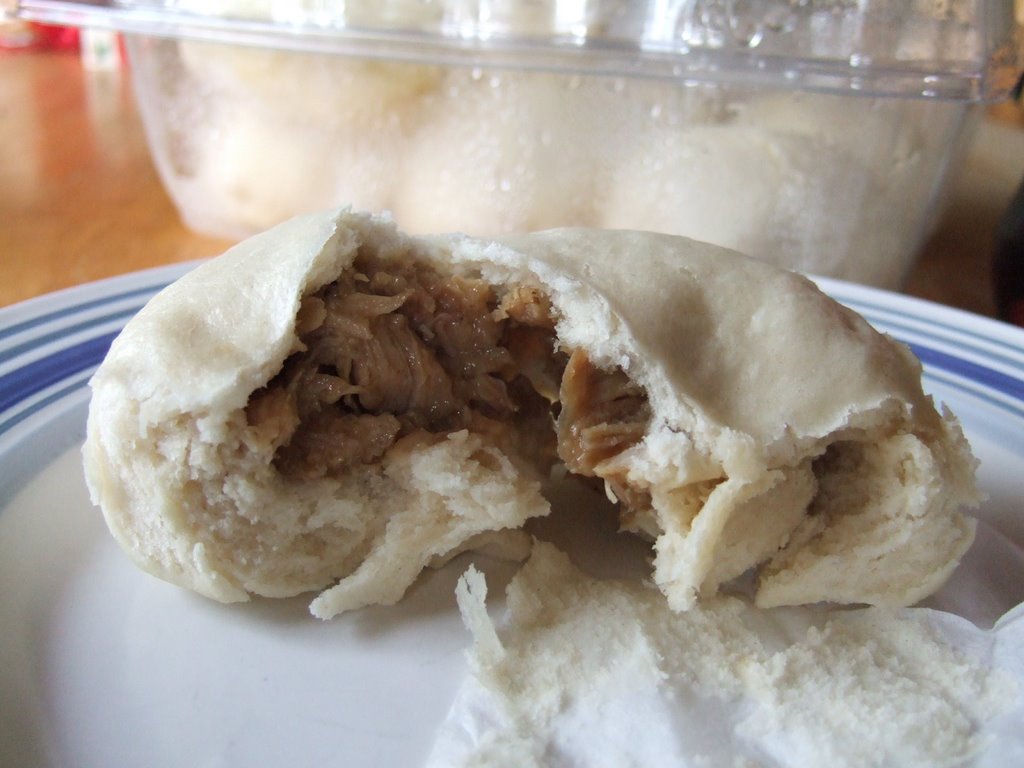
I did have leftover red meat from the chicken, which I chopped roughly and mixed with the leftover sauce, then used as chicken siopao. (More details on how I make siopao can be found here.)

Friday, November 10, 2006

I will be on vacation...and I need help!

But that does not mean I will not create new posts here.

What HELP am I talking about?

Well, I will be leaving for Canada in the first half of December to be with my (visiting) mom and my (immigrant) older sister. ("You must be excited to be with the people who eat the same things you do," hubby said. "Oh yeah!" I replied.)

As such, I will be leaving my boys (big and small) on their own.

Younger son: "We will just cook noodles every morning for our breakfast."
Older son: "Ma, you can make more siopao, freeze them so we can have them for snacks." (Which I already did - have 1 dozen chicken siopao and beef asado siopao frozen now, along with a disastrous looking puto pao.)
I said: "Hep, hep! You are talking only of food, but you have to think also about your laundry, watering the plants, keeping the house clean, and checking your lights and stove/oven."
Younger son: "You should make a list of things to do."
Older son: "And you should post instructions on how to do the laundry and everything..."

I have started "training" them for the routine. But I am still composing the daily schedule and instructions.

I am now thinking of what foods I can possibly prepare ahead, freeze, and then just instruct them on how to reheat these. So like I said, I have siopao and puto pao in the freezer. I also have two loaves of beef embutido (recipe by Iska). I am considering preparing poultry stuffing with chicken/mushroom sauce ready to pop in the oven, but I am not sure if this will turn out right. Also considering freezing chicken adobo but not sure if this comes out okay if reheated. What about par-baked rolls and how to make them so I can freeze them and re-bake for final browning? MY kids know how to cook mac and cheese, and hotdogs, but I would not want them to eat the same thing daily for two weeks. Husband is planning to buy pizza and Italian sandwiches more often. (He also said, "I will take care of the laundry while you are gone.")

I will greatly appreciate any suggestions (both on food and other things) that will help me prepare for my brief absence in my boys' lives.

Friday, November 03, 2006

Pichi-Pichi Espesyal

UPDATE as of 12-22-08:
A more special pichi-pichi recipe can be found here.

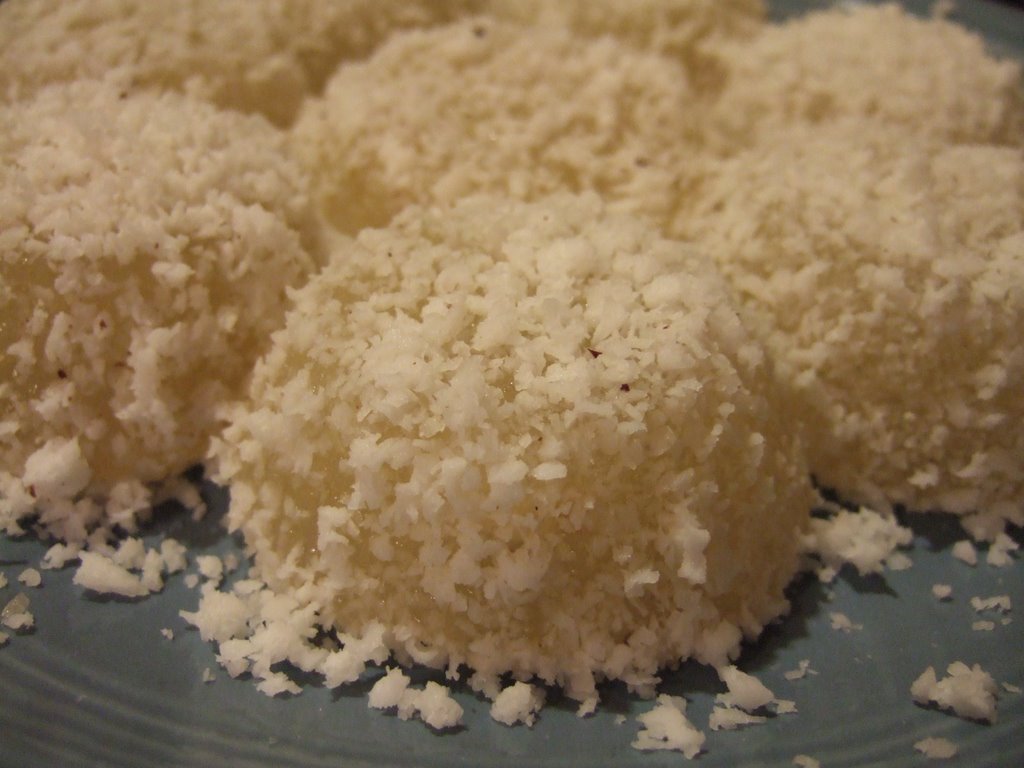
I would have tried stel's recipe, but I did not list down things that I should have gotten from the Asian store when my friend Anna asked if I wanted to go with her. So I forgot to look for the lye water and pandan essence. Good thing, in the comments section, Lani gave her recipe using just the grated cassava, sugar and water. It was very good! Although, I would have still preferred it with some pandan essence. (tita stel, nagpaparamdam po...

Salamat, tita Lani, for the recipe!


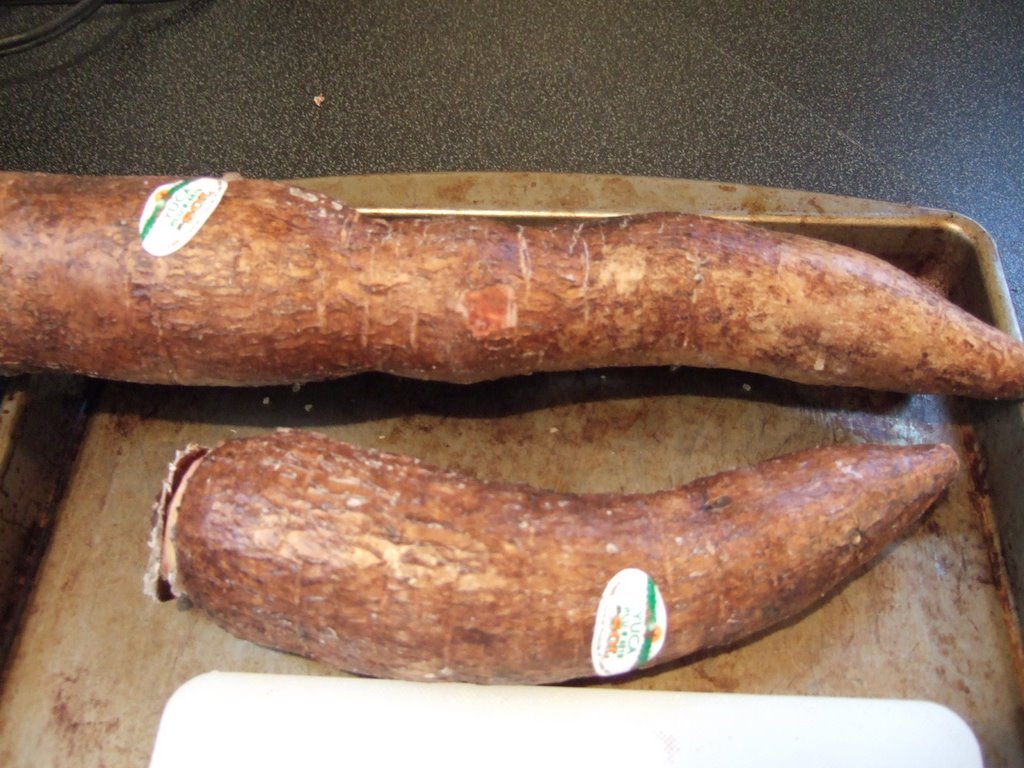
We Filipinos use cassava, but I cannot find any cassava here. Yucca is a good substitute. (I typed that on the search engine, and it showed plants different from what I have come to know as "kamoteng-kahoy." I then realized they are not one and the same.). It was my first time to buy yucca from the Asian store (have not seen it sold in the nearest grocery store), and I was quite surprised that it seemed to have been coated with wax...or is it a natural coating of dried up sap?

INGREDIENTS:

1 cup cassava [or yucca], grated
1 cup sugar
2 cups water
1 coconut, grated

PROCEDURE:
Squeeze out juice of cassava [or yucca]using flour sack. Place squeezed cassava in pan with sugar and water. Cook. Stir constantly 10 minutes or until mixture coats spoon. Transfer cooked mixture on silicone muffin cups placed on the steamer pan and steam 10 minutes. Remove from muffin cups, let cool, then coat in grated coconut.

(I love these silicone muffin cups for steaming purposes! Muffin pan just won't fit in the steamer, and these solved that problem. Now I can also experiment on making puto, and I might get big cups also for steamed leche flan.)

My sons and I loved them, and my Filipina friends did, too! Of course, they asked for the recipe and I generously (ahem!) shared it (salamat sa mga foodbloggers!) My Sdaughter loved coating them in the grated coconut, but would not taste them (pretty much like her father). That same day I just had to make a second batch. Refrigerates and microwaves (30 sec) pretty good, too! Perfect munchkin for after-school!

I am still waiting for the day when I will have my pandan essence.


Wednesday, November 01, 2006

Fish Lumpia

Still on LP's theme, I have here leftover tilapia from a lunchdate with our barkada here. It was a large one, that I had more than 1 cup of flaked fish meat to make into fish lumpia. I was first introduced into fish lumpia by the "balae" of my previous MIL. I liked it so much that I asked how she made it. She said she would buy "galunggong" and steam them then flake the flesh, mix with chopped green/snap/"baguio" beans, carrots, onions, garlic, egg, salt and pepper. Now whenever I have leftover grilled fish, I do the same thing. A nice surprise was when hubby expressed liking it (yes, he did try without me asking him to!).


INGREDIENTS (amounts stated are only approximations):


1 cup flaked cooked fish meat


Chop together then squeeze out excess fluid using flour sack:

1 medium carrot

1 medium onion

2 cloves garlic

handful of (leaftover) green peas

handful of (leftover) grated mozzarella cheese (Of course the ingredients here depend on the availability of veggies and the cook's imagination!)


1 egg

salt and pepper to taste


lumpia wrappers (I like best the TYJ spring roll wrapper)

1 tbsp cornstarch dissolved in 1/4 cup water for making paste


PROCEDURE:

Mix everything together after squeezing out excess fluid of veggies. Prepare cornstarch paste: Mix cornstarch with cold water, microwave for 30 seconds, stir, then microwave again for 30 sec or less, watching closely until you achieve the desired consistency (should be fluid enough to easily brush it onto the wrapper). You may have to add some more water to thin it. This is a cheaper alternative than using egg as sealant. Place about 1 to 1-1/2 tbsp of filling at the center of the wrapper to form a log. Fold over one end then roll tightly. Brush CS paste on the corners to create a good seal. I froze these until two days later when I had visiting friends. While thawing them, I cut them into three parts each and heated about 2 cups of oil on high in a wok. I did not wait for these to thaw completely; I just went ahead and fried them until golden brown (about 5 minutes). Drain on paper towels and serve while still warm (fried lumpia tend to get soggy and chewy when it has cooled down completely). I served these finger foods with Jufran sweet chili sauce (hubby's favorite dip for chicken nuggets).


This time, there were no leftovers!


Thanks to mikemina for hosting this month's
Custom Search