Thursday, October 30, 2008

Sauteed Pork with Veggies

This one is easy to make, especially when you have Filipina friends to do all the chopping.
From sauteed pork with veggies


We had a get-together last Saturday, when I brought lechon paksiw. We needed veggies and I had most ingredients on hand. But the way we Filipinos cook, we usually have protein-rich ingredient with veggies, and that means bits of either pork, chicken, beef, or shrimp. I brought the veggies, and told the hostess she needed to provide the meat. No problem! So chop they did, and I started cooking.

Ingredients:
2 tbsp oil
3 cloves of garlic, crushed
1 medium onion, sliced
1 lb pork, cut into bite-sized pieces
1 carrot, cut into chunks
1 small upo, cut into chunks (similar to zucchini, only tougher and more solid)
3 tomatoes, sliced
handful of green beans
half cabbage, cut into chunks
salt and pepper to taste
ground dried basil leaves

Instructions:

Sautee garlic and onion in 2 tbsp oil until translucent. Add pork and stir-fry until browned. Add tomatoes until caramelized. Sprinkle some salt and pepper. Add carrots and upo and cook for about 2 minutes then add green beans and cook for another 2 minutes. Finally add the cabbage. Sprinkle with some basil leaves. Enjoy while hot.

Note: Never cover stir-fried veggies (I was told by a friend/classmate from Medicine class). This tend (I observed it as well) to lessen the lively color of veggies that they appear like they are no longer crunchy, although they still are (if you stir-fry them first such that they get coated with oil before they steam from their own juice).

Ginisang Mani (Peanuts Deep-Fried with Garlic)

When I was still in PI, I used to buy freshly cooked
From ginisang mani
peanuts from one of the street vendors, and I would often request to include lots of toasted garlic. Since coming to the US, I have not really had peanut prepared this way. What I often see in the grocery stores are honey-roasted, or plain, and while they are crunchy, they just do not taste the same.

Then I saw some small uncooked peanuts in a natural food stall near me (Spice of Life). So I excitedly got a bag, then tried to cook them FOR THE FIRST TIME in my life. I knew I had to use enough oil to submerge the nuts. I knew I had to stir often. I knew I had to use garlic. What I did not know was the timing. I ended up with burnt (overcooked) peanuts with chewy (undercooked) garlic. Probably because I placed all garlic and peanuts at the same time. Probably I waited too long for the peanuts to brown and get crunchy (I tried to taste them before getting them off the pan).
I chucked them away.

It took a while before I had the gumption to try again. I got a small bag of peanuts from a Chinese store in Portland (2-hr ride from my house!) some months ago. Now I finally had the courage to try again. And I was glad with the outcome.

First I heated the oil to med high (6) for several minutes. I added the garlic to

cook until translucent before I poured in all the peanuts. Now the peanuts lowered the temp right away, so I put the heat on high (10)for about 2 minutes or so then back at med high and kept stirring. When I saw a slight change in color and some bubbles forming on the surface of the peanuts without cover, I started scooping them out with a strainer and placed on paper towels and let them cool off a bit before trying them. This time I ended up with just the right taste and crunch both of the peanuts and garlic. And no, I do not eat the big chunks of garlic. I sliced them big enough so I can easily pick them up when cooked, but breaks off just a little piece to eat with 4-5 peanuts at a time. I love the mingling of flavors that way.

I brought this to work that night and was quite surprised at how others were eating them, even the garlic! I was even warned by my charge nurse that if I did not hide it, she would not be able to stop herself from getting more.

Wednesday, October 29, 2008

Lechon Paksiw

To foreigners: Please be warned: Contents and photos might offend you. If you are the type who cringes at the thought of having ligaments and skins in your food, please leave this page.

Notice my cute halloween background? Saw it first in Liz's blog, and followed the link to download the same background for me!
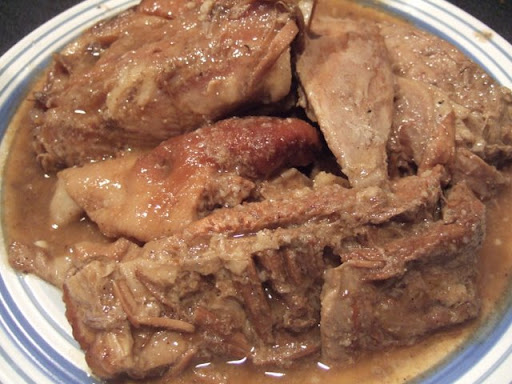
One of my friends roasted pig (lechon) during her birthday. I was on duty that day but I promised to visit her the next day. So I did. She sent home with me a bucketful of leftover lechon. I got to admit I am not a big fan of (tasteless) lechon, except for crunchy skin. But I do love leftovers because I turn them to lechon paksiw. I froze the leftover for a while until my Filipina and friends could get togather again (last week). I did have to browse the net for some basic recipes, and remembering what my Nanay used to do with hers, I added some breadcrumbs to thicken the sauce. I also used the slow cooker, and prepared this the night before the get-together. I had too much (for 4 other Pinays) that even with the take-homes, I still ended up with half the original amount to bring back home. I kept it on keep warm setting at home with occasional stirring and my sons would eat this whenever, for three days! Masarap pero nakakasawa din ha...

Ingredients:
2-3 pounds leftover lechon, cut into big chunks
1/2 cup cider vinegar
1/4 cup soy sauce
3/4 cup brown sugar
1 big onion cut into chunks
3 cloves garlic, crushed
2 star anise
1 cinnamon stick
1 tsp salt (then add more later to taste)
additional water to cover
2 (11.64 oz) jars of Mang Tomas Sarsa ng lechon
additional breadcrumbs for thickening

Procedure:
Place lechon pieces into 3-qt slow cooker. Pour the rest of ingredients except water, sarsa, and breadcrumbs. Cook on slow setting for 2-3 hours. Stir in MT sarsa, add enough breadcrumbs to thicken to desired consistency. Adjust taste with salt as necessary.


Ultimate Melt-In-Your-Mouth Pancakes

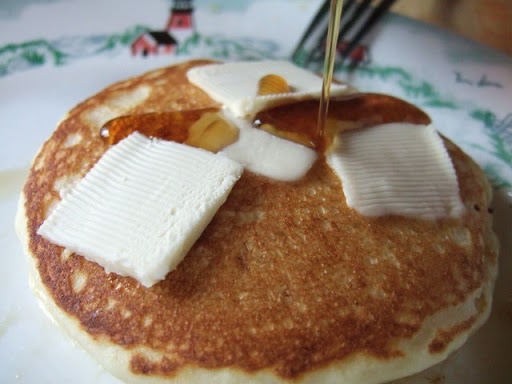
As I have repeatedly said recently, (kulit!!!) I have been using more and more of ready mixes. Bisquick is one of my faves, especially for waffles or pancakes. I particularly love this recipe that they have on the back if you want melt-in-your-mouth fluffy pancake types (achievable by adding the lemon juice and baking powder). My family absolutely loves them!
Below is a copy and paste of the recipe from the offical website of Bisquick.


Ingredients:

2 cups Original Bisquick® mix
1 cup milk
1 tablespoon sugar
2 tablespoons lemon juice
2 teaspoons baking powder
2 eggs

Procedure:

1. Heat griddle or skillet over medium-high heat or electric griddle to 375°F; grease with cooking spray, vegetable oil or shortening. (Surface is ready when a few drops of water sprinkled on it dance and disappear.)
2. Stir all ingredients until blended. Pour by slightly less than 1/4 cupfuls onto hot griddle.
3. Cook until edges are dry. Turn; cook until golden. To keep warm, place in single layer on cookie sheet. Cover with aluminum foil, and place in 200°F oven up to 10 minutes.


Tuesday, October 28, 2008

I had salad for lunch today!

When I am alone at home and it's lunchtime, I graze over fridge contents. I so happened to have leftover from previous night's supper. We had grilled chicken that was marinated in WishBone Robusto Italian dressing, served with iceberg salad and rice (mashed potatoes for my husband). For leftovers, I had a whole chicken breast, which I cut in half (two servings for me) and 1/3 bag of the iceberg salad mix. Then I thought I'd throw in some croutons as well. I used the same dressing as above. I wish I had on hand some cherry tomatoes and crumbled cheese, but I just had to content myself with what I got.
These were my bestfriend today. I prepared another for me to bring to work that night, and I learned that croutons should not be thrown in along with the veggies and chicken and then refrigerated. I knew I had to add the dressing just immediately prior to eating this, but the croutons were soft already! Now I know what not to do for bring-to-work salads.

Monday, October 27, 2008

Beef Stew

How many times have I said that
From beef stew
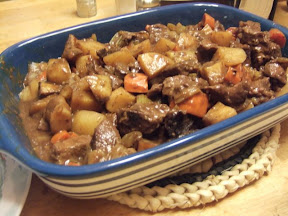
I have been using more and more ready mixes since I started working? Well, this beef stew is a recent addition to those dishes. I particularly like McCormick mixes.

Although my Filipino tongue prefers the tomato-based kaldereta style of beef stew, I figure, if I use these ready mixes, I cannot go wrong in that my husband's palate will probably be familiar with that taste. After all, they are just a mix of spices. As long as I use our home-grown beef, and fresh ingredients from the grocery store, then I am all set.

The ingredients and directions are in the back of the package itself, so I will not post it here anymore.


Chicharon using Smoked Pork Fat Back and a Meat Slicer

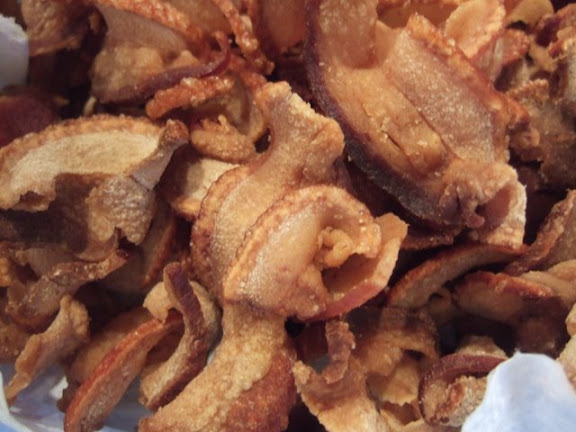
This is the pan fried fat back slices I used in place of bacon. When I made this, it turned out to be like the homemade chicharon; however, the rind part is so tough, my kids did not like those parts. But once they were soaked for a while in the chowder (where I used them), they were tender and added flavor!

I had three slabs of these smoked fat back that my MIL gave to me, and I experimented with the first one by boiling it then broiling, hoping to come up with some sort of crispy lechon, but I only ended up with gallons of oil drippings and chewy rind on top of melting fat...I tossed it away.

Well, this time, after hearing my MIL say that she likes cooking this as she would bacon, I tried the same thing, using my Rival meat slicer that I got several months ago but was just sitting in the uppermost shelf of one of my cupboards. While I was not completely satisfied with the operation of this cheap meat slicer, I was quite content with the outcome of the slices. At least it did the job easier than I if I did it by hand using a (dull and cheap) knife. Clean up was not that easy (and I don't remember seeing the instructions for it. Easy enough to figure out, though.

If I was not too cheap, I should have checked amazon.com first for reviews on top rated meat slicers before buying. The Chef's Choice 610 would have been a good Christmas gift for myself. :) Even hubby says that is not too expensive for a meat slicer. Hmmm....

For those who might be interested on HOW TO MAKE CHICHARON the DOST way, here is their recipe (I have not tried):
CHICHARON

Materials:
1 kilo of pork skin 4 tbsp. vinegar
1 tsp. salt vetsin and pepper

Procedure:

1. Boil the pork skin in a sufficient amount of the prepared solution until tender.

2. After boiling, cool and remove the fat portion.

3. Slice into desired sizes.

4. Dry under the sun until firm.

5. Deep-fry at about 188 C and strain.

6. Pack in plastic bags.

Sunday, October 26, 2008

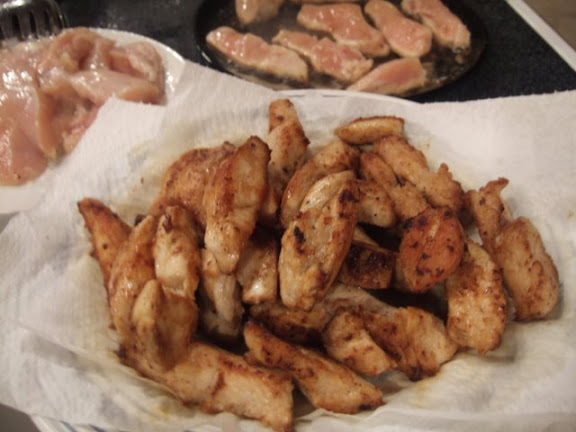
Butter Fried Chicken Strips

My husband loves this simple chicken dish. I first had it when we celebrated a family occasion at my sister-in-law's. She used several pans over several burners to cook all the pieces and serve them at the same time. My husband was so excited when he saw them cooking. So I had been cooking them from time to time since then, using chicken breasts, but I was not really satisfied with the bland taste of the meat until I experimented with brining the pieces first with a mixture of kosher salt and spices. I was in heaven when I bit! My husband noticed the flavor as well, and asked if I used garlic. I admitted, and I asked him if he did not like it. He said he liked the garlic flavor. Whether he really liked it or not (maybe he was just avoiding hurting my feeling?), if I ask him and he hinted approval, then that is how he will get the dish every time in the future. But then, I have had dishes that I modified and he frowned upon tasting the difference from previous, so I would take his word when he said he liked the garlic flavor of this.
For the brining solution, put simply, I use a 1:1 ratio for water and kosher salt. That is, 1 gallon of water to 1 cup of kosher salt. I love the effect of kosher salt. It just brings out a special flavor even in fried rice (if used in place of table salt). I adjust the ratio accordingly. I first learned brining when I had to host a Thanksgiving get-together, and I wanted flavor deep into the meat rather than just on the surface (like how my in-laws usually would have with their turkeys). Everyone loved the flavor of that turkey and my SIL even brought home some for sandwich the next day.

Ingredients:
2 lbs chicken breasts, cut into strips
1 stick butter

Brining solution:
1/4 cup of Kosher salt
1 quart (4 cups) of water
3 cloves garlic, crushed
freshly milled pepper (about 5 turns)
3 bay leaves

Procedure:
Brine the chicken pieces and let sit in the fridge for at least 3 hours.
Drain chicken pieces well.
Using a thick, preferably cast iron pan, melt butter in medium high heat (#6 with my stove). Once butter has clarified, pan fry the chicken pieces. Add more butter as necessary while you turn to cook other sides of the pieces. Drain on paper towels before serving. Serve with salad greens and mashed potatoes or fries.

Saturday, October 25, 2008

Rustic Italian Bread

I saw this on the packaging of Pillsbury Bread Flour

Type
Ingredients:
1 cup water heated to 100 F to 110 F
2 tbsp oilive oil
3 cups bread flour
2 tsp sugar
1/2 tsp salt
1 (1/4 oz) pkg active dry yeast
cornmeal
1 egg white, beaten

Directions:
Place all ingredients except cornmeal and egg white in bread machine pan according to manufacturer's direction. Process on dough setting.

Sprinkle ungreased cookie sheet with cornmeal. At end of dough cycle, remove dough from machine; place on lightly floured surface. Punch dough down (if dough is sticky, knead in additional flour before shaping.) Cover dough with clean cloth; let rest for 15 minutes. Shape dough into baguette-shaped loaf about 12 inches long. Place loaf on cornmeal-coated cookie sheet. Cover; let rise in warm place (80-85 F/ for 20-25 minutes or until light and doubled in size.

Heat oven to 375 F. With sharp knife, make 1 deep lengthwise slash in top of loaf. Brush loaf with egg white. Bake at 375 F for 25-30 minutes or until loaf sounds hollow when ligtly tapped.

Apple Crisp

One time, after baking two apple pies, I still had extra apples and I was kinda getting tired of making pies, so I searched for another apple recipe, and apple crisp was suggested by my older son, as they sometimes have this at school and likes it. I liked it too when I tried the outcome of the recipe below that I lifted from joyofbaking.com, although it was mainly the topping that I copied. The filling I prepared as I usually do for my apple pie . Hubby liked it as well, especially served while warm, with vanilla ice cream.


Ingredients:
Topping:
1/2 cup all purpose flour
1/4 cup granulated white sugar
1/4 cup light brown sugar
1/2 teaspoon ground cinnamon
1/4 teaspoon ground nutmeg
1/8 teaspoon salt
6 tablespoons unsalted butter, cut into pieces
1/3 cup old-fashioned rolled oats
1/3 cup chopped walnuts

Filling:
8 pcs of apples (I used Cortland) peeled, cored and sliced thinly
2 tablespoons lemon juice
1 cup sugar
1/4 cup all-purpose flour
1 tsp ground cinnamon
1/8 tsp ground nutmeg
1/8 tsp ground cardamom
1/8 tsp allspice
1/4 teaspoon salt

Procedure:


Preheat oven to 375 degrees F (190 degrees C) and place rack in the center of the oven. Butter or spray with a cooking spray, a 9 x 9 inch baking dish. Set aside.

For Topping: Place all the topping ingredients (flour, sugars, spices, butter, oats, and nuts) in a food processor and process until the mixture is crumbly (looks like coarse meal) and there are no large pieces of butter visible. (This can also be done with two knives or your fingertips.) Set aside while you prepare the filling.

For Filling: Place the apple slices in a large bowl. Toss with the lemon juice and the rest of the ingredients. Transfer to your prepared baking dish. Spread the topping evenly over the apples.

Bake for approximately 30-40 minutes or until bubbly and the topping is golden brown. Remove from oven and place on a wire rack to cool for about 30 minutes before serving.

Serve with softly whipped cream or vanilla ice cream. Refrigerate leftovers and reheat before serving.
Makes 4 servings

Friday, October 24, 2008

Lobster & Corn Chowder

As I mentioned earlier, I used my leftover lobster meat for chowder (my favorite food to make with lobster heads and smaller claws).
From lobster chowder
But since this time I had 3 leftover whole lobsters (that is, after I made my lobster roll for lunch the next day), I had a total of almost 2 lbs meat, and the chowder I came up with was enough for supper, and even for breakfast (I myself brought a bowl to work that night).
I got the idea and tweaked some from the recipe at epicurious. The tweaking depended on what I had on hand, as usual.

Ingredients:
2 lbs leftover lobster meat (previously boiled)
8 slices of smoked pork fat back, pan fried until crispy (I used this in place of bacon)
2 medium potatoes, diced
2 medium carrots, diced (smaller than potatoes)
1 large onion, chopped
1 cup celery stalks, sliced into 1/8 inches
4 cups frozen and thawed sweet corn kernels (I had mine from my garden; feel free to use canned)
6 cups lobster broth (prepared day before))
1-1/2 cups heavy cream
6 tbsp sour cream
2 tbsp butter

Procedure:


Prepare lobster meat. Set aside in the fridge.

Purée 2 cups corn with 1 1/2 cups broth in processor until almost smooth.

Pan fry on medium heat the thin fat back slices (or bacon) until crisp. Place on paper towel to drain excess oil, crumble and set aside. Leave about 3 tbsp of oil drippings in the pan.

Cook partially the diced potatoes and corn. Doing this helps them retain their shape and prevents making them too starchy/pasty. Set aside.

Pour off and discard all but 3 tablespoons drippings from pot. Add onions to pot; sauté until light golden, about 5 minutes. Add potatoes, carrots, and celery; sauté until vegetables soften slightly, about 2 minutes. Add broth; simmer 10 minutes. Stir in corn puré, corn kernels and heavy cream; simmer 5 minutes. Season with salt and pepper. Remove soup from heat; stir in sour cream.

Melt butter in medium nonstick skillet over medium heat. Add lobster meat and sauté just until heated through, about 2 minutes. Ladle soup into bowls. Garnish each serving with lobster pieces, crispy fat back (or bacon bits) and serve.


Thursday, October 23, 2008

Olive Garden Salad Dressing

Type your summary here

1/2 C. Mayonnaise
1/3 C. White Vinegar
1 tsp. Vegetable Oil
2 Tbsp. Corn Syrup
2 Tbsp. Parmesan Cheese
2 Tbsp. Romano Cheese
1/4 tsp. Garlic Salt - or one clove garlic minced
1/2 tsp. Italian Seasoning
1/2 tsp. Parsley Flakes
1 Tbsp. Lemon Juice

Olive Garden Salad Mix

Methods/steps

Mix all ingredients in a blender until well mixed. If this is a little to tart for your own personal tastes please add a little extra sugar.

From copykat.com


Wednesday, October 22, 2008

Lobster Rolls

Last Sunday night we ate the lobsters with my favorite tender rolls, pandelimon. While traditionally, lobster rolls use the typical hotdog buns, I used leftovers of both lobsters and pandelimon to make myself some "lobster rolls" for lunch the next day. Pictured here are two of them (I already ate the first one).

How to:

Slice horizontally and place your rolls in oven toaster at 350 F for about 3-5 minutes. Meanwhile, cut the lobster meat into bite-size pieces, sprinkle with some (real) lemon juice (probably 1/2 tsp), add a dash of salt and pepper (I used Kosher salt and freshly milled pepper). One whole lobster can make 4 of these (or two using hotdog rolls). I was only able to eat 3 as I was stuffed! I saved the remaining lobster filling for later when my sons came home. The first one to see it got to eat it, who happened to be my older son. He loved it! He said, "Now I know how lobster rolls are made!" I did not really know the exact recipe for that, and I just went ahead with my insticts, but it made me try to search for recipes, and what I saw were the same ingredients. I should learn to trust my instincts...


Posted by Picasa

Tuesday, October 21, 2008

Lobster Dinner

I have posted sometime in the past that our family traditionally has lobster dinner at Boothbay Harbor during summer. Well, we usually do that once a year, since the trip is quite a long one. However, last week, one of my neighbors asked me if I wanted to order some, as her oldest son was going to catch some lobsters. He would set the traps Wednesday and haul them Sunday. He would be back around noontime. At $5 apiece, one lobster weighed around 1.5 lbs. That was super cheap!!! We were scheduled to go leaf peeping (quite late) that day, but I ordered some for me (15 pieces) and asked my friend Ana and my SIL. We ordered a total of 37, and got them as soon as we were back home. I invited my MIL and FIL to have supper with us that night.
From lobster dinner


My in-laws were delighted, of course! Except for my hubby (who never liked lobsters) and daughter (allergic to most seafoods), we were all heartily stuffed that night with this rare (and often expensive) treat. My husband and daughter ate Italian sandwiches. We had melted butter (for FIL and MIL), mayonnaise (MIL), and a mixture of lemon, butter, salt and pepper (for my sons and I). My sons ate these with rice. The rest of us ate pandelimon rolls as starch source. I prepared the leftovers as lobster roll and lobster and corn chowder (upcoming posts).

Things I learned while we were waiting for the lobsters to cook:
1. Never cook a dead lobster. It could make you wicked sick and may even be fatal. Cook only those that are still alive. Chuck the dead ones.
2. Do not eat the greenish part of the lobster. That is the liver and is loaded with mercury.
3. Better to cook them all at once than freeze to cook later.
4. Have water boil first before putting in the lobsters. Once water re-boils, time cooking for 20 minutes.

Sunday, October 19, 2008

Best-Ever Chocolate Fudge Layer Cake

Since having worked as an RN, I have become increasingly reliant on mixes, but I did not particularly like the generic taste of boxed cake mixes. I want my birthday cakes to still have a special taste to it that makes it like I had a special touch. Well, Kraft Foods' food & family magazine I referred to in an earlier post has several wonderful recipes that combine a lot of those mixes and ready-to-use kitchen helpers (like the frozen whipped cream), and the outcome is usually so out of this world! This chocolate cake is now my signature birthday cake for the chocoholics in our family (especially my husband). Rich, but not overly rich, with the right moistness that makes us savor every bite and want more. This cake is gone quickly.
Ingredients:

1 pkg. (8 squares) BAKER'S Semi-Sweet Chocolate, divided
1 pkg. (2-layer size) chocolate cake mix
1 pkg. (4-serving size) JELL-O Chocolate Instant Pudding
4 eggs
1 cup BREAKSTONE'S or KNUDSEN Sour Cream
1/2 cup oil
1/2 cup water
1 tub (8 oz.) frozen COOL WHIP Whipped Topping
2 Tbsp. PLANTERS Sliced Almonds

Procedure:

PREHEAT oven to 350°F. Grease two 9-inch round baking pans. Chop 2 of the chocolate squares; set aside. Beat cake mix, dry pudding mix, eggs, sour cream, oil and water in large bowl with electric mixer on low speed just until moistened. Beat on medium speed 2 min. Stir in chopped chocolate. Spoon into prepared pans.

BAKE 30 to 35 min. or until wooden toothpick inserted in centers comes out clean. Cool in pans on wire racks 10 min. Loosen cakes from sides of pans. Invert onto racks; gently remove pans. Cool cakes completely.

PLACE frozen whipped topping and remaining 6 chocolate squares in microwaveable bowl. Microwave on HIGH 1-1/2 min. or until chocolate is completely melted and mixture is smooth, stirring after 1 min. Let stand 15 min. to thicken. Place one cake layer on serving plate; top with one-fourth of the chocolate mixture and second cake layer. Spread top and side with remaining chocolate mixture. Garnish with almonds. Store leftovers in refrigerator.

See the kraftfoods recipe webpage here.
Posted by Picasa

Monday, October 13, 2008

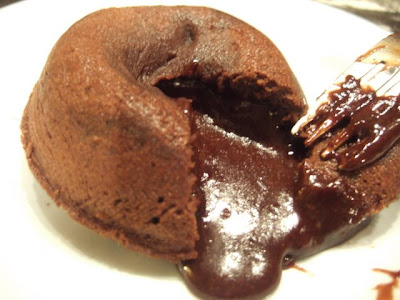
Chocolate Molten Lava Cake

From Molten Lava Cake
Everyone in our family loves chocolate cakes. I have been seeing photos of this cake in the King Arthur Flour catalog that I always get. They sell the mix and the silicone cups to bake these with. They look so good, but I did not want the extra expense of a shipping charge. One time I was intrigued by the Betty Crocker chocolate molten lava cake mix, which I tried. Something in what I did went wrong, and I did not get the desired result. In any case, it was disheartening, and I never tried that mix again...

Then I saw a recipe in Kraft's Food and Family (free) magazine, and at the time I had all the ingredients on hand. I decided to give it a try and made 6...we were hooked!!! The recipe is good for 4 cups, so if you want to make more, adjust the proportions accordingly.

The recipe can be found here along with a how-to video. If you want to receive such magazines for free, just sign up in their webpage.

To make sure I will not lose this recipe, I have included the recipe here, as adjusted accordingly:


Ingredients:

6 squares BAKER'S Semi-Sweet Chocolate
3/4 cup (1-1/2 stick) butter
1-1/2 cups powdered sugar
3 eggs
3 egg yolks
9 Tbsp. flour
3/4 cup thawed COOL WHIP Whipped Topping

Procedure:

PREHEAT oven to 425°F. Butter four 3/4-cup custard cups or soufflé dishes. Place on baking sheet.

MICROWAVE chocolate and butter in large microwaveable bowl on HIGH 1 min. or until butter is melted. Stir with wire whisk until chocolate is completely melted. Stir in sugar until well blended. Blend in eggs and egg yolks with wire whisk. Stir in flour. Divide batter among prepared custard cups.

BAKE 13 to 14 min. or until sides are firm but centers are soft. Let stand 1 min. Carefully run small knife around cakes to loosen. Invert cakes onto dessert dishes. Serve immediately, topped with whipped topping.

UPDATE: This chocolate molten lava cake was tried and posted about by Zee, complete with her rave review and a beautiful photo.

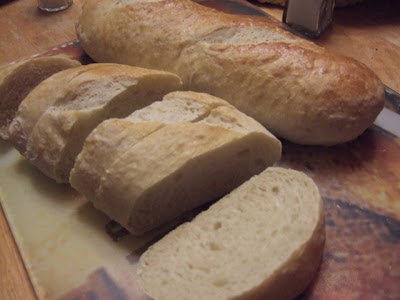
BM French Bread

Taken from Taste Of Home's website, this was recommended to me by a co-worker. I just changed the yeast from active dry yeast to bread machine yeast. Husband raved about it! We all loved it!

From french bread (BM)


Ingredients:

1-1/4 cups water (70° to 80°)
2 teaspoons sugar
1 teaspoon salt
3-1/2 cups bread flour
1-1/2 teaspoons bread machine yeast
1 tablespoon cornmeal

GLAZE:
1 eggwhite (I had leftover eggwhites, which I used instead of whole egg in the orig recipe)
1 tablespoon water


Directions:
In bread machine pan, place the first five ingredients in the order suggested by the manufacturer. Select dough setting (check dough after 5 minutes of mixing; add 1 to 2 tablespoons of water or flour if needed).
When cycle is completed, turn dough onto a lightly floured surface. Divide in half. Roll each portion into a 10-in. x 8-in. rectangle. Roll up jelly-roll style, starting with a long side; pinch seams to seal.
Sprinkle a greased baking sheet with cornmeal; place loaves seam side down on prepared pan. Cover and let rise in a warm place until doubled, about 20 minutes.
Whisk eggwhite and water; brush over loaves. With a sharp knife, make four shallow slashes across the top of each loaf. Sprinkle with sesame seeds if desired. Bake at 375° for 20-25 minutes or until golden brown. Cool on wire racks. Yield: 2 loaves (16 slices each).

Sunday, October 12, 2008

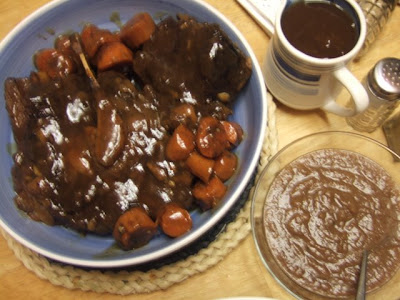
Beef Pares with an Apple Twist

From 10-06-08 dinner

I used the Beef Pares recipe, and added carrots and ginger (per comment of one who tried adding these to my recipe), then instead of using frozen beef broth to top the chuck roast (to avoid drying it up), I used half of the apples I usually use for an apple pie, mixed with the usual spices cinnamon, nutmeg, allspice and ground cloves.


When cooked, I placed the apples in a bowl first and mashed with a fork. Then I strained the sauce (separating the spaces and carrots in the process), then thickened and finalized the gravy the usual way. Then I mixed some of the gravy with the mashed apples, tasted it and adjusted by adding some soy sauce as needed. The resulting applesauce was yummmmmylicious! Hubby liked it as well! (He usually does not use the sauce of beef pares; he likes savoring the flavor infused in the meat itself.)

Then we had very little leftover. At first I was considering making beef asado roll but since I did not have enough meat mixed with remaining applesauce, I decided to use it for fried rice (I had plenty of gravy remaining, perfect for flavoring the rice!)

Saturday, October 11, 2008

Menu for Supper of 10/10/08

Usually after working straight for 3 nights (which usually means quick-fix or TV dinners) and sleeping most of my first day off, I get into a cooking fever the following day. Our supper that day (10/10/08) was a whole-day affair for me. Hubby, starved after working 10 hours that day, said it was supper worth working for...("And what work will you do for me, Honey?"...He gave me a naughty smile...)

We had Beef Pares with an Apple Twist, Mashed Potatoes, Steamed Brocolli, French Bread


and Molten Lava Cake


Recipes to follow...
Posted by Picasa

Thursday, October 02, 2008

Maple Syrup Making

Have you tasted real maple syrup??? We love them, but oddly, my stepdaughter prefers the fake syrup.

My in-laws usually tap maple trees around the month of February to start collecting the clear sap into buckets that will later on be boiled to reduce into what we commonly know as maple syrup.


Any Filipino exposed to the Western influence knows about pancakes and waffles eaten with syrup (usually karo, made with high-fructose corn), but usually do not have a clue that there is such a thing as real maple syrup, and that this is derived from trees! (One of my friends sent me a message telling me that after he saw a webpage I made during the pre-blogger times.)

See more of how maple syrup is prepared on the slideshow below.

A good resource in making your own is found here.

Sunday, September 28, 2008

Antique Home Tools and Gadgets

We went to a tractor show sometime last year, and this exhibit was the least I was expecting, yet it was the highlight of my day...

Do you want to have an idea of how kitchen, laundry and food processing tools and gadgets looked like in the past? Watch this slideshow...


Salmon Paksiw

I don't know what the English term for paksiw is, and I did not really know whether what I was doing was really "paksiw" nor do I know if there is an accurate recipe for making paksiw.

Well, put simply, any fish cooked with crush garlic and ginger, drizzle of vinegar, some salt and freshly milled black pepper, and (as my father taught me when I was a child) a little bit of oil, can be aptly called paksiw.


Now, ever since I have been attempting to cook this, I never really measured. Everything is approximation. A friend suggested I try to taste the mixture first without the fish, but I haven't done so, mainly because of habit (well, my father's habit, that is) that you put all solid ingredients in the pan first (except salt and pepper), with the fish cuts placed as a single layer on top of ginger and garlic, then approximately sprinkle salt and pepper to taste, drizzle with some vinegar (to cover with thin layer every piece of fish you have on the pan) and about 1 tbsp of oil to top. Cover and cook on low heat for about 20-30 minutes. (Do not mix, or the vinegar won't cook!)

Well, the photo here shows tomatoes...Where are the tomatoes in the procedure I described above???

My friend Fe visited me several weeks ago with lots of tomatoes from her garden (I had processed/canned mine so I had no fresh tomatoes by that time) and suggested we add those to the paksiw. She also brought filleted salmon which she and her husband caught from the seas of Alaska, frozen right there. So, about three big tomatoes cut into chunks were placed on top of the fish cuts, and I added some more salt to approximate how much it would take to neutralize the acidity/sourness of the tomatoes. What resulted was the best-tasting paksiw I (we) have ever had!

Approximate amounts of ingredients to serve as some sort of a guide(try at your own risk!):
4 cloves garlic crushed
2-thumbs size of ginger, pelled and crushed then cut to chunks
2 lb salmon fillet cut into serving portions
1/4 cup of vinegar (this really is a big guess, maybe 1/2 cup???)
1-2 tsp salt (I am guessing here, but actually salt to taste, depending on your taste buds)
1 tsp freshly ground black pepper (I used the pepper mill)
1 tbsp of oil
3 big red tomatoes cut into chunks

Goodluck to anyone who will try this recipe!

Tuesday, July 08, 2008

Strawberry Shortcake

Pardon the lack of art in my photo...

My MIL always makes strawberry shortcake around this time of the year (or even during winter; she just thaws her frozen strawberries). This is the first time I ever attempted making my own. The shortcake is more crumbly and sweeter than hers (hers is like that of scones), but I kinda prefer this one. My older son also likes it better. My younger son, who used to pass up on strawberry shortcakes during family gatherings, felt obliged to eat what I handed to him. I was surprised he actually ate everything and said it was good! My hubby usually just eats the strawberries and whipped cream, leaving behind about 75% of the shortcake, but this time, he ate about 80% of my shortcake. I think I will stick to this recipe for my own tradition-building. (I hope my children will someday remember to look into this website for their favorite recipes.)

I had two quarts of hulled and sliced strawberries freshly picked from my MIL's garden. I sprinkled about 2 cups of sugar and let stand while I prepare the rest. Even though I had two cans of prepared whipped cream, I had to use a homemade one to complement the freshness of the strawberries...nothing beats that! And while some would prefer to use angel food cake for this, I love the old-fashioned biscuit-type shortcake (ain't that what a shortcake is supposed to be???)

Ingredients for the shortcake:

  • 2 cups flour
  • 1 tablespoon baking powder
  • 1/4 teaspoon salt
  • 3 tablespoons sugar
  • 1/3 cup shortening
  • 1 cup milk

Instructions:
Heat oven to 450°. Grease an 8-inch round layer-cake pan. In a mixing bowl, combine flour, baking powder, salt, and sugar. Cut in shortening with pastry blender or 2 forks until crumbly. Stir in milk until just blended. Pat dough into prepared pan; bake 15 minutes or until golden brown.

Ingredients for homemade whipped cream:
  • 2 cups heavy cream
  • 1/4 cup sugar (approximate only)
Instructions:

Before you even start on the strawberries and shortcake, chill your mixing bowl and whisk/beater in the freezer. The cold temp helps prevent making butter out of your whipped cream (especially helpful in the summer time).
Start whisking on low going to high, and when starting to form peaks, add the sugar gradually. Stop when firm peaks form.


To assemble:

Divide the shortcake into 8. Slice horizontally. Put some strawberries in between the two halves of the shortcake. Add whipped cream on top of the upper slice. Top with more strawberries and syrup.

Monday, July 07, 2008

Macapuno (Coconut sport strings) Ice Cream


I looked for a recipe for coconut ice cream just to get an idea of how I should tweak it to make it more coconut-ty. Got the original recipe from allrecipes.com and below is my revised recipe.

Before I made this, I asked my MIL and SIL to try the macapuno. They were surprised to find that coconut can be so tender!!! They are used to coconut being chewy, and they are not really a big fan of coconut. But I think I have converted them...Will let them taste this one as soon as I get the time to bring them some.

My husband, as usual, was so-so with the macapuno. He still prefers the Old-fashioned Vanilla Ice Cream, which I made earlier, for our celebration of July 4th.

A note to Debbie:
My sis in Pinas could not find a sorbetero willing to share the recipe for dirty ice cream. I hope you will give this one a try. My Pinay friends definitely rave over this.

Ingredients:

1 cup coconut premium milk (I use Thai brand)
1 cup milk
1/2 tsp salt
2 (14-oz) cans cream of coconut (I use Lopez brand; available in the alcohol section of Hannaford)
3 cups heavy cream
1 jar of macapuno (coconut sport strings; available at Asian/Filipino stores)
Buko pandan flavor (optional)


Macapuno

Buko Pandan Essence


Instructions:

1. Scald milk and coconut milk plus salt over low heat.
2. Remove from heat and add heavy cream and cream of coconut.
3. Chill for at least 4 hours.
4. Freeze using an ice cream maker. (Mine is Rival.)
5. When done, immediately stir in macapuno. (Optional: Add several drops of buko pandan. That's the greenish ice cream in the picture. Personally, I like the plain one.)
6. Freeze overnight. (You might have to stir every 30 minutes or so for the first 4 hours to make sure the macapuno is distributed evenly.)
7. Optional garnishings: additional macapuno, kaong, or nata de coco (available in Asian stores).

Thursday, July 03, 2008

My Bibingka Cake was featured on GMA-7's 100% Pinoy (Fusion Desserts)


I seldom blog nowadays (I feel guilty about it) because I have been very busy, especially in the most recent months with a skin allergy that I have been suffering from for two months now (better now and almost back to normal), plus the recent change in work (from rehab dept to ER).

But recently I was contacted by Ces because GMA-7 wanted to feature my fusion dessert bibingka cake on their 100% Pinoy segment on Fusion Desserts (they needed a foodblogger based in Manila to re-create my recipe as well, and Ces asked for my permission. Needless to say, it did not really take a lot of convincing on her part. I was thrilled, and ChefCK, who agreed to appear on the TV in re-creating my recipe, is a Culinary Institute of America graduate and is going to open a school in the Philippines. I am just honored!

Here's a youtube video of the said segment:


Thanks to Ces, ChefCK, and GMA-7!

Now that I have made this post, this reminds me that I have not actually posted about publications that have also featured my online kusina. Thanks to Catherine Bolandrina of planetphilippines for featuring me on the 09-14-07 issue of Planet Philippines; the article was entitled "Pinay Can Cook!"

Another publication that got interested was Hannaford's "fresh" Magazine, which they publish every two months and which shoppers could get for free with purchases of at least $25. I "got" their attention when I joined a contest for recipes using any of their "Inspirations" line-up (I did not win, but they got interested as to how I, a Filipina, was adapting in an American kitchen, especially in a rural area where the nearest Filipino/Asian store is a two-hour drive). The article appeared on the May-June 2007 issue under the segment "Food Lover's Favorite", and was entitled "When in Maine..." with a photo insert that mistakenly featured the face of a friend who was with me in the photo that I submitted (I did not bother to correct them). My recipes featured were the beef pares, spinach-haddock laing, and leche flan (links are from the hannaford website). I have not featured my laing on my blog, but I submitted the recipe per their request. They changed some ingredients in the recipes they asked for, with my permission, for them to re-create the recipes to what they thought tailored more to the American palates, and which would also reflect more their healthy approach to food (e.g., changing the premium coconut milk to a light one). Some of my co-workers back in the rehab department saw this article and said, "I did not know you were that popular!" I almost choked! Some of my newfound online friends also got in touch with me through email because of this article.

Now I wonder if I will have additional visitors to my site because of this??? Well, I gotta post more often! But I am foreseeing more posts on quick-fix types of meals, using more of ready mixes (they are my best friends nowadays).


Thursday, January 31, 2008

Potato Peasant Bread

My husband is so fond of whole wheat type of breads. This one combines whole wheat with mashed potatoes, and is very soft and tender, like my pandelimon de patatas (which my husband also loves because they are so soft even on reheating), only healthier. Any leftover is good for garlic bread. So if you are like me who end up wondering what to do with leftover mashed potatoes, this is another wonderful way to use it. Of course I got the recipe from my favorite baking site, breadworld.com .

Makes 2 loaves

3 to 3-1 / 2 cups all-purpose flour

1 cup whole wheat flour

1 / 4 cup sugar

2 envelopes FLEISCHMANN’S RapidRise Yeast

2 teaspoons salt

1-1 / 2 cups potato water or tap water

3 tablespoons butter or margarine

3 / 4 cup mashed boiled potato*

1 tablespoon all-purpose flour


Directions
In a large bowl, combine 1 cup all-purpose flour, whole wheat flour, sugar, undissolved yeast, and salt. Heat water, butter and mashed potato until very warm (120o to 130oF). Gradually add to flour mixture. Beat 2 minutes at medium speed of electric mixer, scraping bowl occasionally. Stir in enough remaining flour to make a soft dough. Knead on lightly floured surface until smooth and elastic, about 8 to 10 minutes. Cover; let rest 10 minutes.

Divide dough in half. Roll each half to 8 x 12-inch oval. Beginning at short end, roll up tightly as for jelly roll. Pinch seam and ends to seal. Place on large greased baking sheet; flatten loaf slightly. Cover; let rise in warm, draft-free place until doubled in size, about 30 minutes.

With sharp knife, cut 3 diagonal slits (1 / 4-inch deep) on top of each loaf. Sprinkle with 1 tablespoon flour. Bake at 400oF for 15 to 20 minutes or until done. Remove from sheet; cool on wire rack.

Friday, January 25, 2008

Pleasant surprise from a friend

One of the many joys of blogging about something that is truly shared by many is that I get to meet a lot of Filipino/Filipina friends online. Whether it remains an online relationship or I get to meet them in person does not really matter. These friends are as real as my friends who live here, sometimes even better (as in no intriga, no envy, no judging, if you know what I mean).

I came home the other night very tired from work, and had this pleasant surprise: bottles of pandan essence and various mixes (palabok, tocino, and pancit bihon). Who sent it?

My new friend Deb L from NY sent these goodies. And I want to thank her for sympathizing with me, being very far from the nearest Filipino store, which, actually to date, has closed. So now I only have the Chinese-owned Asian stores to go to. She has read about my plight in one of my previous posts and was very thoughtful to ask me what I wanted/needed and offered to send some to me.

Thanks so much, Deb! No I have to marinade some chicken and pork pieces. My hubby (and of course, the kids and I) loves tocino.

Sunday, January 20, 2008

(Crown) Roast of Pork (South Beach Diet recipe)


I was at the kitchen at work when someone else was reheating his food in the microwave...smelled like pork adobo so I got curious. I told him it smelled like a Filipino pork dish cooked in garlic with vinegar and soy sauce. He said those (except vinegar) were the main ingredients indeed. I asked for the recipe, which I received later in the week (he had to ask his wife for it). This year we have pork cuts in our freezer, as this was the first time we had a pork raised by my MIL and we had slaughtered for our family's consumption. When I tried this recipe, although not using a crown cut (whatever that was), my husband was reminiscing the days he had same pork roasts made by his mom. Needless to say, it was a hit among my sons and I. I just substituted dried basil in place of fresh sage as I did not feel like making a special trip to the grocery store for that.) The recipe called for asking the butcher to trim the fat and french the bones, mainly for presentation purposes, which I did not bother with.)

Ingredients:
2 tbsp plus 2 tsp extra-virgin olive oil
2 garlic cloves, minced
2 tsp crushed dried oregano
1 tbsp crushed dried basil
1/2 tsp freshly ground black pepper
1 (6- to 7-pound) roast of pork
4 celery stalks, cut into 1&1/2-inch pieces
2 medium onions, quartered
2 medium carrots, cut into 1&1/2-inch pieces
1/4 cup plus 2 tbsp water
1/4 red wine

Instructions:


Whisk together 2 tsp of the oil, garlic, oregano, basil, pepper and salt in a small bowl. Rub pork all over with garlic mixture. Cover pork with plastic wrap and refrigerate for 8 hours or overnight.

Position rack in lower third of oven and heat oven to 425 deg F.

Toss celery, onions, and carrots with remaining 2 tbsp oil in a roasting pan; set pork on top. (I actually tossed the veggies in an hour before my "done" time.)

Roast pork for 30 minutes, reduce heat to 350 deg F, and continue roasting, turning pan halfway through, until thermometer inserted in the thickest part of a few of the chops reads 155 to 160 deg F, 1&1/4 to 1&1/2 hours (I actually cooked mine for 3 hours to make sure it is well done, as hubby never likes less cooked meat).

Remove roast from oven. Carefully transfer roast to a platter, loosely cover with foil, and let rest for 20 minutes.

while roast is resting, remove vegetables from pan and discard (I did not discard, although I placed them side by side with the roast). Place roasting pan over lowheat and add water and wine. Bring to a simmer and, using a wooden spoon, scrape browned bits of pork from bottom of the pan. Simmer until you have a flavorful juice, 3-4 minutes (if I remember it right, I added some soy sauce, worcestershire sauce, and salt and pepper to it and kept tasting until I was satsisfied.)

Carve roast into thick chops and serve with pan juices. (The gravy in the last photo in the slideshow is something else I made from leftover ham dish, which my husband also liked a lot. Will post about it later.)

Sunday, December 30, 2007

Total Caloric Requirement and Food Intake

During my early months of blogging, I made a very loooooong post on calculating Total Caloric Requirement and "promised" to tackle its application to actual food intake on the next "nutrition" post, but I totally forgot about that supposed next post...

well, it would have been another looooong post including food exchanges and choosing foods to include in your menu so you will have your targeted caloric intake.

But while I was working as an MT, I have stumbled upon a lot of medical-related websites from fitness to neurology.

I have found out the quickest way to do those without you really doing the calculating...

Calculating your BMR the long and painful way is to go to my blogpost here. Calculating it the easy way is by using a free web-based TCR calculator. While my post calculated my TCR as 1800 cal, the calculator is pretty close at 1746.62 cal per day based on my acitvity level. My results were as follows:
1343.55 calories per day is your Basal Caloric Rate. This is:
no more then 44.78 grams of fat (30%) for your Basal Caloric Rate
50.38 grams of protein (15%) for your Basal Caloric Rate
184.74 grams of carbohydrate (55%) for your Basal Caloric Rate

1746.62 calories per day recommended for your Active Caloric Rate. This is:
no more then 58.22 grams of fat (30%) for your Active Caloric Rate
65.50 grams of protein (15%) for your Active Caloric Rate
240.16 grams of carbohydrate (55%) for your Active Caloric Rate

No less then 1200 calories per day recommended for safe consistent Weight Loss. This is:
no more then 40.00 grams of fat (30%) for your Weight Loss Caloric Rate
45.00 grams of protein (15%) for your Weight Loss Caloric Rate
165.00 grams of carbohydrate (55%) for your Weight Loss Caloric Rate

At this safe consistent Weight Loss Caloric Rate,
you will lose 1 pound every 24.38 Days

As it shows, it gives you a target caloric intake per day for consistent and safe weight loss.

Someone recently asked me how this relates to food intake, and that query prompted this post.

Okay, to translate that TCR to food intake, we are to convert it to protein, fats, and carbohydrate mainly (other nutrients do not have calories; they only serve as minerals and vitamins). As you will note, the conversion is ideally 30% fat, 15% protein, and 55% carbohydrate. (During my medical school days, it used to be 15% fat, 30% protein, but probably that was changed because it is really hard to stick to 15% fat, even with the leanest meat you will find. In other words, unrealistic goal???)

The conversion is that 1 gram of fat equals 9 calories; 1 gram of protein or carbohydrate equals 4 cals. So you will have to take into consideration the amount of protein or carbohydrate or fat you are eating in a day...but to plan that, you have to start with a certain food item you eat, let's say, a cup of milk, and consider how much fat and protein and carb is in that cup of milk, calculate the calories in it then subtract that from your TCR, then do the same with other food items you have eaten, during breakfast, for example, then using the food exchange guide, plan the rest of your meals for the day without exceeding the TCR (if you want to maintain or lose weight). BUT THAT PROCESS IS TEDIOUS, and might possibly be confusing. Maybe that was the reason I decided not to post it...and presenting it logically in a manner comprehensible enough to the ordinary blog reader would be quite challenging.

Anyway, I have discovered (since my MT days) an easier way to do just that without you having to flip through pages and pages of food exchange list and holding a calculator and a table of your actual food intake and their caloric contents. The goal anyway is to check your present diet against your caloric requirement, then planning your menu so you will stick to that caloric limit, right?

The NHLBI (National HeartLung and Blood Institute) Menu Planner gives us an easy way to do just that. It is a public service from the government to have this handy web-based menu planner.

How it works:
You select first your meal: breakfast, lunch or dinner. That is, after entering your calorie target for the day. If you take note of my BMR results up here, I have to eat no less than 1200 cal for safe weight loss. It is a coincidence that the Menu Planner has that as default.
After selecting your meal, you go to the Meal Menu on the left and select food items, enter the servings that you are gonna eat. Everytime a food item and # of servings is entered, it will update, so as to show you how many calories are already taken into consideration. If you enter a food item and makes you exceed your TCR, a notice pops up.

One drawback is that it does not have a wide range of food items. If you ate mousse or a chocolate bar, you would not be able to take that into consideration. You will be pretty much limited to what they have on the list. Another is, you will not be able to put in the exact amount of food you take and they should be 0.5 oz at the least.

So if you will still be interested to do it the painstaking way, here's how to approach it.

Convert your TCR in terms of protein, fat, and carbohydrate.

Using mine, with the above results, for example, with the target of 1200 cal to lose weight safely, I am to eat no more than 40 g of fat, 45 g of protein, and 165 g of carb in a day.

Then get a food exchange list, and get crazy taking into consideration the weight in each serving, and then create your menu as dictated by the limitations given by the above calculator. You have to keep in mind that even in bread slices, there is some protein and maybe some fat. If you are willing to get away from sweets and most fats, the online exchange lists will suffice, as they contain the healthier food items.

Some gave good reviews in amazon.com about the FitDay PC Diet and Nutrition Software.
You might want to check it out.

Monday, December 03, 2007

Sauteed Mussells

 It was only recently that I tried to cook these mussells. I was hesitant at first because the ones available at the Hannaford here in my area have very black and thicker shells that those I was accustomed to back in PI. After trying them, I now want them regularly on our dining table. My kids, as usual, love them. They are being sold by bags worth about $3-$4, weighing around 2 lbs, enough for the boys and I. Satifies my craving, as always.
My father used to cook this frequently because it was relatively cheap in PI, and he always told us not to put additional water, since the soup that comes out of steaming the mussells is loaded with flavor, and he did not want to dilute that. This was in contrast with my late ex-father-in-law, who was so fond of sipping a cup of the soup so he wanted to literally drown the mussells.
Based on some recipes I have seen in other's foodblogs, I added some sherry. And while my father used to add pepper leaves (dahon ng sili), I used baby spinach.

Ingredients:
1 bag mussells, washed and drained well with cold water
2 tbsp oil
3 cloves garlic, minced
thumb-size ginger, sliced
1 small onion, sliced
1/2 cup sherry
ground pepper to taste
salt to taste (if at all needed)
some dash of chopped dried basil
2 cups of baby spinach

Instructions:
1. Heat oil in medium high.
2. Sautee garlic and ginger for about 30 seconds, followed by onions. Sautee until onions are translucent.
3. Add the mussells and stir.
4. Pour the sherry. Cover and lower the heat to #4. Let simmer for 5 minutes.
5. Add pepper, basil and salt (if needed) to taste. (Optional: Add 1/2 cup water if you want to have more soup, and return to boil.)
6. Add spinach. Turn off heat and stir until spinach wilts. Serve right away with plain rice.
Posted by Picasa

Sunday, December 02, 2007

Merry Christmas to Everyone!!!

Here's an early Christmas offering...
PinoySingSnappers AllStars Project02.A


We dedicate this song to those who are away from their family this Christmas. We know how hard it is not to see your family sit around the tree opening gifts, or having dinner together. We sympathize. We hope you try to get the most of what you have, who you're with and where you are. We wish you all the happiness in the world. Most of all.... We wish you a Merry Christmas and a Happy new Year!


Photo Sharing and Video Hosting at Photobucket


Performed by:

elapot, Hazelcute, Ylla, Pinay, Manang, Lilnanz, ana_f_ever, grjdemuynck, Mai725, vgnia, iwunder, jemima, Nisrine, Angelene, --ja--, junix, kitz, Beambam, Bluepepper, mamaberry


Special Thanks To:

Garci (Founder of the PSS Allstars)
Mamaberry (venue sponsor)
Reynaldo (video editing)
Aubzie (audio mixing)
Pinay (banner)
Neutrongirl (upload)
Lark (Coordinator)

Pls. support our upcoming projects as well. Our aim is not to separate ourselves from the rest of the SS Community but to touch hearts and encourage people to share to one another our gift of music. Thanks to all who care and most of all to Singsnap for giving us this opportunity to reach out to the whole world.

Saturday, November 24, 2007

Paris Brest


No misspelling here.

According to Wikipedia:

Paris-Brest-Paris (PBP) was originally a 1200km long bicycle race from Paris to Brest and back to Paris. It is the oldest bicycling event that is still regularly run.


But I am talking about this wonderful dessert that I always look forward to annually from my sister-in-law. Paris Brest is "classic French creation — a large ring of airy choux pastry filled with the richest praline pastry cream —" (from epicurious.com). I fell in love with it the first time I tasted it. I did not bother to try to make it myself, because I love looking forward to having it during holidays. And of course, I love wolfing it down without having to sweat a drop to make it.

But I asked my SIL for the recipe and instructions to share with those of you who might want to try serving this to your relatives (and I am sure you will impress them!) She warned me not to try making it, and I gladly said, "That's your specialty, so I am not even gonna try."

So here it is:

DOUGH
Ingredients:
1/2 cup butter
1 cup water
1 cup flour
pinch of salt
4 eggs

Instructions:
Preheat oven to 400 deg F. (IMPT)
Boil the butter and water then cook on low. Add the flour and salt, and cook for about a minute stirring constantly until it leaves the sides of the pan.
SET 5 MINUTES on the countertop. (This is critical).
Break an egg and drip into the mixture, beat by hand with a woden spoon. Repeat 3 times more (so that makes it a total of 4 eggs added).
Using a pastry bag (or whatever you can use as substitute. I usually use ziploc bag with a corner cut), pipe and form into a circle with 7-inch diameter on a greased baking sheet.
Bake at 400 deg F for 15 minutes then lower the heat to 350 and keep baking for 30-40 minutes more until top becomes dark brown.
Let cool.

PRALINE:
Ingredients:
1/2 cup white granulated sugar
1/2 cup sliced almonds
1 pint whipping cream

Instructions:
Whip cream then let sit in the fridge for 4-5 hours.
Cook sugar and almonds in a small saucepan over low heat and keep shaking (do not stir) until sugar is all melted.
Pour onto buttered tin foil. Let cool and solidify.
Break into pieces then use a FOOD PROCESSOR (not chopper) to break further into powdery form.
Fold the praline into the whipped cream.

ASSEMBLY:
Cut the top off the dough ring and scoop inside. Fill with praline in the middle. Return the top portion then sprinkle with sugar.

Serve as fresh as you could.


Thursday, November 15, 2007

Karaoke Addict Again! Plugging...

Lalo tuloy dumalang and posting ko rine...

Need proof? Visit my Online Karaoke Blog.

And I am not alone (oh no, no no no no!). There are a lot others hooked to SingSnap.com, including people from all over and from all walks of life. Needless to say, hindi pahuhuli ang mga Pinoy. PinoySingSnappers came up with a project in time for the Christmas Season. Check it out. You may wanna send it to your relatives and friends.
Custom Search