Saturday, June 24, 2006

LP 11: Summertime Coolers and Memories of Summer


Wow! After a long hiatus from blogging, this is my first time to participate in the Lasang Pinoy Series. Thanks to JMom for the invitation.

As the title implies, it's about what I used to indulge in during those summers when I was younger (and now I am sharing with my children).

In the LP 10, it had the same theme, and Tina posted about the same thing I made last night and which I am posting about today -- ice candy. This is just one of those delicious and thirst-quenching ways by which Filipinos (kids especially) try to beat the summer heat.

I made chocolate (using my untouched-for-months Nesquick) and melon. I have to share one technique that I have learned from I-can't-remember-who on how to make the ice candy (that's what we call the equivalent of icee or ice pops in the US) easy to bite (I still remember the first time I tried making ice candy, it was so hard that it was annoying to eat it!). It just involves boiling the water (that you are going to use for the mix) first then adding a little bit of cornstarch-water combination to the boiling water, like making it thick as in soups, but not too thick. Let's say for a big pot of boiling water, you add half a cup of cold water in which you have dissolved 2 tbsp of cornstarch. I have long been wondering about how it could bring about the desired effect, and in my "scientific" kuno mind, it seems that the complex starchy colloidal suspension hinders the lattice formation via the strong hydrogen bonds that form when water turns to ice, such that, instead of ice-like consistency of the ice candy, it becomes like packed snow. Once I mastered to do the trick, I even tried selling ice candies in our subdivision when I was in high school. Bad thing was, I did not use a tray, so the sticky substance oozed out of the plastic with small holes, that it stuck to the gadget of the freezer door, nasira!
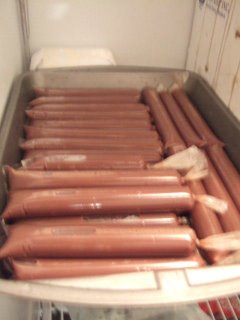
Anyway, back to making my chocolate ice candy, I just poured Nesquick into 1 liter of the cooled-to-RT pre-boiled water, tasted as I went along, making it a bit sweeter than I could tolerate, because I had to add milk by taste, and of course, I had to provide allowance for the freezing. You know how ice makes sweet taste less sweet, and how heat tends to amplify the sweetness.
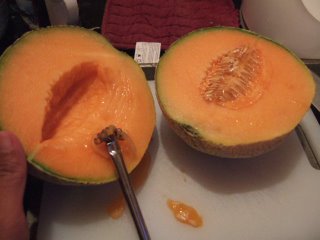
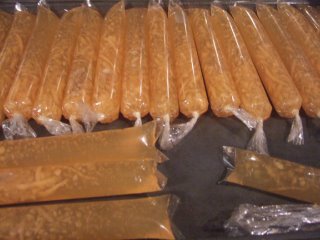
For melon, I did not add milk, because in recalling how chilled melon+condensed milk resulted in a bittery mettalic taste, I did not attempt to add milk here; just sugar. So, 1 liter of the same water, plus 1/4 melon processed in a blender, plus sugar to taste and a bit more, then I poured the whole thing into a bowl and added melon strips (kinayod).
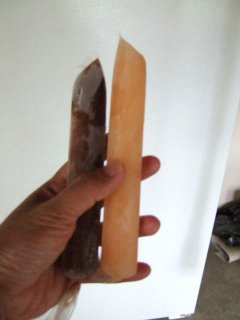

After an hour, my younger son was eager to try it, but I could not give him any because it was not yet solid. I told him to wait til the next morning, which was today.

He woke up very early and asked for these ice candies first thing.

As you can very well see in the right photo, he still had that bed-head, but already was excited with the frozen goodies, and upon tasting, finally exclaimed, "Oh, I know these! I had these in the Philippines!"

Another memory from my childhood days is the Palitaw...it is one of those things I learned to make (experimented with) during the boring summer days, when I always looked for something to do aside from watching TV or reading or biking or trekking. But I will post on that next time (my photos are all ready).

Wednesday, June 21, 2006

EGGS: A Comparison Between Homegrown and Grocery Source

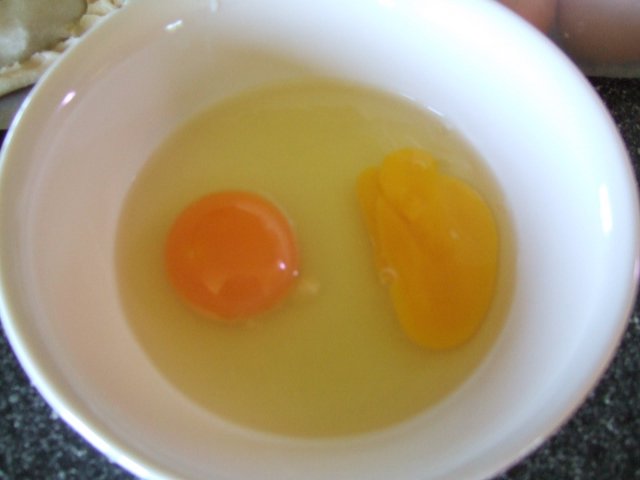
One time when I had lunch at my friend's house (with other Filipinas) I brought an egg with me (My eggs all come from my in-laws who raise chickens). Then I asked for an egg from my friend who was hosting the lunch, an egg which she buys from the grocery store. Both had brown shells. I wanted to compare and see for myself the truth in the photo in a magazine article my sister-in-law showed to me recently.

I was quite a bit careless when I cracked my friend's egg open; hence, the broken yolk. Regardless, it was still quite obvious how different the two are when placed side by side in this bowl.

I remember when I first came here, I was quite surprised at the almost-orange yolk, it made me wonder that maybe the brown shell had to do with it. Now I know better. And yes, that article reminded me about that first time I had an egg here. But during that time, I was comparing it to eggs that I was used to eating in the Philippines. This made me realize that those commercial eggs in PI are no better than the commercial factory farm-produced eggs here.

The physical appearance is only one clue as to the superior quality of eggs from chickens raised with tender loving care. A comprehensive comparison illustrated by a bar graph can be found in Mother Earth News's Chicken and Egg page. Nutrition-wise, they say:
In 1988, Artemis Simopoulos, co-author of The Omega Diet, found that eggs from
pastured hens in Greece contained 13 times more omega-3s than eggs from U.S.
supermarkets. In 1974, a British study found that eggs from pastured hens had 50
percent more folic acid and 70 percent more vitamin B12 than eggs from
factory-farmed hens. In 1997, a study in Animal Feed Science and Technology
found eggs from free-range chickens had higher levels of both omega-3s and
vitamin E than those from hens maintained in cages and fed commercial diets.
Most recently, in 2003, Pennsylvania State University researchers reported that
birds kept on pasture produced three times more omega-3s in their eggs than
birds raised in cages on a commercial diet. They also found twice as much
vitamin E and 40 percent more vitamin A in the yolks of the pastured birds.

Many vegetarians are forced to be so, even refusing to eat eggs because of cruelty to animals. While some cannot get themselves to slaughter (sacrifice) animals for their own consumption, others just plainly do not want to consume products raised under the most horrible conditions one can imagine (so they do not want to support such factory farms), as depicted in the video below, nor would they like to ingest such hormone-laden, probably previously sick products and have some dire health consequences.


Other related videos are the Meatrix I and II.

Have you noticed how the grocery stores are now teeming with "organic" produce? I am afraid it may be another "meatrix" where the produce is labeled as organic, but turns out to be another fantasy created by the profit hungry companies who want to take advantage of the "fad." If you feel at a loss now as to where to get foods you can trust (which can be quite a problem for the city dwellers), read here.

I feel privileged to have a taste of REAL GOOD FOOD, though not as completely as I would like it to be. Some people consider foods prepared in fancy restaurants as good food. To me, homegrown, safe, hormone-free, and healthy (as opposed to sick) nutritious foods are the real good foods.

I am contemplating on saving some money to have a contract with my SIL or MIL so they can raise chickens and pigs (in addition to beef) for my family's consumption (I do not have their expertise). There is also a local farm where the milk is organic and pasteurized (not homogenized). It may be quite costly, but the health benefits will be all worth it. Most of all, I will have the peace of mind on what I am feeding my family. Posted by Picasa

Monday, June 19, 2006

Sloppy Joe

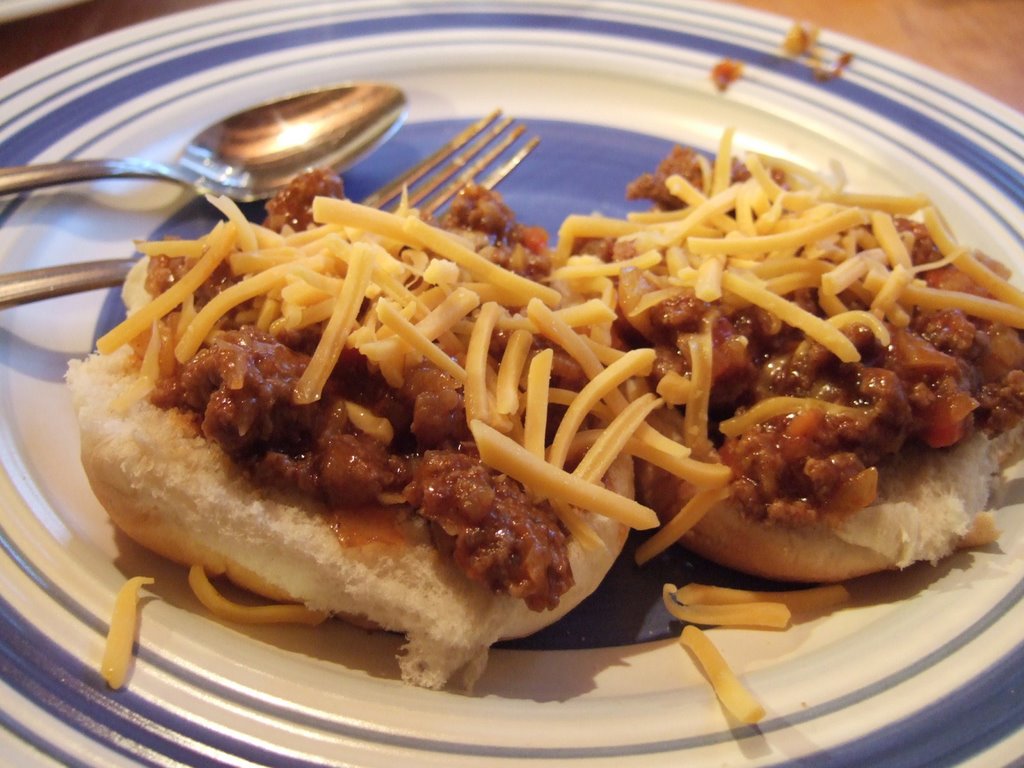
There was one time when hubby picked a can of Sloppy Joe, for one of those items to be added to the pantry for a quick fix supper (we had been doing more of this time-saving measure since I started working at home). I have tasted the canned one, and looked at (and tried to bury in my memory) the ingredients. I thought I probably could make my own (the control freak that I am strikes again!). This is my version of Sloppy Joe.

Ingredients:
1 pound ground beef
3 cloves garlic, minced
1 medium onion, chopped
1 red bell pepper, chopped
1 small can tomato sauce + 1 can water
1/4 cup ketchup (approximate)
3 tbsp sugar (or to taste)
Shredded cheese (for topping; optional; hubby likes it so)

Procedure:
Brown the beef. When it renders oil, remove extra oil and leave about 1 tbsp. Saute the garlic followed by the onion. Give it a dash of salt and pepper, then add the rest of the ingredients. Stir well, and let simmer for at least 10 minutes, then add salt and pepper to taste. You may try to adjust the sugar and ketchup as well. Serve on burger buns and top with shredded cheese as desired.

Sunday, June 18, 2006

Turkey Deli Sandwich

This is still part of my diet.
For me, it is cold lunch: 3 slices of the deli, a handful of salad greens (Romaine lettuce), 1 slice of American white cheese, 4 slices of Bread and Butter Pickles, and a burger bun (or two slices of bread). Nothing else added (like ketchup or mustard).

One sandwich is all I need for lunch. For my kids, though, if I will serve the same, they need two, either as cold lunch or merienda (snack).

Quick fix for a busy day, and they love it!

(I am down now to 123 pounds, but having a hard time losing more pounds because of several get-togethers. It is more like fluctuating now, averaging 124 plus/minus 2. I am quite satisfied with that nonetheless.)

Thursday, June 15, 2006

Peanut Butter & Chocolate Rolls

Manang's Note: This recipe reminds me so much of a Philippine roll which could be bought in any bakery there. I am referring to the "Spanish bread" which makes use of margarine mixed with sugar as filling, then breadcrumps to roll the pieces on prior to laying them on the baking sheet (pretty much like pan de sal). This recipe is from breadworld.com but I revised this in that I did not arrange the rolls in a spoke fashion, and I replaced the chocolate chips with granulated sugar because I had none at the time, then just used the Hershey's chocolate syrup to drizzle on top in addition to the peanut butter icing. The below nutritional information is for the original recipe. My children loved this, and my husband liked it as well.

Makes 8 rolls. Dough can be prepared in all-size bread machines.


Dough
1/2 cup milk
1/3 cup water (70 to 80oF)
1/4 cup creamy peanut butter, at room temperature
1/2 teaspoon salt
2-1/4 cups bread flour
1/4 cup sugar
1-1/2 teaspoons FLEISCHMANN'S Bread Machine Yeast

Filling
2 tablespoons granulated sugar
2 tablespoons creamy peanut butter

Icing

1/2 cup sifted powdered sugar
1 tablespoon creamy peanut butter
2 to 4 teaspoons milk

Hershey's chocolate syrup

Directions
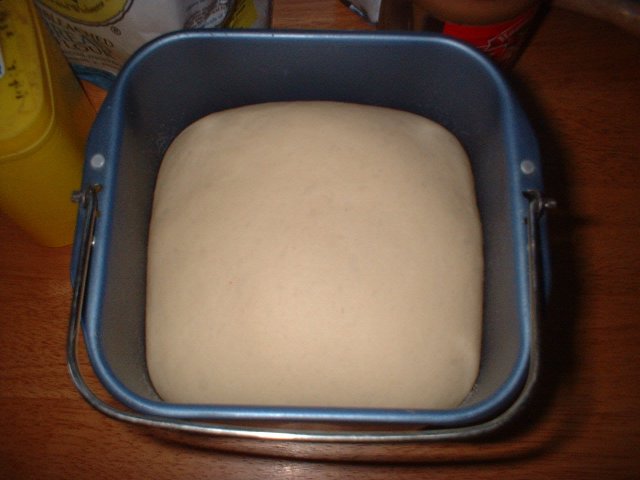
To make dough: Measure dough ingredients into bread machine pan in the order suggested by manufacturer. Process on dough/manual cycle.


To shape and fi
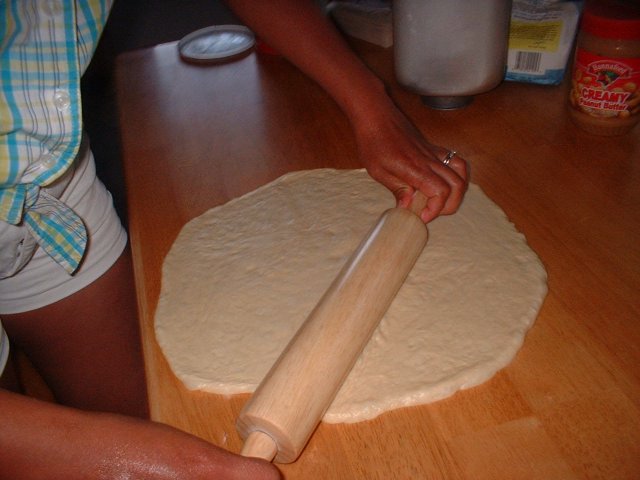
ll: When cycle is complete, remove dough to floured surface. If necessary, knead in additional flour to make dough easy to handle.

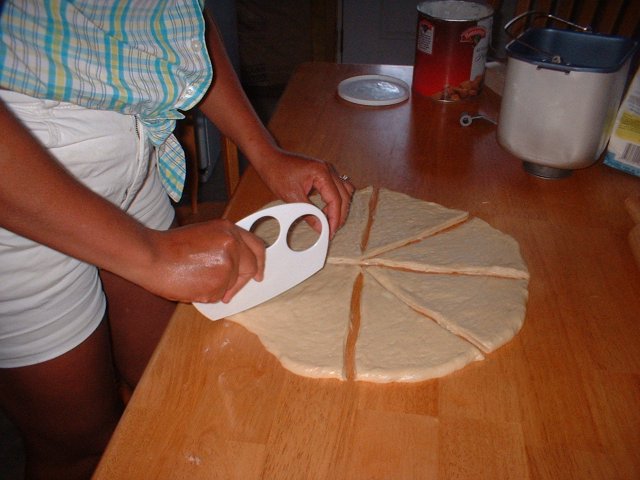
Roll to 14-inch circle.


Cut into 6 wedges;


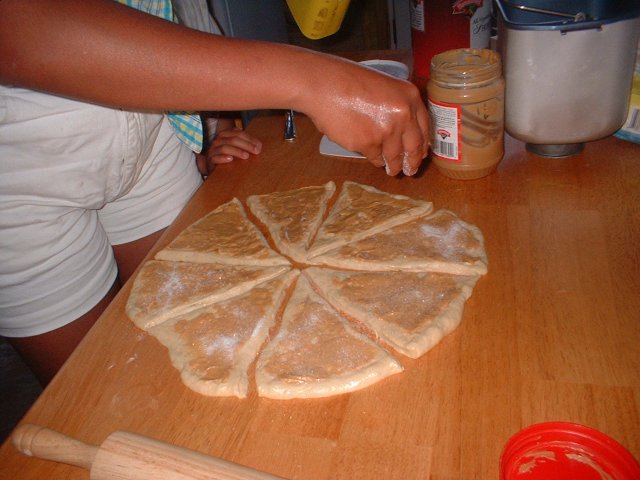
sprinkle filling, dividing evenly, at wide end of each wedge.


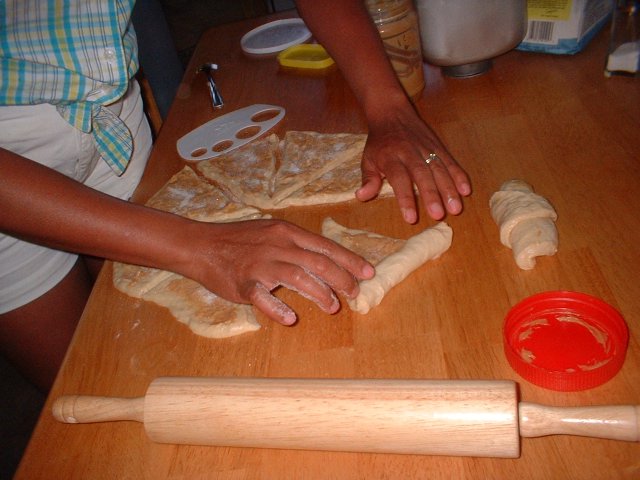
Beginning at wide end, roll up tightly; curve to form crescent.


Arrange crescents, seam side down, on greased large baking sheet. Pinch ends at center to seal. Cover; let rise in warm, draft-free place until doubled in size, about 30 to 45 minutes. Bake at 375oF for 15 to 20 minutes or until done.


Remove from pan; cool on wire rack.


To make icing: In small bowl, combine icing ingredients except Hershey's chocolate syrup; stir until smooth.


Drizzle on rolls. Drizzle Hershey's chocolate syrup.


Nutrition Information Per Serving:Serving size: 1 rollcalories 458; total fat 16g; saturated fat 5g; cholesterol 2mg; sodium 299mg; total carbohydrate 70g; dietary fiber 3g; protein 13g

Inday_adin has a different recipe here that she has tasted and recommends as well.


Tuesday, June 13, 2006

Chocolate Mousse Cake


This is my second attempt at making this cake which is so loved by my husband and my kids.

My first one was not as artistic as this one though. The recipe was shared by stel, and can be found here.

The only revision I made was the addition of Piroulle (sp?) . I placed them along on the inner side of the heart-shaped pan after the base was baked and some mousse was poured so I would have some form of "glue" to stick the Piroulles in. I cut them first to the level of the pan before sticking them into the cake base. Ads by AdGenta.comOnce in place, I then poured the rest of the mousse and followed the rest of the directions. Instead of chocolate shavings only, I added Lindt chocolate truffles. The Piroulles (sp?) were good for munching alone, but used for this purpose, it becomes chewy, so that it serves mainly a decorative purpose.

I thank stel for this recipe!

Posted by Picasa

Chocolate Mousse Cake


This is my second attempt at making this cake which is so loved by my husband and my kids.

My first one was not as artistic as this one though. The recipe was shared by stel, and can be found here.

The only revision I made was the addition of Piroulle (sp?) . I placed them along on the inner side of the heart-shaped pan after the base was baked and some mousse was poured so I would have some form of "glue" to stick the Piroulles in. I cut them first to the level of the pan before sticking them into the cake base. Ads by AdGenta.comOnce in place, I then poured the rest of the mousse and followed the rest of the directions. Instead of chocolate shavings only, I added Lindt chocolate truffles. The Piroulles (sp?) were good for munching alone, but used for this purpose, it becomes chewy, so that it serves mainly a decorative purpose.

I thank stel for this recipe!

Posted by Picasa

Saturday, June 10, 2006

Asparagus Sautee with Shrimp Paste

My MIL recently had had enough of asparagus from her garden, so she asked me whether I would like to get the rest of them. Of course, I jumped at the opportunity! Who would not want such freshly harvested goodies?!!!Ads by AdGenta.com


I got a grocery bag full of them, so I immediately washed them with cold water, then I set aside enough to cook for one week to set them aside in the fridge. Since I could not consume all of them and I was pretty sure I would get sick of them after a week, I set aside several to pre-cut and blanch for 3 minutes, pack in storage bags and froze them.

Once way I cook asparagus is like adobong kangkong. I did that last year when I first had my MIL's asparagus giveaway. I have not had kangkong here, but asparagus makes a good substitute for purposes of adobo.

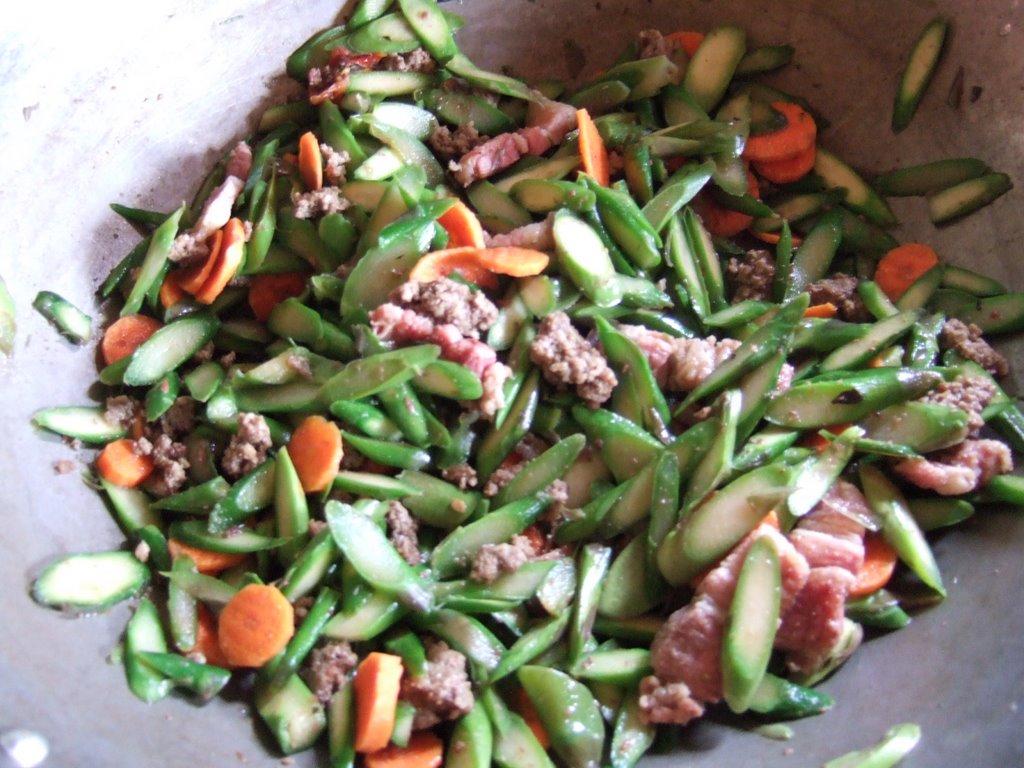
The very first recipe I made out of them this time is stir frying them with shrimp paste. My kids loved them! Though I cooked only about 3 cups of them when sliced as in the photo (probably a bundle if bought in the grocery store), we managed to finish the whole batch! Don't bother to ask how my hubby liked it, though, as he is not a big fan of asparagus. I never saw him eat them.

Ingredients:
asparagus
1 carrot, sliced in disks
2 oz salt pork sliced thinly (optional; I use them for the flavor and the oil derived from the fat; if you do not like to use pork, you may just use 1 tbsp olive oil for greasing the pan. Wok works best (They are cheap at Asian Food Grocer.)Ads by AdGenta.com
2 cloves of garlic, crushed and sliced thinly
pepper
2 tbsp of shrimp paste (to taste)

Procedure:
If using pork pieces, separate the fat and use it to render oil. If you don't use pork, you may use any oil of preference (e.g., olive oil or peanut oil)

Once fat is rendered, remove excess oil and leave about 1 tbsp.

Sautee garlic. Add the rest of the meat if using, and let it cook for about 2 minutes or until browned.

Add the veggies. Season with pepper and add 2 tbsp (to taste) of shrimp paste. Stir fry for about 2 minutes. You may add 1/4 cup water if you prefer (I like stir-fried veggies better if there is no added water.)

Serve with hot plain rice and enjoy!


Powered by Qumana


Thursday, June 08, 2006

You're the Chef - Baking Bread

This is a very educational video for those who want to make homebaked goodies not having to rely on the bread machine. (Now I do not have to post step-by-step nor do I have to contemplate of making a video myself! )

Enjoy the video and enjoy baking!


Saturday, June 03, 2006

I'm on a DIET!!!

Since coming here, I have gained weight gradually. Predisposing factors: sedentary job (MT), working at home (I barely go out), easy access to food (anytime; i have a stock of frozen meat and enough flexibility in my work schedule that I can eat whenever I feel like), winter months (confined to home).

You see, when I gave birth to my first son, I became plump. I was resigned that I would be like my Nanay, gaining weight with every pregnancy. My sisters were biggies after pregnancies as well, although I had always been the slim one among us. Well, I thought I had no hope to be slim again, especially that I always ate my son's leftovers.

That frame of mind changed when my sister, who was so big when she left to work in Taiwan, came back home after three years looking like a she had never had a kid!

That was a wake up call for me. So I started reducing weight, avoiding leftovers, eating less, exercising more. I succeeded but shortly thereafter, I was pregnant again. This time, I was resolved to slim down as soon as I gave birth to my second son.

I did, and after six months post-partum, some of my friends could not even remember me having given birth to my second son (asking, "Di ba buntis ka?" to which I would answer "Nanganak na ko no!"). When I was working already, at age 32, some thought I was just 27 and that my first son was my younger brother.

Then I came to US of A with the same body built I had when I was 22. One would only know I was already a mother when she/he would see my stretch marks and the loose fat on my tummy.


Three years have passed...

I was sorting through my clothes earlier in the spring, getting ready for the change in weather pattern, looking for my sleeveless shirts and shorts. The pants that I brought with me no longer fit, as in they could not get past my thighs!. My sleeveless shirts cut through the skin around my armpit. I thought..."Hindi maaari ito!!!"

I resolved to lose weight.

First I calculated my basal metabolic rate using the calculator on this page (shortcut!).

Results are:

1379.27 calories per day is your Basal Caloric Rate. This is:
no more then 45.98 grams of fat (30%) for your Basal Caloric Rate
51.72 grams of protein (15%) for your Basal Caloric Rate
189.65 grams of carbohydrate (55%) for your Basal Caloric Rate

1793.05 calories per day recommended for your Active Caloric Rate. This is:
no more then 59.77 grams of fat (30%) for your Active Caloric Rate
67.24 grams of protein (15%) for your Active Caloric Rate
246.54 grams of carbohydrate (55%) for your Active Caloric Rate

No less then 1200 calories per day recommended for safe consistent Weight Loss. This is:
no more then 40.00 grams of fat (30%) for your Weight Loss Caloric Rate
45.00 grams of protein (15%) for your Weight Loss Caloric Rate
165.00 grams of carbohydrate (55%) for your Weight Loss Caloric Rate

At this safe consistent Weight Loss Caloric Rate,
you will lose 1 pound every 19.52 Days


Then I went to MyPyramid.gov to get food exchange lists for the various food groups to plan how much I should eat limited by the above results. My diet was in such as way as to consume much less than that in my calculation results, nothing patterned after Atkins or South Beach or Jenny Craig. My diet is typically as follows: Almost-liquid diet for breakfast and lunch (with the addition of a slice of toast or none in the morning, and grilled cheese sandwich plus banana or salad plus matchbox-size white meat), and a full meal for supper. I drink cold milk (1/2 cup) or plain cold water if I get hungry, munch a small cracker or banana, just to relieve the hunger pangs if any. When I feel giddy, that's how I know I am becoming hypoglycemic, so I would give myself some fuel, enough to keep me going until my major meal for the day. I would have wanted the full meal during lunch, but suppertime is the only time I could eat meals with my whole family. I am more lax during weekends.


MY TYPICAL LUNCH

mixture of cubed rhubarb stalks, baby spinach, shredded cheddar cheese, cubed chicken breast about 1-1/2 matchbox size 1/2 cup milk, 1 banana, grilled cheese sandwich
Salad: baby spinach
cubed rhubarb stalks, shredded cheese
cubed chicken breast 4 oz
Italian dressing
Grilled cheese sandwich with
milk and banana

Then I bought a Health-O-Meter, which has built-in BMI calculator, saves up to 10 weight recordings for up to 4 users, tells the difference between the recordings, tells the total lost weight from starting, and tells how much more you have to lose according to your targeted weight.

Of course, exercise should be incorporated. I have always been exercising, but I admit I have no discipline and quite inconsistent. Anyway, I resolved to do 15 minutes or jogging or elliptical in the morning and at night (or 30 minutes in the morning), plus some upper arm toning exercises using elastic bands (short and long), jumping rope x 100 at a time, and warming up/stretching exercises, all at least 3 times a week. Not just to burn calories, but also to tone up muscles and strengthen bones. I usually do my exercise before breakfast (fat mobilization happens more if you are in a fasting state, especially during aerobic activities).

Well, now after one month, my weight has gone down from 137 to 124 pounds. I can now wear my pants and actually zip them up, although it is still quite uncomfortable for me to wear them the whole day. And my sleeveless shirts no longer cut through my skin. Not bad eh?

My Goal: If I reach and maintain a weight between 115 and 120 pounds (for my height of 5' 2.5"), I would be happy.

Tags: , ,


Ads by AdGenta.com
Ads by AdGenta.com


Powered by Qumana

Wednesday, May 31, 2006

Crepe Maker, also good for Lumpia Wrapper

I have long wanted to find a kitchen gadget to make lumpia wrappers (mainly) and crepe with, and have tried using nonstick pans/griddle with no luck.

But I think I have found the right tool. This is the VillaWare 7-inch diam crepe maker. You dip the hot surface into the pan of batter and let a thin film cling; lift it up and let the batter cook awhile, then slowly peel off.
7-inch diam crepe maker

I have not tried making lumpia wrapper with this, but I am posting it now because it is on sale (regular price of $39.99 down to $19.99). So instead of waiting for it to come to try it, I am already sharing this sale deal with you now for those who will be interested. I am not sure until when they will run the promo. (The larger one, 10-inch diam, is not on sale and is around $44). I have just made the online purchase recently (two nights ago).

You can get it from the following link. You can even browse their closeout sale

Disney Toaster 468x60banner

Once I have it with me, I will try it to make lumpia wrappers (I hate the ones being sold frozen. Nothing beats the freshly made wrapper.)

For the recipe, I am planning to try this one:

1 cup flour
1 cup water
1 egg

Mix all ingredients until very smooth.
Lightly grease a nonstick pan and heat. Brush mixture onto pan. When dough starts to come away from the pan, lift wrapper out carefully. It will not lift out if mixture is not done.

I will let you know how it will turn out once I made it.

Tags: ,


Ads by AdGenta.com
Ads by AdGenta.com


Powered by Qumana

Monday, May 29, 2006

Kare-kare

There must be tons of recipes out there for this dish, but I will still post it here, as usual, for my children's sake (looking far into the future).

One of our favorite Filipino dishes is this uniquely Filipino (?) beef stewed in peanut butter sauce.

Salamat ke Mama Sita, it is very easy to cook this dish! Just get some packets from your nearest Filipino store (mine happened to be one hour away from my house).

Boil the beef prior to when you want to prepare the kare-kare, preferably using a slow cooker, so that you can let the fat cool down and solidify, which makes it easy to remove, and therefore, making your kare-kare less laden with calories.

Ingredients
:
Mama Sita's Kare-kare mix 1 packet
3-4 pounds of beef (pre-slowcooked in 8 hours with water to cover, plus 2 bay leaves, 10 peppercorns, and 3 garlic cloves)
1 cup (or more, depending on desired consistency) beef broth (from above)
3/4 cup peanut butter
veggies

sauteed shrimp paste (to be served with the kare-kare) -- This is optional. Salt may be substituted.

Suggested veggies:
Banana blossom (cut into chunks) - This may be hard to find. Can anyone recommend a good substitute? This is "Puso ng saging" in Tagalog.
sitaw (the really long string beans), cut into 3-inch pieces
eggplant, cut into wedges
pechay, aka bokchoy, or Swiss chard (I prefer Swiss chard now).

Since it is hard to find banana blossoms here (once I did, but it was awful-looking), I just content myself withat least eggplant and pechay (or bokchoy, although during our get-together, we could not find bokchoy, and I considered using Swiss chard due to strikingly similar appearance and smell. I was not disappointed. On the contrary, I liked it so well that I no longer buy bokchoy for pechay dishes). Sitaw is hard to come by here.

After the initial slowcooking, everything is very simple. Just remove the solidified fat, boil 1 cup of broth, add the meat and cook the veggies minus the pechay. Meanwhile, combine the peanut butter and the mix with 1 cup of broth, then add to the simmering mixture, slowly stirring. Add more broth if you need to thin out the soup more. Do not add salt. During the last two minutes of cooking the harder veggies, add the pechay and bring back to boiling, then immediately turn off the heat. Serve with plain rice and shrimp paste.

(Note: I have been trying to post this and other recipes using Qumana blog editor tool, which lets bloggers advertise and earn through that, but it always hangs, that I end up having wasted my time because once it hangs, I cannot recover whatever I have typed. I do not recommend it. I am switching over to another advertising scheme, apart from Google's Adsense. Maybe that will be more effective. Will let you know as soon as my blog is approved.)

Friday, May 19, 2006

A Survey on Favorite Filipino dishes

To the Filipinas all over the world:

I would like to make a survey of your most favorite Filipino recipes that you have tried or cooked using your own recipe or from another foodblog or even from my own foodblog (if any).

If you have a favorite PINOY recipe to share (revised to adapt to your present location, if you are an expat), please share by posting here the ingredients and instructions, your location, including where you got the ingredients (Hannaford, Filipino store, spice stores, etc.).

Or if you do have a blog, please provide the link to the posts of your favorite recipe/s, along with your location (this is so we have an idea if we have the ingredients where we are), and also where you got your ingredients.

I would have wanted to make this survey through the "Philippines according to blogs" but it is gone (nahuli ako sa balita!).

With your permission, I would just like to compile them all then print (COLORED) for easy reference. (Pagmamayabang ko rin dito sa area ko, so people will see how artistic we are in cooking.)

Thank you for your contribution.

Manang

Tuesday, May 02, 2006

Shrimps with Ketchup Sauce


This is one shrimp recipe that I learned to make from my mother, and which my sons love to the max. It is so easy to make, and ingredients are easy to find.

The grocery store here (Hannaford) carries their brand of shrimps packed according to whether they are cooked or not, and according to size. I usually like to get the one labeled "Jumbo E-Z Peel." These shrmps are already deveined. I do not like the cooked ones, or the ones without shell, because for me, the uncooked ones have more flavor. I like those with shell for purposes of flavoring the broth or sauce, although I usually remove the shell before cooking the shrimp, then I just put in a small strainer the shells so I can dip them in the boiling broth (if applicable to the dish I am cooking).

Ingredients:
1 tbsp butter
2 cloves of garlic, minced
1 small can of sliced button mushrooms, drained (optional)
1 pack (1 lb) shrimps

For the sauce, mix well:
1 tbsp cornstarch
1/4 cup tomato ketchup
2 tbsp soy sauce
1/2 cup water
2 tbsp sugar (or to taste)
1/2 tsp salt (or to taste)
1/4 tsp pepper (or to taste)

Instructions:

Melt the butter in medium heat, then saute the garlic, followed by the mushrooms if using, then the shrimps.

As soon as the shrimps start turning pink, add the sauce mix and cook further until sauce thickens or the shrimps are completely cooked, stirring frequently. Adjust the taste with salt and pepper as needed. If it turns out too dry too fast, add small increments of water (by tablespoons).

Spoon onto a dish and serve with hot plain rice.

Monday, April 17, 2006

Chocolate Indulgence Cake


For husband's birthday, I ordered this mix from King Arthur Flour. I realized almost too late that I needed heavy cream to make the choco frosting, so that I had to ask hubby to go to town to get one. Small though it may be, it was sooo rich. Each had only a little piece and that was enough. Hubby brought some leftover to dinner at work the next day.

Pinakbet

Pinakbet is allegedly an Ilocano original. My parents are both Ilocanos, but I admit that this pinakbet by my friend Ana from Davao is the best one I have ever tasted, so that I asked that she share her recipe so I can post it here. With her generosity, here is the recipe:

Ana's Pinakbet from Digos Davao Del Sur
Ingredients:
· 4 tsp oil (Sesame oil is best)
· 1 Large onion diced
· 4 medium tomatoes diced
· 2 tsp garlic minced
· ½ cup diced pork meat
· 1 cup peeled small shrimp
· 1 cup sliced eggplant
· 1 cup cubed squash
· 1 cup sliced okra
· 1 bunch prepared green beans (B A L A T O N G)
· Generous amount of sautéed A L A M A N G N A H I P O N
Procedure:
1. Sauté onion & garlic until aroma is released and slightly brown
2. Add minced pork until slightly browned
3. Add tomatoes and let simmer for about ten minutes or until mush
4. Add eggplant and squash and simmer for ten minutes or until tender
5. Add A L A M A N G N A H I P O N (K A M A Y A N)
6. Add shrimp, okra and green beans until tender
Serve with white rice and vinegar on the side.

Thursday, February 16, 2006

Chocolate Mousse Cake

Recipe courtesy of babyrambutan.

Served this for wedding anniversary (obvious ba?)


Ingredients:

8 oz. semisweet chocolate (I used Trader Joe's
Bittersweet, the hunky block fr.Belgium)
3 oz. unsweetened chocolate (Baker's)
1 cup (2 sticks)unsalted butter
5 large eggs, separated
1/4 cup rum (Bacardi, the goldy one)
1 tsp. vanilla extract
1/3 cup + 1 tsp. sugar
1 & 3/4 cups heavy (whipping) cream, chilled
1 oz. dark chocolate for shaving.

Instructions:
1. Preheat the oven to 350F. Line the bottom of a
9-in. springform pan with a parchment or waxed paper
circle.
2. Melt both choc.s and the butter in the top of a
double boiler placed over simmering water.
3.Transfer the chocolate mixture to a large mixing
bowl and allow it to cool to room temp.
4. Add the egg yolks, rum and vanilla to the
chocolate mixture and whisk briskly until blended, 5
seconds.
5. Beat the egg whites in a medium size mixing bowl
with an electric mixer on medium-high speed until
frothy, about 30 seconds. Gradually add 1/3 cup
sugar and continue beating just until the peaks are
stiff but not dry, about 1 minute more.
6. Add one third of the egg whites to the chocolate
mixture and whisk gently to lighten this batter.
Add the rest of the egg whites and whisk until
blended.
7. To form the cake base, spread one third of the
chocolate mixture evenly in the prepared pan with a
rubber spatula. Refrigerate the rest immediately.
8. Bake the base until it rises and then drops,
18-20 minutes. Cool it in the pan in the
refrigerator, 15 minutes.
9. Meanwhile whip 1 cup of the cream until stiff in
a medium-size mixing bowl with an electric mixer on
medium high speed. Fold the cream into the
remaining chocolate mixture using a rubber spatula.
10. Scoop the chocolate mixture on the cooled base
and smooth the surface with a spatula. Stretch a
piece of plastic wrap over the top of the pan and
place the cake in the freezer overnight.
11. The next morning run a frosting spatula (or thin
knife) and remove the side.
12. Place a large plate upside down on the top of
the cake and flip the cake onto the plate. Remove
the bottom of the pan and the paper. Then flip the
cake right side up onto a second large plate.
13. Beat the remaining 3/4 cup of cream with 1 tsp
sugar in a mixing bowl with an electric mixer on
medium-high speed unti stiff peaks are formed.
14. Spread half the whipped cream gently over the
top of the mousse cake.*
15. Place the remaining whipped cream in a pastry
bag fitted with a decorative tip. Pipe rosettes of
whipped cream around the top edge of the cake.
16. Shave the dark chocolate over the top of the cake and refrigerate it for 8
hours.
17. Remove the cake from the refrigerator 1 hour
before serving.

Wednesday, February 15, 2006

Ginataang Tilapia with Butternut Squash

This is one of my favorite seafood dishes. It is basically same way I cooked ginataang hito.
Custom Search