Thursday, October 07, 2004

Chicken Empanada

Last Tuesday I attended a Filipina friend's surprise birthday party. It was planned and hosted by her business partner, Janis, an American. Other visitors included relatives of that American, as well as some common friends of theirs. I thought it would be a good opportunity to bring the empanadas, as at our house, it is quite hard to consume even a dozen when it's only me and my sons who would eat red meat with veggies as fillings for rolls and pies. And since empanada is very Filipino (I presume), this is one good way to introduce these to the non-Filipino guests there. If they would be as fussy as my husband, at least I would have several Filipina friends who would enjoy that rare baked treat.

(With the few Filipinas that I have met, very seldom do they experiment with baking, as working with dough is not a popular thing in Filipino households for the mere fact that only a few can afford a stove with an oven. So that in the Philippines, baking is most often done by bakers using big ovens and handling massive doughs which often requires machines, and they have mastered working with yeast and quick breads and cakes. The busy mother would find it more practical to just buy the perfectly baked goods from a nearby bakery or mall on her way home from the office. That meant less hassles and less expenditure for the mother, more profit for the big bakeshops.)

After the Americans have tried the chicken empanada, they wanted the recipe! I gave them my blog address instead, to make teaching easier. Hence, my haste in posting this one. Then Janis had an idea to push through with her catering business plan, seeing that our combined efforts would be able to feed a group of 20-30 people. She and the other Americans can prepare the American dishes, our Burmese friend can prepare Oriental dishes like Lo Mein and Fried Rice and be the bartender, my friend Ana can prepare the cakes (she has mastered that art!), and I will bake the rolls and pies! We were all quite enthusiastic about it, because it will provide income opportunities for stay-at-home moms like us. Realistically speaking, it was a wishful thinking; we live so far apart that this would be impossible to do.


The original recipe shared to me by drstel used the following as filling:

2 cloves garlic, chopped fine
1 medium o yellow onion, diced
2 1/2 lbs coarsely chopped chicken, preferably dark meat
1/2 cup cream of asparagus soup
2 diced medium potatoes
1 diced carrot

I had to make adjustments to that because I could not just go out to buy the cream of asparagus. The short notice for the party left me with very little time to include that in my list. So I thought, since the leftover meat from roasted chicken already was packed with flavors, it might not hurt to miss on the cream of asparagus, and the gravy made from the pan juices were also yummy enough and would provide a good cohesive force. The result was very good.

Ingredients:

Dough:
2 cups flour
1/2 cup shortening (stel forgot to include that when I copied; I just looked at other recipes)
1/2 cup sugar
1/4 tsp baking powder
1 tsp salt

ice water (enough to make a cohesive ball)

Filling:
I used leftover chicken meat from roasted chicken (or sautee 1/2 lb chicken meat with 2 cloves garlic and 1 onion, diced), plus
2 medium potatoes, diced
1 carrot, diced
pan juices (1 cup) (substitute:broth)
2 tbsp chicken fat plus 2 tbsp flour(In the absence of broth, may use cream of asparagus and don't use fat and flour any more)

Instructions:
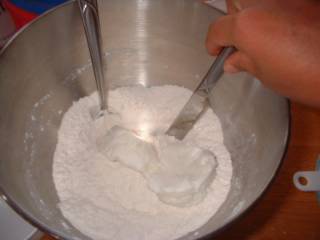
I mixed all dry ingredients together. Using a knife and a spoon, I cut the shortening into the flour mixture (by "cutting," flour coats the sides of the pieces of the fat, until the pieces are smaller, all coated by flour). - Update as of 3/12/09: I now just use my hands to do this. I also use my homemade pork lard.
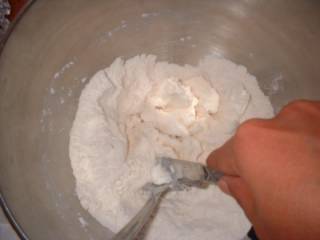

Some use a pastry blender or two knives. Anything you can think of to do the job will be good enough.

Stop when the texture is crumbly and mealy, like cornmeal.
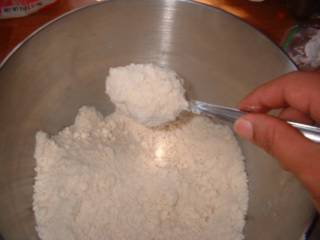


Teaspoon by teaspoon, add ice water (water in a pitcher with lots of ice swimming) while fluffing with a fork. After about 3- 5 teaspoons, check if the dough will form a ball. Add some more if it cannot stay cohesive yet. Use the smallest amount possible. Chill in the fridge.

(Note: This recipe will make about a dozen empanadas. The filling that I made could be used for 2 dozens empanada, but I used a different dough, a roll recipe, for that other dozen, which I prepared the next day. You may want to double this dough recipe or lessen the filling to suit your needs. I don't suggest freezing the excess filling, because frozen cooked potatoes taste awful.)

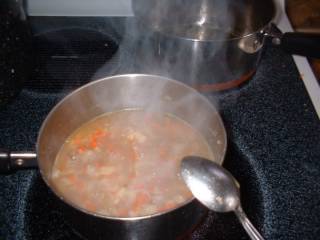
Remember my baked/roasted chicken? I chopped the leftover red meat, skin, gizzard, and heart, which amounted to about 2 cups packed. Then I got half of the pan juices (the other half I used for gravy to make sandwiches the next day), reheated it, then added cubed (half-inch cubes) of 2 medium potatoes and a carrot to cook until tender.
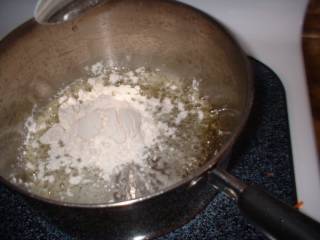

In a smaller saucepan, I heated 2 tbsp of chicken fat (the fat that formed on top of the pan juices which I transferred to another jar), then blended it with 2 tbsp flour to make a paste. (I got this idea from the Creamed Beans from bingbing, where she used butter and flour then milk and spices to make a creamy base for beans. I thought, when fluid like broth is added, then something like "cream of [broth flavor]" is made, especially upon addition of milk or cream).
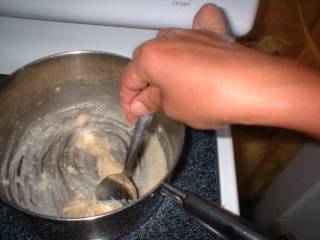


I added the chopped meat to the simmering veggies to heat through. I then adjust the taste by adding sugar, salt and pepper as needed. This is one good way to use leftover meat (from roast chicken, ham, roast beef, etc. Chopped raisins may be added, too.)

If you don't have any leftover meat, just sautee chopped 2 cloves of garlic and
1 medium onions, add chicken pieces to brown then simmer for 10 minutes then chop. Put back into the pan and sautee with diced potatoes and carrots and chopped raisins then add the cream of asparagus (or whatever cream you want to use. Asparagus goes very well with chicken.) and simmer for another 10 minutes.

When chicken filling has cooled, you can then start working on the empanada itself. Form a piece of the chilled dough into a ball the size of pingpong. Sandwich this in between sheets of plastic (here I greased the plastic with shortening, but later I found out that sprinkling with flour is better). Maneuvering is made easier by using plastic.
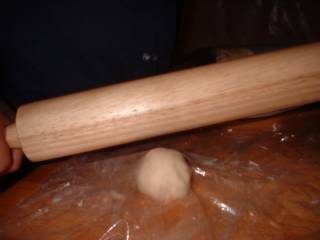


Starting from the middle, work toward the sides on all directions to make a disk about 5-6 inches diameter. UPDATE: 3/12/09 - A more energy- and time-saver method would be to roll out flat a big piece then cut out using a bowl or an empanada dough press.

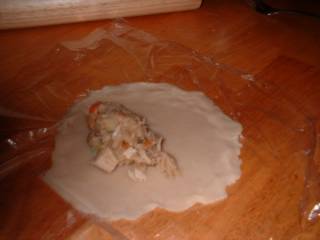
Peel off the plastic,


place about a tablespoonful of filling on half of the disk,

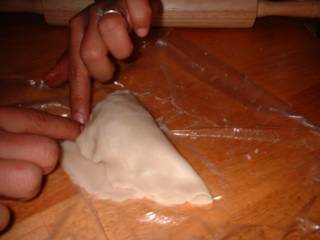
Fold over the other half of the disk by flipping the plastic and peel it off,
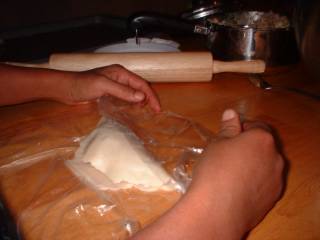


By small sections, fold the lower crust over the top (fluting?). You may press with fork tines to decorate and seal further). UPDATE as of 3/12/09: When using the dough press, if your dough is too floury to seal, brush the edges with eggwash then seal.

Place on greased baking sheet. Cover with the greased/floured plastic until ready to bake. When baking, pre-heat oven to 400 deg F then prepare 1 egg slightly beaten and mixed with 1 tbsp sugar plus some cream (around 1 tsp). Mix together. (or you may use 1 egg plus 1 tbsp water = eggwash. I just used the egg-sugar combination because that was what was called for in a recipe for holiday dinner rolls that I used for my excess filling).
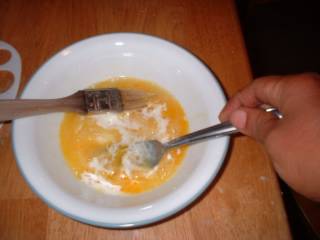
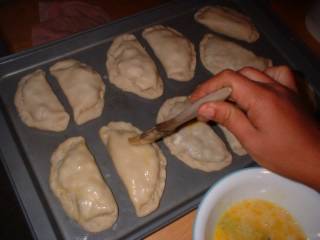

Use this to coat the empanada before baking.

Pierce with a fork to create vents through which stem may escape during baking. (if you use different fillings, you may use the orientation of the fork marks to differentiate - e.g. horizontal for pure breast meat without veggies, vertical for the rest). Without vents, the crust may puff and create dead space inside, creating the impression that the filling was not enough ("Nagtitipid siguro!")
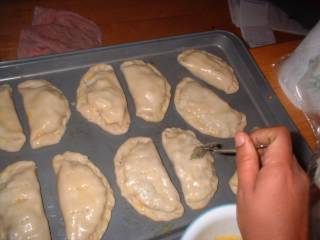
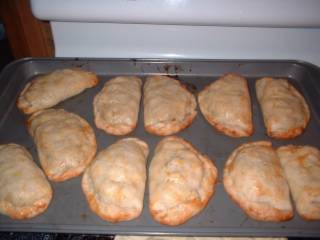

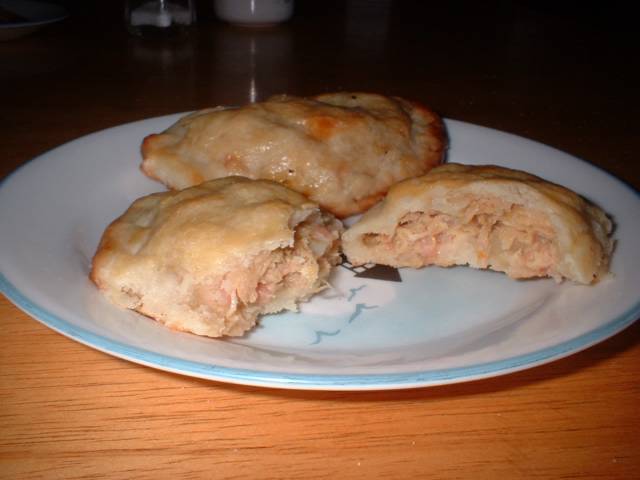
Bake for 20 minutes (or until golden brown; the filling is cooked already anyway), then cool on a wire rack for at least 2 minutes before serving (filling will be piping hot!)
Posted by Hello


UPDATE: 08-09-09
Para kay jayneh na nag-request ng Tagalog translation:
"Sangkap:

Dough:
2 tasang harina
1/2 tasang purico (puting mantekilya; vegetable lard. )
1/2 tasang asukal
1/4 kutsaritang baking powder
1 kutsaritang asin
ice water (tama lang para makabuo ng bola ng dough)

Palaman:
Gumamit ako ng natirang baked chicken na mga 2 tasa ang dami (o kaya ay maggisa 1/2 lb manok sa 2 ipin ng bawang at 1 sibuyas, tinadtad)
2 medium patatas, diced
1 carrot, diced
tinadtad na raisins (1/4 tasa)
pan juices (1 cup; eto yung sabaw sa baked chicken) (pwede gumamit ng chicken broth)
2 kutsarang mantika ng manok galing sa sabaw ng baked chicken or gayatin ang balat ng pino at igisa hanggang magmantika;
2 kutsarang harina
(Kung walang broth, gumamit ng Campbell's cream of asparagus at hwag na gumamit ng taba ng manok na hinaluan ng harina)

Paraan sa paggawa ng dough:
Paghaluin ang harina, asukal, baking powder, asin (eto ang dry ingredients. Gamit ang mga kamay, ihalong maigi ang purico sa dry ingredients. Pag namumuo na ito, unti-unti idagdag ang ice water habang hinahalo ng tinidor. Pag nakapaghalo na ng mga 3-5 kutsaritang ice water, subukan kung makakabuo na ng bola. Dagdagan ng ice water kung hindi pa. Kung nakakabuo na, tama na yung ice water. Balutin ng plastic at ilagay sa refrigerator.

NOTE: Ang recipe ko sa dough ay tama para sa 12 pirasong empanada. Yung recipe ng palaman ay makakagawa ng 24. Pwede mo doblehin yung dough.

Paraan sa paggawa ng palaman:

Pakuluin ang patatas at carrots sa chicken broth hanggang lumambot (wala pang 10 minuto ito; hwag i-overcook dahil pangit naman kagatin pag masyadong malambot at baka madurog lang). Ihalo ang tinadtad na manok hanggang kumulo. Isantabi muna ito.

Sa maliit na saucepan o kaldero, pagmantikain ang balat ng manok (or kunin ang mantika galing sa pinagsabawan ng manok); sa katamtamang init, ihalo ang 2 kutsarang harina at haluin hanggang maging parang paste (roux ang tawag dito). Idagdag ang pinakuluang patatas, carrots, manok at haluing maigi hanggang maging malapot. Ayusin ang lasa sa pagdagdag ng asin, paminta, at asukal. Hayaang lumamig.

(Kung walang tirang manok, maggisa ng 2 ipin ng bawang at 1 medium sibuyas, idagdag ang manok at hayaang mag-brown, takpan at hinaan ang apoy, lutin ng 10 minuto. Tadtarin ang manok, ibalik sa pan at igisa pati ang tinadtad na carrots at patatas. Idagdag ang cream of asparagus o kung anong cream ang gusto mong ihalo, gaya ng cream of chicken. Magdagdag ng konting tubig kung masyadong tuyo ito. Pakuluin ng 10 minuto o hanggang lumambot ang patatas at carrots. Palamigin. )

Pag malamig na ang palaman, ilabas ang dough at i-flat gamit ang rolling pin, umpisahan sa gitna palabas. Mas madali kung merong wax paper or plastic sa ilalim at ibabaw ng dough. Wisikan ng harina kung masyadong madikit.
Gumamit ng bowl o empanada dough press para makahugis ng bilog. Lagyan ng 1 kutsarang palaman sa gitna. Magbati ng isang itlog at ibrush ang itlog sa gilig para magselyo ang dough pagkalagay ng palaman. pwede gamitan ng tinidor para disenyo sa gilid.

Painitin ang oven sa 400 deg F.

Pahiran ng purico ang baking sheet ("plantsa") at ilagay ang mga empanada. Pahiran ng binating itlog (egg wash - pwedeng haluan ng 1 kutsarang gatas at 1 kutsarang asukal) ang ibabaw. Tusuk-tusukin ng tinidor ang ibabaw para sumingaw ang steam at hindi lolobo. I-bake ng 20 minutes o hanggang mag-golden brown ang ibabaw.
"

Tuesday, October 05, 2004

Baked Chicken (Roast Chicken)

(By this posting, it was my second time to bake chicken using this method and it gave the same perfect result as the first. But this has been my 4th trial-and-error in baked chicken. I finally found this to be satisfying not only to me but also my hubby's. Needless to say my children loved it.)

Ingredients:
roaster chicken (~4 lbs), pre-brined
a whole garlic
1 tsp dried rosemary
3 big onions
water

Instructions:

Separate and pierce with a knife the cloves of a whole garlic. Roast in the oven (broil on high for about 5 minutes or until skins crack open). Peel the garlic cloves, sprinkle with 1 tsp of dried rosemary then mash together to make a paste.


Here is now the garlic-rosemary paste, ready for rubbing under and onto the chicken skin and cavity. I use this Hannaford roaster chicken (about 4 lbs, ~$6.++), which is pre-brined.


Using a blunt knife or spatula (which will not pierce the skin), separate the skin (I use my bandage scissors to cut through the connective tissues and probe to loosen the skin from the underlying muscles). Rub the paste underneath the skin on the thighs, wings, and back, then on the skin all over, and lastly in the cavity lining (I avoid rubbing under the skin over the breast, as my hubby prefers that part, and he might find the flavors too strong).


Then I bundle up several leaves of lemongrass (tanglad) tied with twine and insert it into the cavity. If I have some lemons previously used with the rind reserved and refrigerated, I chuck the rinds into the cavity as well (it gives a hint of sweetness to the juice, plus the lemon flavor). Then I insert the innards (for flavoring the gravy afterwards).


Then I set the chicken breast side up on a bed of onions cut in chunks, with water in the pan about half an inch high. I cover with foil and bake at 350 for the first 30 minutes.


After 30 minutes, I remove the foil, baste the chicken using the fluid in the pan (which already has a bit of oil by this time), then bake for 1 hour, then baste again and bake for a further 1 hour. I cover again with the foil to avoid drying up then add chunks of potatoes (pre-cooked in the microwave; my hubby likes potatoes cooked the traditional way rather than in microwave) and carrots and cook for another 30 minutes [Please see update below]. (By this time the built-in indicator of doneness has popped up).


Total cooking time: 3 hours for this 4+-pounder chicken, with the foil cover during the first and last 30 minutes. This is now the finished product. So yummy and juicy, with crispy browned skin. My hubby eats it with eyes closed, savoring every bite, and always requesting that I prepare sandwich made from leftover breast the next day for his lunchpack. I usually don't prepare gravy during this time, because the meat itself has been permeated by the flavors of the spices (lemongrass, garlic-rosemary). I usually serve this with mashed potatoes and dill pickles. (The round white button on the breast is the indicator.)


UPDATE as of 2/28/09: Now I take out the pan and replace it with a small jelly roll pan so while the chicken bakes for the last 30 minutes with the foil on, I prepare the gravy. To make the gravy, I use a fat separator to remove most of the fat, the proceed with making the gravy as described below.

Boil the pan juices in a small saucepan, (optional: mash the liver), adjust the taste accordingly (I usually add some more pepper, worcestershire sauce and salt). Mix 2 tbsp flour with 1/2 cup cold water, then gradually pour into the boiling liquid while consistently stirring until the desired consistency is reached.

Once the final 30 minutes of baking time is up, remove chicken from the oven. Place chicken on a platter covered with foil and let rest while you finalize the gravy.


Place jelly roll pan with drippings on stove top and add 1/4 cup sherry or cooking wine. Scrape the browned bits on the pan while you boil with the wine. When the juices are dark brown and all bits are scraped off, pour this into the gravy. Mix thoroughly. If the gravy turns too thin, boil some more and add flour-water mixture again. Add more salt and pepper to taste as necessary.

For leftover, we like using the breast meat for sandwiches the next day, either cold with addition of mayonnaise, salt and pepper, or hot using leftover gravy as open sandwiches.

Place into the pan cubed slices of the breast meat to heat through, and put on a toast with butter (if desired) for a light supper. (My hubby's sandwich for lunch at work is just sliced breast meat with mayonnaise on top. He said he liked it that way for cold chicken. But he liked the sandwich with gravy for heated chicken meat.) The red meat I gathered and chopped coarsely for chicken empanada using drstel's recipe.


Potatoes

Potatoes are planted using "eyes". Each potato has about 5 or more eyes that will each give rise to a plant. One plant will give, in return, 5 to 10 potatoes depending on the size. The container that you see here in this photo has potatoes which I got from 5 plants. Hence, this is about the amount of potatoes you harvest from a single potato, or maybe more (if you have more than 5 eyes in one potato). And as I am holding in this photo, this is the biggest potato I have ever seen in my entire life (even my Mom-in-law said it was the biggest she has seen so far, too!). I got two of them about this size (about 7 or more inches long, 3 inches thick and 5-6 inches wide), and I got only one thing in mind to do with them:


FRENCH FRIES! (This photo shows a batch of fries that I cooked using my very small saucepan. I could not take a photo of more fries as my kids and hubby would eat each batch in seconds! )


This afternoon we dug up all my potatoes as we are expecting a temperature of 20 deg F tonight (below freezing!). We came up with a total of 4 sacks, enough to last through the winter!


Potatoes are so versatile and are a constant item in my pantry. I realized only now that here, it is more practical and cheaper to rely on potatoes for carbohydrate source rather than rice, considering the relative ease of planting and harvesting them! So I am trying to get my sons and myself used to not having rice everyday. We probably have rice once or twice a week. It's cheaper that way, without compromising nutrition.


Some potato facts can be found here for those interested or will have the need to see guidelines in planting it.


Sweet Corn

Sweet Corn


Recently we have had our fill of sweet corn...at least for 3 days, because the racoons (we suspect) raided our garden for these sweet treats!


During that short period of time we enjoyed sweet corn the way we wanted it best - steamed! According to MS Living Mag, the right way to prepare steamed sweet corn is: Boil the water, run to the garden and pick the corns, husk them, steam and eat! It said sweet corn, as soon as picked from the plant, converts its sugar into starch even if refrigerated, so that it is best to cook them right away. Of course we eat this with butter and salt.


Other way I thought of enjoying it was making a soup out of some pieces of leftover cuts of corned beef (which I cooked like nilagang baka). And of course, in my tinolang manok with pepper leaves.


Bad thing is, due to unforeseen circumstances whereby those racoons depleted our corns, I forgot to think of other ways to enjoy corns. Looking back now, I regret not having cooked maja blanca (I remember Bernice cooking that one time)...


Even the corns given by my in-laws I was not able to cook into maja! What I did not fail to remember to do with it was to make corn muffins style Sassy's, using the pancake batter. Posted by Hello


Saturday, October 02, 2004

Facts about Eggs

The information in this fact sheet answers many of the questions consumers frequently ask about the quality and wholesomeness of eggs and egg-rich foods (such as quiche and baked custard).


Click on the title to get to the fact sheet.


(Note: I am compiling these articles in my blog for easy reference for my own use. Posting them here is an attempt to share the info with my friends. )

Calories and Weight

This publication is a quick reference guide to caloric values of common foods (in a tabular form). It also includes information on maintaining a healthy weight (with a BMI table) and eating for better health.


Click on the title to get to the page. A PDF version is available if you want to print.

Tuesday, September 28, 2004

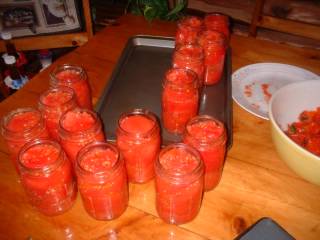
Canning TOMATOES - WHOLE, HALVED OR QUARTERED (Packed in Own Juice)

The method presented here deviates from what is in the canning resource links, where they use citric acid or lemon juice to increase the acidity and decrease the likelihood of botulism. Also, it eliminates the bubble removal step. My mom-in-law had 40 years to defend her method, saying that just in ensuring the cleanliness of the tomatoes, the materials, and the hands, and thereby minimizing the contamination, the risks of food poisoning are prevented. And I agree with that. It is essentially the same thing you should do in treating wounds to avoid infection.

Ingredients:

Tomatoes (I used 8-10 of these medium-sized tomatoes per quart jar)

Instructions:

Before starting with the produce, always wash the jars first with hot soapy water, then fill to the brim with boiling water. Empty just before filling with the produce to be canned. Some recipes call for the jars to be sterilized. Procedure for such sterilization techniques are also provided for in the canning links. During the whole procedure, refrain from touching anything aside from the produce and canning materials. Whenever you have to touch other things (e.g. camera, canning book, your hair or oily face, etc) or if you have to go to the bathroom, always wash your hands again before going back to canning.

1. Wash tomatoes. Dip in boiling water (blanch) for 30 to 60 seconds or until skins split, then remove.

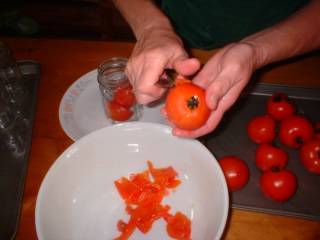
2. Slip off skins; trim away any green areas; cut out core. Leave tomatoes whole or cut into halves or quarters, depending on size.


3. Pack tomatoes into hot jars until space between tomatoes fills with juice, leaving 1/2-inch headspace. (Don't be afraid to push the tomatoes downward; just make sure your hands are clean.)

4. Wipe jar rim clean with clean damp cloth or paper towel. Place lid on jar with sealing compound next to glass. Screw band down evenly and firmly until a point of resistance is met - fingertip tight.


5. Process pints and quarts 1 hour and 25 minutes in a boiling-water canner. (That's as per Canning Resources' procedure. Start timing when the water has boiled vigorously. You can lower the heat as long as water continuously boils vigorously.) Avoid opening the canner while processing; otherwise, you lose heat everytime.

(My Mom only processes her pints 30 minutes and the quarts 40 minutes. Never had any problems with that shorter time. We figure it must be that she properly observes sterile technique in canning.)


6. Upon processing. carefully lift the jars out of the canner one by one, avoiding banging the jars with one another (which can crack the very hot jars).

7. Place the hot jars on a towel at least 1 inch apart.


8. Cover and LEAVE ALONE for at least 3 hours, after which you can check for proper seal. (Those which did not seal will have to have their lids replaced then reprocessed, or store in the fridge and use within 2 weeks. You may also opt to freeze, then thaw before use for cooking.) Don't move them for at least 12 hours after processing.

9. After 12 hours or so, label them ("Tomatoes - whole, packed in own juice, [date]") then store in a cool and dark place and use within one year.


These tomatoes can be used for recipes calling for stewed tomatoes. My in-laws and hubby always called them stewed tomatoes, although now, after educating myself about canning, I realized they are not so. We have used these for lasagna recipes, for caldereta, fish sarciado, escabeche, and other yummy tomato-based dishes. I have also used it for making sweet-and-sour sauce, substituting it for water and tomato paste called for. When I have leftover mac&cheese, I reheat it with half a jar of these tomatoes, then add leftover sauteed ground beef. It sure is advantageous and cheaper to have access to these tomatoes from my pantry rather than having to go to the grocery store once a week to grab 5-10 fully ripe tomatoes for once- to twice-weekly tomato-based dishes. The best thing is, I know how the tomatoes were raised, how clean they were processed, and how healthy my canned goods are.
Custom Search