Thursday, September 07, 2006

Potato Dill Salad

When I was still in PI, I used to have potato salad with shreds of chicken breast added to the potatoes, spiced with chopped onions, and the taste adjusted with salt and pepper.

Now I have embraced what my husband's family of origin traditionally prepares. Potato dill salad is usually served on July 4th, and is now commonly found in our menu during summer days when it is too hot to have a hot meal, especially after harvesting our own potatoes that we planted.

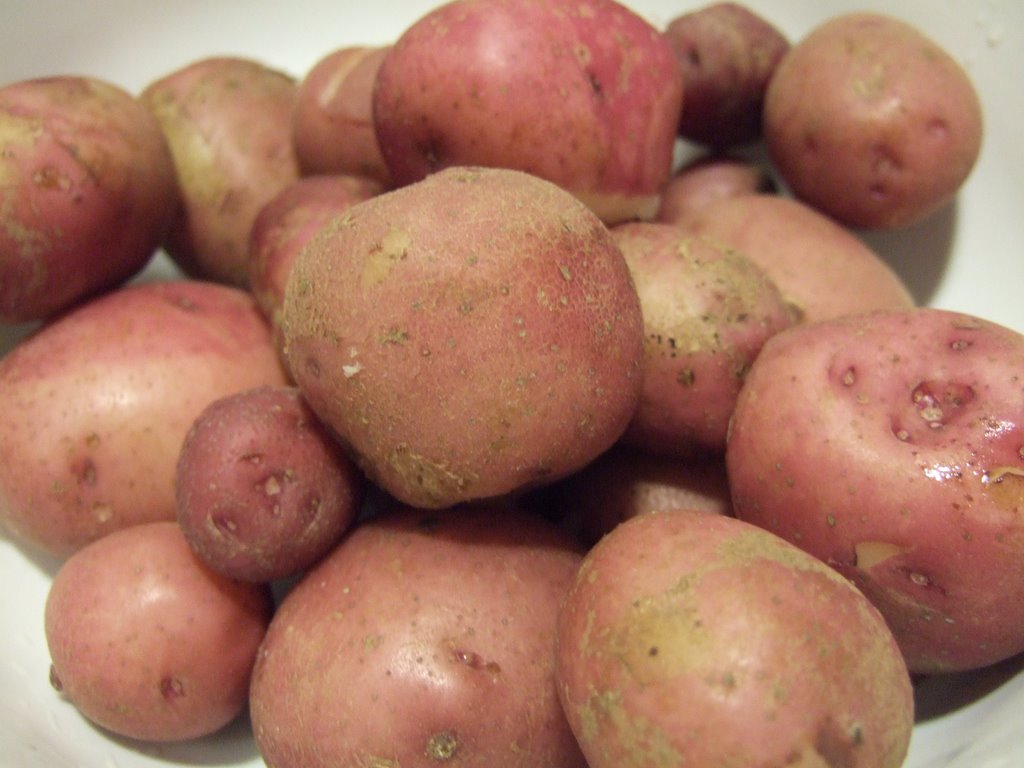
The red potatoes are usually the first (we also plant Russett(?) potatoes which we harvest later in the fall). They are smaller but more compact and yummy! For me, they are the best to use for potato salads as they do not easily crumble, and they retain their shape better when stirred. They are also very good for mashed potatoes, but they don't create fluffy mashed potatoes -- just sticky and creamy, like that served in KFC here (as commented by my older son's friend once).

This potato salad is not the same as the potato salad I used to have back in PI, where we add shreds of boiled chicken breasts, chopped onions, mayonnaise, salt and pepper to the chunks of boiled potatoes.

Here in Maine I had to prepare it the way my husband's family would eat it; otherwise, I will end up eating the salad by myself. Anyhow, I have developed a taste for the dill, which gives the distinct flavor of this recipe. When I first made it, I cut the potatoes in bigger chunks, but hubby requested to make them smaller next time, to enhance absorption of the flavors.

Here's the recipe as passed on by my MIL:

Ingredients:

10 red potatoes, boiled with some salt, peeled and sliced (approximately 2x1 inch cubes)
1/2 cup mayonnaise
1 tbsp grated onion
1 tsp dill
salt and pepper to taste
sliced hard-boiled eggs as topping

I added a sprinkle of lemon.

Instructions:
Boil the potatoes in water enough to submerge them, add some salt and boil for about 30 minutes or until done (check with fork). Once done, drain and peel as soon as cool enough to handle. (I have tried putting them in the fridge prior to peeling, and it was not a good idea! They were harder to peel that way!).
Add all other ingredients. Taste. Adjust ingredients according to your taste preference.
Chill for at least 3 hours. Top with sliced eggs.

Hubby wants it chilled overnight for his work lunch, and wants it even more when 3 days have passed. It will suffice for lunch, but for a heavy supper, I serve it usually with salad greens and grilled chicken (my Wish-Bone Robusto-marinated recipe).



Posted by Picasa

Monday, September 04, 2006

Manang KusiNARS na po ako!

Ingredients:
Two months of no job (and no $$)
Saunders Comprehensive Review for RN Exam
Saunders Strategies for Success
Saunders Q&A
Money for registration fees (state board and PV NCLEX)
Prayers from my friends

How-to's:
While waiting for ATT from the state board where the application was filed, I was studying part-time (at least two hours a day) aside from working regularly as a home-based MT/QA.

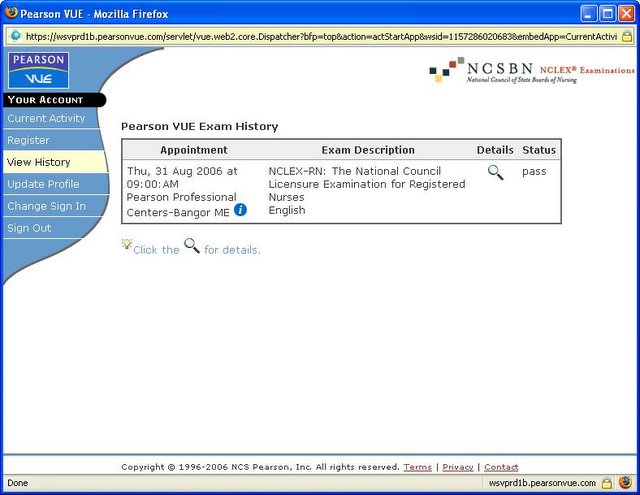
As soon as I got my approval to sit for NCLEX, I registered with Pearson-Vue for my NCLEX then notified my present employer, that I was going to take a two-month vacation (that's how flexible homebased MT is).
As soon as I got my ATT, I scheduled my test online. I then studied the books and CD practice questions religiously, only standing up every two hours for a short break.
On the last day prior to my exam, I did not peep into the reviewers. I just cleaned the house, especially the fridge. Then I slept early (10:00 p.m.)
I left the next day (Thursday) 1-1/2 hours prior to my exam. My good friend Ana drove me to the place and waited patiently (and praying) for me.
I then relaxed and prepared for my son's birthday party, enjoyed the company of guests, slept through Saturday night, then checked online (complete with tachycardia and anxiety) for the unofficial result on Sunday morning.
I will wait for the official certificate then seek endorsement (from Vermont to Maine) then serve this to potential employers.

I hope I will enjoy the new career!

Thanks for those who prayed!!!

To those who have tried and tested methods on how to proceed from here, I welcome your input! TIA!

I have not completely closed the possibility of aiming for USMLE sometime in the future, but I am also considering the NP path.

Wednesday, August 30, 2006

Pork Menudo

This is a reposting from my old kusina.

I have cooked this only twice this time, because I only cook it when . craving hits me. Why? 1 - Hubby is not a big fan of pork. 2 - Hubby does not really care for cubed meat. 3 - Hubby usually leaves out the veggies save for the potatoes. 4 - Kids and hubby leave out the liver (I think they are only grossed out by the thought, but beef liver tastes pretty good compared to pork liver, and especially better than chicken liver. I can only tolerate chicken liver when mashed to thicken sauces and gravy.)

But, I LOVE MENUDO.

So I cook it despite the above-mentioned reasons, then freeze the rest in a foil, then whenever craving kicks in, I reheat the pack in the oven toaster at 450 deg F for about 20 minutes. I can re-freeze the rest and repeat the procedure whenever I want menudo. So if you want, you can do the same, but make sure that you freeze within 2 hours of cooking/reheating.

I marinate my pork pieces overnight prior to cooking, because that was the tip given to me by my sister's MIL (a Kapampangan - I bow to the Kapampangans for most dishes I love to eat during fiesta, of which menudo is one) when I asked her during a fiesta how she made her menudo so tasty. She used soy sauce-kalamansi combi. I made mine now using lemon instead of kalamansi.

My recipe:

INGREDIENTS:
1 pound lean pork cut in cubes, marinated overnight in
juice of 1/2 lemon and
1/4 cup soy sauce

2 tbsp oil
1 clove of garlic, minced
1 medium onion, minced
3 medium tomatoes, cubed (the more, the better)
1/2 bell pepper (whatever color; tip on what to do with the rest found below)
1/4 cup raisins
2 medium potatoes, cubed
1 carrot, cubed
water as needed

1/2 cup green peas

a handful of cubed beef liver (I have cut into cubes one whole pack of beef liver and placed them in separate plastics by the handful, for such cooking purposes as this)
1 chicken liver, mashed or finely chopped
two hotdogs cut into pieces equivalent in size to the pork pieces
salt and pepper to taste

PROCEDURE:
Heat oil. Sautee garlic for 10 seconds then the onions until transluscent. Add the tomatoes and sautee until they caramelize. Add the pork and stir until browned. Lower the heat and cook covered for 5 minutes.

Add the bell peppers, raisins, potatoes, and carrots, stir and cook covered in another 10 minutes. Add water in increments of 1/8 cup to keep it from drying, if needed. Meanwhile, you can chop the livers and hotdogs while waiting.

Check for doneness of potatoes and carrots. When almost done, add livers. Stir to thicken sauce. You may add more water depending on the consistency you want. Add the hotdogs and let simmer for 2 minutes. Adjust taste with salt and pepper.

Serve with hot plain rice and enjoy!


Tip on storing bell peppers:

One of our problems when buying bell peppers is that we often want two colors at least. I sometimes buy the 3-in-1 pack of yellow, red, and orange bells. But I usually just slice 1/4 of each pepper then use the rest at some point in time later. What I do is slice them longitudinally, layer them on a baking pan, freeze for 30 minutes, then pack into freezer bags. When I need them again, I just shake or bang against the countertop to loosen some pieces and grab some, then return to the freezer the rest. I do the same with fresh ginger (I can't use all in arroz caldo or tinola or chicken curry). Posted by Picasa

Sunday, August 27, 2006

Pecan Crusted Chicken with Honey Mustard Sauce

This was what we had today for dinner.


Since I wanted to make use of pecans and honey that my SIL gave me, I made a search for recipes using both/either of them.

Also, since I have some mustard seeds left over from making my favorite cucumber pickles, bread and butter pickles, I searched for a recipe for the honey mustard sauce.

I first made my honey mustard sauce two days ago using this recipe for Basic Coarse Mustard Recipe from cdkitchen.com, with the help of the good old blender and a pint-sized Ball jar (yes, it fits perfectly, plus it had the advantage of storing the prepared mustard in the jar itself). If not for my desire to use my honey supply, and the mustard seeds left over from my pickling, I could have just bought Dijon mustard and followed the procedure for making honey mustard sauce as directed in the cdkitchen.com's Pecan Crusted Chicken recipe. Or, maybe it is available in grocery stores (it definitely is served in KFC, McDonald's or Friendly's.)

Basic Coarse Mustard

Ingredients:
1/3 cup mustard seed
1/3 cup cider vinegar
1 clove garlic -- halved
3 tablespoons water
3 tablespoons liquid honey
1/4 teaspoon salt
1 pinch ground cinnamon

Directions:

Combine mustard seeds, vinegar and garlic in a small bowl. Cover and refrigerate for 36 hours.

Discard garlic. Process mixture in a food processor with water until coarse consistency. Stir in honey, salt and cinnamon.

Refrigerate in tightly sealed containers.

Among the variations, I tried

Dijonnaise Mustard: Add 1/3 cup mayonnaise

It was very very spicy. I stored that in the fridge until I was ready to make my honey mustard sauce for the chicken.

I came up today with this menu for our dinner:
Pecan Crusted Chicken with Honey Mustard Sauce
Honey Whole Wheat Loaf
Roasted Veggies and Potatoes

I started the bread in the bread machine at around 3:00 p.m. , then made my final honey mustard sauce by mixing
1/2 cup mayonnaise
2 tbsp honey
2 tsp Dijonnaise honey mustard (that I prepared)

I tasted that and adjusted the amounts until it was good to my taste (not too spicy).

I rested for about 2 hours, before preparing the potatoes/veggies and chicken. And here is the recipe for the

Honey Whole Wheat Loaf

Makes One (1-1/2 pound) Loaf

1/2 cup milk
1/4 cup water
3 tablespoons honey
2 tablespoons butter or margarine
1 large egg
1 teaspoon salt
1-1/2 cups bread flour
1 cup whole wheat flour
2 teaspoons FLEISCHMANN'S Bread Machine Yeast

Directions
Add ingredients to bread machine pan in the order suggested by manufacturer. (Mine says to put all (room temperature) liquid ingredients first topped by the dry ingredients.) Select basic/white bread cycle; medium/normal color setting.

When cycle is complete, remove from pan; cool on wire rack.

I preheated the oven to 375 deg F. I washed thoroughly (with a brush) and cut 5 medium red potatoes into quarters and placed them in a bowl, then poured about 2 tbsp of olive oil and mixed to coat evenly, then sprinkled with 1/2 packet of Italian Dressing Mix. I then placed the potatoes on one side of the baking pan (would use the other half for the rest of the veggies) in the oven and let them cook while I prepared the chicken strips.

For Pecan Crusted Chicken, I revised the original recipe such that I used one packet of Italian Dressing Mix (available at Hannaford) instead of measuring the different spices called for. So, my final ingredients were:

dip:
2 eggs (room temp)
1/4 cup butter (melted and cooled to room temp)

coating:
1 cup pecans, finely chopped using chopper
1/2 cup plain breadcrumbs (I used my own)
1 packet Italian Dressing mix

2.5 pounds chicken breast cut into strips

The chicken breast strips were dipped first then coated. I arranged them on a pan lined with parchment paper. I then placed them on the higher rack in the oven (and I placed the potatoes below). I set the timer at 20 minutes (only because my chicken strips were still a bit frozen).

Meanwhile, I got half of summer squash and half of small zucchini, and cut them into wedges same size as those of potatoes, coated with the same (olive oil and 1/2 packet of Italian dressing). I placed them alongside the potatoes, and let cooke for another 5 minutes. Then I set the temp to 400 for the last 5 minutes to make a good browning on the surface of the potatoes.

Everyone enjoyed the chicken strips. My boys said the honey mustard sauce was more spicy than that in restaurants, and hubby quipped, "because this is made with real honey and real mustard." My older son used it, though, despite it being different from what he was used to. Hubby, daughter and I liked it. Younger son used ketchup. It was a very satisfying hearty and healthy meal!

Hubby's comment: "Your chicken dinner was a success! Everyone enjoyed it!"

Later tonight, as I was posting this actually, he approached me to thank me again for that wonderful meal, and asked if there were enough left over for his lunch tomorrow to take to work. I said I prepared three strips for him, then he asked whether we still had that honey mustard sauce as well, because "that was very good!"

Pecans

This is a (gallon) bag of uncooked pecans, again from my SIL. She must like me so much!

It so happened that I am so fond of pecans.

She has given me pure honey and raw pecans at least twice now, so I think I should expect these gifts to be coming on a regular basis.

That means, I should hunt for recipes using these ingredients.

I plan to make pecan pie later (when we have consumed the peach pie that I made yesterday).

I did use pecans and honey for a recipe I prepared today for supper, the pecan crusted chicken with honey mustard sauce. It was a hit among everyone. Posted by Picasa

Honey


Last year, my SIL gave me honey in it's most raw form...still in honeycomb (see the hexagonal pattern made by these greatest natural architects called bees). She and her husband have just started having it for home-based business. I am lucky to have some form of benefit from it.

Every summer now I look at my garden full of flowers in bloom, surrounded by bees and butterflies and hummingbirds...I eagerly anticipate the honey that I know would follow.

This year, SIL gave me two pints of honey ready to be consumed.

Ah, the goodness of all-natural honey...

Friday, August 18, 2006

BLT Sandwich

Every supper time I am in a quandary, not truly knowing what to prepare that my fussy hubby will eat. If I ask him ahead of time, his usual answer is, "I don't know, honey. I am too full now that I can't think about supper for tomorrow." Won't do me any good to ask him when he is actually hungry for supper (as in 10 minutes before).

So, sometimes I ask him what he wants me to get from the grocery store. Summer is a hard time, because during this season when produce abound and I feel like eating stir-fries or salads, I always worry about what to offer to him (and daughter). My boys will always eat what I serve.

Can you believe I just learned about him liking BLT ("the perfect summer food") this year, our third year together????!!!!

But he does not like tomatoes, so for him, it's BL sandwich.

For me, I like it with onions and cucumbers as well, so it's BOLTC sandwich.

How to prepare:

Cook bacon the usual way and drain on paper towels.

On separate bowls/platters, serve lettuce (there are several bags available in Hannaford ready for consumption right from the bag), sliced fresh and ripe tomatoes, sliced fresh cucumbers, sliced onions (I get these three items from my garden during this time of the year). Also place on the table the mayonnaise, ketchup, and mustard.

Put regular bread or buns on the table. To each his own. Let everyone prepare his own sandwich.

I know this is not the healthiest meal, but it is complete nonetheless. We only use 2-3 strips of bacon per sandwich. One is enough for me, two will do for each of the boys (including the big one). Posted by Picasa

Thursday, August 10, 2006

Pork Siomai

I got this recipe from The Book of Chinese Cooking by Jasper Spencer-Smith.

(Karen also has a post on the basic recipe for siomai here, including the recipe for the wrapper.)

Ingredients:
3/4 pound ground pork
1/4 pound raw shelled shrimp, ground
(Believe me, I used a scale to measure these, but of course, you can approximate.)
1-1/2 tbsp soy sauce
1/2 tbsp Chinese rice wine or dry sherry
1/2 tbsp sesame oil
1/2 tbsp sugar
Dash of pepper
1 egg white
1-1/2 tsbp cornstarch
won-ton skins (I buy Nasoya brand)
green peas or chopped hard-cooked egg yolks for garnish

(Note: I usually buy pork chops then grind them using my Kitchen Aid attachment, since I can't find ground pork for sale here. I grind other ingredients as well, like the shrimp. when making lumpia, I also grind the garlic, onions, and other veggies.)

Procedure (I revised according to how I made it):
To make filling: Mix together ground pork, ground shrimp, soy sauce, rice wine or sherry, sesame oil, sugar, pepper and egg white until mixture is well blended and smoth. Stir in cornstarch. Place in a storage bag and cut one corner big enough for the content to squeeze through. Place about 1 tbsp or so of filling in the middle of wonton skin and gather the skin around the filling. Dip a teaspoon in water and use to smooth the surface of the meat.

Garnish by placing a green pea or chopped egg yolk on top of meat. Repeat with the rest of the wonton/filling. Line a steamer with a damp cloth; steam over high heat 5 minutes or until done. Serve with your fave dip (I use soy sauce/kalamansi juice as a dip. When I was in PI, I used to like it with chili paste.)

My sons love these. Also a good finger food to bring during Pinoy get-togethers.

Tuesday, August 08, 2006

Fried Rice

I do not want to give it any special name. I just want to post here how I usually prepare my fried rice.
Basically, I heat 1-2 tbsp of oil (depending on the amount of leftover rice; I don't want my fried rice to be swimming in oil), then sautee 1-2 cloves of chopped garlic, then add the rice. No salt added. Sometimes my sons would add soy sauce. (I sometimes use bacon drippings, or even use leftover bacon, usually the fatty parts, instead of the vegetable oil.)

But, in times when I have leftover sauce/gravy from such dishes as beef pares, chicken or pork adobo, Korean short beef ribs, or meatloaf, I save that even if it is just 1/4 cup, because I love using them to flavor fried rice.

Then I also always have in my freezer bags of peas, sometimes I have canned slice mushrooms, which I love adding to the fried rice. I also save some leftover scrambled eggs (even bacon if any) from past day's breakfast, and cut them into strips before adding.

If I have chives or leeks or spring onions, I also sprinkle them on top before serving.

When prepared this way, especially if we add bits of sausage or hotdogs, truly we Filipinos can say, "Kanin pa lang, ulam na!"

My sons already know what to do when we have leftovers which they can imagine to be good with fried rice.

Thursday, August 03, 2006

Honey-Ginger Pork Roast

I found this recipe in 1st Traveler's Choice Internet Cookbook. (http://www.virtualcities.com/).

Although hubby is not a big fan of pork, he liked this one! Even stepd liked it. Needless to say, the boys and I loved it as well.


Ingredients
One 5-pound center cut boneless pork loin (I used a 3-pound pork loin)
1 Tablespoon freshly grated ginger root
2 Tablespoons olive oil
2 teaspoons ground ginger
2 teaspoons salt
honey

Procedure
Run knife between fat and meat to form pockets on top of roast. Using a long-bladed knife, insert grated ginger into pockets. In small bowl, mix olive oil, ground ginger, and salt. Place pork in roasting pan and brush with oil, ginger, and salt mixture. Bake at 350 degrees, allowing 30 minutes per pound. About 15 minutes before roast is done, brush meat completely with honey. Allow roast to stand 15 to 20 minutes before slicing. Posted by Picasa

Tuesday, July 18, 2006

Bibingka Cake with a Twang

Imported from my old website...

This is my entry for this month's LP theme "Distinctly Pinoy with a TWANG" hosted by ces.

UPDATE:
This cake was featured in GMA-7's 100% Pinoy for the segment on Fusion Dessert.

Here's the video for the said segment. Notice that the website being read by ChefKC for the recipe is this very same webpagefrom my old website with the photos down below.


Presenting, the BIBINGKA CAKE with a TWANG!


I had been wanting to try to make bibingka and found several recipes for them. While the most traditional would call for live charcoals above and under the batter, which resulted in toasted surface, I wanted a "tamed" version (for the sake of my intended tasters, my husband and in-laws). I found a recipe which seemed promising, and the original recipe can be found here.

When I first made them, I modified the recipe, wanting more of a Filipino taste to it by using 1 cup coconut cream and 1 cup milk instead of the 2 cups of milk called for in the recipe, then I added small squares of sliced white cheese on top during the last 5 minutes of baking. I offered one to one of my Pinay friends (I poured into three 8-inch round pans), and several slices to my MIL. We all loved this plain (as in no frosting) bibingka, although my MIL was intrigued by the cheese (she could not identify it and had to ask me what it was!). I loved the smooth texture albeit its heaviness, and the longer it sat in the fridge (less than 1 week, that is), the better it tasted!

BUT, I wanted to experiment more, hoping to offer some sort of an Americanized bibingka cake that I could offer to guests during my birthday (I try not to offer experiments on Pinoy dishes/foods during birthday celebs of my kids or hubby, as they usually have preferences that I try to stick to). Since I have observed that, in contrast to my inkling towards sponge cakes, my in-laws and hubby prefer the crumbly cake (which, to me, sort of represent a cake that is at least one day old). So for that, I thought of experimenting with the bibingka recipe using the ordinary rice flour instead of the sweet rice flour (I figured it would result to crumbly texture, because that's what I have observed with siopao , puto, and bibingka if made with rice flour as opposed to the ordinary flour.)

So my final recipe for the batter was as below, which I poured into two 9-inch round pans:

Ingredients:
2 cups granulated sugar
1/2 cup (1 stick) butter or margarine
6 eggs
1 cup milk
1 cup premium coconut cream (Thai)
2 teaspoons vanilla extract
3 cup rice flour
2 tablespoons baking powder

Procedure:
Preheat the oven to 350 deg F. Cream the butter and sugar well (around 5 minutes on medium speed). Slow down the speed and add eggs one at a time.


Meanwhile, mix flour and baking powder. Mix the milk and coconut cream. Add this to the egg-cream mixture, alternating with the dry ingredients a little at a time. Add the vanilla and stir. Pour into two 9-inch round pans. Bake immediately for 35-45 minutes (keep checking!)

Since this is a fusion of Filipino and American cuisine, I did not use banana leaves (I do not have them anyway!) nor charcoal, but used the oven instead.


To make it more Americanized, I prepared JMom's

SEVEN MINUTE FROSTING
1-1/2 Cups sugar
1/4 teaspoon cream of tartar
1/8 teaspoon salt
2 egg whites
1/4 cup water
2 tablespoons light corn syrup
2 teaspoons vanilla extract

Mix sugar, cream of tartar, salt, egg whites, and water in a pot or bowl over simmering water. Beat steadily over low heat with an electric hand mixer until the frosting stands in peaks, about 5-7 minutes, no more. (Overcooking will make your frosting brittle upon cooling). Remove from heat and continue to beat until thick enough to spread. Add the vanilla before spreading.

(I asked my stepd to taste the frosting, and her reaction was, "Hey, I know this! This is Fluff!" It indeed tasted like Fluff, only not sticky, and the sheen was superb! It is less sweet, too.)

As an additional Pinoy touch, I used sweetened macapuno as filling in between the two layers of cake. I actually mixed it with the 7-min frosting, which turned out to be a disastrous mistake as it made the filling runny, so that when I placed the top layer of cake, it squeezed out most of the filling. Next time, I will use just the macapuno as filling, and the frosting will be used exclusively to cover the whole cake.

I used some sprinkles to make it colorful.

Quite reluctantly, I offered it as dessert to hubby, and HE LIKED IT! I asked his opinion on whether it would be enjoyed by the others in his family as well. DEFINITELY! The next day my MIL came to give me brocolli, and I gave her two slices of the cake to bring home and share with FIL. They loved it!

I will definitely serve this on my birthday in December.

I bet this will also be a big welcome as cupcakes for school functions.

Saturday, July 15, 2006

Old Fashioned Vanilla Ice Cream

Because of the most recent LP round up, I was reminded to try making UBE ice cream, something that I have been meaning to experiment on for quite some time now.

First step, of course, was to acquire an ice cream maker. I settled for Rival 6-qt ice cream maker that I got from Wal-Mart. I was excited! I have only seen home made ice cream making at my SIL but never had the chance to try it myself. It turned out hubby was quite excited also. He did not know how to prepare the mix, but he LOVED running the churning machine, putting in the ice and rock salt into the bucket.

Okay, so I prepared the mix. I was thinking of using a vanilla ice cream then would just try mixing the ube-macapuno later. However, there was probably something wrong with the way I prepared the ube from the powder form, and it did not turn out the way it should be, appearance-wise or taste-wise. Hence, I will not bother to jot that down here, and will just concentrate on the Olc Fashioned Vanilla Ice Cream.

This recipe came from the manual that came with the machine.

Ingredients:
4 Quart
2 1/4 cups sugar
1/4 cup plus 2 tablespoons flour
1/2 teaspoon salt
5 cups milk
4 eggs, beaten
4 cups whipping cream
2 tablespoons vanilla extract

5 Quart
3 cups sugar
1/2 cup flour
1/2 teaspoon salt
6 1/4 cups milk
5 eggs, beaten
5 cups whipping cream
2 tablespoons plus 11/2 teaspoon vanilla extract

6 Quart
3 1/2cups sugar
1/2 cup flour
3/4 teaspoon salt
7 cups milk
6 eggs, beaten
6 cups whipping cream
3 tablespoons vanilla extract

Directions:
Combine sugar, flour and salt in saucepan. Gradually stir in milk. Cook over medium heat approximately 15 minutes or until thickened and bubbly, stirring constantly. Take off from heat. Gradually stir about 1 cup of hot mixture into the beaten eggs and stir well. Add egg mixture to remaining hot mixture, stirring constantly. Place back on medium heat and cook 1 minute; remove from heat. Cool down and then refrigerate at least 2 hours. Combine whipping cream and vanilla in large bowl; add chilled mixture, stirring with wire whisk to combine. Freeze as directed by your ice cream maker manufacturer.

Cookies and Cream Ice Cream: Crumble chocolate sandwich cookies (25 cookies for4 quart, 30 cookies for 5 quart, or 40 cookies for 6 quart) into mixture before freezing.

Coffee Ice Cream: Combine instant coffee (4 tablespoons for 4 quart, 5 tablespoons for 5 quart, or 6 tablespoons for 6 quart) with sugar, flour and salt. Continue as directed.


And here are the photos....


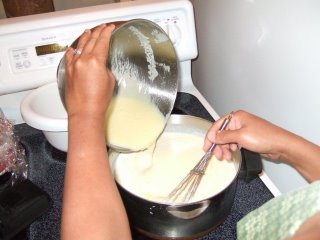
Here on the left, I am mixing the chilled mixture with whipping cream and vanilla.

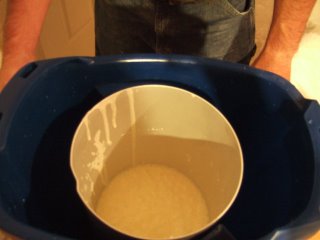
Middle photo: we are ready to churn. The mixture is placed in the ice cream can, then the dasher is inserted, then covered, then the driving machine is attached. It is turned on by plugging into an outlet, and only then will the ice and the rock salt be added.

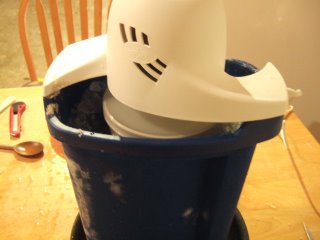
On the right shows the set up during churning. Rock salt tends to lower the freezing temperature of ice, such that, even when "melted," its temperature reached down to about 15 deg F (freezing temp is 32 deg F). The white spots on the bucket are actually frost formed by freezing the moisture in the air immediately surrounding it.

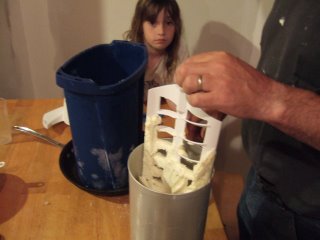
My stepdaughter was eagerly watching after about 40 minutes of churning. The machine automatically stops when done. Here, hubby is removing the dasher.

Finally, we had the goodness of this rich vanilla ice cream soft served! I froze the remaining to harden or "ripen" further. Hubby had been looking forward to this all day! (We had been working hard on the kitchen construction, and we still are. We have just finished painting the walls.)

Friday, July 14, 2006

Oatmeal - Not only for breakfast, but also for skin allergy

As I mentioned in my "diet" post, I sometimes eat oatmeal for breakfast. I like the fast effects of its fibers (won't elaborate further, hehe...).

My favorite is the Quaker Instant Oatmeal Maple & Brown Sugar flavor. I eat it plain or with slices of banana, or fresh berries (blue/black, strawberries), or even cantaloupe.

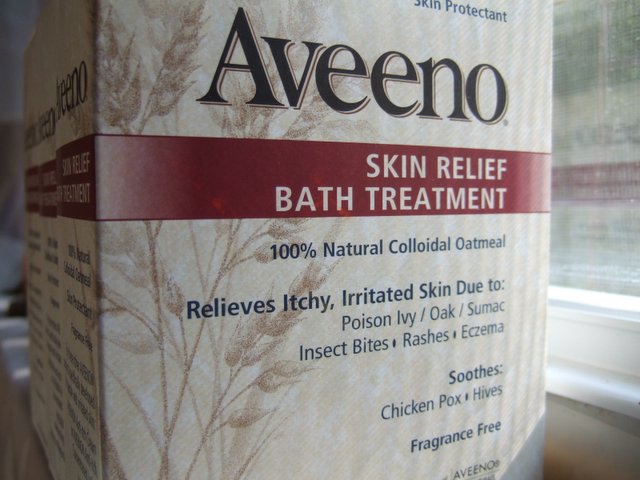
There is another oatmeal "preparation that I like so much especially during the summer season --- the Aveeno Colloidal Oatmeal bath.

I have had no prior history of allergies to medications nor to food. When I would have rashes, usually it would be to an unknown allergen.

Last year, I had my first ever attack of "urticaria," where rashes are welts, wheal, appearing like maps all over. It lasted three days, during which I just took Benadryl and Alavert. On the third day, which was Friday, I decided to see a doctor for a prescription in case I will need a drug that worked better than those I was already taking. He prescribed prednisone, and suggested Aveeno oatmeal bath.


That oatmeal bath was something new to me. I tried it, and as early as the first bath, my rashes resolved gradually over the day, and I woke up the next day without rashes. Whether it was that the attack was really at its conclusion or not, I was not sure whether oatmeal bath really had the desired effect.

This year, my attack was worse and different. It did not occur all day, appearing mostly at night and getting worst in the wee hours of the morning, usually waking me up with intense pruritus (itchiness) and burning sensation, despite having taken both Benadryl and 24-hr Claritin the night before, that I could not help but take another dose of Benadryl then continue my sleep. This pattern continued for more than two weeks, with the worst attack around the 10th day. The offending agent, I was sure, was not due to a food item. But there are foods that are to be avoided in such a condition, including strawberries, tomatoes, shrimps, eggplants, spinach, tuna, etc., as these have histamine-releasing actions (histamine causes the itch).

I was having daily oatmeal baths upon waking up, taking my Benadryl and Claritin at night, sometimes experimenting on skipping them to see what the effect would be. It appeared that no matter what I took or not took, the pattern was the same, only with varying severity, with the most severe attack at the middle of the whole duration, during which (2nd week), I was actually worried that it might turn out to be a chronic case (6 weeks minimum). I am glad that during the past several days, I woke up with less and less of them. Yesterday was the first day I woke up with NONE. Hooray!Posted by Picasa

Saturday, July 08, 2006

Kilawing Tuna

While many Filipinos prepare kilawin to enjoy a booze, I love it with or without alcohol. As a matter of fact, I even eat it with rice, especially during summer when it is too hot to cook nor to eat hot foods.

Here is how I prepare it basing on my Nanay's method, plus adding more veggies and less hot peppers.

Ingredients and Procedure:
Tuna steak (I bought 2 steaks, about 1/4 pound total), cut into bite-size pieces
vinegar (I used Datu Puti cane vinegar; enough to submerge the fish)

Leave in the fridge for 30 minutes, after which, drain and squeeze gently to remove excess vinegar.

Meanwhile, chop the following must-have spices:
fresh ginger (thumb-size)
onion (medium size)

Add a dash of red pepper flakes (siling labuyo, chopped, if you have), depending on your taste

optional veggies:
bell peppers, diced (I love these here)
chives, snipped
cucumbers, diced

Squeeze 1 whole lemon (My substitute for kalamansi) and remove the seeds.

Mix everything together, sprinkle the lemon, add salt and ground black pepper to taste, mix again, then let sit overnight (I like it overnight so that the lemon will fully "cook" the fish flesh. I do not want it overcooked, though, as it tends to be crumbly. I guess the size of the pieces matter. I prefer the size of the pieces to be about 1/2 inch by 1 inch by 1 inch. Any thinner and it will be "overcooked;" any thicker and it will be undercooked (with the inner flesh still looking pink, which I do not prefer. Others may prefer it that way, though, but I am no sushi lover.)

I prepared just a little amount because I expected only myself to eat it. To my surprise, my older son liked it as well, and remembered that he has had it before.

I had my FIL taste one prepared by my friend, with pieces quite thick so the inner part was not "cooked," and he could not stomach it. I could, but I really would prefer the "cooked" version.

I remember in Kamayan Restaurant, they serve the kilawin quite raw even on the outside (perhaps only mixed the the lemon-spices the moment the order was made), and I really could not take it. Posted by Picasa

Friday, July 07, 2006

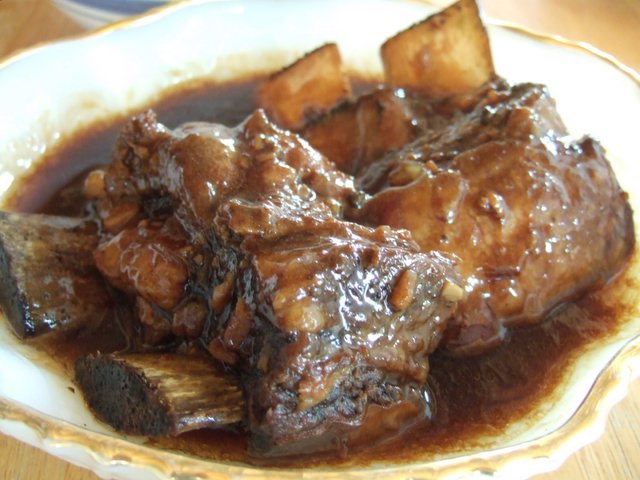
Korean Beef Ribs

This is a reposting from my old kusina...

This is probably the 4th time I have prepared this dish, mainly because my kids and I love it.

I got the recipe from JMom's, which she said she saw in purplegirl's blog. (Thanks to both Pinay bloggers).

Although husband does not like short ribs (he said there is too much work to separate the meat from the bones and fat), I prepare all our beef short ribs using this recipe, with only a little tweaking on my part.

As in the recipe except for the water, I followed these:

Take 4 tablespoons of brown sugar and sprinkle or rub onto the slices and marinade for 10 minutes while getting the rest of the ingredients ready. Mix in a small bowl: 4 garlic cloves crushed and minced, 4 tablespoons soy sauce, 2 tablespoons sesame oil, 1/4 cup rice vinegar, 1/2 teaspoon red pepper flakes, and 1 cup water.

But since I do not have a pressure cooker, I opted to slow cook it on high for 4 hours. As I mentioned, I omitted the water, and let the beef cook in its own juice (which also accounts for the shrink in size) until the meat literally falls off from the bone. Then I just thicken the sauce and pour over the beef (omitting the caramelizing part of JMom's method, mainly because we can not prolong the already long cooking hours, plus we can't wait usually (the aroma while it slowly cooks always torture our olfactory centers for hours).

I am thinking of using this same recipe for beef chuck roast instead of the recipe I use for beef pares the next time I have a get-together here at the house.

Tuesday, July 04, 2006

Lobster Soup

It's lobster time again!

I brought home some leftover "bodies" of lobsters (which I would think were heads instead of bodies, but that's how they referred to it, or did I hear them right?).

We recently had my hubby's fave aunt/uncle and their daughter/son and families, who came over for the funeral of their oldest relative, Great Grandma Gower who died at age 100 despite her love for sweets and deep fried goodies, plus her daredevil driving.

Since Maine is qutie popular for its lobsters, the visitors naturally wanted a dinner with lobsters.

I took home four "bodies" and patiently gathered shreds of meat, along with their eggs (which Filipinos really love! My sons did not, though). Then, I boiled the shells with garlic, bay leaf, peppercorn and salt for about 2 hours to have stock. I strained this.

Next, i boiled the lobster shreds (about 2 cups along with the eggs) in the stock, made a water-cornstarch mixture for thickening, then beat an egg to be added a la egg drop soup. I adjusted the taste with salt and pepper.

My sons loved this! Younger son, who is more fussy than older son, said,"Ma, these eggs taste good in soup!"

I ate mine with saltine crackers.

Hubby never liked lobsters, though. He would always settle for the scallops instead.

Monday, July 03, 2006

Beef Tapa

Husband-approved!

In PI, beef tapa is usually served in carinderias, most commonly as part of tapsilog (tapa, sinangag (fried rice), at itlog (egg). But although I liked the taste then, I did not like it in that the beef cuts, however thin, were quite tough and chewy.

When I recently went to the Filipino store, I got this beef tapa marinade to try making my own, but I wanted it not too dry and chewy.

I used top round steaks and sliced them thinly, marinated overnight, then stir-fried in batches for 1-2 minutes over high heat using only about 1 tbsp of olive oil. I served it topped with chives, and with Rice-A-Roni. When prepared this way, it turns out to be so good, not dry or tough! As soon as hubby tasted it, he said "Hmmmmm, Honey, this is so good!"

Salamat uli ke Mama Sita, this is an addition to Filipino dishes hubby likes. Posted by Picasa

Saturday, June 24, 2006

Palitaw

This is my second entry for the LP 11.

Like I said in my most recent post, palitaw is one Filipino snack item that, as a child bored during summer, I learned to make through the recipe pages of Liwayway Magazine. I can't remember whose column it was, but I liked the recipes featured there. The original recipe called for galapong. I had no idea then what that was, but I asked my mother for money so I could try making this, and off I trekked to the wet market one sunny afternoon when most market vendors were taking their nap. Galapong turned out to be sticky rice soaked overnight (at least 8 hours), then ground as soon as there was a buyer. Once ground, it should be consumed immediately; otherwise it will spoil (panis). I have always loved to make this kakanin because of the ease of finding the ingredients and the simple process of making them. It was a bit of a challenge, though, now that I am here in the US. It took quite some time for me to finally come up with substitutes and the tools.

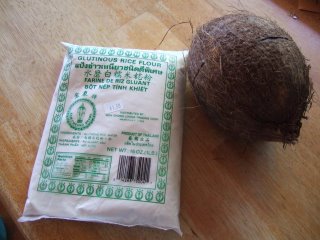
First, I tried to make my own galapong, but I did not know the proper proportion of water to rice, and my first attempt was not successful, I ended up throwing the rice. I was discouraged for a while, until I had an epiphany of using sticky rice flour and water instead! So now I had to start with these two basic ingredients: coconut and sticky sweet rice flour.

When it comes to the freshly grated coconut, I knew matured coconuts were available in Hannaford. I bought one several months ago and tried to grate that with fork. I got tired and swore 99% of the time. I did not want to do that again.

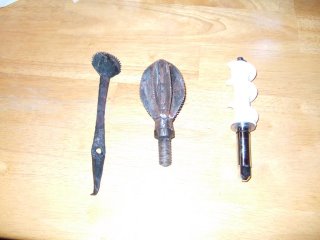
But when my friend Ana went on a vacation to the Philippines, I requested that she buy me a coconut grater. She did get me one for manual grating (left most in this photo), one as an attachment to a machine (middle one). I am hoping hubby could turn it like the Kitchen Aid attachment I have for grinding (right most). But until he could find the time to do that, I will content myself with the manual tool.

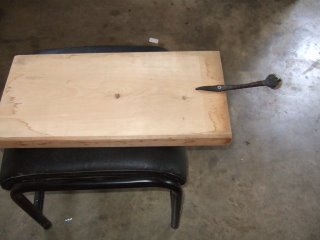
I attached it to a small piece of plank, which I could sit upon when placed on a bench or a chair or an ottoman.

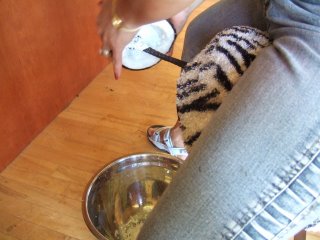
This is my friend Fe doing the grating when we had a lunch as a welcome to Ana.

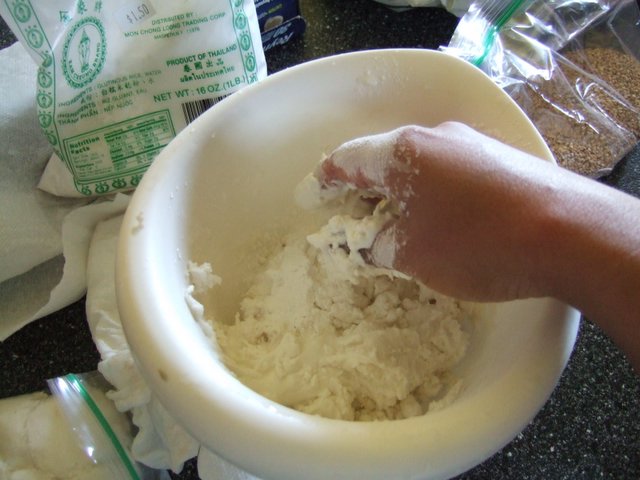
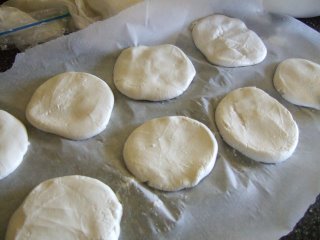
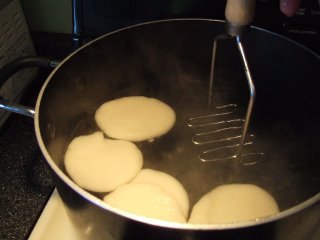
Now, going to the sticky rice patties, first, boil water in a big pot (wider than tall). While waiting for it to boil, prepare the patties by mixing cold water with some flour. I did it by approximating, I wanted to create a smooth dough, not mushy or super sticky, but not too dry. As soon as it is good to shape into balls, make the balls and flatten them into disks. Once the water is boiling briskly, drop these disks one by one, leaving enough space for each patty so they do not stick together.

Once they come up to the surface/float (lumitaw sa ibabaw - hence, the name "palitaw"), scoop them out and let the excess water drip.

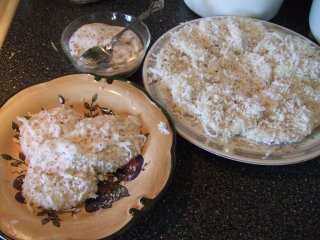
Roll each patty into the freshly grated coconut (I do not like using the dry coconut flakes), then lay on the plate, as illustrated in the first photo. Never add the sugar-sesame seed mixture as this will draw out the water and make it very wet, which will dissolve the sugar. Rather, serve the palitaw with the sugar-sesame in a separate bowl, to be added only once the palitaw pieces are on the eater's plate, to be consumed very soon.

How to prepare the sesame-sugar: toast/roast the sesame seeds (either white or brown are okay) on very low heat. If you are using the white, it will start popping, which heralds that it is almost ready. You must swirl or stir constantly so as not to burn. With the brown one, you just have to go by the smell. Let cool then add the sugar (1:1 proportion, or according to your preference).

I had enough leftover for each of the visitor to take home 3 pieces each (of course I had some too!) What to do with leftovers: Put in the fridge without the sugar-sesame. When you want to eat them, microwave for 30 seconds (if only one patty), then add the sugar-sesame.

My kids still have to develop the taste for this dessert/snack. I plan to serve this during Pinoys' Christmas get together or during my birthday to serve to my in-laws.

I would love to learn how to make pichi-pichi as well (another favorite of mine), and I hope someone can share the how-to's. Maybe it is already featured in past LPs. I gotta have the time to read them...

I also want to be able to find coconut juice (the real coconut juice, even if it is canned) with some young coconut bits so I can make buko-pandan ice candy or drink, and also buko-brown beans popsicle. Any such info?

UPDATE:
JMom posted an easy recipe on pichi-pichi (Yehey!!!), found here.
Custom Search