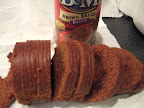
Sunday, November 23, 2008

Supersoft Ensaymada

NOTE as of 2/23/09:
This has become a favorite of many of my readers, as well as mine. Easy to make, super moist and supersoft. Satisfaction guaranteed. :)

UPDATE: Sorry I was not able to come back yesterday to posting.
From supersoft ensaymada
I got busy cooking, (and experimenting yet again with my ensaymada recipe below. I am quite satisfied with the outcome I got with the recipe I am posting here, but I am currently waiting for the newest experiment to rise prior to baking. Once I get the results, I will post later today about comparison...)

This is dedicated to all homemakers like me, who have a life outside of the kitchen...I have tried to make my recipes easy to make and follow, with ingredients easy to find and not gourmet types which you will find in God-only-knows-what-specialty-store (and therefore they are very affordable) and which would not demand your whole day to make (unless you make several batches), yet will give you fulfillment and definitely will wow your friends, brown- or white-skinned. As one of my white co-workers told me after I made her taste a pinch of this roll minus the sugar and butter, "Hmmm, how come your rolls are always moist and pillow soft???".

But of course, if you have easy access to specialty items (like special cheeses) and you have the financial means, go ahead and do your own experiment in trying different ingredients.

Just kindly do me favor, my dearest readers/followers, if you know of people with whom you might like to share the recipes I have here, please point them to my website instead of giving them a copy of the recipe. I appreciate increased traffic to my website.

11-22-08
An absolute welcome give-away in any Filipino Christmas Party supersoft ensaymada that melts in your mouth(soft even without heating up in the microwave, even after two days. Yeah, we finished them after two days because I made a big batch trying to experiment with other ways to use the dough.)

The secrets:
(1) Potatoes
(2) Lots of butter
(3) No kneading!!! (You read that right!)

I have been telling some of those who have been emailing me that I have been experimenting with this ensaymada. I am posting this right before the Holidays, in time for preparing giveaways made with love. The recipe to be posted later...Gotta go grocery shopping first.

(I can hear you say..."Bummer! Whatta teaser!")
Ingredients:
5 cups bread flour (separate 1 + 1 + 3)
1/2 cup sugar
2 envelopes Fleischmann’s RapidRise Yeast (1 envelope is 0.25 oz = 2-1/4 tsp)
1 tablespoon salt
1 cup milk
1/2 cup water
2/3 cup shortening (also known as lard, purico in Philippines, strutto in Italy)
1 cup mashed potato
2 eggs
3 egg yolks
2-oz grated sharp cheddar cheese, added to the 3-cup flour above(I used Helluva Good brand, because it comes closest to the kind of cheese paired with ensaymada that I grew up with. It's up to you to experiment with other cheeses.)- [UPDATE 12-23-08: I tried 2-oz crumbled feta cheese and it was wonderful! I loved the cheesy effect on the dough. Save your cheddar cheese for topping instead.]
melted butter (approximately 1 stick)
softened butter (approximately 1 stick to 1-1/2)(for rolled method)
(Note: Before you turn your nose up with the shortening here, wait for my next post comparing the two).

Directions
Combine 1 cup flour, sugar, undissolved yeast and salt. Heat milk, water and shortening until very warm (120º to130ºF). Gradually add to dry ingredients. Beat 2 minutes at medium speed of electric mixer, scraping bowl occasionally. Stir in mashed potato, eggs and 1 cup flour; beat 2 minutes at high speed, scraping bowl occasionally. Stir in remaining flour to make a stiff batter. Detach dough hook and cover dough plus hook loosely with plastic wrap; refrigerate 2 hours. Remove from fridge and add the 3 egg yolks, stir setting on the mixer. Remove hook from the dough this time and cover loosely again with plastic then refrigerate for another 1-22 hours.

The next stage will make use of a method depending on how hardworking you are or how time pressed you are.

Coiled: If you got lots of time, do the old-fashioned way of coiling like katol by pinching off pieces from the chilled dough about the size of a small pandesal. Get only a few at a time and chill the rest of the dough again because it becomes harder to handle when warmer; it becomes too sticky. Sprinkling flour on work surface helps lessen the stickiness. Shape the dough into a long rope about a foot long and coil as previously illustrated in older posts. Place on greased baking pan and brush with melted butter. See this post for step-by-step slideshow on how to shape into coils.

Rolled (para sa tinatamad): Get a chunk of dough about the same as one that you have for 2-lb recipes of bread (or about the size of a grapefruit or suha). Flatten to disk, fold over the four edges like that of an envelope, and roll to make a rectangle about 8 x 10 inches. Place a generous layer of softened butter except near the edges. Roll tightly from the long end. Cut in 1 to 1-1/2 inch intervals. Dip one end of cut side in melted butter then place on baking pan. Brush the rest of the surfaces with melted butter. [UPDATE 12-23-08: This whole batch can be divided into 3. When shaped into logs after you place your filling, wrap tightly in cling wrap and freeze. After freezing, let stand in room temp for about 15-20 minutes and cut with a knife to end up with 8-9 pieces minus the ends. Place in baking pan, preferably where they will crowd together to compress so they rise upward; ex., in 8x8 or 9x9 or round pans. Brush with butter. Let rise in warmed oven for about 45 mins to 1 hr, or until doubled in size. Bake as directed below. Cool down some or completely before applying topping of choice.]

Let rise in warm, draft-free place until doubled in size, about 1 hour. (My favorite thing to do is place them in the oven and "start" baking then turn off after one minute then let rise for 30 mins to 1 hr. Once puffy enough, remove from oven and start heating up the oven).

Bake at 350ºF for 12-15 minutes or until done. Remove from pans; cool on wire rack for about 30 minutes or until completely cool if not consuming immediately, and store in ziploc bag.

To enjoy ensaymada the traditional Filipino way:
Brush softened butter to warm ensaymadas (not too hot that it melts the butter), dunk in a bowl of sugar (or sprinkle the sugar on top), and top with finely grated cheese (the finer grater gives you soft looking curls of the cheese like in the photo above).


TAGALOG VERSION:

Sangkap:
5 tasang "bread flour" (paghiwa-hiwalayin 1 + 1 + 3) = hula ko, eto yung primera sa Pilipinas
1/2 tasang asukal
2 pakete Fleischmann’s RapidRise Yeast (instant yeast din to)
1 kutsarang asin
1 tasang gatas
1/2 tasang tubig
2/3 tasang purico
1 tasang "mashed potato" (maaaring gumamit ng purong nilagang patatas, o yung tirang mashed potato)
2 itlog
3 pula ng itlog
2-oz ginadgad na sharp cheddar cheese o kaya ay gumamit ng "crumbled feta cheese" at ihalo ito dun sa nakahiwalay na tatlong tasa ng harina (pwedeng gamitin ang food processor para mabiyak nang husto ang feta cheese at mahalong maige sa harina)
tinunaw na "butter" (mga 1 stick, pampahid bago i-bake)
pinalambot butter (mga 1 stick to 1-1/2)(para sa nirolyong dough)

Paraan:
Paghaluin ang 1 tasang harina, asukal, yeast (lebadura) at asin (eto ang tuyong sangkap). Pagsamahin at initin ang gatas, tubig, at purico hanggang 120º to130ºF. Unti-unting ihalo ang mga likidong sangkap sa tuyong sangkap. Paandarin ang electric mixer sa medium speed ng 2 minuto (paminsan minsan ay kaskasin sa gilid ang bowl para mahalong maigi). Idagdag ang mashed potato, itlog, at 1 tasang harina at i-beat uli ng 2 minuto sa high speed (pinakamabilis); kaskasin uli para mahalo maige.Unti-unting ibuhos ang natitirang harin (na me halong keso) habang umaandar ang mixer. Sa puntong ito, kung hindi kaya ng mixer maghalo ng makapal na dough, pwedeng gamitin ang wooden spoon o kamayin hanggang maging malambot na dough. Takpan ng plastic (cling wrap) at ilagay sa ref nang 2 oras.

Ihalo ang 3 pula ng itlog. takpan uli at ilagay sa ref. Maghintay ng 2 oras o kahit abutin ng 22 oras pa bago ihulma.

Sa paghulma, pwedeng hugis katol o nirolyo. Kung tinatamad ka, irolyo mo. Kung matyaga ka, gawing parang katol.

Wisikan ang countertop/lamesa ng maraming harina. Ilagay ang dough. Budburan ang ibabaw ng maraming harina. Gamit ang rolling pin, i-flat ang dough (Budburan lang na harina sa madikit na parte.). (Mas mabilis ito kesa paisa-isang piraso na pinahaba ng kamay).

(1) Katol: Gamit ang "dough cutter", maghiwa nang pahaba para makagawa ng "lubid" na kasingtaba ng hinlalaki na 1 ft ang haba.. Eto ang gawing parang katol. Ilagay sa baking sheet na pinahiran ng manipis ng purico. Yung dulo ng katol ay dapat nasa ilalim, para hindi hihiwalay habang umaalsa. Maglaan ng 2 inches na pagitan bawat piraso. (Pwedeng i-freeze sa puntong ito: ilagay sa freezer ng 3 oras, ilabas at ilagay sa makapal ng plastic bag/ziploc. Alisin ang hangin hanggang kaya. Pag handa na paalsahin, ilabas sa freezer, ilagay sa mold na me pahid ng purico, at paalsahin ng mga 4 na oras sa countertop/room temp, o ilagay sa pinainit (1 minuto) na oven para mas mabilis umalsa.)

(2) Nirolyo:
Itupi ang apat na gilid para makagawa ng parihaba (8x10 inches). Pahiran ng pinalambot na butter maliban sa pinakagilid para magselyo pag nirolyo. Irolyo nang mahigpit mula sa mahabang gilid. (Pwede i-freeze sa puntong ito: Balutin nang cling wrap nang mahigpit. Pag handa na paalsahin, ilabas sa freezer, palipasin ang 15 minuto bago hiwain.) Hiwain na mga 1 inch hanggang 1-1/2 inches ang kapal. Ilagay sa ensaymada mold na pinahiran ng purico/pinalambot na butter.

Pahiran ng tinunaw na butter. Hayaang umalsa sa lugar na mainit-init at kelangan, walang malakas na hangin (draft); takpan ng plastic na pinahiran ng purico. Pwedeng ilagay sa oven. Ganito: Painitin ang oven ng isang minuto, saka ilagay ang baking sheet (hindi na kelangan takpan ng plastic). Hayaang umalsa hanggan dumoble ang laki. Pahiran uli ng tinuna na butter. Ihorno (bake) sa 350 F ng 12-15 minuto or hanggang maging golden brown ang ibabaw. Pagka-alis sa oven, ilagay agad sa wire rack para lumamig nang mga 30 minuto. Kung hindi kakainin agad, ilagay sa ziploc.

Kung kakainin agad, pahiran ng pinalambot na butter ang ibabaw (ang iba ay gustong gawin to habang mainit pa ang ensaymada, kaya natutunaw ang butter. Ako, ang gusto ko ay makapal yung malabot na butter, hindi tunaw.) Maglagay ng asukal sa mangkok (bowl) at idukdok ang ensaymada na may butter. (Maaaring paghaluin ang malabot na butter at asukal, tapos eto ang ipahid sa ensaymada. Mas kakapit ang keso pag ganito.)

Kung gusto mo na me keso, maggadgad ng cheddar cheese sa ibabaw.


Variations for topping:

A. glaze/frosting
1 cup confectioners' or glazing sugar
2 tablespoons melted butter
1 tablespoon milk

better recipe from Spice Islands (good for 24 rolls)
# 6 1/2 cups powdered sugar
# 6 tablespoons butter, softened
# 6 tablespoons milk
# 1 teaspoon Spice Islands® Pure Vanilla Extract
# 1 teaspoon Almond Extract

B. cinnamon-flavored frosting
1/2 cup (1 stick) butter, room temperature
2 cups confectioners' sugar
1/2 teaspoon ground cinnamon
3/4 teaspoon salt
grated zest and juice of 1/2 orange
1 to 1 1/2 tablespoons hazelnut liqueur, such as Frangelico, or almond liqueur, such as Amaretto)

Why do I like this recipe aside from it giving me those tender, light-colored ensaymadas that very much reminds me of red ribbon or goldilocks (my previous recipes were only a bit more special than the ensaymada I grew up with, made by my Tatay or Manong)? Well, aside from those reasons mentioned above, this recipe also is pretty much like a slow cooker. Prepare then forget for a while until you are ready to cook. This recipe gives you a whole 24 hours to finally get going with the baking stage. Prepare today, put in the fridge, shape, rise and bake tomorrow. Or you can prepare today, shape hours later and refrigerate, bake the next day. Your choice. Just don't let 24 hours pass before you bake.

TIPS: For those who have a cellar with temps almost like that of a fridge, and you would like to bake several batches of this, I suggest you get a shelf (maybe 5-tier aluminum) and a damp sheet to wrap around the shelves once you have pans with the buns shaped already to keep them moist. You might want to experiment with just one or two pans and see how it turns out.

To those planning to give these away for Christmas (or maybe making a business out of it?), may I suggest baking them in Christmas baking boxes like those by KAF (star or tree).

UPDATE (12/11/08)
I tried to freeze some of the dough after rolling like a log, then tried to cut with a knife after about 20 minutes out of the freezer, as shown in the additional photos in the slideshow. I let it rise in room temp after brushing some more with melted butter, which maybe took one hour before I baked them. Taste-wise, they turned out perfect still, if not for the fact that placing them on baking sheet made them expand laterally so they looked flat. They probably would look better if placed in 8x8 or a tree-shaped pan, where they would be compressed and forced to rise upward.
Happy Holidays!

UPDATE as of 12-21-08:
From Holiday tree baking pan

I baked them in tree-shaped pan after freezing, and they rose after about 1-1/2 hour (would have been faster if I let them rise inside a warm oven, but I was baking something else that time). So this is how they looked like after baking. Beautiful, ain't it? Just add toppings of softened butter, sugar and grated cheese just before giving to your friends/relatives.

UPDATE: 1-24-09
Does this task seem daunting to you? Don't feel intimidated. Wena has tried making this and was very pleased with the results, too. And as you will see with the comments by Crystal, she found this very satisfactory as well. So shake off you fear and JUST DO IT!


UPDATE: 1-29-09
Anonymous EQ, a pastry chef, tried this recipe and states it is better than the ensaymada of goldilocks or red ribbon. Here's a photo of what pastry chef made. Pwedeng pang-business! Click on the photo to see a larger picture. Basing on his story in the comments section below, seems like he played with the dough (like it was Play-Doh, haha!), especially that he did not have his Kitchen Aid Mixer to prep the dough. I remember when I was just learning to bake from scratch (not play with dough, as that is something I have done since I was a kid), I was soooo scared to handle the dough that I myself produced, and it took time for me to get comfortable again to handle it like it was clay.

To EQ, Thanks a lot for your comment. It means a lot to me!

UPDATE as of 3-15-09: Joy L. also made these today and was very satisfied with the results. She is going to bring them the next day to her homeschooling group.

The next day she again emailed me about how these were received by his husband. "My husband said:"WoW! It's one of your best bread ever!! I can easily eat more but I have to watch my carb." My husband is diabetic but is addicted to bread and chocolates My 6 years old boy ate 2 for merienda while my little girl ate one whole piece too!! They want me to pack ensaymada for their lunch tomorrow."

Thanks Joy L for letting me know about your outcome!

UPDATE as of 4/3/09: Mai also baked these (first time for her to bake!), and was so nervous before placing the dough inside the oven to bake. The results brought joy both to her and to her husband. Her husband said, "masarap pa to kesa Goldilocks."

Thanks, Mai, for trusting me and giving this recipe a try!

UPDATE as of 4/21/09: I was at work when I received this email of Marlene's ensaymada photos.Truly inspiring! Thanks for sharing this photo of your gorgeous ensaymadas, Marlene! Glad your family enjoyed them!


Thursday, November 20, 2008

Black & White Brownie Cupcakes

I had a box of Ghirardelli brownie mix in the pantry for quite sometime now.
From Black & White Brownie Cupcakes
I bought it because it was on sale. I was thinking last night of what to have for dessert to accompany a New England Boiled Dinner in which I used a pork shoulder for meat. So I was looking at the instructions for this mix and the photo of a variation caught my attention. I thought I'd follow that instead, and I added red wine just 'cause I had two opened red wine bottles that I must consume as fast as I can. My husband got excited and had to lick the dough even as I was placing it in muffin cups. As supper was served, I had a plate of this ready on the table and everyone was looking longingly for them. Nobody was disappointed. It was soooo good!

From Black & White Brownie Cupcakes
Ingredients:
1 box Ghirardelli Dark Chocolate Brownie Mix
1/4 cup water
1/2 cup vegetable oil
(optional) 1 tbsp cabernet sauvignon (red wine)
2 eggs
1 cup (8-oz) cream cheese, softened
1/3 cup sugar
1 tsp vanilla

Instructions:
Preheat oven to 350 deg F. In a medium bowl, stir together brownie mix, water, oil and 1 egg until moistened (about 40 strokes). Line muffin tin with paper cups and lightly spray with nonstick cooking spray. Spoon batter into muffin cups, filling 2/3 full. Using electric mixer, mix cream cheese, sugar, 1 egg and vanilla on medium speed for 1 minutes or until smooth. For each cupcake, place rounded tablespoon of cream cheese mixture on top of batter. Bake 28-32 minutes. Makes 16 cupcakes.

Stir-fried Cabbage and Green Beans

No hard recipes here. I will just tell you a story of how I gave leftover meat a healthy makeover. 

I went on duty the other night with just a sandwich for "supper" to be eaten during my break. I am not really quite satisfied having something so light for "supper" to sustain me the whole 12-hr shift. So when one of my co-workers asked whether I would like to order Chinese food, I said yes. I ordered a D30 combo meal(chicken teriyaki with something ground beef dish,and fried rice, although when I made the order I thought I had veggies there). While the beef tasted good, I was quite overwhelmed with the amount of sauce that I even drained some off it. Imagine, I was using a fork to eat, yet I was still overwhelmed with the sauce. I could aptly call it brown sauce with ground beef.

Anyway, typical of ordered Chinese food, I had enough to feed me for at least two meals. So I brought home my leftovers. I had one skewer of chicken teriyaki left, which I combined with leftover chicken adobo and used for fried rice (ssee my previous post). My leftover ground beef was probably about 1/2 cup, still quite sauce-y. I have always like cooking stir-fried veggies with the sauce of some meaty dishes like adobo and the likes. So, I cooked this meager amount of beef with some frozen green beans and fresh cabbage, and ate that with chicken adobo fried rice. That was my supper the next night I went on duty. I loved it!

So if you are like me who orders Chinese food from time to time, here's some leftover ideas to toy with.

Ingredients:
1/2 cup ground beef with brown sauce (don't know what it was really called)
2 tbsp oil
1 medium onion, sliced
handful of green beans
1/4 of a whole cabbage, sliced
1/4 cup sherry
cornstarch-water mix for thickening
additional water as needed
salt and pepper to taste,
sprinkle of ground basil

Instructions:
Sautee onions until translucent. Add the green beans and cook for about 2-3 minutes (depending on how crisp you want it to be). Add cabbage and stir-fry about a minute, add the sherry and let sizzle. Add the leftover beef and sauce. Add some more water as needed for the amount of sauce you want (My green beans were frozen, my harvest from past summer gardening, so they rendered some juice). Adjust taste with salt and pepper. Gradually pour cornstarch-water mixture until the desired consistency is achieved. Sprinkle ground basil and serve hot.

(Thickening the sauce makes it cling more onto the veggies.)

Posted by Picasa

Chicken Adobo Fried Rice

Any Filipino loves using leftover adobo (if any) for fried rice.
Before my husband and I went out of town for an anniversary celebration (without the kids!), I cooked chicken adobo for them to bring to my in-laws to have for supper. Not that I was worried they would not have anything they would like to eat there, and I was sure my MIL would cook something good for them. It's just that on that day, I finished packing and freezing my chickens and I left one in the fridge for having chicken adobo, but my husband, who was quite concerned that I was already exhausted, offered to bring us out for supper. I did not object. But thinking I did not want to leave the chickens in the fridge for 3 days, I cooked them that night and left instructions for my older son to bring it to my MIL for their supper. Of course, I wanted my in-laws to have a taste of adobo as well.


Since my husband was the breast lover (chicken, that is), I had leftovers mainly of breast meat. I cut them in bite-size pieces and I added the leftover chicken teriyaki from a previously ordered Chinese food. Since I did not have enough adobo sauce, I mixed some soy sauce with water (probably 1/4 cup each) and used that for further seasoning of the rice. When fried rice is prepared this way, as in lots of meat in it, we Filipinos like saying, "Kanin pa lang, ulam na." (Rice itself is a whole dish" since we do not really consider rice alone as a meal by itself, and it has to be accompanied by meat and veggies. Now, even if I was considering adding frozen veggies (carrots and peas) to this, I decided against it because I was going to convert a leftover saucy beef dish into a healthy veggie based stir-fry (up on my next post).

I will not post exact amounts of ingredients; just approximate because everything depends on how much you have.

Ingredients:
4 cups of leftover cooked rice
(optional) 2 cloves garlic, minced (I did not add any since I had some still in the adobo sauce)
1 whole chicken breast adobo leftover (or so, this can be forgiving) plus whatever adobo sauce was left
1-2 tbsp oil (may add more depending on the amount of rice and how oily you want it to be. I don't like it too oily, nor too "dry")
soy-sauce water mix (1:1)
kosher salt

Instructions:
Heat wok/pan. Add oil (then garlic, if using). Sautee chicken pieces briefly. Add the rice and stir, stir, stir, until the grains do not clump together too much and are quite coated with some oil. Add the soy sauce-water mixture and stir, stir, stir again. Adjust taste with kosher salt as needed. Continue stirring until heated good (some want the rice to get toasted. We don't.)

Posted by Picasa

Wednesday, November 19, 2008

Savory Pot Roast

Here's another dish that makes use of spices (I love spices!)
From savory pot roast
And to save time, I get a packet of McCormick Savory Pot Roast Seasoning. Since this is slowcooked, prep time is short, then I just forget about it while it cooks, then as the aroma fills the house, I get reminded of what we are going to have for supper. One thing I like about McCormick is that, since it mainly uses natural spices, I can't really go wrong with it. Plus, I get a glimpse of how dishes are supposed to taste like per American standards instead of Pinoy standards. While this dish did not taste at all like the typical mechado or caldereta (more tamato-based) beef stews of the Filipinos, we all like the taste of it. We enjoy this usually with slices of freshly baked bread.

INGREDIENTS:

3 pounds boneless beef chuck or rump bottom round roast, well trimmed
5 cups cut-up fresh vegetables, such as carrots, celery, onions and potatoes
1 package McCormick® Slow Cookers Savory Pot Roast Seasoning
1 cup red wine or water

INSTRUCTIONS:

1. Place roast and vegetables in slow cooker.
2. Mix Seasoning and red wine until blended. Pour over roast and vegetables. Cover.
3. Cook 8 hours on LOW or 4 hours on HIGH. Remove roast and vegetables to serving platter. Stir sauce before serving.
IMPORTANT: For best results, do not remove cover during cooking.

Tuesday, November 18, 2008

Shrimp with Chayote (Sayote)

One of my Pinay friends had extra chayote that she purchased from the Asian store and was generous to share them with me.
From shrimp with sayote

One of my favorite dishes to cook with chayote (or sayote) is to sautee it with shrimps. My sons also love them. (Oh please don't ask if my husband liked it. He won't even touch most seafoods!)

Ingredients:

2 tbsp oil for sauteeing
3 cloves garlic, minced
1 medium onion, sliced,
3 medium tomatoes, sliced
1 lb deveined jumbo shrimps
2 chayote, peeled, seed removed, then sliced thinly as shown
1/4 cup sherry or white wine
1 cup water
salt and pepper to taste
some fresh basil leaves for flavor (or sprinkle dry ground basil)

Instructions:


Heat oil on medium high. Sautee garlic for a minute, then onions until translucent, then add tomatoes and cook until they are caramelized. Add both shrimps and chayote and stir for about 1 minute, then add the wine, let sizzle, then add water, salt and pepper, and basil. Cover and let cook for 2 more minutes or until shrimps and chayote are cooked. Serve hot on a bed of plain rice.

Monday, November 17, 2008

Roast Chicken with Baked Potatoes

Last night's supper menu:

Roast Chicken with homemade gravy
Baked Potatoes
French Bread

(No dessert! We usually do not have space in our tummy for dessert after a heavy hearty meal like this). I meant to serve steamed broccoli as well but I totally forgot to prepare it towards the last 30 minutes of baking the chicken, potatoes, and bread.

In preparing these, I started about 3-1/2 hrs prior to my targeted time for meal. The photos in my slideshow below are from my first year of roasting chicken, as I blogged about in my old kusina. I have prepared this numerous times now and I have developed my method to come up with menus that would maximize the use of oven and time.

I used one of our very own homegrown chickens. For the potatoes, I used big Russet potatoes, which might have been 1-pounder each. This is my second attempt at baking potatoes. The first was a disaster in that it was not fully cooked. This time I made sure the potatoes were cooked by baking them for two hours.

I was not quite organized with my how-to's below, because I proceeded as I would with actual preparation.

Roast Chicken:

1 whole garlic, cloves separated
1 tbsp rosemary
1 whole chicken (3-4 lbs)
1 bunch lemongrass
1 whole onion
(optional) 1 lemon rind (use the juice in something else)
coarse kosher salt, sprinkled onto wet chicken skin
garlic salt, sprinkle onto chicken
1 onion, cut into chunks
3 carrots, cut into chunks
1 cup celery stalks cut into chunks
2 bay leaves
10 or so peppercorns
1-1/4 cup water (or enough to cover the veggies)

Roast the garlic cloves (I now use a whole garlic to prepare the paste) for about 7 minutes in the oven toaster (broil setting) or until skin cracks open and you smell the aroma. Make a paste by mashing (I now use the garlic press for that purpose) and add rosemary.

Pre-heat oven to 350 deg F. Separate skin from underlying meat using blunt instruments. Insert some paste underneath and massage over the skin to distribute. Wipe cavity with paper towel and apply garlic paste as well.

Insert lemongrass (tanglad), lemon rind, and whole onion into the cavity. Sprinkle kosher salt all over chicken.

In a baking dish, place the chunks of onion, carrots, and celery. Add the water.

Preferably using a wire rack, place the chicken above the veggies. Cover with foil. Bake at lower 3rd rack of oven for 30 minutes.

Meanwhile, prepare the french bread in the bread machine.

Once BM has started, start preparing the potatoes.

After 30 minutes has passed since baking chicken, remove foil. If skin is relatively dry now, spray with olive oil and sprinkle garlic salt. Continue baking uncovered for browning.

Baked Potatoes
From baked potatoes

4-5 big Russet potatoes (mine was about almost a pound each)
olive oil, sprayed (can be bought from grocery store)
kosher salt

Wash the potatoes gently with a brush. Pat dry with paper towels. Pierce with fork at 1.5 inch intervals for the steam to escape while baking. Spray with olive oil. Sprinkle all over with kosher salt. Place on a wire rack (cookie cooling rack) then onto a cookie sheet.

When the chicken has been cooking for an hour, reposition to make space and place the potatoes beside the chicken. Set your timer for 1-1/2 hrs to announce baking the french bread.

Once dough cycle of bread machine is over, shape the dough and let rise for about 30 minutes, covered with plastic, in a warm and draft-free place (I just place the pan on the stovetop where steam from chicken being baked keeps the area moist and warm).

For the last 30 minutes of baking (after the 1-1/2 hr alarm), remove chicken from oven, get the liver, and transfer the chicken (using the rack) onto a shallow baking pan to catch drippings while you continue baking. Place chicken back into the oven, then place your french bread on upper third rack of oven and bake for about 20-25 minutes or until brown.

Meanwhile, if you do remember and if you plan to offer steamed broccoli, do so now using a steamer or your cooktop.

Homemade Gravy
Chicken/veggie juice
Chicken drippings
1/4 cup white wine

Prepare your gravy. Remove veggies from pan and transfer to a bowl and keep warm. Place juice, liver and some onions into a small saucepan and let boil. Adjust taste by adding salt and pepper. Thicken with flour-water mixture. Set aside.

Once everything is done and removed from oven, place the chicken back to the original baking pan and surround with the veggies. (Ask your husband and/or children to set the table and slice the bread.)

Pour the white wine onto the 2nd baking pan that caught the chicken drippings (this has the flavor of roasted chicken if the drippings have browned but not burnt). Add this to the prepared gravy and mix well. Transfer to gravy boat.

Going back to the baked potatoes, cut longitudinal slits onto top. Using silicone mitts, press at both ends to crack open at the middle. Put slices of butter on top. You may want to enjoy this with gravy as well.

Have gourmet pepper (using pepper mill) and butter sticks ready on the table.

Enjoy your meal!


Saturday, November 15, 2008

Lechon al Horno (Oven Roasted Pork)

I was gonna title it lechon de horno but when I tried to google it,
From lechon de horno
there was not such a (Spanish) phrase. Lechon al horno was the phrase that appeared, and the recipes I saw were all in Spanish. Anyway, this is not a typical lechon because I used a smoked instead of plain pork. Around this time of the year, we usually prepare our freezers for storing our meats. As I posted about earlier, I froze my chickens. Yesterday, I packed and froze some pork, and tomorrow I will have beef. These are supplies for the next year's meat consumption.

My previous supplies of pork and chicken ran out before I had replenishment. But last month my SIL was cleaning out her freezer and gave me lots of pork ham and shoulder, all smoked.

From lechon de horno
I recently picked one that I originally intended to cook a la New England boiled dinner style, but after cooking it for 2-1/2 hours, I decided to grant my hubby's wish to have seafood that night. So I prepared this lechon the next day. There was so much skin and fat on this one (compared to, let's say, the shoulder), that I did not proceed having it as NEbd, and since photos of lechon kept popping into my head, finally I decided to roast the parboiled pork. I looked up instructions on how to prepare this. Since my pork was already boiled (with my usual spices of garlic, peppercorns, bay leaf and coarse kosher salt), I just proceeded with the rest of the preparation to the baking part. I did let the pork drip excess juices, even wiped the skin with paper towel and let it sit on a cookie rack for at least 3 hours out in the garage (40 deg F). Remembering how my brother-in-law in Canada (my sister's hubby) told me how he would roast a pig's head (which he got free from the butcher), I then set the rack to the lowest level and started the heat at highest temp. I sprayed the skin with oil and sprinkled garlic salt generously and roasted the pork for 15 minutes before lowering the temp down to 350 deg F to bake
a closer look
(meat appears red because it is ham/cured)
for additional hours (I lost track! I was instructing my son to start preparing the table, and he asked, "Are you working tonight, Ma? It's only 3:30." Ooops! So I just kinda continued and continued, rotating the pan and brushing it's own oil onto the skin once in a while until I was satisfied that it was crunchy and that it was finally supper time. I probably roasted it for about 3 hours total, but since this was parboiled already, I could have cooked it for about an hour or so only, or when the skin is crunchy all around.)

I prepared gravy using a Knorr mix for pork gravy, and served this lechon with peas, and mashed potatoes/rice. I loved the crunchy skin and the different flavor, it being smoked. However, I could feel my arteries constricting after several cuts of skin even if I removed the fat underneath. I did have some more the next day for lunch and this time I used my favorite dip of vinegar with garlic, which tended to neutralize the effects of the fat.

My husband prefers the New England Boiled Dinner style. But when I told him I was getting sick of preparing pork hams this way, he offered a compromise and suggested we split them into NEbd or lechon. Fine with me!

UPDATE as of 12-21-08:
I prepared this yesterday using a rotisserie. It turned out much better!

Friday, November 14, 2008

Chicken Curry

I just realized I have not made a post about this.
From Chicken curry
The recipe for this one is probably ubiquitous, and versions may be available not only from Filipinos but from other nationalities as well. I will not claim superiority of mine over others'. I am posting for the sake of my children who, one day, will come to this online kusina for guidance on how to cook their favorite foods "the way Mama used to cook them" if and when I will, for some reason, be unavailable.

This dish is another Filipino favorite that has found its way to my husband's tummy and gained approval.

Ingredients:
1-1/2 to 2 lbs chicken pieces
oil for browning (or you may render the fat from chicken skin)
3 cloves garlic
2 thumb-size cuts of ginger, sliced
1 medium onion, sliced
curry powder to taste (try 1/4 tsp first)
salt and pepper to taste
(optional)2 tbsp fish sauce (patis)
1 cup chicken broth or water
2 potatoes, cut into chunks
2 carrots, cut into chunks
1 each of red and green bell peppers (or other colors; use only half of each and freeze the rest)
1 (14 oz) coconut milk (Premium)

Instructions:
If using chicken skin, render the fat by boiling the skin in about 1/4 cup water first then chopping them then returning to the pan to render the fat. On medium high heat, sautee garlic and ginger for about 1 minute, follow with onions. When translucent, add chicken pieces and brown all sides briefly (1 minute per side). Add patis if using and let sizzle (or sprinkle some salt) then cover pan, turn heat to medium low and simmer for about 15 minutes. Uncover, turn heat to high and let juices evaporate until you are able to brown the chicken pieces in the oil some more. Add water, potatoes, and carrots and let boil, then lower heat to med high, cover and let simmer for another 10 minutes or until potatoes and carrots start to become tender. Add the coconut milk and bell peppers, sprinkle curry powder and let simmer uncovered, occasionally stirred, until coconut milk becomes creamy. Adjust taste with salt and pepper and additional curry powder as needed. Serve with plain rice. (Hubby likes this only with freshly baked bread.)

Thursday, November 13, 2008

Easy Spiced Cabernet Chocolate Molten Cakes

This is not a repeat post. It is an another recipe for
From Molten Spiced Chocolate Cabernet Cakes
a molten lava cake. Shortly after I made the kraftfoods' version, I saw this in a McCormick ad in bon appetit magazine, and I was intrigued because of the addition of red wine - cabernet sauvignon. I have always been fascinated with the flavors of foods cooked/baked with wine, so I tried this one out. It was good, too, but lacking immediate comparison between the two recipes, I could not really tell if it was better. But since now I have a whole bottle of red wine to use, I probably will make this more often, aside from using the red wine in beef recipes.

Ingredients:
4 ounces semi-sweet baking chocolate
1/2 cup (1 stick) butter
1 tablespoon Cabernet Sauvignon or other red wine
1 teaspoon McCormick® Pure Vanilla Extract
1 cup confectioners' sugar
2 eggs
1 egg yolk
6 tablespoons flour
1/4 teaspoon Cinnamon
1/4 teaspoon ground ginger
1/8 teaspoon ground cloves

Directions:
1. Preheat oven to 425°F. Butter 4 (6-ounce) custard cups or soufflé dishes. Place on baking sheet.

2. Microwave chocolate and butter in large microwavable bowl on HIGH 1 minute or until butter is melted. Whisk until chocolate is completely melted. Stir in wine, vanilla and confectioners' sugar until well blended. Whisk in eggs and yolk. Stir in remaining ingredients. Pour batter evenly into prepared custard cups.

3. Bake 13 to 15 minutes or until sides are firm but centers are soft. Let stand 1 minute. Carefully loosen edges with small knife. Invert cakes onto serving plates. Sprinkle with additional confectioners' sugar. Serve immediately.

Make Ahead: The chocolate mixture can be prepared up to 10 hours ahead of time. Pour the batter into prepared custard cups; cover with plastic wrap and refrigerate. Bring to room temperature for 30 minutes before baking.
Type rest of the post here

Corned Beef

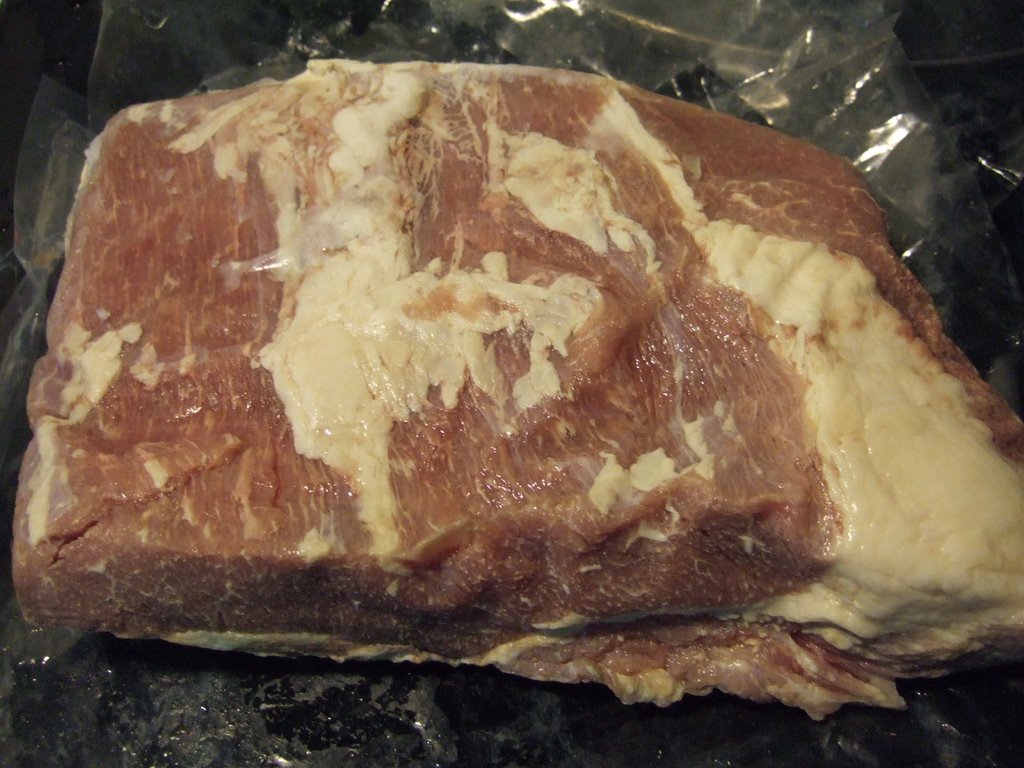
As a Filipina who grew up in the Philippines, my favorite corned beef was the Argentina brand. All I knew of corned beef then was that it came canned. I was surprised when my MIL once handed this slab of corned beef. I just had to look up on the internet what really was corned beef, and here's my answer:

"Old-time butcher shops closed every weekend. Ice, the only refrigerant available, could not dependably hold fresh meat for two days. To keep unsold meat from going to waste, the butcher soaked the meat in a strong brine or covered it with coarse salt to trigger osmosis. The grains of salt were called "corn" in England, and the name "corned beef" stuck with the product.

Corning is a form of curing; it has nothing to do with corn. The name comes from Anglo-Saxon times before refrigeration. In those days, the meat was dry-cured in coarse "corns" of salt. Pellets of salt, some the size of kernels of corn, were rubbed into the beef to keep it from spoiling and to preserve it.


Today brining -- the use of salt water -- has replaced the dry salt cure, but the name "corned beef" is still used, rather than "brined" or "pickled" beef. Commonly used spices that give corned beef its distinctive flavor are peppercorns and bay leaf. Of course, these spices may vary regionally."


Source: carnegiedeli.com

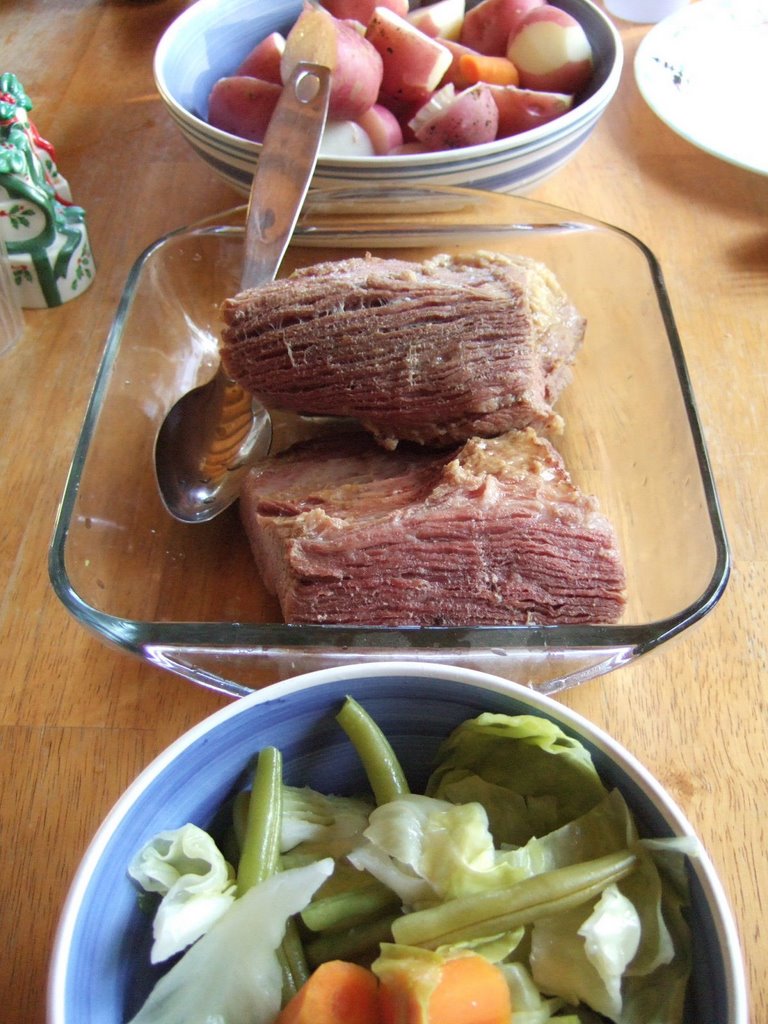
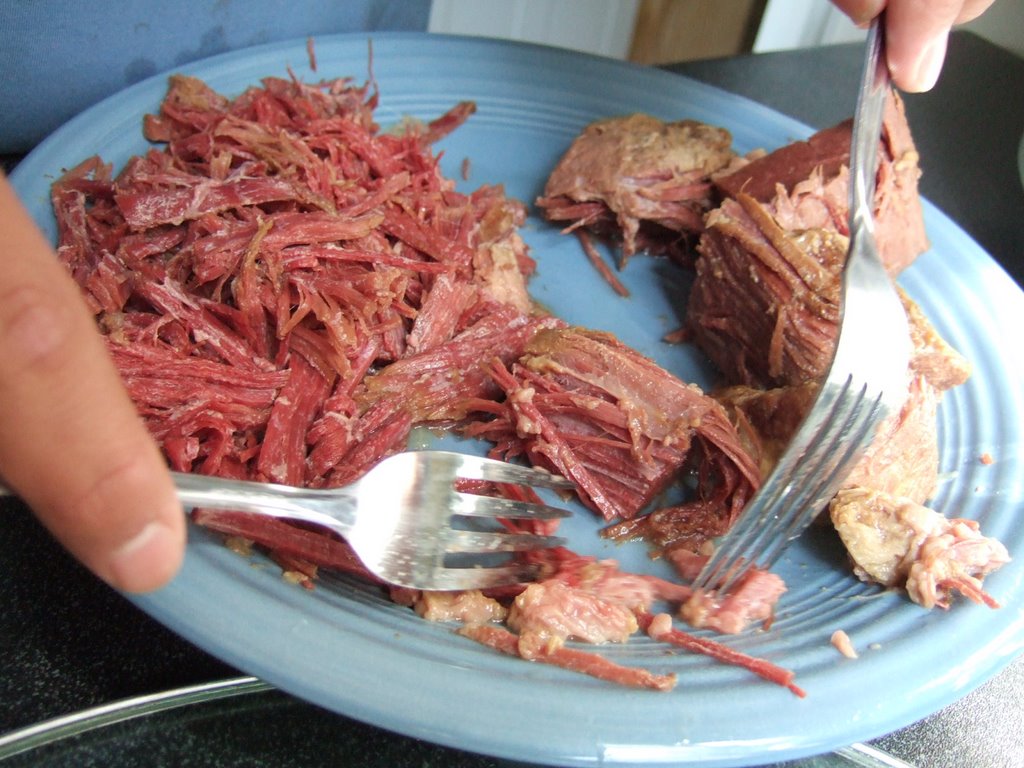
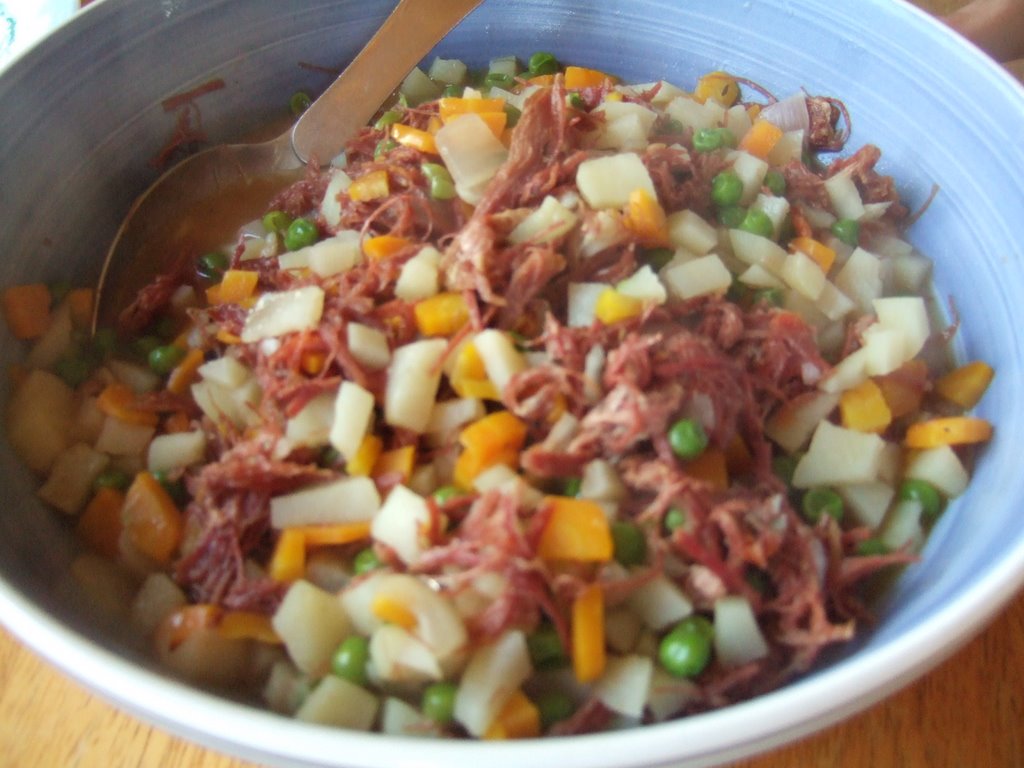
So, I asked my hubby how they usually prepare this one (any Filipino would know a different way of enjoying canned corned beef -- sauteed with garlic and onions). Apparently they prepare this only as New England Boiled Dinner. Translated to Filipino cooking: "Nilaga" with the typical veggies potatoes, carrots, and cabbage. So that was how I prepared this slab of corned beef. It was different but very good! We did have a lot of leftover (this slab could feed two or three families!). So, I tried to mimic the corned beef I knew by shredding then sauteeing with some veggies as shown.

For those who might be interested, corned beef slabs are available in grocery stores.

I remember another thing I used to do with Argentina corned beef -- as filling for the dough used for pan de coco. I used to just mix chopped medium onion with 1 small can of Argentina corned beef, then proceed with using this as filling before I bake the rolls. I used to sell them when I was still going to school, and they were always sold out.

I still miss Argentina corned beef...

Wednesday, November 12, 2008

Bread Pudding

There is a lot of bread pudding recipes out there.
From Bread Pudding
This is a revised recipe from one I learned back when I was still in Medicine days. I used a recipe by Milkmaid, which originally called for coffee granules, but which I omitted simply because I like the taste better without it. I used to sell these to my classmates back then. I would make an 8 x 8 in and cute them into 9 (small) squares, and I sold them P8/piece to make a profit that would cover my labor. Despite being quite pricey, they were always sold out! I steamed them, but now that I have an oven to use, I bake them using a water bath. I still love them to this time, and I made them for the first time here. My sons love them. My hubby did not, which did not surprise me, as he is not a big fan of custard, and this recipe is based on leche flan ingredients.

Like I mentioned earlier, I had been experimenting with using the microwave for caramelizing sugar. I used an 8 x 8 in baking glass dish for this and it took forever to caramelize the 1-cup sugar I placed in it. (I probably won't do that again!).

Ingredients:
As I said in my previous post about custard cake, I used the rest of the leche flan mixture for this purpose. I only added shredded bread (8 slices, edges removed), maraschino cherries, sliced almonds (small pack), and several drops of almond extract. (If you are going to try this, and have the whole leche flan mixture available, you might have to add two more slices. The bread pieces should be soaked with some more liquid in excess so as to come up with moist, not dry, bread pudding.)


Instructions:

Prepare caramelized pan. Cut maraschino cherries in two, and place each half at the middle of each piece (i.e., 9 pieces if cut into 3x3). Let cherries sit to set.

Shred bread pieces and soak in the flan mixture for at least 30 minutes (you may leave in the fridge overnight).

Pre-heat oven to 350. Carefully pour on top of each cherry half a ladle-full of pudding mixture. Once every cherry is covered, pour the rest of the pudding into the pan making sure it is well distributed. Put the pan in a larger baking pan to have water bath, with water level up to half the sides of the smaller pan. Bake for 30 minutes or until set. Test with a toothpick inserted at the center. Cool on wire rack for about 10 minutes. Loosen sides and invert onto a platter.

If you are going to try this steamed, use medium high heat to steam for 30 minutes or until set. As usual, cover with foil when steaming.

Tuesday, November 11, 2008

FoodSaver

I spent the whole day yesterday packing a
From Food Saver
whole year supply of chickens. My MIL raised them (we provided the money for buying the chicks and grains). We had a total of 32 which we brought to a slaughter house yesterday. As soon as I came home from my interview at another hospital, I spent the rest of my day packing. Packing itself was not tedious. I found it most tasking to clean the gizzards (made me wish i did not ask for those).Now I have fresh supply of chicken roasters. I cut up the smaller chickens for such meals as adobo or tinola (the whole ones I can also cut up later if I have to). I have chicken necks in groups of 6-8, perfect for arroz caldo. The gizzards and hearts I plan to cook adobo style, slow cooked. And of course, Adidas will have to be slow cooked as well...
Freezer full of frozen goods

Tips on freezing:

Freeze as soon as chickens are slaughtered. Make sure you have clean surfaces. I worked them in batches, keeping the rest of the chickens out in the garage where it was cold, and had my hubby throw ice cubes on them while I was still at the interview.

Use freezer grade paper or plastic. I used FoodSaver. I was quite surprised that my biggest chicken could fit in it, although I had some difficulty, but was successful with maneuvering. The less air in, the better. That's why I prefer vacuum packing. Prevents freezer burn.

Place in the freezer right away. Avoid fluctuations in temperatures. Especially avoid prolonging them inside where it is room temp; in that case, try to work quickly so you can place them in the freezer ASAP.

If bag improperly seals because of too much juices from the meat, try to freeze first for 3 hours while in the freezer bag (to solidify the juices) before sealing.

(Filipino) Custard Cake

One of my favorite merienda back when I was still
From Custard Cake
working in PI in a busy Pasay-Makati area, this Custard Cake (Filipino style) was available in the nearby cheap bakeries, NOT in the more expensive ones, yet I loved it. It tasted good and was very affordable. My mother used to make them too when we had our own bakery, although when I ask my Nanay now for how-to's and recipes, she cannot recall anymore because of lack of practice.

In the past few days I had been experimenting with caramelizing sugar using microwave , then I could not take my mind off of what to do with my mini baking pans with caramel. I was considering preparing flans, or making bread pudding, or trying this custard cake. One morning that I woke up too early for my interview at another hospital, I (crazily) proceeded with baking these (and was done in time for preparation for my interview). I did not come up with the familiar taste I would have wanted to recreate, but I got approval from my kids and (most importantly) my hubby, so I will stick to this recipe from now on.

For the flan topping:
Caramelized pan
Leche flan mixture enough to create thin layers of flan for topping (I will show you later what to do with the rest of the leche flan mixture, aside from making them into leche flan)

Pre-heat the oven to 350 deg F. Put caramelized pans into bigger pans with water enough to cover the sides of your smaller pans up to the level of leche flan. Pour a thin layer of leche flan ONLY WHEN THE OVEN IS READY. Bake the flan for 15-20 minutes (depends on how hot the water you use for water bath) until flan is jelly-like wiggly at the center. Meanwhile, prepare your ingredients for the cake.

For the yellow pound cake:(I followed the instructions at the side of the box)
From Custard Cake
1 box Yellow cake mix
1 small vanilla instant pudding and pie filling mix
4 eggs
1 cup water
1/3 cup vegetable oil

Combine dry ingredients in one big bowl. Combine the liquid ingredients in another bowl. MIX ONLY WHEN FLAN IS READY. Beat these together for two minutes at medium speed then pour on top of baked flan. Continue baking these for 25-50 minutes depending on what size pan you used (I made small ones the size of custard cups and a bigger one in an 8-inch round pan so I had two different baking times).

Once done, let rest on a cooling rack for about 10 minutes. Loosen the sides with a spatula and invert onto a plate (or a bigger pan).

Now for your own preference, maybe instead of the pound cake recipe (I found this too heavy for me), you might want to experiment with plain yellow cake.

UPDATE:
Please see a similar and very creative post made by MaMely. Yummy!

Caramelizing Sugar Using Microwave

The daring me...I experimented again with the microwave and tried to caramelize sugar using microwave,
From microwave-caramelized sugar
mainly because there are times I want to put caramelized sugar in small pans and make small individual servings of leche flan. I started experimenting using different power settings. After the 6th attempt, I have a final recipe for making an individual caramel-lined ramekin.

Place two heaping (ordinary) spoonfuls of sugar into the ramekin (I used glass custard cups; Pyrex or Anchor Hocking. DO NOT USE PLASTICS. Sugar can get very hot and will melt plastic containers.). Microwave on high for 1 min 30 seconds then continue in 30 second increments until you see some bubbling begins. From this point, you have to continue microwaving in increments of 10 seconds while stirring with a fork or chopstick in between to avoid scorching/burning at that hot spot (notice in my photo there was one that had darker look. If you want your caramel a bit bitter as if there was some coffee, you might like it this way). After about a total of 4 minutes you will have perfectly golden caramel. USE OVEN MITTS to handle cups. Be careful not to drop caramelized sugar on your skin; it causes second degree burns. I know, because I had them. :)

I did try it on a bigger pan and was not too pleased at the prolonged microwaving time. So I will use this microwave method only for smaller ramekin.

UPDATE as of 2-04-9:
I tried to caramelize 1 cup in a pyrex measuring cup, high power, initially for 5 minutes but I was watching it closely. As soon as it starts melting at one point, stir, then zap and stir at intervals of 30 seconds. By the end of 5 minutes total, I had a perfectly caramelized sugar ready to pour in a round foil pan (downside to foil pan, if it hardens before you distribute, you can't zap to make it fluid again). Better pour in a round baking glass or ceramic pan which you can zap again in case you have to).

What did I end up doing with them? I made custard cakes for the small ones and bread pudding for the larger one(up on my next post...)

Sunday, November 09, 2008

Classic Boston Cream Pie

No, it was not a "Boston" fever for me (having just recently prepared Boston baked beans).
From Boston Cream Pie
It just so happened that I was looking at different chocolate recipes from a Hershey's book to prepare for celebrating Nov 8th. I was planning to make a Florida citrus cake that my co-worker recently brought to work and that I loved, but I asked hubby first.

Me: Honey, would you be interested in a lemon-type cake that I can prepare for our anniversary?
Him: Nah...I am not fond of lemon cakes. Yellow cake with chocolate frosting would be good, though.
Me: Or maybe you would prefer chocolate cake with chocolate frosting?...
Him: That would be even better.

Well, thinking that he was probably referring to the boxed yellow cake and Duncan chocolate frosting when he mentioned that that was what he would like, I was not really looking forward to preparing something from the box when it was a special occasion. Although we plan to go out of town this coming week for a major celebration (no kids!!!), I did want to prepare something special (as in, from scratch) on the day itself.

So I was browsing through the photos in that Hershey's book and this Classic Boston Cream Pie caught my attention. It did look close enough to a yellow cake with chocolate frosting, but it has something else that I LOVE: custard. However, my husband is not a fan of custard like my leche flan (though he likes the custard in eclair, and had been hinting for years that he would love to have those). So, on the day before our anniversary...

Me: Honey, would you be interested in Boston Cream Pie?
Him: Sure. My grandmother used to make those.

Ok, I got the go signal, although his response somewhat appeared lukewarm to me (it might have been because he was tired. He and the boys had been splitting and piling wood, while I cleaned out the upright freezer in preparation for our fresh meat supplies for the coming year).

When it was finally done and served, hubby's face was priceless. He even closed his eyes to savor his slice. Mmmmm...

My boys, needless to say, loved it. Older boy said, "Ma, are we having Christmas or Thanksgiving here? You should make this and show off, errr, ah, let them taste this." Younger son said, "Yeah, Ma, this is really good! Mmmm!!!"

Cake:
1/3 cup shortening
1 cup sugar
2 eggs
1 tsp vanilla extract
1-1/4 cups all-purpose flour
1-1/2 tsp baking powder
1/4 tsp salt
3/4 cup milk

1. Heat oven to 350°F. Grease and flour one 9-inch round baking pan.

2. Beat shortening, sugar, eggs and vanilla in large bowl until fluffy. Stir together flour, baking powder and salt; add alternately with milk to shortening mixture. Pour batter into prepared pan.

3. Bake 30 to 35 minutes or until wooden pick inserted into center comes our clean. Cool 10 minutes; remove from pan to wire rack. Cool completely.

4. Prepare RICH FILLING. Using long serrated knife, cut cake horizontally into two even layers. Place 1 layer on serving plate, cut side up; spread filling over layer. Top with remaining layer, cut side down. Prepare DARK COCOA GLAZE. Pour glaze over top of cake, allowing glaze to drizzle down sides. Refrigerate several hours or until cold. Cover; refrigerate leftover dessert. 8 to 10 servings.

RICH FILLING
1/3 cup sugar
2 tablespoons cornstarch
1-1/2 cups milk
2 egg yolks, slightly beaten
1 tablespoon butter or margarine
1 teaspoon vanilla extract

Stir together sugar and cornstarch in medium saucepan; gradually add milk and egg yolks, stirring until blended. Cook over medium heat, stirring constantly, until mixture comes to a boil. Boil and stir 1 minute. Remove from heat; stir in butter and vanilla. Cover; refrigerate several hours until cold.

DARK COCOA GLAZE
3 tablespoons water
2 tablespoons butter or margarine
3 tablespoons HERSHEY'S Cocoa
1 cup powdered sugar
1/2 teaspoon vanilla extract

Heat water and butter in small saucepan over medium heat until mixture begins to boil; remove from heat. Immediately stir in cocoa. Gradually add powdered sugar and vanilla, beating with whisk until smooth; cool slightly. About 3/4 cup glaze.

Saturday, November 08, 2008

Gadget to Make Empanada Easier

I have posted way earlier in my old kusina about how I made empanadas.
From empanada
Several years later, I am posting this now to show how I made it easier using a dough/dumpling/empanada press, and of course, coming up with more presentable empanadas.

How I make pie crust can be found here.

How I make my empanada filling can be found here.

This is basically a short description of how I make my empanadas nowadays. In using the dough press to shape the circles, use a bigger one as the dough may shrink back once you lift it up. Then use the right size dough to place this on and the filling. You will have some extra dough to pinch off this way.


After several times of making this, I have come up with some more tips:


1. Use plastic to cover dough while rolling. It makes flipping easier.
2. Sprinkle flour from time to time to lessen stickiness.
3. Make sure your dough is quite chilled and not room temp before rolling. It tends to be less sticky, and it tends to help preserve the flakiness. So to do this, take out some dough and leave some while you work on your first batch.
4. The eggwash will make your floury dough seal. Without it, the flour will prevent sealing. The while baking, eggwash makes your empanadas appear golden.

Please take note that I have a new kusina blog

To my old-time visitors and those who have found this site for the first time, kindly take not that I have a newer kusina blog, still named Kusina Ni Manang. I am posting this because I still get visits on this site, but then I understand that a lot of posts here are not in my new kusina, and are found mainly through google search. So for those who will get curious as to new posts, just follow the link provided. Thanks for visiting!

Friday, November 07, 2008

Butter-fried Scallops

One of the three seafood items my husband will eat
From scallops
(and actually loves)...When we do eat at one of our fave restaurants, if he orders scallops, they are the usual batter-coated deep-fried ones, and I usually order the baked with honey and butter ones. This recipe is not an attempt to copy the restaurant recipes. It actually is the way my MIL prepares scallops at home, and I copied her for the love of my hubby. :)

Ingredients:
1-1/2 to 2 lbs scallops
1 stick butter
enough flour to dredge scallops

Instructions:
heat on med high one big or two medium sized iron pan (enough to cook all scallops just at one time. (If you cook more than one batch, the butter tends to make the subsequent batches blackish instead of golden brown). Melt butter and quickly try to dredge the scallops and place on pan. Cook each side (top and bottom) 1-2 minutes. I usually serve these on the pan itself with all the melted butter. Do not overcook.

Thursday, November 06, 2008

Chili

One of my husband's favorites, he tells me,
From chili
"Honey, you make the best chili." My reply: "Thanks to McCormick."

I like preparing chili when I have to go to work (night shift). I usually start thawing 2 lbs ground beef at night. Then in the morning, I prepare it as directed on the package of McCormick Chili seasoning. By suppertime, I just have to have shredded cheddar cheese (or 4-cheese mexican shredded cheese) available as topping (I add chopped onions for myself).

Ingredients:
2 pound lean ground beef
2 packages McCormick® Chili Seasoning Mix, Original or 1 package McCormick® Chili Seasoning Mix 30% Less Sodium
2 cans (15 ounces) kidney beans, drained
2 cans (14 1/2 ounces) diced tomatoes, undrained
2 cans (8 ounces) tomato sauce

Instructions::
1. Cook ground beef in large skillet on medium-high heat 5 minutes, stirring occasionally. Drain fat.

2. Place in 3-qt slow cooker. Stir in Seasoning Mix and remaining ingredients. Bring to boil. Reduce heat to low; cover and simmer 10 minutes, stirring occasionally.

3. Serve with shredded cheese, sour cream and chopped onion, if desired.

Chicken Broccoli Cheese Casserole

My husband mentioned one time about liking
From Chicken-Brocolli Cheese Casserole
this type of dish which his ex used to cook, and told me (He had the nerve to tell me!) he should ask her for the recipe. Of course he (the typical man that he is) forgot about it, but I went ahead and groped my way through making my own recipe. Very simple and easy, we all love it. He basically spoon-fed to me the ingredients: chicken, broccoli florets, Velveeta cheese. I just added what I felt I had to, and cooked it the way I imagined it. This is one of my favorite dish to prepare if I am going to work. I am posting while having a slow time at work, so I am guessing at the proportions as I try to recall how much I use. Make sure you use a baking dish deep enough for this.

From Chicken-Brocolli Cheese Casserole

Ingredients:
1 tbsp oil
1-1/2 lb chicken breasts (or 1 lb, depending on how many are eating; this is for 5 people) cut into bite-size
1 lb frozen broccoli florets
(Please take a look at the photo for the sizes of the cans)
1 can Cream of Chicken
1 can Broccoli Cheese condensed soup
1 package of stuffing prepared as directed on label
Sprinkle of Parmesan Cheese
1/4 oz (?- kindly check the lines on the foil wrap, just one small block/line) Velveeta cheese, cut into small pieces
Sprinkle of grated Parmesan cheese

Instructions:

Preheat oven to 400 deg F. Heat oil and brown chicken then place in the baking dish. Add broccoli florets, cream of chicken, and broccoli cheese condensed soup; mix well. Scatter the Velveeta pieces; top with stuffing and sprinkle with parmesan cheese. Bake for 20-25 minutes.


Tuesday, November 04, 2008

Zyliss Mandolin Slicer; Ground Beef with Green Beans and Corn

This is one of my most useful gadgets/toys in the kitchen.

I use it for mainly making bread and butter pickles, for slicing any vegetable thinly, espcially carrots, cukes, onions. It uses manpower, so less use of electricity, more exercise for the arms.

Last summer, I had lots of green beans and sweet corn that I would harvest daily (kapagod! That's why I told my husband I don't feel like having a veggie garden next year. He said, "Ok, then we will only have cukes and corn. No more tomatoes or beans." Ngek!)

From ground beef with corn and green beans
Well, my kids are not particularly fond of green beans (I love them in bulalo or anything nilaga), until I cooked them this way (which I used to cook back in PI when I was tasked by my aunt/maid as the slicer in the kitchen).

Ingredients:
1 lb ground beef (I browned, seasoned with salt and pepper, separated some for my husband's consumption as he likes them plain served with potatoes and broccoli)
2 cloves garlic, minced
1 small onion, sliced
3 small tomatoes, sliced
2 handfuls of green beans, sliced thinly as shown (quite time-consuming, but the mandolin makes it easier and faster)
1 cup sweet corn kernels (or 1 12-oz can, drained)
some water
basil to taste
salt and pepper to taste

Procedure:
Brown beef; drain excess fat. Add garlic until aromatic, then add onion until translucent. Sprinkle some salt and pepper. Toss the tomatoes in and stir until tomatoes have caramelized. Add the green beans, corn, and some water (maybe 1/4 to 1/2 cup). Let simmer uncovered for 2 minutes. Season with basil. Add salt and pepper to taste.

Monday, November 03, 2008

My Visitors and My Kids...My Inspirations

I seldom have comments on my posts...I do receive emails once in a while. Now that the blogworld is saturated with bloggers, it is quite hard to have an audience that sticks with me. What do I get from blogging anyway?...

As I have said before, I started blogging as a way to make use of my time, and to make myself useful to the society, to somehow lift my self-esteem up especially at the time I was unemployed. It has been a fun ride. I have met (and helped?) a lot of people online.

I do get some from ads since I signed up for them. But what I get from these in 10 months I can earn in one day work as an RN.

So what motivates me? An occasional note of thanks and praise via comment or email does tons. When I do not have any, I have found a way to keep me motivated.

I signed up for statcounter.com a long time ago, but had not been logging on it
From stats
during my more busy RN days so I had forgotten my PW. I recently signed up for a new one and started the # with what I had on my blogs. Interesting to see people getting to my blogs either directly (as in they bookmarked me already) or via google/yahoo search using keywords such as "kusina", "kusina ni manang" or "pandesal", ensaymada, chicken afritada, beef pares, beef asado, siopao, pichi-pichi, etc. Interesting to see "first time visitors" turn to "returning visitors" in the following days. Photos here are snapshots of my visitors both at my new and old kusinas.
From stats
I find it very amusing that I have seen stat map showing visitors in Alaska, Pakistan, South Africa and other less likely places. Seems like there are a lot of Filipinos/Filipinas searching for some of these Filipino goodies.

I guess these stats are enough to keep me motivated.
From stats
Sometimes I am just not sure whether what I post is still interesting to my readers. And whether how I post is the right way to keep them coming back, whether for old posts or new ones.

Then my ultimate motivator is knowing my kids can refer to these pages in the future when they get to the age (or situation) when they will have to prepare foods by themselves. Sometimes they, especially my older son, would even initiate and actually told me that baking/cooking is quite interesting. I tell my boys, they are good looking not only by Western Standards but also by Filipino standards, and they are quite intelligent (not nerdy types, though); knowing how to cook and bake on top of those will surely make girls ga-ga over them.

Boston Baked Beans & Brown Bread

I admit, I don't always cook. During those times, my husband woiuld just take
From boston baked beans
whatever he finds appealing in the pantry. One of his fave canned foods is the baked beans, served with brown bread. My stepd would only eat the beans. Both of them like to eat these with hotdogs. I would eat same but only because so he has someone to share that with. My sons don't like them; they'd rather eat whatever leftovers we have. I'd like to eat what I could before giving the rest to the pigs/chickens.

This baked beans reminds me of Hunt's "pork and beans" back in the Philippines, although that one is more tomato-based, and maybe because I grew up with that, I preferred it over this baked beans.

One time my MIL invited us over for supper, and she prepared baked beans. That was the first time I tasted the homemade baked beans, and I LOVED IT! My husband also loved it, and there really is no comparison between the homemade one and the canned one.
brown bread

Now with our annual trip to Greenville, I saw last year the specific pot used for this purpose in an Indian store, and I vowed to get it the next time we went there, which was late this fall (when all red/orange leaves have fallen off the trees), especially that the sight-seeing purpose of the trip was lost already. I at least should get that pot. And I cooked this for the first time. I asked my husband to
dry mustard
soak the navy/pea beans that night around 9 pm while I was at work and told him to soak with enough water to allow for the beans' expansion. Silly me, I did not check the recipe. It specified 6 cups! So I ended up estimating the amount of water to boil the beans in, and kinda ended up with a soupy dish, which my husband told me he loved better (than drier), and even loved it more the next day when he was eating the leftover. I still served it up with brown bread (which my husband suggested when I mentioned I wanted to make baked beans.) One thing funny as well was when I went to the grocery store to pick up the ingredients and had a hard time finding the dry mustard, and I guessed it was the powdered mustard as there was nothing else that was dry. Good thing I guessed it right!

I used the smoked pork fat back (which I also used for my chicharon) and I loved the effect. Now I just gotta get my kids to start acquiring the taste for baked beans.

This recipe is found in a card that was tied to the beanpot. I made a point of copying that onto this page so that I will not have a hart time looking for it if I lose that card (which is so easy to do!)
Official Recipe:
For 2-1/2 qt Boston Beanpot
Bake at 300 deg for 3-1/2 hours
Serves 8

Ingredients:
1 package (1 lb) navy or pea beans
1/4 pound salt pork, cut in 2 pieces (I used 3/4 lb smoked pork fat back)
1 small whole onion, peeled
1 tsp dry mustard
8 cups water
1/3 cup molasses
1 tsp salt
1/2 tsp baking soda
3 tbsp sugar
1/4 tsp pepper

Instructions:

1. Soak beans overnight in a large suace pan in 6 cups of water. Add baking soda. Heat to boiling and simmer 10 minutes. Drain in colander ove a large bowl. Save liquid.

2. Place beans, salt pork and onion in the beanpot. Add molasses, salt, sugar, dry mustard, pepper and a cup of water. Stir thoroughly. Add enough water to cover the beans. Cover the beanpot.

3. Bake 2 hours at 300 degrees. Add the rest of the water and stir again. Bake additioanl 1-1/2 hours (or until beans are tender.) Uncover last 1/2 hour.

Sunday, November 02, 2008

Sugar Cookies for decorating Graveyard Halloween Cake

This post should have been earlier uploaded,.
From Sugar cookies for Halloween
but I had been working every night since Halloween, and I blog during the slow time of my shift, if any.

I was not able to take a photo of the cake that I made for Halloween. I got the idea of "graveyard" look by browsing kraftfood.com. I brought it to work with only the chocolate glaze on it, planning to top it with crushed Oreos then decorate once I got to work, but I forgot to bring my camera! Anyway, while I found it quite too sweet for my teeth, my coworkers said it was excellent!

The recipe I used for the sugar cookies was courtesy of Liz. My husband hogged the sugar cookies as soon as the first batches were out of the oven. He loved them especially with the sugars. I got different sprinkles and icing colors from Walmart. (Hubby had been hinting to me for years that he likes sugar cookies. I just got discouraged with the flat cookies I have been making using Nestle Toll House choco chip cookies recipe that I did not try sugar cookies too soon.) My sons had some fun trying to shape them cookies and decorating, but I myself had a hard time achieving the effect I wanted (as you can see in the photo). I probably will try to recreate that graveyard cake just so I can take a photo. I still have some sugar cookies in the freezer (we got tired of shaping them).

I will post about the cake recipe itself once I had the gumption to make it again and take a photo of it complete with "graveyard" decors.

Friday, October 31, 2008

Pumpkin Carving

It's Halloween!
From pumpkin carving


One thing we have embraced in the Western Culture is the tradition of pumpkin carving during this holiday. I have to go to work tonight so we did this last night. Too bad my stepd had to be with her mother so she was not able to join in the fun. (We also made sugar cookies and tried to decorate them.) Here's my artwork, and those of my kids can be seen in the slideshow below.

I purchased a cheap pumpkin carving kit from Hannaford a few weeks ago. The boys were quite excited when they saw it (first time to have that at home!) so last night was the opportunity they (we all) have been waiting for. I myself had some fun (I joined in the carving craze since my stepd was not here and my husband never really was interested in this activity. He just likes appreciating our finished products.) Now I am off to find a recipe for the seeds...

Mozarella Sticks

There is a family-friendly restaurant about 45 minutes away from our house that we visit often. Our favorite appetizers is the mozarella sticks.
From Mozarella Sticks

At home one attempt that I have made to come up with something close is to make them using lumpia wrappers instead of batter, then dip in homemade marinara sauce (I'd like to think that I made marinara sauce although I was not looking at a recipe when I cooked it. Basically sauteed lots of tomatoes with other ingredients we usually use. We like the outcome and that's all that matters!). For purposes of simplifying things, I suggest you use the recipe below for marinara sauce.

Then one day, my older son and I thought of trying to really copy those served in that restaurant. I looked up the ingredients and one weekend we tried. We were very satisfied with the outcome, and my son had fun making them. Recipe courtesy of foodnetwork.


Mozzarella SticksPrep Time: 30 min Inactive Prep Time: 2 hr 0 min Cook Time: 10 min Level:
Intermediate Serves:
6 to 8 servings (makes about 56 pieces) 1 1/2 cups Italian-style dried breadcrumbs
1 1/3 cups freshly grated Parmesan
1 teaspoon salt
2 (16-ounce) blocks pasteurized mozzarella cut into 4 by 1/2-inch sticks
4 large eggs, beaten to blend
1 1/2 cups vegetable oil
4 cups Marinara Sauce, recipe follows


Stir the bread crumbs, 1 cup of Parmesan and 1 teaspoon of salt in a medium bowl to blend. Dip the cheese in the eggs to coat completely and allow the excess egg to drip back into the bowl. Coat the cheese in the bread crumb mixture, patting to adhere and coat completely. Place the cheese sticks on a baking sheet. Repeat dipping the cheese sticks in the egg and bread crumb mixture to coat a second time. Cover and freeze until frozen, about 2 hours and up to 2 days.
Heat the oil in a large frying pan over medium heat. Working in batches, fry the cheese until golden brown, about 1 minute per side. Transfer the fried cheese to plates. Sprinkle with the remaining cheese and serve with the Marinara Sauce.


Marinara Sauce:


1/2 cup extra-virgin olive oil
2 small onions, finely chopped
2 garlic cloves, finely chopped
2 stalks celery, finely chopped
2 carrots, peeled and finely chopped
1/2 teaspoon sea salt, plus more to taste
1/2 teaspoon freshly ground black pepper, plus more to taste
2 (32 ounce) cans crushed tomatoes
2 dried bay leaves
In a large casserole pot, heat the oil over a medium-high flame. Add the onions and garlic and saute until the onions are translucent, about 10 minutes. Add the celery, carrots, and 1/2 teaspoon of each salt and pepper. Saute until all the vegetables are soft, about 10 minutes. Add the tomatoes and bay leaves, and simmer uncovered over low heat until the sauce thickens, about 1 hour. Remove and discard the bay leaf. Season the sauce with more salt and pepper, to taste. (The sauce can be made 1 day ahead. Cool, then cover and refrigerate. Rewarm over medium heat before using.)

Yield: 2 quarts
Prep Time: 10 minutes
Cook Time: 1 hour 10 minutes


Custom Search